
Awning Windows: Placement, Reach and Ventilation Planning
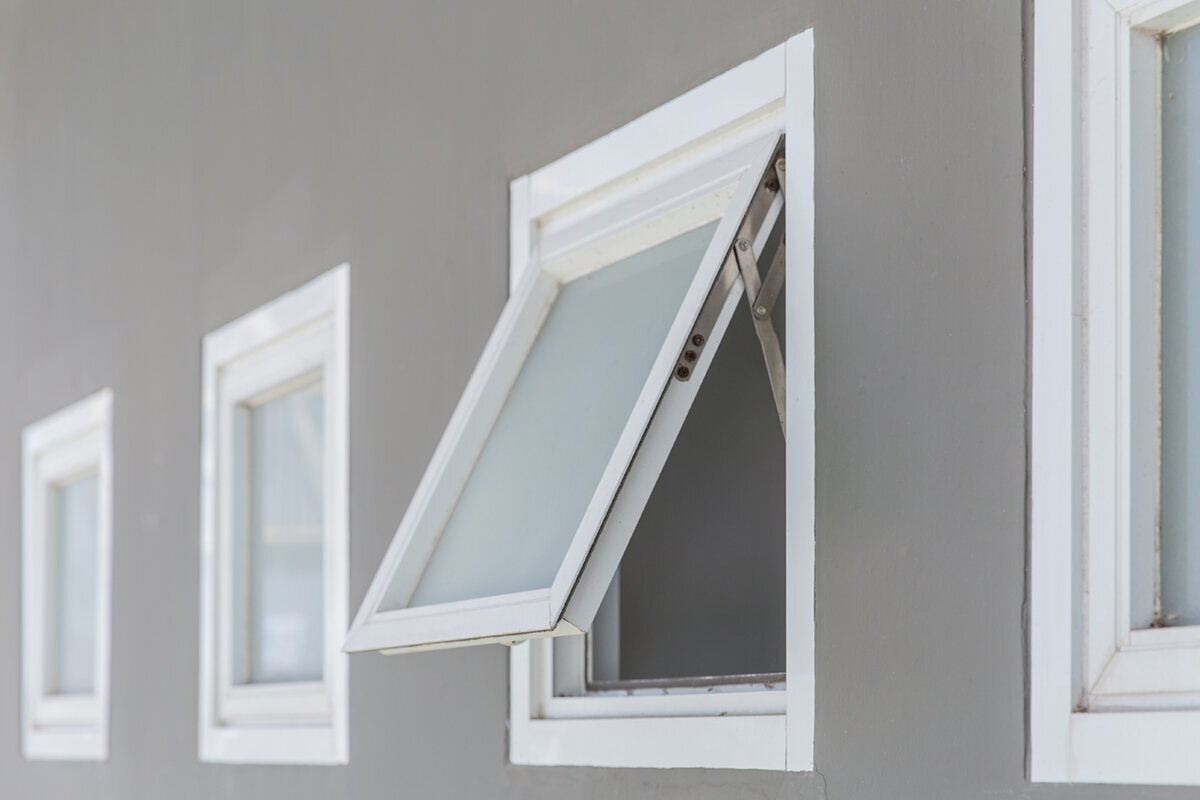
US awning window planning guide
An awning window has a top hinge, with the bottom of the sash moving outward. That simple operation can solve a difficult placement problem, especially above a counter or high on a bathroom wall, but only when the window remains reachable and has somewhere safe to open. Before choosing dimensions or grille patterns, picture the room in daily use. Where will a person stand to turn the handle? Will a faucet, shade, cabinet, plant, walkway, or deck occupy the same space? What kind of ventilation is actually wanted: occasional airing, a modest background opening, or a stronger cross-breeze? Treat operation, reach, exterior clearance, and airflow as one decision. The result should be a window people can open comfortably without rearranging the room or creating an obstacle outside.
Begin with the path of the opening sash
An awning sash projects outside the wall, so assess its moving footprint before refining the elevation. Mark the proposed open position on a plan or side view, then compare it with actual conditions: a side passage, porch railing, outdoor chair, hose bib, planting bed, gate, or cleaning route. A clear-looking wall may still be unsuitable if people regularly walk close to it. A higher opening above low landscaping may work better, provided the handle remains usable indoors. The outward-opening top-hinged window shows the relevant operating format, but its final dimensions and position should follow the surveyed opening and surrounding space.
Ask the supplier to illustrate the operating geometry for the selected size and hardware rather than relying on a generic front view. The useful questions are how far the bottom rail projects, where the corners travel, and what outside area should remain unobstructed during normal opening. Review temporary and seasonal objects too. Patio furniture moves, plants grow, and snow-removal tools or trash containers may be stored beside the house. Photographing each proposed location from an angle often exposes conflicts that a floor plan misses. This check also helps distinguish a genuine clearance problem from a purely visual concern that can be resolved through proportion or placement.
Define the ventilation job room by room
Do not specify an operable window merely because ventilation sounds desirable. Describe when and why it will open. A kitchen may need brief airflow while cooking, while a bathroom may need an opening above a privacy-sensitive sightline. In a bedroom, the window should be reachable around the bed, nightstand, curtains, and normal walking route. A home office may benefit from an opening that can be adjusted without leaving the desk area. These situations create different priorities for sill height, handle position, opening size, and treatment of the glass. They also reveal whether the window will realistically be used or simply remain closed.
Air movement depends on more than one sash. Consider where air can enter, where it can leave, which interior doors are usually closed, and how wind or weather changes the preferred openings. Where a wall needs broad daylight but only a limited operable area, a combination window is an alternative arrangement worth comparing. Fixed portions can preserve the view while an accessible portion handles ventilation. Ask for drawings showing the exact divisions and operating locations. Making every pane operable can add handles, screens, cleaning tasks, and exterior swing zones without producing a more useful room. Reserve moving sash for positions that support a realistic household routine.
Whole-home opening plan
Set sill height around reach and sightlines
A higher awning window can fit above a counter, vanity, headboard, desk, or bathtub surround while shifting the view away from a nearby path or neighboring property. The tradeoff is operating access. Measure from the finished floor to the proposed handle, not just to the sill or rough opening. Include countertop depth, backsplash thickness, faucet height, and the place where a person’s feet can actually stand. Tape a handle-size marker to the wall and test it with the planned fixture represented by a box or cardboard template. This simple mockup is more reliable than judging reach from an elevation drawing.
A lower window can provide a stronger seated view and easier access, yet its open sash may project toward exterior activity and its glass may require more deliberate privacy planning. Interior objects can be just as restrictive: long curtains, a deep sill, appliances, or houseplants may discourage operation. If an uninterrupted low view matters more than ventilation at that location, a fixed window is an alternative that eliminates handle reach and opening clearance. Another option is fixed glass paired with a smaller operable vent placed where it can be reached. Separate the goals of view, daylight, and airflow instead of asking one large sash to satisfy all three.
Test operation with the room furnished
Reach should be tested from the position a user will occupy after the room is complete. Above a kitchen sink, stand back from the counter edge and account for the faucet. In a laundry room, include an open appliance lid or folding surface. In a bathroom, determine whether the handle can be reached from dry floor space rather than by leaning across a tub or toilet. Consider everyone expected to operate the window regularly. A layout that requires a step stool for ordinary airing is unlikely to be convenient, even if the exterior composition looks balanced. Record the tested handle location in the order brief.
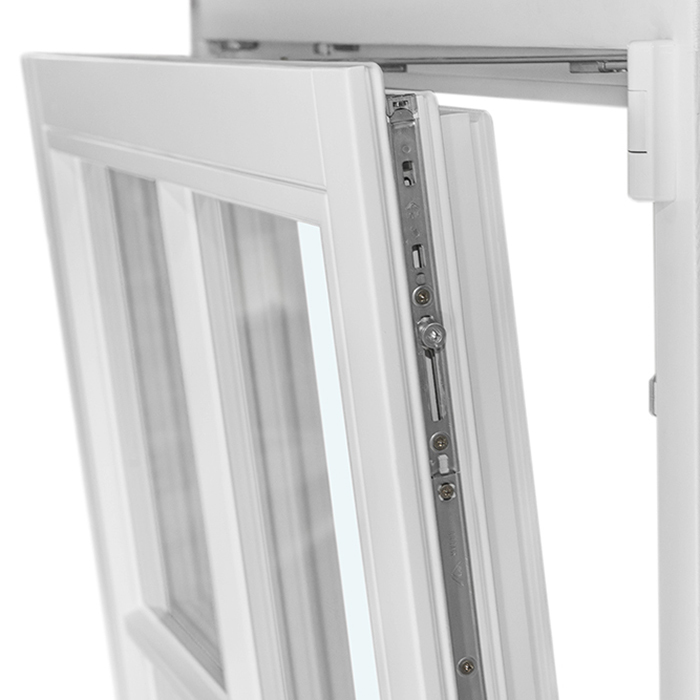
Discuss sash size, hardware, and screen access together because a rendering does not show operating effort or hand position. Ask what handle is proposed, where it sits on the selected size, and how the sash is opened, secured, closed, and cleaned. If an awning arrangement puts the operating point beyond practical reach, compare a single-sash inward-opening window as an alternative. Its interior swing creates a different set of furniture, curtain, and circulation constraints, so it is not an automatic substitute. The correct choice is the format whose full operating sequence works safely and comfortably in the furnished space, not merely the one with the preferred exterior appearance.
Reserve practical clearance outside
Treat the area beneath an open awning sash as active space. At ground level, avoid conflicts with a frequently used path, bench, package-drop location, bicycle parking area, or gate. On a deck or beside steps, consider where a person’s head and shoulders pass relative to the projected sash. At corners, check activity on both adjoining walls. A window can appear remote from a route when viewed straight on yet project into it at an angle. Marking the projected corners with removable tape or stakes can make an exterior review more concrete before final dimensions are approved.
Upper-level locations require a different review. A sash above a lower roof, balcony, canopy, or wall projection may be difficult to clean or service even when nothing blocks its initial opening. Confirm how exterior access, the wall assembly, and water-management details will be handled by the qualified professionals responsible for the project. If a conventional awning swing does not fit the location, an outward-opening pivot window is another operating concept to compare. Its pivoting movement still needs to be drawn and assessed; it should not be selected merely to avoid documenting clearance. Ask how the alternative changes exterior projection, indoor access, screen placement, and routine maintenance.
Coordinate kitchen windows with fixed elements
Above a sink or work surface, establish the finished counter, backsplash, faucet, and cabinet layout before setting the window. Draw a side view showing the sill projection, faucet arc, handle, and expected hand path. A faucet overlapping the glass visually may be acceptable, but a handle directly behind it can be awkward. Also check whether open upper-cabinet doors obstruct the user’s arm or whether an appliance normally occupies the counter. If the window includes fixed and operable portions, position the operating hardware around actual standing access rather than centering every division solely for symmetry.
Plan the screen and window treatment at the same time. Determine how the screen is removed, where it can be set down, and whether the shade must be raised completely for ventilation. For a wide opening, compare one awning sash with a divided operating arrangement. A Kombi outward-opening casement window is an alternative where separate side-hinged sections may better suit the work area. Its title confirms the named configuration only; it does not establish dimensions, glazing, hardware, or kitchen suitability. Request those details in the quotation, then place the actual shop drawing over the cabinet elevation before approval. Late cabinet changes should trigger another reach and clearance review.
Whole-home opening plan
Separate bathroom privacy from ventilation
Start a bathroom layout by ranking daylight, privacy, ventilation, view, and visual emphasis. A high awning window may preserve a preferred sightline and clear tile, a vanity, or a tub surround, but elevation alone does not make it practical. Show mirrors, medicine cabinets, shower glass, towel bars, and permanent fixtures on the same interior drawing as the window. Test whether the handle is accessible from a stable floor position and whether a shade can be operated independently. Outside, consider views from the sidewalk, neighboring windows, decks, and the home’s own paths rather than assuming height resolves every privacy concern.
Placement, glass treatment, window covering, and proportion can each contribute to privacy. Verify available glazing and accessory choices directly instead of assuming they are included with a product. If a high-level opening is intended only to introduce light, a round fixed window can be considered as a decorative alternative for that separate daylight role, while ventilation comes from a more reachable opening elsewhere. This division of duties can produce a clearer plan than forcing one unit to provide privacy, a focal point, broad daylight, and everyday airflow. It also lets the buyer judge each opening by its actual purpose when comparing drawings and quotations.
Plan screens, shades, cleaning, and appearance
Ask where the insect screen sits, how it is released, and whether it interferes with the handle or window treatment. Confirm the intended method for cleaning the interior and exterior glass at the selected height. A ground-floor window above low planting presents a different maintenance problem from one above a porch roof, deep counter, or stairwell. Inside, show the shade, curtain, or blind in both its open and closed positions. Requiring a shade to be lifted for ventilation may be acceptable, but it should be an intentional routine. Avoid relying on accessory arrangements shown only in generic illustrations.
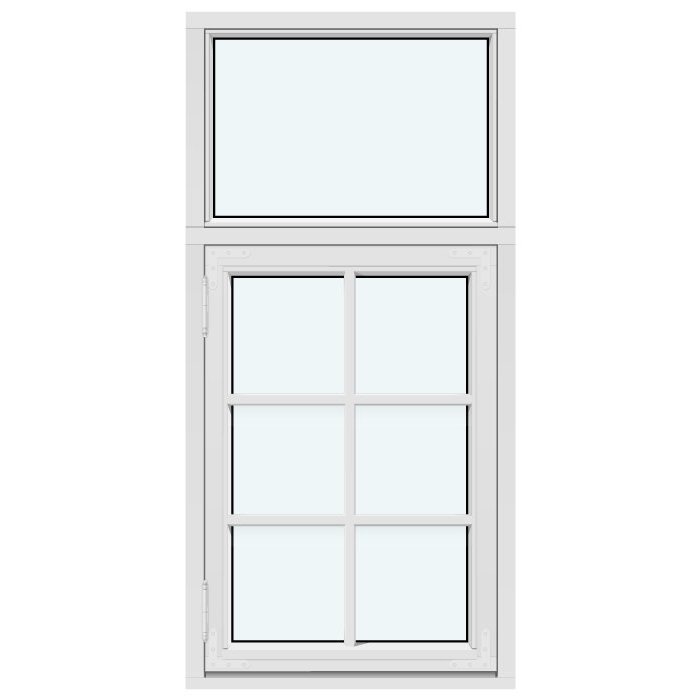
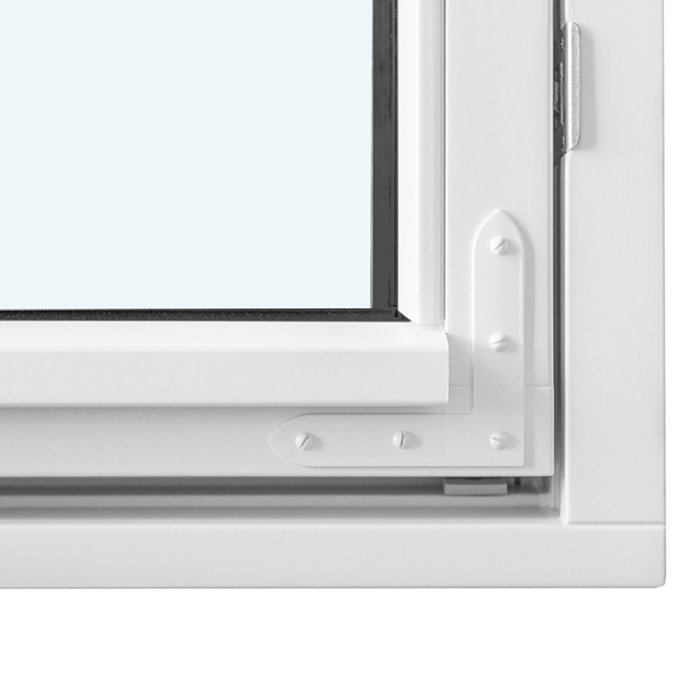
Use precise language when discussing grille appearance. Decorative bars create a visual pattern, while glass-dividing bars form actual divisions. Confirm which treatment is quoted and consider how it affects the view and cleaning routine. Review exterior and interior color choices beside siding, trim, cabinets, and other windows rather than as isolated samples. If the main goal is a traditional two-part composition, a historic-style two-sash outward-opening casement window is an alternative to evaluate. Its side-hinged sashes require a different exterior clearance pattern from an awning window. That comparison can reveal whether the priority is top-hung operation or the desired façade character.
Build a coordinated opening plan
Review all operable windows and exterior doors together instead of treating each room as an isolated purchase. Mark normal opening modes on one floor plan and describe likely routines: morning bedroom airing, short kitchen ventilation, bathroom use after bathing, or an office window opened during the day. Note which interior doors tend to remain closed and which exterior areas are occupied. This exercise identifies whether openings can participate in a useful air path and whether several outward-moving units compete for the same patio or side-yard space. The goal is controllable ventilation in useful locations, not the greatest possible amount of moving glass.
Different operating types can serve different parts of the plan. Fixed glass may hold a view, an awning sash may provide high-wall ventilation, and a patio door may support a larger seasonal opening. Compare these roles without treating unlike products as interchangeable. For every operable unit, record who reaches it, what must be moved first, how far it projects, and where the screen or shade sits. Then test less typical conditions: furniture rearranged for guests, a gate left open, or a room used by someone with a shorter reach. A coordinated plan exposes conflicts early while changes remain drawing decisions rather than installation problems.
Prepare an order-ready specification
Create a schedule for every opening with the room name, proposed unit size, sill and handle heights, operating type, exterior clearance notes, desired view, screen needs, window-treatment conflicts, color, and grille choice. Attach marked interior and exterior photographs. For replacement work, record existing obstructions and useful features worth preserving. For new construction, coordinate the schedule with cabinetry, plumbing fixtures, electrical devices, trim, and landscaping. The dimensions in a preliminary plan are not enough; suppliers and installers need the surrounding context to recognize a handle, swing, access, or finishing conflict before fabrication and site work begin.
During quotation review, ask which dimensions, glazing, color, hardware, screens, and decorative details are included. Request approval drawings and verify the hinge arrangement, handle location, projected opening, and required surrounding space on the exact proposed unit. Have the appropriate qualified professional confirm wall integration and project-specific requirements because adopted rules and site conditions vary by location. Bloomcabin states a 5-year windows and doors warranty and delivery in 4–6 weeks, subject to order confirmation. Reconfirm both for the final order, together with responsibilities for measurements, installation preparation, unloading, finishing, and any changes between the approved drawing and purchase documents.
Frequently asked questions
Can an awning window be installed above a kitchen sink?
It can work well if the counter, backsplash, faucet, sill, and handle are planned together. Test reach from the normal standing position and include anything usually kept beside the sink. Confirm exterior projection, screen removal, shade operation, and the method for cleaning the glass before approving the window drawing.
How much exterior space does an awning window need?
The needed practical space depends on the selected sash dimensions and opening geometry. Ask for a drawing of the open position, then compare it with paths, decks, gates, furniture, landscaping, and storage beside the wall. Keep the moving sash away from places where people or objects routinely pass.
Is a high awning window a good privacy solution?
Higher placement can alter sightlines and clear fixtures, but it may also make the handle difficult to reach. Review views from relevant indoor and outdoor positions, then combine placement with suitable glass or window treatments as needed. Do not assume height alone resolves privacy, daylight, ventilation, and access.
Should every section of a large window open?
Not necessarily. Fixed portions can provide daylight and preserve a view without adding handles, screens, maintenance tasks, or exterior swing zones. Place operable sections where they offer useful ventilation and convenient access. Compare the complete fixed-and-operable composition with an all-operable design before deciding.
What should I verify before ordering an awning window?
Confirm final dimensions, sill and handle heights, opening geometry, exterior clearance, glazing, screen arrangement, hardware, color, and grille choice. Review the product drawing against counters, fixtures, furniture, shades, paths, and landscaping. Also confirm wall integration, installation responsibilities, warranty terms, and the order-specific delivery schedule.
Next steps
A successful awning window begins with its movement, not its appearance. Give the opening a specific ventilation role, draw the outward swing, and test the handle from the furnished room. Then coordinate screens, shades, cleaning access, privacy, and adjacent openings before approving dimensions. Fixed glass or another operating format may be a better alternative where view, reach, or exterior circulation takes priority. A marked-up site plan, a full-scale reach test, and a detailed opening schedule give the supplier and project team useful information to resolve conflicts. When operation fits both sides of the wall, the window is more likely to become a convenient part of everyday life.
