
Can an Existing Wooden Garden House Be Insulated?
Garden house planning
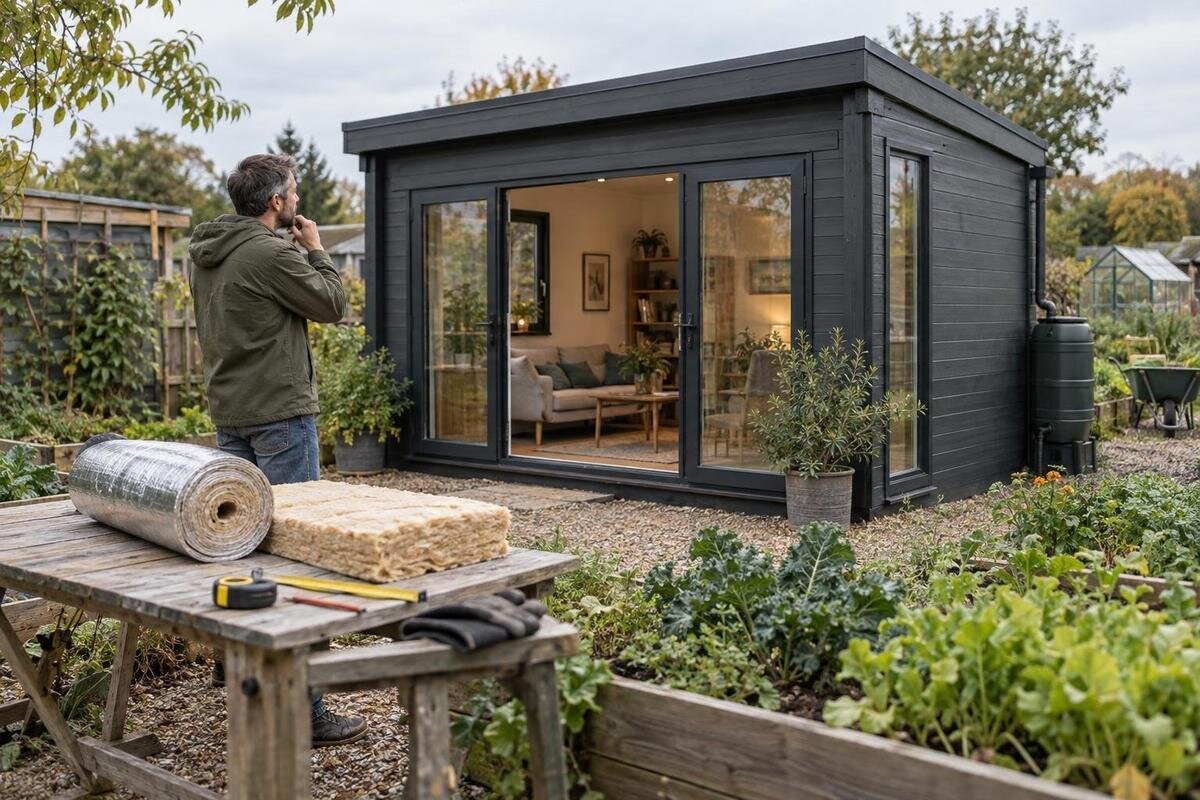
Yes, an existing wooden garden house can be insulated in many cases, but the answer depends on its condition, its construction, and how you plan to use the space. Sound, dry wood and a clear understanding of the existing wall layers matter before new material goes in. An upgrade can also change moisture behavior, reduce interior space, and affect doors, windows, and finishes. Insulation is not a repair for leaks or decay, and it does not supply heat or fresh air. A careful assessment helps you decide whether to retrofit, limit the work to repairs and draft reduction, or compare the project with buying a replacement.

Insulation is possible when the structure is sound
Insulating an existing wooden garden house is possible in many cases, but there is no single retrofit assembly that suits every building. Wall construction, the condition of the timber, previous repairs, the roof and base, and exposure to rain and ground moisture all matter. One building may have boards fixed directly to framing; another may have added linings or coatings that change how its walls dry. Do not assume that similar-looking exteriors hide the same construction. A well-maintained older building can be a better candidate than a newer one with active leaks, soft timber, or movement. Age alone is not a reliable test of suitability. If available, save drawings, receipts, or assembly notes for the assessment.
The key question is not simply how much insulation will fit. It is whether the structure can remain dry and stable after another layer is added, and whether the resulting room will suit its purpose. Insulation slows heat transfer; it does not stop water entry, repair decay, supply heat, or create fresh air. A storage building used occasionally has different needs from a room used for long work sessions. An interior lining can also reduce usable dimensions and affect existing finishes. Treat insulation as one part of a building assessment, rather than a self-contained product purchase. You may find that repairing a leak or addressing a known draft is the first useful improvement.
Match the insulation plan to how you will use the space
Begin by describing the intended use in concrete terms: what will be stored or done there, how often people will be inside, and whether use is seasonal or regular. For storage, the goal may be reducing temperature swings; for a hobby or work area, comfort and outdoor air exchange matter as well. These are different targets, so choosing insulation without a defined outcome can use up space and money without solving the problem you care about. If stored items have their own temperature or humidity limits, check their care guidance rather than assuming an insulated garden house will maintain those conditions. Consider how often doors will be opened, too, since use affects the indoor environment.
Write down the outcome you need, such as fewer drafts, less severe temperature change, or a room intended for frequent use. A qualified building-envelope professional can translate that brief into options for the existing construction and climate. If a new building is also in the running, the Verdana 1 garden house page identifies one model to ask about; request its actual construction and insulation information instead of reading performance into a listing title. Ask whether any stated details cover the walls only or the whole enclosure, then compare documented scope rather than relying on the word insulated. Include your intended use in the inquiry so different proposals are not treated as equivalent.
Inspect the wood and structure before covering it
Before buying insulation or interior finish, look for evidence that needs repair or further investigation: recurring wet marks, soft or crumbling timber, peeling coatings, musty odors, visible fungal growth, insect damage, distorted boards, or joints that have opened. Check both inside and outside, including corners and lower edges where splashback or drainage issues may leave clues. A visible stain does not, by itself, identify the cause; equally, a clean surface does not prove that concealed timber is sound. Note when dampness appears, whether it returns after rain, and any previous patching or lining. Those observations can help a professional investigate rather than guess.
Do not cover an unresolved leak, damp wood, or structural movement with insulation or a new lining. Find out whether the issue comes from rain entry, ground moisture, condensation, or another source, since the remedy depends on the cause. If damage extends beyond a small area you can clearly understand, ask a qualified contractor or building professional to assess the framing and likely extent of decay before you commit to finishes. If replacement is now a serious alternative, the Verdana 2 garden house page can identify a model for a separate inquiry; compare its documented scope with the repair assessment, not with a guess about what is hidden in your existing walls. That keeps the decision grounded in the work each route actually entails.
Identify the existing wall construction
Before selecting insulation, establish what is behind the visible boards. Gather drawings, purchase records, or assembly notes if you have them; otherwise, a contractor may need to inspect an appropriate location to identify the layers. Find out whether there is framing, where the main supports are, what materials are already present, and how interior and exterior finishes attach. A wall thickness measured at a doorway describes one dimension, but it cannot show whether the cavity is empty or whether another layer is present. Old linings, foil, coatings, and repairs can matter as much as the original timber. A simple sketch of each wall, noting openings and obvious changes, can make the first conversation more specific.
Wall type affects where insulation can go, how the new finish will be supported, and what route moisture has to dry. New layers also change temperatures within the wall, so an assembly that seems simple from indoors can affect concealed wood. Avoid choosing a generic package based only on nominal thickness or a product description. For a replacement comparison, the Durano garden house page can help identify the exact model to ask about; request a section drawing or written description of its wall construction and any stated insulation provisions. A professional should check compatibility with your current building before specifying a retrofit. The answer needs to come from technical documentation, not an exterior photograph.

Resolve moisture sources and plan for drying
Moisture control starts before the insulation layer. Check whether rain reaches the walls through damaged roof edges, failed joints, openings, or repeated splash from the ground, and whether water collects near the base. Indoors, note condensation and activities that may add water vapor. These are clues for an investigation, not proof of a specific defect. A dry spell, new paint, or a temporary patch can hide a recurring problem rather than fix it. If there is persistent dampness or visible deterioration, have the source assessed and the affected material evaluated before closing the wall behind a new finish. Record when signs appear, since their timing may help explain the cause.
Insulation can change how quickly parts of a wall warm and dry. Depending on climate, existing layers, and intended use, a poorly chosen combination may leave timber colder or limit its ability to dry. Do not assume that plastic sheeting or another vapor-control layer is automatically protective; its role and placement depend on the whole assembly. Ask the designer to explain how bulk water is excluded, how incidental moisture is managed, and which areas remain accessible for future inspection. If a new model is under review, the Veltor 1 listing gives you a specific identity to reference when requesting moisture-management information; get that guidance in writing instead of inferring it from a photo. Ask what assumptions the advice makes about heating and occupancy.
Separate air sealing from ventilation
An insulated wall and an airtight wall are related, but they are not the same thing. Unintended gaps can let drafts bypass insulation, while some openings may have been provided for deliberate ventilation. Sealing every visible gap without understanding its role can reduce needed air exchange; leaving uncontrolled leaks can make the space uncomfortable and allow warm, moist indoor air to reach colder surfaces. The right approach depends on the current assembly, climate, use, and any planned heating. Do not treat a tube of sealant as a complete insulation, moisture, or ventilation plan. This distinction matters more if people use the building regularly or bring wet gear inside.
Ask a qualified professional to distinguish joints that should be made more airtight from openings that belong in a ventilation strategy. Describe activities in the room: people, wet equipment, and some hobbies add moisture, while a space with little occupancy has a different pattern. If you are considering a new purchase, the Orello 1 garden house page can identify the model for a written inquiry about air-sealing details, ventilation guidance, and what is included in the building package. The page or model name alone does not establish airtightness or suitability for your planned use, so compare the actual answers and the intended assembly. Ask whether the guidance assumes a heated or unheated room.
Consider the roof, floor, and junctions as one enclosure
Do not judge the project by the walls alone. Heat can move through the roof, floor, openings, and the places where those parts meet, so consider how the complete enclosure affects the result. This does not mean every surface needs the same upgrade, or that roof and floor work should be improvised as an afterthought. Their construction, exposure to moisture, ventilation requirements, and connection to existing walls each need an appropriate plan. If another component is due for repair, coordinate the inspection and timing so wall work does not conceal a problem or prevent later access. The question is whether the complete proposal addresses the parts that matter for your intended use.
Ask for a written scope that names every surface and junction included: walls, roof, floor, doors, windows, and transitions, as applicable. That makes it easier to see whether a quote covers only one component while describing the space as fully insulated. For a replacement comparison, the Modano 1 garden house page can identify one model for a request about wall, roof, and floor construction; it is not evidence of how those parts are assembled. Use the supplier's current drawings or written specifications to understand the whole package, then compare that scope with the retrofit proposal. If roof or floor work is separate, clarify who will coordinate the connections between those areas and the walls.
Check openings, clearances, and finished room size
Interior insulation and finish layers take up room, even when each addition seems modest. Check the effect on usable width and length, shelves, workbenches, stored equipment, and the route through the building. A new lining can change how a door or window meets its frame, so the plan should preserve normal operation and address the finishes at edges and corners. Record existing drafts, damaged seals, or condensation around openings, but do not assume that new hardware alone fixes a wall or moisture problem. Before design work, note which built-in features must remain accessible and what has to fit through the doorway. Those practical limits can rule out an otherwise workable assembly.
Ask for finished interior dimensions and clearances around every opening, not only the nominal depth of the proposed insulation. This matters if furniture, equipment, or bulky stored items must pass through a door or sit against a wall. If buying a replacement is on your shortlist, the Veltor 2 page gives you a model name to use when requesting drawings or measurements; confirm whether figures describe the exterior, rough opening, or completed interior. Include trim and finish layers in the discussion so the final usable space, rather than an unfinished shell, is what you compare. Do not assume an appearance image shows those measurements; confirm that doors and windows will work with the proposed finished surfaces.

Compare the retrofit with a replacement on total scope
Keep retrofit and replacement open as alternatives until the condition and work scope are clear. A retrofit proposal should identify preparation, repairs, surfaces included, interior finishes, treatment of openings, and any specialist assessment. A replacement comparison should describe the entire building package and installation scope, as well as what happens to the existing structure and any site preparation. Do not compare a materials-only figure with a complete project quote. The smaller initial number may leave necessary repairs or coordination out of view, while extensive work may not make sense if the building has limited remaining service life. Compare what each route actually delivers for your intended use, including disruption and access to the space during work.
Ask for itemized written proposals so you can compare the same questions: specified layers, the basis for moisture control, ventilation assumptions, finished dimensions, exclusions, and responsibility for repairs found during work. A listing photo or model name is not proof of thermal performance, and a general promise of year-round comfort is not a defined scope. If a new build belongs in the comparison, the Veltor 3 listing can identify one candidate for a quote and technical documents. Use the seller's actual specifications, installation details, and written offer; do not assume anything about insulation from a product title. Include any removal or adaptation of existing components in the same comparison.
Set the questions before work is scheduled
Before work is scheduled, create a written brief that records the building's condition, planned use, known wall and roof or floor construction, moisture history, and the result you want. Ask which parts of the enclosure will change, what repairs come first, how openings are treated, and how the chosen assembly manages water and drying. Find out who will investigate concealed damage and how changes to the plan will be handled if the actual construction differs from expectations. A concise record helps you compare advice from different professionals and keeps the discussion focused on this building rather than a generic insulation product.
Also confirm the completed room dimensions, expected finish at edges and corners, maintenance needs, and any changes that could affect daily use. If the garden house will be heated or occupied regularly, say so at the outset; that can change what the whole enclosure and air-exchange plan need to address. For work beyond simple, visible repairs, use a qualified contractor or building-envelope professional who can assess the actual structure. Ask for explanations you can follow, not just material names. Proceed only when you understand what the proposed layers do, how moisture is managed, and what limitations remain.
Frequently asked questions
Can I insulate a garden house from the inside?
Often, yes, but the existing wall construction, moisture conditions, and space available all matter. Interior work can reduce usable room dimensions and change how the wall dries. Identify existing layers and have the assembly assessed before choosing materials.
Will insulation make a garden house comfortable year-round?
Not by itself. Insulation slows heat transfer, but the result also depends on the roof, floor, openings, air leakage, ventilation, and any planned heating. A professional can assess the complete enclosure against your intended use; no generic insulation layer guarantees year-round comfort.
Does a wooden garden house always need a vapor barrier?
No single vapor-control approach suits every wall. The right materials and placement depend on the existing layers, climate, and how the room will be used. Ask a qualified professional to explain the proposed assembly rather than adding a vapor barrier by default.
Can I cover damp or damaged wood with insulation?
Do not conceal an unresolved leak, persistent dampness, or damaged timber. First find out what is causing the problem and have the affected structure assessed. Insulation is not a repair, and covering a problem can make later inspection harder.
Is insulating the walls enough?
It depends on the problem you want to solve. The roof, floor, doors, windows, and their junctions also affect the enclosure. Ask for a clear scope showing which parts are included so you can judge whether the proposed work matches your intended use.
An existing wooden garden house is a realistic insulation candidate only when its structure, moisture conditions, and intended use are considered together. Base the decision on what is actually in the walls and what result you need, not on a generic material choice. If repairs are extensive, the finished room would be too small, or the project depends on a broader enclosure upgrade, compare retrofit and replacement using clearly documented scopes. A sound decision is one you can explain in terms of the building's condition, the purpose of the space, and the work each option includes.
