
Child-Safe Windows: Restrictors, Locks, and Opening Choices

US window buying guide
The moment to plan child-safe windows is before choosing handles, color, or decorative bars: decide how each opening must work in the room. A nursery may need modest daily ventilation without creating an easily opened route; a second-floor playroom may need a different routine from a ground-floor bedroom; a living room may prioritize a broad view and very little operable area. The useful question is not simply “Does this window lock?” It is who can reach it, what can be moved beneath it, how far it should open during normal use, who holds the key or release knowledge, and what must happen if the household needs to leave the room quickly. This guide separates those decisions so a window quote supports real family habits rather than a single feature checklist.
Buyer checklist 1
Start with the room, not the hardware
Make a simple opening map before comparing restrictors or keyed handles. Walk through each room and record floor level, usual occupants, window-sill height, furniture that may be climbed, nearby outdoor surfaces, and the reason the window is opened. A kitchen window over a counter, a nursery beside a future bed, and a stair landing may look similar in an elevation drawing yet call for very different day-to-day decisions. Include rooms used by visiting children, not only designated bedrooms. Also mark windows that adults regularly open to manage cooking odors, nighttime comfort, pets, or cleaning. The map turns a vague safety aim into individual operating scenarios a supplier and installer can discuss clearly.
Separate access from opening. A child who cannot reach a handle today may reach it after a chair, bed, or toy bin is moved. Ask how the layout could change as the child grows, and plan shades, curtains, and cords with the sash path. Decide which adults manage keys and opening routines. Hardware supports that household system; it does not replace supervision or thoughtful furniture placement.
Choose the amount of operable glass deliberately
One of the strongest design choices is deciding where a window does not need to open. A fixed window can bring daylight and a view to a high-risk or awkward location without asking the family to manage a sash, handle, or opening limit there. It can be paired visually with nearby operable units where fresh air is actually useful. This approach can suit a large glazed wall, a window behind a sofa, or a feature opening above a stair where routine ventilation is not the purpose. Do not assume a fixed pane solves every project question, however. Discuss room ventilation, cleaning access, appearance, and the overall opening strategy with the project professionals before finalizing the mix.
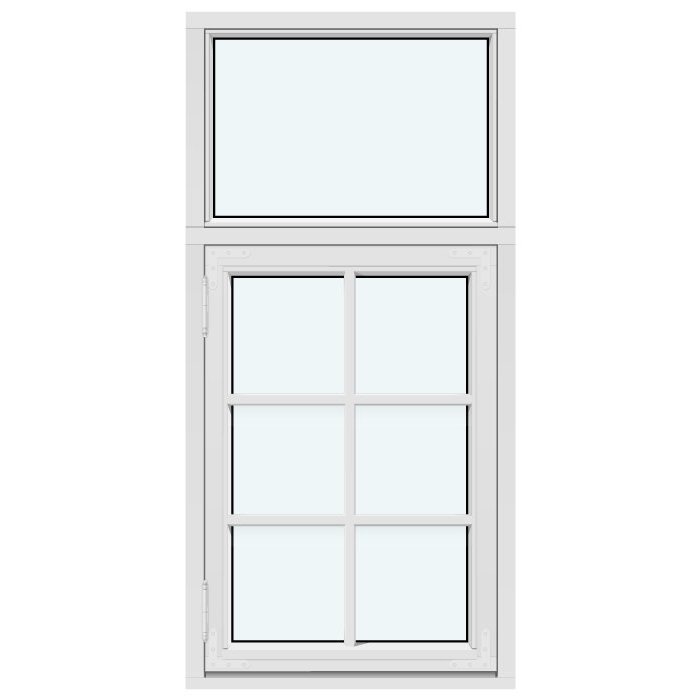
Where ventilation is wanted, divide the job between panes rather than expecting every part of a large composition to operate. A combination window is worth exploring when the concept calls for both a non-opening area and an opening area within one visual arrangement. The planning benefit is conceptual: daylight and view can be retained while the portion used for fresh air remains identifiable and manageable. Ask the supplier to show exactly which sash opens, in which direction, from which handle position, and how any proposed restriction affects that motion. This is more informative than approving a drawing based only on overall width and height. A clear operating diagram should be part of the decision record.
Buyer checklist 2
Understand what a restrictor does and does not do
A restrictor is intended to limit ordinary opening; it is not a universal declaration that a window is childproof. Its usefulness depends on the precise product, its installed configuration, whether it is engaged every time, and whether it has a release mechanism. A family may value a limited ventilation position in a child’s room, but an adult should also understand what action changes that position and whether the action is intuitive under stress. Ask for the proposed restrictor’s operating demonstration before approving it. Have the discussion in plain terms: closed, restricted opening, fully released opening, relocked. Avoid treating an unspecified “safety stay” as a complete specification.
Restrictions also change the experience of cleaning, insect-screen access, window treatments, and airflow. If ordinary ventilation through a narrow opening feels inadequate, residents may be tempted to disengage the device and leave it disengaged. That is a design signal, not a user failure: reconsider the location of operable units, the preferred opening method, or the ventilation plan. Ask whether the proposed component is integral to the window or an added device, who will install it, who will explain its operation, and what maintenance or inspection is appropriate. Keep any release information available to responsible adults, while avoiding an arrangement that makes the window’s normal status ambiguous to everyone else.
Use lockable handles as controlled access, not as a lone strategy
A lockable handle can help an adult control when a window is available to open, particularly in rooms where an openable sash is useful but not meant to be independently operated by a child. The important buying questions are practical. Is the handle actually offered on the selected window configuration? Is it locked only when the sash is closed, or does the proposed arrangement address a restricted ventilation position too? How many keys are supplied, can additional keys be arranged, and where will they be stored? Do not rely on a key tucked on the sill; decide on an adult-accessible, known location that remains usable when routines are disrupted.
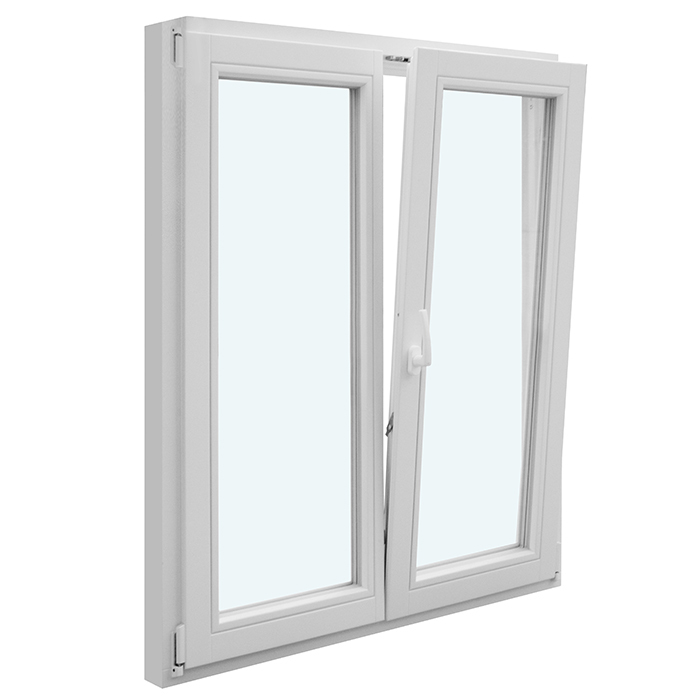
Keys introduce their own operational tradeoff. A lock that is never used does little, while a lock that adults cannot access promptly can complicate the household response to an unexpected situation. Establish a simple rule for each room, such as locked when unattended or opened only by an adult at certain times, then test whether that rule fits real life. For a single-sash inward-opening window, ask to see the handle and swing in the proposed room context, including whether furniture or a radiator affects adult access. The product title identifies an inward-opening single sash, but final hardware, restriction, and configuration should be confirmed rather than assumed from the name alone.

Buyer checklist 3
Match opening direction to the space around the window
Opening direction affects more than appearance. An inward-opening sash takes space inside the room, which can conflict with a crib, bed, desk, curtains, or a frequently used circulation route. An outward-opening sash moves the opening zone outside, but requires attention to exterior walkways, landscaping, screens, and weather exposure. Neither direction is automatically safer. The safer choice is the one that gives adults clear, repeatable control without creating a convenient climbing setup or an unexpected collision point. Sketch the swing path at the planned furniture stage, not after the room is complete. A full-scale tape outline on the floor can reveal conflicts that a small plan misses.
For locations where overhead clearance and exterior activity need to be considered, a top-hinged outward-opening window may prompt a different conversation from a side-hinged sash. Confirm the intended opening geometry and how the chosen handle, stay, or restrictor works at the desired ventilation setting. In a ground-floor room, think about whether an open sash projects toward a path, patio, or play area. Upstairs, think about how an adult will reach and close it without standing on furniture. Include seasonal behavior too: a window that is comfortable to operate in mild weather may be handled differently when storms, snow, or strong sun change the space around it.
Plan two-sash windows as a system
Two-sash designs create several choices: which sash is used routinely, whether both handles are accessible, and whether each side needs the same level of control. For a two-sash inward-opening window, ask the supplier to identify the operating sequence and behavior of each sash. Then assess the handles from floor level, from the planned bed position, and beside movable furniture. The intended adult routine should be evident rather than inferred from a generic elevation drawing.
A large opening can be attractive for cleaning and airflow, yet may be more than a child’s room needs on an ordinary day. Consider whether one controlled ventilation position serves most daily use while fuller opening is reserved for adults performing a specific task. Discuss screens, shades, and drapery early because they can affect how naturally someone reaches each handle and notices an open sash. If decorative bars are part of the design, distinguish between decorative bars and glass-dividing bars in the quote; visual detailing should not obscure the operating plan. Request a final schedule that lists each unit’s handing, opening side, hardware finish, locks, and any proposed restrictors individually.
Buyer checklist 4
Treat roof and elevated openings as their own category
A roof window changes the planning problem because the handle, opening path, and access method may be overhead. A pivoting roof window should be discussed in terms of the actual ceiling height, furniture beneath it, adult reach, cleaning method, and the way its pivot action is controlled. It is not enough to decide that a child cannot reach the handle today. Think ahead to bunk beds, loft furnishings, stools, and older children who may learn the operating routine. Determine which adult will demonstrate the window’s positions, what normal ventilation setting is intended, and how it is secured after use. A remote or accessory option, if offered, needs the same clarity about control and override behavior.
Do not let an elevated handle create a false sense that room layout is irrelevant. A bed below the window can interfere with adult access for closing, cleaning, or responding to an unexpected event. Keep a clear route and avoid a routine that depends on moving heavy furniture or finding a stool. Ask the installer to demonstrate operation from the finished floor and identify appropriate owner checks. Details must come from the selected configuration rather than a generic assumption about roof windows.
Keep emergency use in the same conversation
Child-safety measures must be considered alongside how the room may need to function during an emergency. The right balance is project-specific, and local requirements can depend on the adopted code, building type, room use, and alteration scope. This guide does not assign a nationwide opening size, permit rule, or emergency-opening requirement. Before ordering, ask the local building department or a qualified design and code professional which requirements apply to the exact address and planned work. Give them the room plan, proposed window schedule, and intended restrictor or lock arrangement. That direct review is more reliable than applying an online rule from another state, county, or version of a code.
The practical question for the household is equally important: can responsible adults understand how a window changes from its everyday restricted or locked state to its required use? Do not hide the answer in a manual. Request a demonstration at handover and include all caregivers in it. Discuss bedrooms, basements, converted spaces, guest rooms, and rooms whose use might change later. If a window is part of an emergency strategy, avoid choosing an added feature until the qualified professional has confirmed that the complete arrangement is appropriate. Keep furniture placement, window coverings, and storage from blocking adult operation. A well-planned route depends on the room remaining usable, not solely on one piece of hardware.
Buyer checklist 5
Coordinate windows with doors and outdoor routines
Families often focus on upper-floor windows while overlooking ground-level doors that children use or observe every day. A window plan should sit beside the entry and patio plan: which openings lead to a deck, driveway, pool area, garden, or shared outdoor space; which doors are normally locked; and which adult has responsibility when children are outside. A sliding patio door may change traffic patterns near a window wall, so leave room for people to pass without moving chairs or play furniture under nearby sills. Door and window choices are alternatives in circulation planning, not interchangeable safety products. Each needs its own hardware and supervision discussion.
Adults may want a clear view of a yard while children are drawn toward the same area. A fixed or restricted window near a door can support observation without becoming the main ventilation route. Decide how many doors and windows normally need to be open at once and whether that routine remains easy to monitor. Review planned screens, outdoor furnishings, and indoor traffic paths, but do not assume a door lock or window handle controls the entire perimeter.
Specify, demonstrate, and maintain the final arrangement
Before placing an order, turn your decisions into a room-by-room specification sheet. For every window, record whether it is fixed or operable; opening direction; intended daily ventilation position; proposed restriction; lockable-handle request; key plan; screen and shade considerations; and any question reserved for the installer or code professional. A single-sash outward-opening casement window should be listed by its actual selected configuration, not merely by a generic note saying “child-safe.” Ask the supplier to confirm what is included, what is an alternative, and what must be sourced or installed separately. This prevents a restrictor, keyed handle, or release detail from being assumed by one party and omitted by another.
At completion, have the adults who use the home test the agreed opening, restriction, locking, and closing routine. Store instructions and keys in a known adult-accessible place. Reassess the arrangement after furniture moves, room changes, or increased child reach, and seek qualified help if operation changes or hardware appears damaged. Bloomcabin states a 5-year warranty for windows and doors; delivery is 4–6 weeks subject to order confirmation.
Common questions
Are window restrictors enough for child safety?
No single device is enough on its own. A restrictor may help limit ordinary opening, but its value depends on the selected product, installation, continued engagement, room layout, and adult understanding of any release. Combine the hardware discussion with furniture placement, supervision, window use, and emergency planning for the specific room.
Should every child’s bedroom window have a lockable handle?
Not necessarily. A lockable handle may suit some room routines, but it also requires a clear key-management and adult-access plan. First decide whether the window needs to operate daily, whether a fixed pane can serve part of the design, and what local project requirements apply. Confirm compatible hardware for the chosen configuration.
Can I add restrictors after windows are installed?
Some projects may consider added devices, but compatibility, installation method, operation, and effect on the complete window arrangement need to be checked for the exact product. Do not assume an aftermarket item behaves like an integrated option. Ask a qualified installer or supplier to assess the particular window and intended use.
Which window opening style is safest for a playroom?
There is no universal best style. Start with furniture, reach, ventilation demand, sash swing, exterior conditions, and adult access. A fixed window may be useful where ventilation is unnecessary; an operable unit may need a carefully selected restriction and routine. Review the complete proposal with the relevant qualified professional.
Do child-safety window choices affect emergency planning?
They can. Locks, restrictors, release methods, room use, and furnishing placement should all be reviewed together. Requirements vary by location and project scope, so obtain direction from the local building department or a qualified design and code professional for the exact address. Ask for a clear handover demonstration after installation.
Next steps
Child-safe window buying is a sequence of room-level decisions, not a hunt for one reassuring label. Identify where fresh air is needed, where a fixed pane makes better sense, what opening action adults can manage reliably, and how furniture and family habits may change. Then specify the exact window operation and hardware rather than relying on broad notes in a quote. Restrictors and lockable handles can be useful parts of the plan, provided their purpose, release, and everyday routine are understood. Finally, have locally applicable project questions reviewed by the appropriate qualified professional, and test the finished arrangement with the adults who will operate it.
