
Front Doors With Sidelights and Transom Windows: How to Plan the Entry
US Front Entry Planning Guide
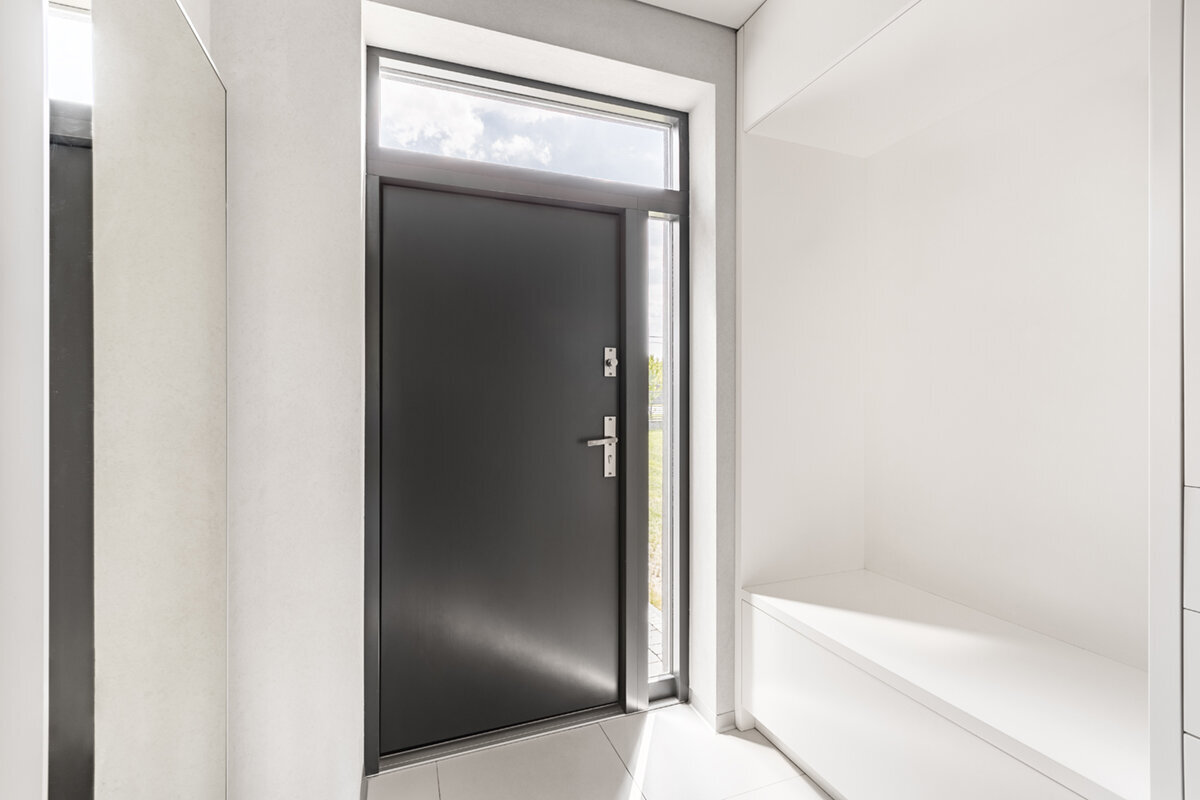
A front entry becomes a different project once the door is framed by sidelights and a transom window. Instead of choosing a door first and filling the remaining space later, begin with operation and project scope: will the existing rough opening stay intact, be widened at the sides, or be raised into the wall above? Then map how people approach the house, where the door swings, what visitors can see through the glass, and how daylight reaches the foyer. A well-planned assembly can make a narrow or shaded entrance feel more welcoming without making the interior feel exposed. The strongest results come from treating the operating door, fixed glass, trim, hardware, threshold, and adjacent façade as one composition rather than as separate purchases.
Start with door operation and the true project boundary
The first decision is not the glass pattern; it is what moves and where it moves. An inswing door occupies foyer space when open, while an outswing door uses space on the exterior landing. Trace the complete swing path rather than viewing the leaf in isolation. Include a person carrying groceries, a visitor waiting near the handle, an interior rug, a bench, steps, railings, and any separate storm or screen door under consideration. The active leaf must remain convenient for daily use. Sidelights and a transom are usually fixed visual partners, so they can widen or raise the composition without introducing another operating panel.
Define the construction boundary before comparing styles. Replacing an assembly within an existing opening is different from creating a wider or taller opening. An enlargement can affect the surrounding wall, exterior cladding, interior trim, wiring, and water-management details. Bring photographs of both sides, approximate wall thickness, and distances to the floor, ceiling, corners, porch roof, switches, and nearby windows. If exterior circulation makes an outswing arrangement worth considering, use outswing exterior door options as an operating alternative, then ask the supplier to identify every proposed fixed companion panel. A qualified project professional should assess the existing conditions and any wall alteration.
Measure the complete composition, not a nominal door size
Measure the opening width and height at several locations, but also document the usable façade around it. A sidelight needs a deliberate relationship to the nearest corner, porch post, downspout, light fixture, or adjacent window. A transom should relate convincingly to the porch ceiling, eave, trim band, or upper-story openings. A drawing that shows only product dimensions can conceal an awkward installed result. Request an exterior elevation that includes finished trim, threshold, surrounding wall, and all visible frame divisions. Add an interior elevation if the foyer ceiling, stair, closet, or casing layout could affect the composition.
The available wall does not dictate a single arrangement. One narrow sidelight can provide daylight where a balanced pair would make the entry too broad. Matching sidelights can formalize a centered door. A transom may suit generous headroom where side expansion is impossible. When both side and upper glass are included, compare a transom spanning only the door with one spanning the complete assembly; the frame grid changes significantly. A single-panel sidelight offers a useful reference for a simple vertical-light arrangement. Confirm which elements are fixed, how they connect visually, and the overall ordered dimensions rather than assuming the product title describes the whole entrance.
Plan the complete entry opening
Balance daylight, privacy, and real sightlines
Evaluate entry glass from outdoors and indoors. Outside, stand where a caller, delivery person, or passerby could realistically pause. Inside, look from the threshold toward the foyer, stairs, living areas, and any private room aligned with the door. Clear sidelights can create a crisp connection and useful side light, but they may also reveal movement at eye level. Diffusing glass, a solid lower section, partial-height glazing, decorative bars, interior coverings, and landscape screening offer different responses. Begin with the exact view you want to protect or preserve; otherwise, privacy treatments can become unrelated decorative additions.
Observe the entry at the times the household commonly uses it. Direct sun may create glare on a reflective floor, while a deep porch could make every source of daylight valuable. A transom admits light from above and may brighten a deeper foyer without creating the same eye-level exposure as full-height sidelights. Note where the porch roof, overhang, planting, and neighboring buildings cast shadows. Also identify any view worth framing, whether it is a tree, garden, or open sky. The best layout does not simply maximize glass. It places light where it is useful while keeping the entry comfortable after dark when interior lighting changes the direction of visibility.
Use the transom to solve a proportion problem
A transom works best when it answers a clear visual need. It can lift an entrance that otherwise looks compressed beneath a high interior ceiling or tall exterior wall. It can also provide a horizontal counterpoint to narrow sidelights. Upper glass is not automatically an improvement, however. Beneath a low porch, it may be barely visible from the approach while adding another frame line and more glass to maintain. On a façade with a strong trim band, the transom might align neatly or compete with that line. Compare the same entry with and without upper glass before deciding whether the transom contributes enough.
Treat the transom as coordinated fixed glazing, not leftover space above the door. A fixed window configuration is a relevant category to discuss when the goal is a stable, non-operating upper element. Ask whether the transom is separately framed, how its frame widths relate to the door and sidelights, and where the horizontal division appears indoors and outdoors. With a vaulted foyer, inspect the upward view from inside: upper glass may connect the entrance to the ceiling volume, or it may emphasize an awkward transition. A full-size taped outline on the interior wall can reveal whether the proposed height feels intentional before the final elevation is approved.
Establish a clear visual hierarchy
Most successful entrances make the operating door the focal point, with sidelights supporting it and the transom completing the outline. This does not require equal widths. An asymmetric arrangement can look purposeful when a stair, wall, porch post, or path places the door off center. Anchor the composition to one or two existing façade lines, such as nearby window heads, porch-post spacing, a masonry course, or the centerline of a gable. For more complex groupings, a combination window arrangement can serve as a visual reference for discussing how fixed areas and frame lines relate, although it remains an alternative window category rather than a front-entry specification.
Color and surface choices alter perceived scale. A dark frame can make individual panes and divisions read more strongly, while a lighter surround may make a broad opening appear quieter. Review the door face, trim, handle, lighting, and house numbers together under both exterior and interior light. Decorative bars create a pattern over the glass, whereas glass-dividing bars create actual divisions, so use precise terminology when requesting drawings. Approve the plain frame structure before adding decoration. A grille pattern cannot correct poor proportions. Viewing the elevation in grayscale can also help because it removes the distraction of color and shows whether the door still reads as the intended visual anchor.
Coordinate glazing with the architecture around it
The entrance does not have to copy every nearby window, but it should share a recognizable design language. Compare visible frame widths, major horizontal lines, pane proportions, color, and the balance between glass and solid surfaces. A door with one broad lite can work beside divided windows when the contrast is clearly intentional. Conversely, a dense entry pattern beside minimal windows may look disconnected. Review the design from the sidewalk and from the main interior approach. At a distance, numerous narrow divisions may merge into a dark texture; up close, they become prominent details. Choose the viewing distance that matters most instead of making every feature equally emphatic.
Shaped upper glazing should respond to real architectural cues. Where an arch is already present in a porch, gable, or neighboring opening, a half-round fixed window can help frame the discussion about a curved transom form. A round fixed window represents another shaped fixed-glass alternative, but neither shape should be added merely to make the entrance more ornate. Rectangular transoms are often visually easier to align with door rails, trim, and nearby rectangular windows. Request elevations with every frame line shown and compare versions with and without decorative bars. Resolve the geometry at the drawing stage rather than after the wall or finish materials have been disturbed.
Plan the complete entry opening
Plan for the approach, porch, and interior landing
Walk the route a first-time visitor would take. The entry should read clearly from that approach, but sidelights also interact with porch posts, railings, steps, planting, and exterior lighting. A panel hidden partly behind a post may still illuminate the foyer yet look clipped from outside. A broad assembly at the end of a narrow walk can feel imposing, while the same width may look settled on a generous porch. Place the doorbell, handle, lock, house number, and light fixtures on the elevation before finalizing glass widths. Visitors need a comfortable place to pause without standing in the operating path or crowding the hardware.
Inspect the interior landing with equal care. New glazing can expose a coat closet, mirror, stair opening, or storage area that attracted little attention beside a solid door. It may also make a small foyer feel less enclosed. Consider where shoes, packages, pets, and guests collect and whether the open leaf blocks their path. Identify any planned shade or covering early because it requires usable space and convenient operation. Where the door approaches stairs, a tight hallway, or another unusual condition, ask an appropriate qualified professional to review the specific layout and locally applicable requirements. Do not infer suitability from a generic floor plan or product photograph.
Match the design to the wall and installation plan
The connection between the assembly and the house matters as much as the front elevation. Existing casing or exterior trim can conceal conditions that affect final size and finish work. A wider or taller opening may require decisions about the wall above and beside it, interior casing returns, flooring transitions, and the way exterior finishes meet the frame. Ask the installer to describe the sequence for removal, opening preparation, placement, flashing and sealing, insulation around the frame, exterior integration, interior trim, and final adjustment. An early concept measurement should be followed by a project-specific site measure before the order is confirmed.
Clarify whether the door, sidelights, and transom arrive as one coordinated assembly or as framed components joined during installation. The number and position of joins affect both appearance and installation planning. Request written responsibility for assessing existing conditions, protecting the opening, completing interior and exterior finishes, and correcting any work outside the product supply. Requirements vary with location and project scope, so the appropriate local authority and qualified professionals should confirm what applies before work begins. A responsibility list prevents an avoidable gap in which the supplier expected the installer to finish the surrounding wall while the installer assumed that work belonged to another contractor.
Specify glass, hardware, and access together
A front entrance is opened, locked, viewed through, and cleaned every day. Evaluate handle height and location against the sidelights and the needs of household members. Decide whether the hardware should contrast with the frame or visually recede, and coordinate it with the doorbell and lighting. Review useful glass samples at a meaningful scale because reflection, privacy, and decorative patterns can be hard to judge in a small image. Consider how both faces of a high transom will be cleaned, especially above a stair or tall foyer. Attractive upper glazing can become frustrating if routine access was never considered during planning.
Do not let a configuration title substitute for a complete specification. If a paneled operating leaf suits the design, outswing panel entry doors can support that style discussion as an alternative, but the quotation still needs to confirm operation, handing, panel design, glass location, frame, finish, hardware preparation, threshold, and fixed companion elements. Record handing from a clearly stated viewing side so terminology does not reverse the intended arrangement. Discuss locks, handles, and access-control equipment together. Sidelights and a transom already introduce several visual elements, so leaving calm space around the handle can make the entrance easier to understand and use.
Compare reduced and full-glass alternatives before ordering
The largest glazed arrangement is not necessarily the strongest choice. A door with one sidelight may preserve useful interior wall space while providing enough daylight. Two sidelights can create ceremonial balance around a centered approach. A transom alone may suit an entry constrained by side walls but with generous headroom. Another possibility is improving foyer daylight through a nearby window instead of enlarging the door opening. Score each option against the same criteria: swing and circulation, privacy, useful light, façade proportion, construction scope, finish interfaces, and maintenance access. Consistent comparison prevents decorative enthusiasm from outweighing daily function.
For a façade that genuinely contains angled roof or window geometry, triangular and angled fixed windows provide an alternative design reference rather than a default replacement for a transom. Keep the entrance decision grounded in the actual opening and household use. Request at least two elevations at the same scale: the preferred full arrangement and a reduced-glass version. Add a plain version without decorative bars if the proposed pattern is complex. The comparison often shows whether the transom is performing essential proportion work or only adding another component. Choose the scheme that remains coherent when color, landscaping, furniture, and seasonal decorations are removed from the presentation.
Frequently asked questions
Should sidelights be the same width on both sides?
Not necessarily. Matching sidelights suit a centered, formal entrance, but one sidelight may be more practical where a wall, porch post, hardware location, or interior path limits the other side. Make asymmetry deliberate by aligning it with an existing feature and reviewing the complete exterior elevation rather than an isolated product image.
Is a transom better than wider sidelights?
They address different conditions. Wider sidelights add breadth and eye-level light, while a transom adds visual height and admits light from above. Compare available wall space, privacy, porch shadows, interior ceiling height, and existing façade lines. Draw both alternatives at the same scale before changing the rough opening.
Can sidelights use clear glass when privacy matters?
Clear glass may work where the approach is screened or the interior view is not sensitive, but evaluate it from places where visitors actually stand. Diffusing glass, a solid lower portion, coverings, and landscape screening are alternatives. Repeat the sightline check after dark with interior lights on before finalizing the glass choice.
What belongs in an entry-system quote?
Request the door operation and handing, all fixed panels, overall dimensions, visible frame divisions, glass locations, finishes, decorative treatment, hardware preparation, threshold, trim, and included installation work. The quote should also state who performs the final site measure and who handles each interface with the existing wall, floor, and exterior finish.
How much time should I allow before installation?
Bloomcabin states a delivery timeframe of 4–6 weeks, subject to order confirmation. Plan separate time for site measurement, design approval, any opening preparation, installer coordination, and finishing. Do not schedule demolition from a preliminary estimate alone; wait until the final configuration, responsibilities, and delivery arrangements have been confirmed.
Next step
A front door with sidelights and a transom can improve daylight, proportion, and the experience of arriving home, but only when the pieces are planned as one operating entrance. Start with swing direction and the real construction scope. Test privacy from actual sightlines, establish a frame grid that belongs to the façade, and compare the full concept with a simpler alternative. Take measured elevations and a written component checklist into the ordering conversation, then confirm final dimensions and responsibilities before work starts. Bloomcabin windows and doors carry a 5-year warranty; review the applicable order and product details for the selected configuration.
