
Using a Garden House in Winter: Prep Checklist
Garden house winter preparation
Winter preparation starts with a clear idea of what your garden house must do—not with a blanket layer of sealant. A space used for brief visits to collect tools has different needs from one where you plan to spend hours, store moisture-sensitive items, or use powered equipment. Cold weather can expose problems that are easy to overlook in mild conditions: water getting in, blocked airflow, damp belongings, or an entrance that becomes difficult to use. Before the season changes, inspect the site and structure, read the exact product guidance, and separate routine owner checks from work that needs a qualified professional.

01
Define how you plan to use the garden house
Write down the intended winter use before making changes. Occasional access to gardening supplies, storage of seasonal equipment, and spending a full afternoon inside are different demands. A garden house may provide shelter without keeping its interior warm, dry, or above freezing. Decide how long people will be there, whether the contents can tolerate dampness and temperature swings, whether you expect to use water or electricity, and whether you need access after storms. If visits will be frequent or items are sensitive to their environment, confirm suitability with product-specific guidance instead of assuming the building performs like an extension of your home.
Turn that use case into a short set of questions: Is this exact model intended for winter use under conditions like those at your site? Are insulation, glazing, ventilation, or weather-protection details documented, and are those components included in the configuration you would order? Which tasks must be done before assembly, and which are recurring maintenance? If you are still choosing, the Verdana 1 listing identifies one candidate to discuss; it is not evidence of winter performance. Compare its documented details and ask the seller or manufacturer about unanswered points before you plan around it. This keeps a product image or model name from substituting for specifications.
Verify winter-use limits before relying on the structure
Check the manual, product specifications, and installation and maintenance instructions for the exact model and configuration. Look for its stated intended use, required site or base conditions, weather-exposure limitations, permitted finishes or sealants, care schedule, and guidance for any doors, windows, vents, or roof components. If the information is not explicit, ask the seller or manufacturer to clarify. A product photo, an isolated wall-thickness figure, or a broad description does not by itself establish insulation, weather tightness, snow capacity, or suitability for regular occupancy. Components can differ between configurations, so verify the item you would actually order rather than relying on a nearby model or a category-wide assumption.
Keep the answers with your order or maintenance records. Note what is included and what must be arranged separately, such as installation, surface treatment, or options that affect use. These details matter for planning time as well as money: work required before assembly may be harder to complete afterward, and later changes can conflict with the original instructions. The Verdana 2 listing can identify a candidate while you make those inquiries; use the exact model details when requesting documents, not as evidence that the house is insulated or intended for winter occupancy. If a seller cannot clarify something essential to your plan, treat it as an unresolved requirement.
02
Inspect the roof and exterior safely
Make a visual check before the first sustained cold or wet spell, then repeat it after severe weather when it is safe. From the ground, look over visible roof edges and coverings for displaced, damaged, or missing parts. Check exposed trim and exterior surfaces for peeling, cracks, open joints, or water marks, and look for branches touching the structure or leaves collecting where water should drain. Details vary by roof and exterior material, so follow the care instructions rather than reaching for a generic repair product. Do not climb onto the roof or stretch beyond a safe position to inspect it. If you cannot see a concern clearly, arrange a qualified inspection.
Look for signs of a problem rather than trying to calculate structural capacity: a fresh ceiling stain, a new drip, a shifted component, or repeated water tracks deserves attention. Do not assume that a roof can carry a particular amount of snow based on its shape, a photograph, or a model name. Consult the manufacturer’s directions for roof and snow care for the exact unit and local conditions, and ask a qualified professional if the instructions do not resolve your concern. Use the Durano listing only to identify the model under consideration; verify roof-related limits and maintenance directly instead of treating the listing as a load rating. Never improvise roof access or snow removal.
Check drainage around the site
Water management starts around the base. Walk the perimeter after rain and note where runoff travels, whether water pools against the house, and whether soil washes away or the interior floor becomes damp near a wall. Clear leaves from existing channels or outlets only if they are intended for homeowner maintenance, and make sure water can leave the area without being directed toward the building. If downspouts are present, check that they discharge away from the structure in a way consistent with their instructions. Keep vegetation from blocking inspection routes or resting against exterior surfaces; use qualified help for large branches or substantial site changes.
Compare the base and siting requirements for the exact garden house with the conditions at your property. Uneven ground, persistently wet soil, or runoff crossing the intended footprint may need professional attention before you make changes. Do not guess at a foundation fix or dig where buried services may be present; a site contractor can assess drainage and installation needs. If you are evaluating the Veltor 1 listing, identify the exact model, then ask for its documented site and base requirements and compare them with your prepared location. A product name does not explain how water will behave in your yard, and surface drainage problems are not solved by sealing the exterior alone.

03
Look for water entry and drafts at openings
Open and close every door and window, where fitted, before the weather turns. Note sticking, loose hardware, damaged seals, cracked panes, or visible gaps around a frame; test the latch gently rather than forcing it. Inspect thresholds and sills after rain for water marks or dampness, and look for light at a closed joint if conditions make that visible. A door that no longer shuts properly can admit wind-driven moisture as well as cold air. Identify whether the issue is alignment, worn weatherstripping, or another component before applying a fix. Keep drainage slots and intentional vents clear.
Use only replacement seals and repair products compatible with the specific material and assembly, following the manufacturer’s instructions. Caulk is not a universal answer: applied across a drainage opening, moving joint, or designed vent, it can create a different problem. If the source of a leak is unclear or damage reaches the frame or glazing, ask the manufacturer or a qualified repair professional before attempting a repair. When assessing the Orello 1 listing, confirm which openings are included in that exact configuration and what maintenance guidance applies; a model name or image alone cannot tell you how an opening is sealed. Record any issue you defer so it is not overlooked during winter use.
Keep ventilation open and watch for moisture
Airflow matters even when outside temperatures are low. Moisture can come from wet coats, damp soil or tools, people, and stored materials; if it remains in a closed space, it may show up as condensation, musty odors, or persistent dampness. Before winter, identify the vents or other openings that the manufacturer intends to remain functional and learn how they should be used. Do not block them with storage or cover them to stop a draft. At the same time, do not treat every gap as intentional ventilation: investigate unwanted leaks separately, because sealing one indiscriminately can hide the source instead of solving it.
After a cold, damp period, inspect corners, window edges, and items stored against exterior walls for condensation or moisture. If dampness returns, remove wet items and look for the underlying source: a leak, poor airflow, a wet floor, or a use pattern that adds moisture. Follow the product’s ventilation and maintenance guidance, and seek professional advice if the cause is persistent or hidden. If the Modano 1 listing is one of the models you are considering, ask what its documentation says about vents and their intended operation in the exact configuration. Do not infer ventilation from a photo, an opening style, or the name of another model.
04
Protect furnishings and stored items from damp and cold
Plan stored belongings around the fact that an unheated garden house may follow outdoor conditions unless its documentation says otherwise. Before a cold spell, move items whose labels require a protected temperature, or that could be damaged by dampness or repeated temperature changes. Depending on the item, this may include paint, liquids, battery-powered equipment, electronics, paper goods, and textiles; check each item’s storage directions rather than assuming a closed building is enough. Empty wet planters, dry tools before storage when possible, and keep items that can rust or mildew from sitting in damp contact with surfaces.
Keep walkways, the entrance, and access to vents, windows, or shutoffs free of boxes. Use shelving only where the floor and fixing guidance permit it, and avoid stacking items where they could fall against glazing or block airflow. If you are choosing a model, check the exact interior dimensions, floor guidance, and permitted use before designing storage around a photograph. For the Veltor 2 listing, use the model reference to request those details; neither the name nor a product image establishes usable space or a safe storage load. A simple inventory of what stays outside and what moves indoors can show whether your winter storage plan fits the space.
Plan heating and electrical use with qualified help
If you plan to spend time inside or use powered equipment, settle the heating and electrical questions before cold weather. Confirm that the structure and its exact configuration are intended to accommodate the equipment and use you have in mind; a heater alone does not establish that the space is insulated, weather tight, or suitable for extended occupancy. Have electrical work, permanent heater installation, a flue, or another building-service change assessed and handled by a qualified professional familiar with the product and site. Do not improvise wiring, modify a wall, or assume that an outdoor-rated device makes an indoor setup safe. No single setup is appropriate for every garden house.
If water pipes, a sink, or other water equipment are part of your plans, ask a qualified plumber how the system should be protected or shut down in freezing weather. Follow the equipment maker’s instructions rather than relying on guesswork. Also consider lighting, a reliable route to the entrance, and whether use will be occasional or frequent, since those details affect what a professional needs to assess. When reviewing the Veltor 3 listing, identify the exact model and verify compatibility, stated limitations, and any required clearances with the manufacturer and installer. Do not infer heating or electrical capability from product images or a named feature.

05
Keep winter access and maintenance safe
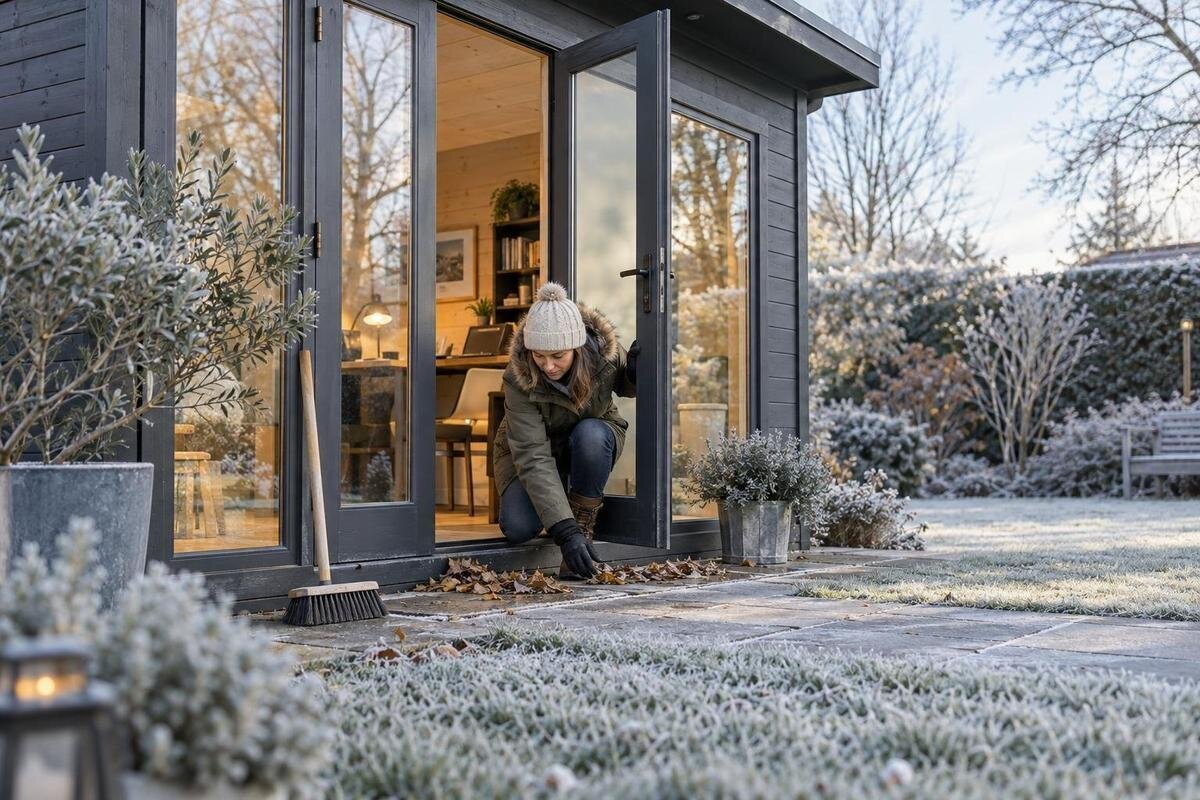
Prepare the approach as carefully as the interior. Clear leaves and debris from paths and steps, check that a gate or door can be reached, and make sure the route does not depend on crossing a place where water routinely pools. In cold weather, watch for slippery surfaces and use only a treatment suitable for the path material and permitted by its care instructions; avoid applying an unknown product to an entry surface. If lighting is installed, check it before the darker season and have repairs made safely. Keep a shovel, gloves, or other frequently used items where they can be reached without blocking a doorway or vent.
Include a quick, safe check after storms and after a long period with the door closed. Look for fresh leaks or marks from the ground and inside, confirm that doors still operate, and note any persistent odor or condensation. Do not go onto the roof or use improvised tools to clear snow. If the manufacturer’s guidance calls for a roof-care step that is unsafe for you to perform, arrange qualified service rather than improvising. Stop using an area where you see signs of structural movement, recurring water entry, or damaged electrical equipment until the issue has been assessed. Planning access and maintenance makes winter visits less dependent on last-minute fixes.
Keep a written winter check and maintenance log
Keep a short written record rather than relying on memory. Before winter, note the date, exterior condition, roof and drainage observations, door and window operation, visible seal damage, ventilation clearance, interior dampness, and which belongings you moved. Write down repairs to complete and questions sent to the manufacturer or a professional. Mark an item unresolved if weather or access prevented a safe inspection; do not check it off just because you intended to look. A record makes changes easier to spot on the next visit and prevents a previous year’s assumption, such as a leak that seemed minor, from being mistaken for a completed repair.
Plan inspections when conditions let you see the structure clearly and leave time to arrange any work. Do not wait for active leakage or an icy roof to become your first inspection. Repeat the walk-around at sensible intervals and after notable weather, following the maintenance schedule for the exact model. Separate routine cleaning and visual checks from work involving the roof, electrical systems, structural changes, or persistent moisture, which may need qualified help. Review the list before each planned winter use. The record should show what you inspected, what remains uncertain, and which documented limits shape your plans.
Frequently Asked Questions
Can I use any garden house throughout winter?
No. The model’s documented intended use, installed configuration, site exposure, and your planned activity all matter. A structure used for occasional storage may not provide the conditions needed for long periods inside or for sensitive belongings. Check the guidance for the exact model and ask about anything it does not state clearly; appearance and a product name are not proof of all-season suitability.
Should I seal every gap before winter?
No. First determine whether a gap is a leak or an intentional vent, drainage opening, or moving joint. Use only repair materials compatible with the product and follow its maintenance instructions. Sealing a designed opening can interfere with ventilation or drainage, while covering an active leak may hide the cause rather than fix it.
How can I tell whether the roof is safe under snow?
Do not estimate snow capacity from a roof’s appearance, a photograph, or a model name. Check the manufacturer’s guidance for the exact garden house and local conditions, and ask a qualified professional if the instructions do not answer your question. Inspect from a safe position on the ground; do not climb onto the roof or improvise snow removal.
Will adding a heater make a garden house winter-ready?
Not by itself. A heater does not establish that the structure is insulated, suitable for extended occupancy, or compatible with a particular electrical setup. Confirm the intended use and any limitations for the exact model, and have heating or electrical work assessed by a qualified professional familiar with the structure and site.
What should I remove from an unheated garden house?
Check the storage instructions for anything that could be damaged by freezing, dampness, or repeated temperature changes. Depending on the item, that may include paint, liquids, electronics, batteries, paper goods, or textiles. Move vulnerable belongings to a suitable place, and avoid leaving wet tools or planters where moisture can linger.
Preparing a garden house for winter is less about one dramatic treatment than about knowing the limits of the exact structure and noticing changes early. Match your plans to documented intended use, manage runoff around the site, address leaks without blocking ventilation, and protect belongings from damp and cold. Leave roof, electrical, structural, or persistent-moisture concerns to appropriate professionals. A written checklist helps turn those checks into a clear routine without promising a level of comfort the product has not been documented to provide.
