
How Long Does Window Replacement Take?

Window replacement planning
Window replacement may involve one straightforward opening, several rooms, or a mix of windows and patio doors. Opening operation shapes the plan from the beginning: inward-opening sashes need indoor swing clearance, outward-opening units need exterior clearance, and fixed windows eliminate operating space without eliminating installation work. The calendar also has two distinct parts. First comes order confirmation and product preparation; then comes scheduling and work at your home. Bloomcabin delivery is typically 4–6 weeks, subject to order confirmation, but that period is not an installation-duration promise. On-site timing depends on access, opening condition, weather, finish work, and what removal reveals. Instead of relying on a universal estimate, plan around the rooms affected, the crew’s access route, and the decisions that must be settled before installation starts.
Buyer checklist 1
Separate delivery from installation time
Begin by identifying what is being replaced and how each unit operates. An operable window requires its handing, opening direction, hardware arrangement, and clearance to be settled before ordering. A project of matching rectangular units may be simpler to coordinate than one combining shaped glazing, roof windows, and patio doors. Selection, measurement approval, order confirmation, delivery, and installation are separate milestones. Treat Bloomcabin’s typical 4–6 week delivery period, subject to order confirmation, as a procurement guide rather than a reserved installation date. Ask when measurements become final and which choices cannot be changed after confirmation. A simple milestone tracker can prevent delivery and installation from being treated as one date. Record when the opening schedule was surveyed, when measurements were approved, when operation and finish choices were confirmed, and when delivery and site work were separately acknowledged. Add the name of the person responsible for each remaining decision. This is especially useful when a contractor, designer, property manager, or several household members participate. The tracker need not predict every day of work; its purpose is to show whether the next stage is genuinely ready or still depends on information, access, or approval.
On-site work starts when the crew can protect the area and reach the opening. It is not complete merely because the old unit is out and the new one is visible. The window must be positioned, secured, detailed around the perimeter as specified, checked, and handed over with the immediate area cleared. A fixed window removes sash-operation decisions, but it does not guarantee faster installation. Access, wall construction, trim treatment, and concealed opening conditions remain relevant. Build your household plan around confirmed work stages rather than another homeowner’s window count or experience.
Create an opening-by-opening scope
Walk through the home before choosing dates. List each opening by room, floor, operation, and exterior location. Note nearby furniture, blinds, alarm contacts, landscaping, porch roofs, narrow side yards, and rooms that must support work, sleep, or pet care. This turns a broad “replace the windows” request into a sequence that can be discussed. Grouping by room may reduce repeated furniture movement, while grouping by elevation may suit exterior access. The best sequence depends on the actual property, so identify household priorities before the crew plans staging.
Do not assume visible glass dimensions reveal the complete opening. Existing frames can be concealed by casing, and later finishes may overlap the original installation. Ask how measurements will be verified, what trim may be removed, which finishes will be protected, and who decides what happens if correction is needed. When considering a two-sash inward-opening window, check the indoor swing area as part of both ordering and room preparation. A bed, desk, deep sill, curtain, or shade can interfere with daily operation even if installers have enough temporary access to fit the unit.
Buyer checklist 2
Understand the active installation period
The most disruptive work usually occurs in concentrated stages. The crew needs a protected route, space for tools and the incoming unit, and access near both sides of the opening when the project requires it. Removal is followed by inspection and preparation of the opening, fitting and securing the replacement, checking its intended operation, and completing agreed perimeter and finish details. Expect tool noise, movement through the home, and temporary loss of normal use in the active room. The exact method must reflect the property’s wall construction and existing condition.
A room that remains reachable may still be unsuitable for ordinary use. Do not schedule a video meeting beside the opening or leave fragile objects on nearby shelves. Keep children and pets outside the work zone. Before the appointment, ask where the crew will enter, stage products, place removed units, and collect debris. Confirm which floors and surfaces will receive protection, whether doors should remain open for access or closed to separate inactive areas, and what end-of-day cleanup includes. These specific questions are more useful than asking whether installation will create any mess at all.
Match operation to indoor and outdoor clearance
Opening style affects preparation and long-term use. Inward-opening sashes need a clear interior sweep, while outward-opening casements require space beyond the exterior face. Shrubs, railings, walkways, and narrow passages should therefore be discussed before installation day. Pivoting units require attention to their turning path and adjustment access. Fixed glazing has no operating sweep but may sit beside operable sections in a larger arrangement. Compare the sash’s everyday movement with the access needed for installation; a visually suitable choice can still conflict with a headboard, countertop, walkway, or window treatment.
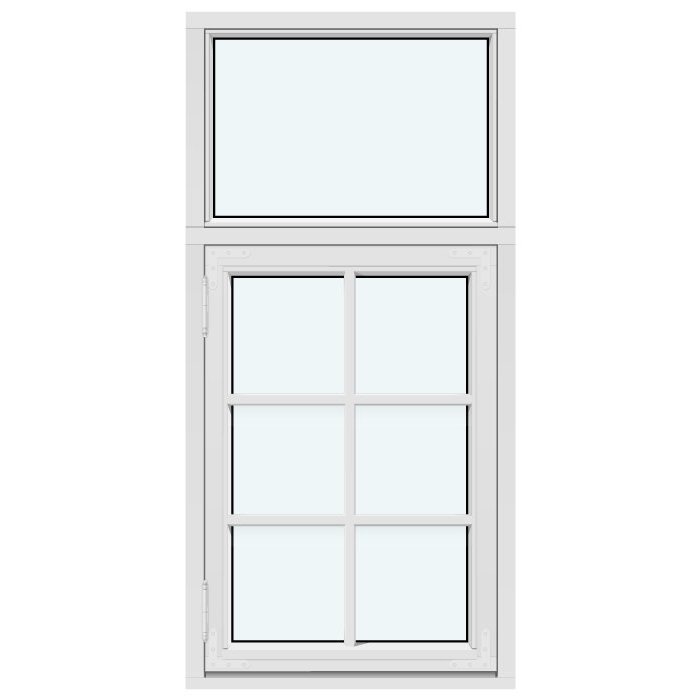
Where exterior movement is acceptable, an outward-opening top-hinged window is one configuration to compare. The name confirms only that opening arrangement, so verify dimensions, hardware, finish, and all other order details with the supplier. Ask the installer to mark the clearance zone and explain how the opening will be protected while active work is underway. Decide separately who removes and reinstalls blinds, curtains, shades, and security sensors. If those tasks are excluded from the installation scope, arranging them in advance prevents a small household job from delaying access or requiring an unplanned return visit.

Buyer checklist 3
Treat access as part of the schedule
A ground-floor opening beside a driveway presents a different access problem from an upper-floor window above a porch, landscaped bed, or steep yard. Indoors, narrow halls, stair turns, delicate flooring, and crowded storage areas can restrict movement. Outdoors, parked vehicles, locked gates, patio furniture, planters, branches, and grills may occupy the intended work zone. Share current photos and disclose these constraints during the survey. If access would depend on a shared passage or another person’s property, settle permission and timing before the installation date instead of assuming the route will be available.
Large glazed openings require a deliberate handling and traffic plan. A Patio Life sliding patio door should be treated as a door-opening project rather than scheduled like a small bedroom window. Ask how the existing unit will leave, where the replacement will be staged, and whether the usual household route must temporarily change. Arrange another entrance for residents, pets, and deliveries if the patio opening is normally a primary exit. Clear exterior furniture and loose objects beforehand so the crew is not repeatedly stopping to move belongings or negotiating a narrowed handling path.
Prepare the active rooms, not the whole house
Create a workable perimeter around each scheduled opening. Move lamps, small furniture, electronics, breakables, and paperwork to another room. Take down nearby wall décor that could be disturbed and remove window treatments according to the agreed division of responsibility. Label any hardware, curtains, or reusable pieces you plan to keep. Photograph existing finishes before work starts so pre-existing marks and project changes can be distinguished later. If a heavy bed, cabinet, or built-in desk cannot move, disclose it during planning so the installer can judge whether adequate access remains.
Preparation should also reflect how the household functions. Clear counters near active kitchen openings, identify a secure place for pets, and move remote work away from expected tool noise. Preserve a quiet room if someone needs to rest during the visit. A single-sash outward-opening casement window may be appropriate to compare for a compact room, but its fit with exterior clearance and interior access still needs confirmation. Ask whether casing, trim repair, paint touch-ups, siding transitions, or sensor reconnection are included; otherwise, installation may end before every visible finishing task is complete.
Buyer checklist 4
Allow for concealed opening conditions
Removal can expose conditions hidden by the frame, trim, or exterior finish. An opening may be uneven, previous work may interfere with the planned approach, or surrounding material may require repair. A careful survey can reduce surprises but cannot reveal every concealed condition without removing the existing unit. Before installation, agree on a response process: who records the issue, who explains the options, who can authorize additional work, and how the home will be protected if a decision cannot be made immediately. That process prevents rushed choices while an opening is active.
Avoid relying on generic online statements about permits, ratings, required dimensions, or other project thresholds. Requirements vary by location, building, opening, and scope, so have the applicable details checked by an appropriate qualified local professional. A specialty product such as a pivoting roof window also calls for location-specific planning around roof access, interior protection below the opening, and weather. Its visible room footprint may seem small while exterior access remains complex. Ask which parts of that coordination belong to the window installer and which require another professional before confirming the work date.
Plan for weather, security, and routines
Because removal temporarily exposes an opening, weather can affect whether planned work should proceed. The project team should determine whether conditions are suitable and how the home will be protected during the active stage. Ask how schedule changes will be communicated, whether another opening can be substituted, and how unfinished work would be secured. Avoid placing installation immediately before travel or an event with no scheduling flexibility. Coordinate alarm contacts, smart sensors, and monitoring arrangements in advance so a disconnected device does not become an end-of-day surprise.
Protect daily routines by defining routes that should remain open. Move vehicles away from exterior access, plan meals outside the busiest room, and tell the scheduler if a bedroom or bathroom must remain usable. A combination window can involve multiple elements in one arrangement, so ask how its components will be handled and staged without blocking circulation. The objective is not to keep the home silent or unchanged. It is to identify the disruption you can accept, preserve the functions you need, and give the crew a sequence that does not require repeated last-minute rearrangement.
Buyer checklist 5
Include finishes and handoff in the timeline
Homeowners often judge completion by the surrounding finishes, not by the moment the sash first operates. Discuss how interior casing meets the wall, how exterior edges relate to adjacent finishes, and whether painting or other touch-ups fall within the scope. Appearance terminology should also be precise. Decorative bars create a divided visual effect, while glass-dividing bars separate panes. Confirm which treatment appears in the order instead of relying on a general description. A fixed pane beside an opening sash may require a different sightline and trim discussion from a single operable unit occupying a similar wall area.
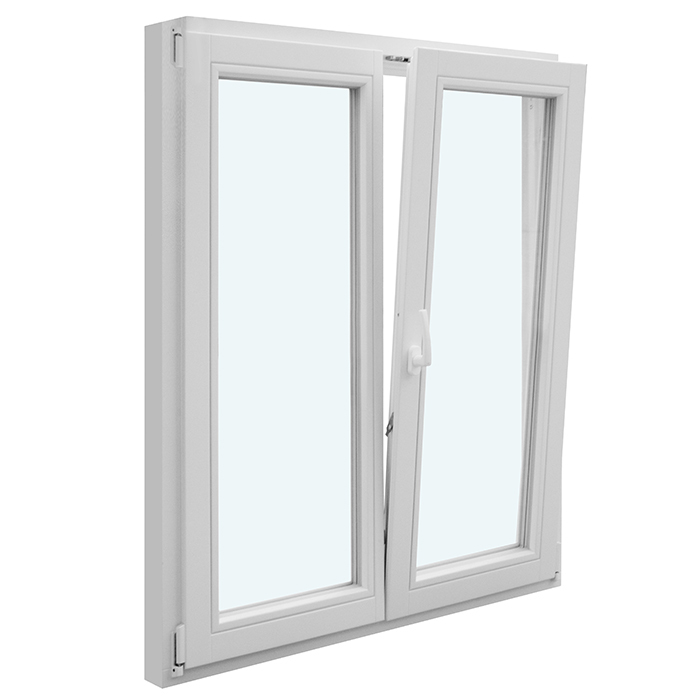
At handoff, operate every movable unit and record questions by room. Confirm the intended hardware use, appropriate cleaning access, and any remaining punch-list work. For a Kombi outward-opening casement window, verify the delivered configuration against the order and check its actual opening behavior; the product title alone does not establish every specification. Bloomcabin windows and doors have a 5-year warranty. Keep the order confirmation, product records, installation documents, and punch list together. Clear records make it easier to identify the exact unit and project history if a later question arises.
Build flexibility into the final schedule
The least disruptive plan does not depend on every stage proceeding without change. Leave space between expected delivery and travel, a move, interior decorating, or furniture installation. Hold a pre-install conversation after operation and finish choices are settled. Confirm the first work area, anticipated sequence, arrival arrangements, access instructions, parking, and the person authorized to answer questions. When several household members are involved, designate one contact for on-site decisions. A crew should not have to wait while different people debate access, trim expectations, or a newly visible condition.
Compare alternatives partly by their coordination needs. A shaped fixed window may require different measurement, handling, and finish planning from a standard rectangular opening. Adding a patio door to a window project may consolidate household preparation but can also affect a primary route and require more staging space. Ask for a written scope explaining what the installer provides, what you must prepare, and what circumstances trigger a change discussion. Then clear only the rooms and routes actually scheduled. Accurate site information and a flexible calendar are more dependable than any universal promise about installation duration.
Frequently asked questions
How far ahead should I plan window replacement?
Start early enough to confirm measurements, operation, finishes, access, and household dates without rushing. Bloomcabin delivery is typically 4–6 weeks, subject to order confirmation, while installation scheduling is separate. Keep additional flexibility for weather, survey findings, and repairs that may become apparent only after removal.
Can I stay home during window installation?
You may be able to remain home, but active rooms will be noisy and inconvenient. Discuss entry routes, remote-work needs, pet arrangements, and rooms that must stay available. Keep children and pets away from work zones, and ask how each opening and room will be protected at the end of the day.
Will the installers need every room at once?
They need the rooms containing that day’s scheduled openings, plus practical interior and exterior access routes. A whole-house project does not necessarily activate every room simultaneously. Confirm the sequence before moving belongings so you clear the agreed work areas without unnecessarily disrupting rooms scheduled for a later stage.
What can cause a delay after removal starts?
Hidden opening conditions, uneven surrounding materials, access obstacles, weather, and decisions about repairs can change the sequence. A survey identifies visible concerns but cannot expose everything behind the existing unit. Ask beforehand who documents discoveries, who approves changes, and how the opening will be protected if work must pause.
Should patio doors and windows be replaced together?
Combining them may consolidate product decisions, access preparation, and finish planning. It may also increase disruption because a door opening can affect a primary household route and require additional staging space. Compare the convenience of one coordinated project with your ability to maintain another entrance and a clear handling path.
Next steps
Window replacement is easiest to manage when the project is planned by opening, room, and work stage rather than by unit count alone. Confirm operation, access, finish responsibilities, household priorities, and the process for handling concealed conditions before installation. Allow for Bloomcabin’s typical 4–6 week delivery period, subject to order confirmation, without treating it as the on-site schedule. A clear sequence, prepared work zones, and one authorized contact will not eliminate noise or temporary inconvenience, but they can prevent avoidable delays and make the active installation period much easier to navigate.
