
How to Grow Microgreens in a Greenhouse
Greenhouse production notes / 27
How to Grow Microgreens in a Greenhouse
The fastest harvest in the greenhouse asks for the most exact routine: clean seed, even density, measured darkness, tempered light and a cold finish.
Plan the production bench in a Classic Aluminum Greenhouse7–21 daysTypical crop-dependent cut window
1 tray / cropKeep germination behavior consistent
Clean → coldProtect quality after the cut
The production thesis
Not miniature vegetables. A short, disciplined crop cycle.
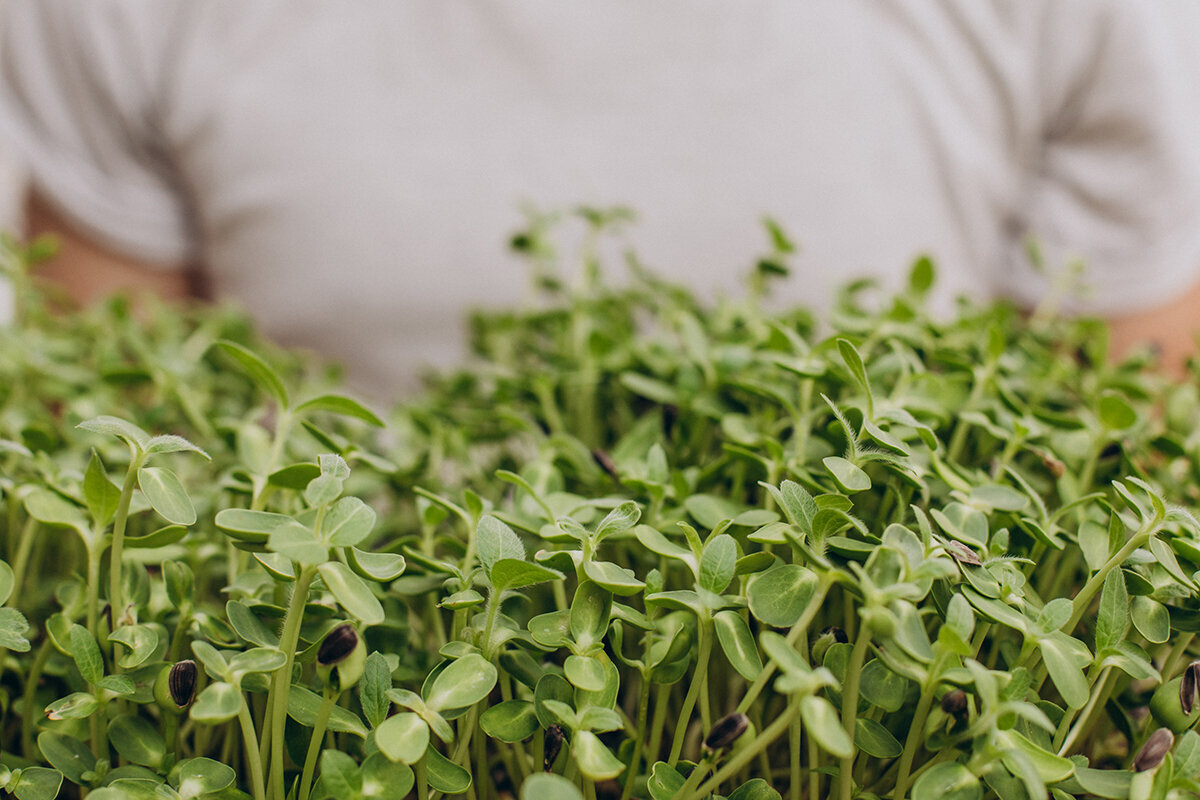
Microgreens are tender edible seedlings harvested young—usually with open cotyledons and, depending on the crop and desired finish, just before or as the first true leaves appear. Unlike sprouts, they are generally grown in a tray of medium or on a mat, then cut above that surface. The seed hull, roots and growing medium are left behind.
That distinction changes how a greenhouse should be used. A tomato bench rewards room, warmth and a long season. A microgreen bench rewards repetition. The crop moves from dry seed to harvest quickly enough that small mistakes are amplified: a tray sown too heavily stays wet; a greenhouse that feels pleasant at 9 a.m. can become stressful behind glass by midafternoon; and a dirty pair of scissors can compromise an otherwise careful week.
For a serious home gardener, this is useful rather than intimidating. You do not need a large installation or a complicated feeding program to begin. You need one dependable tray format, a few straightforward crops, potable water, an easy-to-clean work surface and a habit of checking each tray at the same point every day. Treat the first month as calibration. Record the crop, seed lot, sowing weight, soak time if used, cover date, first light date and harvest condition. Those notes become more valuable than an assumed universal day count.
Microgreen quality is designed before sowing—and protected until the greens are chilled.
01 / Seed behavior
Choose by rhythm, not by color alone.
Begin with a crop whose seed size and germination pattern make sense for a single tray. Fine brassica seed establishes a quick, shallow canopy; larger peas and sunflower create a more substantial crop but need more room, water judgment and cleanup discipline. Avoid mixed trays until you understand how rapidly each crop emerges, how much water it drinks and when it becomes too tall or fibrous for your preferred harvest.
Buy accurately identified seed intended for edible production. Keep the original lot information where possible, and label each tray with the crop and sowing date. That simple label makes it much easier to isolate a disappointing tray, repeat a success or notice that a batch is taking longer than expected in a cooler or cloudier greenhouse week.
Fine seed / fast
Broccoli & kale
- Soak: Usually unnecessary.
- Blackout: Brief and monitored.
- Character: Mild to gently brassica-like.
- First tray: Excellent for learning an even sow.
Fine seed / vivid
Radish
- Soak: Usually unnecessary.
- Blackout: Short; uncover once seedlings lift.
- Character: Peppery, crisp and colorful.
- First tray: Forgiving, but watch density.
Large seed / substantial
Pea shoots
- Soak: Often useful; drain thoroughly.
- Blackout: Gentle cover may help anchoring.
- Character: Sweet, juicy and voluminous.
- First tray: Easy to read; demands airflow.
Large seed / robust
Sunflower
- Soak: Common, with clean water.
- Blackout: Lift cover as growth strengthens.
- Character: Nutty, crunchy and full-bodied.
- First tray: Best once sanitation is routine.
Do not grow tomato, pepper, eggplant or potato seedlings as microgreens. Their young tissues can contain undesirable alkaloids. A single-crop tray is also easier to harvest at the proper condition than a blend of seedlings with different speeds.
02 / Coverage is the variable
Dense enough to become a canopy. Open enough to breathe.
Underseeded
Productive coverage
Overcrowded
Seed should form a nearly even field, not piles and bare islands. In a productive tray, cotyledons close into a harvestable canopy while individual stems can still dry after watering. When seed touches in thick ridges, humidity remains trapped at the surface and weak, stretched stems become more likely.
Tray, media & calculation
Measure once. Record the result.
A standard 10-by-20-inch greenhouse flat is a practical home-production format because trays, inserts and bench space are easy to organize around it. One solid tray beneath a perforated growing tray creates a straightforward bottom-watering system. The lower tray is a temporary reservoir, not a permanent pond.
Starting seed weight = tray area × your crop’s proven rate.
There is no universal ounces-per-tray rule. Seed size, variety, germination percentage, medium, light level and preferred harvest stage all change the answer. Start with supplier guidance for microgreens, weigh every sowing and adjust only after comparing coverage, surface dryness and yield.
Use a clean, lightweight soilless mix, coco coir or a purpose-made mat suited to edible production. Moisten it evenly before sowing: it should hold together when squeezed but should not release a stream of water. Garden soil is too dense for this shallow, fast crop. Avoid raw manure and media of uncertain origin, because microgreens are commonly eaten raw.
03 / Tray anatomy
Build a tray that separates roots, water and the edible canopy.
Keep the system simple enough to wash completely. Moisture rises from below, roots occupy the medium and the leafy crop remains as dry and ventilated as practical between irrigations.
Canopy airflow
Even seed zone
Root mat + medium
Perforated insert
Bottom reservoir
Use a solid tray beneath a perforated insert so the medium can wick moisture from below and excess water can be drained away. Keep the medium shallow, level and evenly moist; distribute seed in a single even layer rather than in mounds. The root mat belongs in the medium, while the leaves need enough open air around the tray to dry between irrigations.
Food-contact surfacesChoose sound, washable trays and reserve them for edible crops rather than using cracked containers that hold residue.
Medium depthA modest, level layer is enough for many fast microgreens. Peas and sunflower may need more anchorage than fine-seeded brassicas.
Water routeAdd water to the lower tray, let the medium wick it upward and drain excess rather than leaving roots submerged for extended periods.
Canopy routeLeave visible space around each tray. Air should pass across the leaves, not merely circulate somewhere else in the greenhouse.
04 / Dark to daylight
Blackout is a germination tool, not a fixed ritual.
Some growers use a second tray, a humidity cover or light weight during early germination. The purpose is even moisture and root contact—not an automatic number of dark days. Crop, temperature and seed vigor decide when the cover comes off.
Frame 01
Sow & settle
Even seedFrame 02
Anchor
Daily checkFrame 03
Introduce light
Moderated daylightFrame 04
Finish with air
Dry, upright leavesLevel the moist medium, distribute seed evenly and press only as needed for contact. Mist only when it helps settle seed; do not create puddles.
Check daily. If roots lift the tray or seedlings push hard against a cover, reduce pressure or uncover. Stale, warm air is a warning.
Move trays into bright, moderated greenhouse light as cotyledons seek to open. Avoid a sudden blast of hot direct sun through glazing.
Bottom-water as needed, vent the greenhouse and harvest when the crop is crisp, proportionate and true to its intended stage.
Safelight caution: A tray that smells sour, shows fuzzy growth, remains wet at the surface or develops patchy collapse is not a tray to nurse along. Isolate it, discard it when contamination is suspected, clean the surrounding area and review density, water and airflow before sowing again.
05 / Greenhouse management
Give the fast crop the calmest part of the house.
Greenhouse growing can be wonderfully efficient because natural daylight, water, tools and a harvest door can all be close at hand. It also creates the central risk for microgreens: heat and humidity climb quickly in a closed glazed structure. The goal is not maximum warmth. It is a consistent, moderate environment where the canopy dries without scorching.
For most home growers, a basic thermometer-hygrometer placed at tray height is more useful than guesswork. Check it during the brightest part of the day, not only during a cool morning visit. When the forecast calls for sun after a cold night, open vents early enough that heat does not arrive all at once. In hot U.S. summers, a shaded bench or seasonal shade cloth may be more valuable than extra watering. Water cannot correct leaf stress caused by an overheated tray.
During darker months, supplementary LEDs can extend a useful day or smooth out weak daylight, but they cannot compensate for stale air or poor sanitation. Run a small circulation fan so it moves air gently around the crop rather than blowing hard enough to dehydrate one edge of the bench. Keep trays clear of condensation drips, door drafts and the dead-air corner behind stored pots.
Explore greenhouse planning ideas for benches, ventilation and shadingSeed
storage
storage
Sow
zone
zone
Grow
bench
bench
Cut +
cool
cool
Set a small greenhouse bench up like a food-production station.
Leave a hand-width of open space beside trays, keep hoses and nozzles off the floor, and reserve a clean shelf for scissors, labels and empty harvest containers. The flexible interior of a Bloomcabin Classic Aluminum Greenhouse can be organized as a compact growing studio. Use that flexibility to prioritize washable surfaces, airflow, shade and access rather than fitting one more tray into a crowded corner. A productive bench is one that can be cleaned, inspected and harvested without moving unrelated garden equipment.
06 / Food safety
Move in one direction: dirty work never returns to the harvest end.
Microgreens are commonly eaten raw, so cleanliness is a production practice rather than an optional finish. Purchase seed intended for edible use and never use treated seed. Use potable water. Wash hands before handling seed or cut greens, keep pets and wildlife out of the greenhouse, and do not harvest when ill. If greens are sold or served beyond your household, check current federal, state and local requirements before production.
Cleaning and sanitizing are distinct steps. First remove soil and residue with detergent and water; then use a food-safe sanitizer exactly according to its label. Sanitizer is not effective through visible dirt. Establish a simple end-of-cycle routine: empty the tray, remove roots and debris, wash tray and tools, rinse where required, sanitize, air-dry and store the clean items away from media, hoses and outdoor footwear.
Stop: do not carry dirty trays, hose ends, potting debris or outdoor footwear into the cutting and packing zone.
01Receive
02Wash
03Sow
04Grow
05Cut & cool
Store seed dry, labeled and away from chemicals. Clean trays, tools and the bench before food contact, then handle medium and seed in one designated sowing zone. During production, bottom-water carefully and remove crop waste promptly. At harvest, use clean clippers and food-safe containers, then refrigerate the greens without delay. The direction matters: media handling and dirty trays should never cross back into the cutting and packing end of the bench.
07 / Cut windows
Harvest by condition, not by a calendar promise.
A seed catalog may offer an approximate day range, but greenhouse light, temperature, cultivar and your desired stem length shift the real finish. Look for an upright, evenly colored canopy; fully opened cotyledons; clean, dry leaves; and flavor that tastes fresh rather than harsh or overgrown. Harvest in the cooler part of the day whenever possible, before the greenhouse has accumulated heat.
Use clean, sharp scissors or a knife and cut just above the medium. Keeping the cut clear of the growing surface reduces debris and avoids dragging medium into the harvest container. Unless greens are visibly soiled, avoid automatically washing after cutting: extra handling and moisture can shorten shelf life. If washing is necessary, use clean potable water and dry the greens thoroughly before chilling.
Harvest only what can be eaten, shared or packed in peak condition. A small succession—one or two trays sown every few days—usually gives a household more reliable freshness than a single large sowing that matures at once.
Radish
Crisp cotyledons
Broccoli
Even canopy
Pea
Tender shoots
Sunflower
Paired leaves
Radish is best with open, crisp cotyledons and its characteristic peppery finish. Cut broccoli when the canopy is tender and evenly green. For pea shoots, choose the stem length you enjoy before the crop toughens. Harvest sunflower at a robust paired-leaf stage, before stretched growth or leaf damage takes away from its clean, nutty character.
Cold is part of the crop.
Move harvested greens out of greenhouse heat as soon as practical. Pack loosely in clean food-safe containers and refrigerate promptly. Make only what you can use at peak quality; microgreens are at their best when the journey from cut to kitchen is short.
08 / Diagnostic review
Read a failed tray as evidence—not as a reason to add more water.
Negative proof
Long, pale stems
Long, pale stems
Stretching and leaning
The likely issue is insufficient or uneven light, often combined with trays left covered too long. Uncover at the correct emergence point and move the crop to bright but moderated light. Do not assume more heat will correct a weak canopy.
Positive proof
Dry, upright canopy
Dry, upright canopy
Surface stays wet
Reduce water volume, switch to careful bottom watering and increase gentle air circulation. Also inspect sowing pattern: overcrowded fine seed creates a moisture-retaining felt even when the greenhouse itself is ventilated.
Negative proof
Patchy emergence
Patchy emergence
Uneven germination
Look first at medium moisture and seed distribution. A tray with dry edges, a saturated center or clumps of seed will not mature evenly. Pre-moisten, level and record whether that crop benefited from soaking or a brief covered phase.
Positive proof
Clean cut, cold finish
Clean cut, cold finish
Short storage life
Harvest dry-looking, sound greens with sanitized tools. Minimize warm handling, avoid packing wet leaves and refrigerate quickly. If shelf life stays short, audit both the sanitation route and the post-cut temperature.
Questions from the bench
Microgreen FAQ
Do microgreens need direct sun in a greenhouse?
No. Bright natural light is valuable, but intense direct sun through glazing can overheat shallow trays and stress tender leaves. Use a greenhouse position with moderated light, venting and seasonal shade as needed. Supplemental LEDs are most useful when daylight is short or inconsistent.
Should every microgreen be soaked and weighted?
No. Large seeds such as peas and sunflower are commonly soaked by growers, while small brassica and radish seed usually does not need it. Likewise, a cover or light weight is crop- and condition-dependent. Observe emergence rather than following a universal blackout schedule.
Can I grow several species in one tray?
You can, but begin with single-crop trays. Species differ in seed size, water use, germination speed and ideal harvest stage. Once you have records, mix only crops that emerge and finish on a similar schedule.
Do microgreens need fertilizer?
Many microgreens complete their short cycle using seed reserves, especially in a suitable growing medium. Do not add nutrients automatically. First establish even germination, appropriate light, careful water and sanitation; then follow guidance for your selected crop and production method if additional feeding is appropriate.
Is a greenhouse safe for greens that will be eaten raw?
A greenhouse can be an excellent setting, but safety comes from practice: potable water, clean trays and tools, reputable seed and media, exclusion of animals, hygienic handling, airflow and prompt cooling. Treat every tray as food production, not merely as a decorative planting.
Sources & further reading
Build your own production notes.
These U.S. Extension and federal resources informed this guide. They are especially useful when refining a crop, choosing substrates, setting a sanitation routine or understanding the distinction between microgreens and sprouts.
- https://www.pubs.ext.vt.edu/SPES/spes-756.html — Virginia Cooperative Extension, greenhouse and controlled-environment microgreen production.
- https://extension.umd.edu/resource/growing-microgreens-and-baby-greens-indoors — University of Maryland Extension, tray systems, seed, media, moisture and harvest guidance.
- https://extension.psu.edu/ensuring-food-safety-in-microgreens-production — Penn State Extension, water, sanitation, media and post-harvest food-safety practices.
- https://extension.psu.edu/legal-considerations-for-microgreens-production — Penn State Extension, legal and regulatory considerations for U.S. microgreen producers.
- https://www.fda.gov/regulatory-information/search-fda-guidance-documents/guidance-industry-standards-growing-harvesting-packing-and-holding-sprouts-human-consumption — U.S. Food and Drug Administration, food-safety context for sprout and produce production.
Start with one clean, shaded tray cycle—and make it repeatable.Design your greenhouse production bench →
Explore Bloomcabin greenhousesConsider finishes, accessories and shade planning
