
How to Grow Potatoes in a Greenhouse
The Hidden Yield Ledger · Greenhouse Crop No. 09
How to Grow Potatoes in a Greenhouse
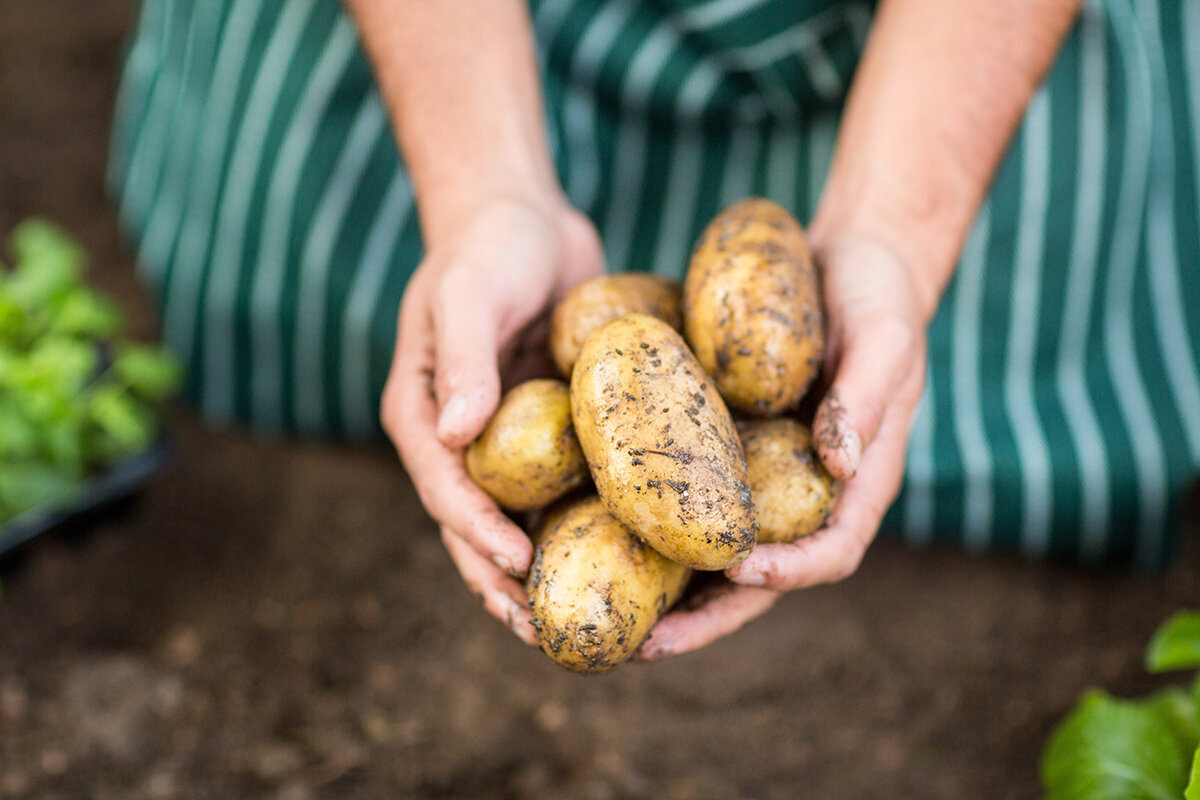
Potatoes reward a gardener who can think below the surface. The visible canopy is only the receipt: the true account is written in cool, covered soil, where buried stems send out stolons and each stolon may quietly bank a new tuber.
In a greenhouse, that underground account can be carefully managed. You control the planting medium, irrigation rhythm, air movement, disease hygiene, and—most importantly—the amount of soil reserved for hilling. The structure does not make potatoes a tropical crop. It gives you a more deliberate way to grow a cool-season one: earlier in spring, later into fall, and with far less dependence on wet weather arriving at the right moment.
Folio 09 · United States · Seed tuber to cellar shelfPlate A · Where the harvest forms
Chapter one · Read the underground plant
A potato is a stem story, not a root story.
Potatoes are grown from seed tubers rather than true seed. After planting, the eyes produce shoots. Those shoots become stems, and the buried portion of those stems can make slender horizontal structures called stolons. Tubers form on those stolons. This distinction explains nearly every good greenhouse practice: plant deep enough to establish a protected base, add soil as stems lengthen, and never allow developing tubers to sit near the light.
Hilling is therefore not decorative mounding. It is an investment in protected underground stem length and in darkness. University of Minnesota Extension notes that stolons emerge from main stems and that hilling both increases the underground zone and prevents shallow tubers from greening. For the greenhouse gardener, the practical conclusion is simple: do not fill a bag or tall container to its rim on day one. Keep a reserve of clean growing mix ready for the later soil rises.
Ledger correction — myth versus fact.
Myth: a bigger pile of soil automatically means a bigger crop. Fact: soil volume must be paired with a healthy canopy, steady moisture, and enough oxygen around the roots. A deep, soggy container is not a productive storehouse; it is a rot risk.
Myth: a bigger pile of soil automatically means a bigger crop. Fact: soil volume must be paired with a healthy canopy, steady moisture, and enough oxygen around the roots. A deep, soggy container is not a productive storehouse; it is a rot risk.
A greenhouse changes the weather around the foliage, not the crop’s underlying preference for a measured, relatively cool root zone. Its advantage is precision. A roof limits rain-driven wetting, containers can use a clean medium, and vents can clear humidity after irrigation. Yet glazed spaces also warm rapidly. The gardener’s task is to keep the crop from experiencing abrupt swings: hot, dry compost at noon; drenched medium in the evening; stale, wet leaves overnight.
Chapter two · Opening inventory
Start with seed stock worth recording.
Buying clean planting material is the first disease-prevention decision, not a luxury. Potatoes saved from a grocery bag may be treated to inhibit sprouting, and they can carry problems that are invisible at planting time. Purchase certified, disease-free seed potatoes from a reputable supplier whenever possible.
01
Choose the purpose
Early, salad, storage
For a tight greenhouse season, early and midseason varieties are often the most comfortable fit. Choose according to the meal you actually cook: waxy salad types hold their shape, all-purpose yellow types are flexible, and floury russets favor baking and mashing. If late blight or scab has been a local concern, read the catalog’s disease notes and favor varieties with tolerance where available.
02
Size the seed piece
Whole small · divided large
Plant small seed potatoes whole. Divide larger ones into pieces around 1½ inches across, each carrying one or two sound eyes. Use a clean knife and a clean board; cut only what you can plant after the surfaces have dried. Smaller pieces stretch the inventory, while robust pieces carry more stored energy for emergence.
03
Let cuts cure
A brief healing interval
After cutting, lay pieces in a single layer at roughly 60–70°F for a few days, out of direct sun, until cut faces dry and form a protective skin. Do not plant freshly cut pieces into cold, waterlogged compost. That combination spends the crop’s opening credit on decay instead of roots.
04
Keep a crop record
Variety · source · date
Write down variety, supplier, planting date, first emergence, first hill, and any disease symptoms. This modest ledger becomes valuable in the second year, when you can distinguish a variety that merely survived from one that delivered the texture, harvest timing, and storage behavior you wanted.
Chapter three · Before planting
Chit for short, sturdy intent—not a tangle of pale sprouts.
Chitting means allowing seed potatoes to make compact sprouts before planting. It is optional, but useful when you want an earlier start or wish to inspect each piece before it enters the greenhouse bed. Set tubers in shallow trays, eyes upward, in bright but indirect light at a cool room temperature. The aim is thick, colored sprouts that stay attached during planting—not long, fragile white shoots made in darkness.
01 · Sort
Dormant but firm
02 · Place
Eyes upward
03 · Wait
Short, colored shoots
04 · Plant
Ready for soil
- SortReject shriveled, soft, moldy, or badly damaged seed pieces before they reach the growing area.
- PlaceArrange tubers in a single layer so air can circulate. Indirect light helps keep sprouts compact.
- WaitA few sturdy sprouts are enough. Handle them as carefully as you would a new stem on a young perennial.
- PlantIf pieces were cut, confirm that the cut surface has properly cured before planting into a moist—not saturated—medium.
Chapter four · The protective rise
Plant low. Raise the soil in measured stages.
In a greenhouse bed, dig a trench about 4 inches deep and set seed pieces 8–12 inches apart, sprouts upward, before covering. In a large opaque container, begin with a shallow lower layer of growing medium rather than a full pot. This preserves the one thing a potato crop cannot add later: hilling room.
Stage 1 · Planting
Cover the seed piece
Stage 2 · First rise
Stems reach 8–12 in.
Stage 3 · Final ridge
Protect every tuber
- PlantingUse a loose, fertile medium with excellent drainage. In ground beds, avoid compacting the planting zone; in containers, use quality potting mix rather than dense garden soil.
- First riseGently draw or add soil around the base, covering the lower stem while leaving a healthy tuft of leaves exposed. Work without tearing roots or snapping stems.
- Final ridgeRepeat once or twice as growth continues. The finished ridge should keep developing tubers dark, cool, and safely beneath the surface.
Spacing is also a size decision. Closer seed pieces tend to make more, smaller tubers; wider spacing tends to make fewer, larger ones. For a home greenhouse, begin around 10–12 inches between plants in a bed and leave enough path width to inspect foliage, water the root zone, and hill without standing on productive soil.
Chapter five · Protected-space ledger
Choose a system with volume to spare.
The useful measurement is not only the footprint you see. It is the clean soil volume beneath it, plus the empty vertical reserve you can convert into a hill.
In a roomy greenhouse, a dedicated raised bed makes the easiest long-term rotation plan. In a compact structure, a few large containers can turn a lower storey into a productive crop without committing every inch of floor to potatoes. Whatever you choose, insist on drainage, opacity, and a route for watering the medium—not spraying the leaves.
For a purpose-built growing room, consider the practical dimensions and ventilation options of the Classic Aluminum Greenhouse. Its roof ventilation and generous interior can support the careful climate management potatoes need as outdoor conditions become less predictable.
| Crop form | Plant allowance | Hilling reserve | Main watch |
|---|---|---|---|
| Bed row | 10–12 in. apart | Open trench | Access and rotation |
| Grow bag | 10–15 gal., one plant | Leave upper depth empty | Dry outer edges |
| Opaque container | 10–15 gal., one plant | Layered fill | Drainage and crowding |
- Greenhouse bed row. This gives the best root volume and the easiest hilling, because loose soil can be drawn toward the stems. Keep a working path beside the row and do not repeatedly follow potatoes with tomatoes, peppers, or eggplants in the same soil.
- Grow bag. A bag is portable, contained, and convenient where the greenhouse floor is paved. Plan on about 10–15 gallons per plant, depending on bag width and cultivar, and check moisture closely in bright weather because the outer edge dries first.
- Large opaque container. Use drainage holes and generally one plant per container. Containers are orderly in small spaces and easy to refresh with disease-free medium, but several seed pieces in one small pot create foliage competition rather than a grand harvest.
Penn State Extension specifically notes that a 10–15 gallon opaque, food-safe container with drainage can grow potatoes successfully. The opaque requirement is purposeful: light promotes tuber greening.
Chapter six · Keep the account steady
Water the soil, exchange the air, and resist excess.
Moisture
Potatoes have a shallow root system and respond badly to wide wet-dry swings. Keep the medium evenly moist through tuber set and enlargement, then reduce water as vines yellow toward harvest. A finger pushed a few inches into the mix tells more than a rigid daily schedule: water thoroughly when the root zone is drying, then let it drain freely.
Nutrition
Start with a soil test for permanent beds where possible. Use compost thoughtfully and apply a balanced vegetable fertilizer according to its label and your test results. Potatoes need fertility, but excess nitrogen produces a grand canopy at the expense of timely tuber development. Side-dress lightly rather than repeatedly feeding a container into lush imbalance.
Ventilation and heat
Open roof vents and doors early on bright days, before the greenhouse becomes hot. Add shade cloth when intense sun drives the interior far above outdoor conditions. Potatoes are not a crop to seal into a steamy summer conservatory; cool roots and moving air are more useful than maximum warmth. Automatic openers can make this daily correction more reliable.
Leaf dryness
Use drip irrigation, a watering can at soil level, or a low-flow hose. Avoid late-day overhead watering, which leaves foliage wet into the night. Clear airflow and dry leaves help reduce the favorable conditions for foliar disease. Remove lower yellowing leaves promptly and keep tools, trays, and paths clean.
A premium greenhouse is most useful when its details support that calm routine. Explore the Bloomcabin greenhouse design options when planning ventilation, shading, shelves, and the footprint required for food crops. For a particularly narrow patio or side-yard project, the Aluminum Mini Wall Greenhouse provides a more compact starting point for containers and early-season crops.
Chapter seven · Risk register
Respond early, before a hidden yield becomes a hidden loss.
A greenhouse can shelter a crop, but it can also hold humidity close to foliage if ventilation and watering are careless. Inspect plants twice a week, including leaf undersides, stems at soil level, and the surface of the growing medium. When symptoms appear, isolate the question before reaching for a treatment: is it water, heat, nutrition, pest feeding, or disease?
Case file 01 · Late blight
Water-soaked, rapidly enlarging dark lesions
Late blight is favored by cool, very humid conditions and can move between potatoes and tomatoes. Begin with certified seed, avoid overhead irrigation, ventilate to dry foliage, and remove suspect material promptly. Do not compost plants with a suspected serious disease; bag and dispose of them according to local guidance.
Case file 02 · Blackleg or seed decay
Poor emergence, dark stems, collapse
Cold, saturated medium and infected seed are common opening failures. Use clean seed stock, let cut pieces cure, avoid planting into wet, chilly soil, and do not reuse questionable mix. A collapsed plant is not a candidate for close quarters with healthy ones.
Case file 03 · Common scab
Rough corky lesions on otherwise firm tubers
Scab is largely a soil-borne issue. Certified seed, clean container media, variety choice, and rotation matter more than a late rescue. In permanent greenhouse beds, avoid making potatoes and other susceptible root crops the repeated residents of the same ground.
Case file 04 · Pests
Chewed leaves, clusters of eggs, curling growth
Check for Colorado potato beetles, aphids, and spider mites. Hand-remove beetles and egg masses on a small planting. For aphids or mites, improve airflow, wash off light infestations with a directed water stream outside the greenhouse if practical, and use only controls labeled for the crop and pest.
Case file 05 · Heat and uneven water
Knobs, cracks, hollow centers, erratic sizing
These are often records of stress rather than a single pest. Tuber set and bulking are sensitive periods. Shade, vent, mulch the surface if appropriate, and avoid allowing containers to become dust-dry before soaking them heavily.
Case file 06 · Green tubers
Green skin or an exposed shoulder
Light exposure causes greening and is accompanied by bitter glycoalkaloids. Add soil immediately to cover exposed tubers. At harvest, keep potatoes out of direct light. Trim only a small green patch from an otherwise sound potato; discard extensively green, bitter, or sprouted tubers.
Chapter eight · Closing the account
Harvest in stages, then give the skins time to set.
New potatoes and storage potatoes are two different finishes to the same season. New potatoes are lifted young, with tender skins, for immediate meals. Storage potatoes remain in the soil until their skins are firm and the vine has begun to die back. Do not rush the latter: a properly set skin is part of the harvest, not an afterthought.
1 · Seven to eight weeks
First new potatoes
2 · Vine decline
Let maturity announce itself
3 · Ten days or more
Cure, dark and ventilated
4 · The cellar shelf
Store cool, dark, and humid
- First new potatoesOnce plants are flowering or robustly established, carefully reach into the side of a hill for a few young tubers. Re-cover the soil and allow the plant to continue building the main crop.
- Vine declineFor storage, wait until foliage yellows and dries. Reduce irrigation as the crop winds down. Choose a dry day and lift gently with a hand fork or by tipping containers onto a tarp.
- CureKeep unwashed potatoes under cover at about 60–65°F with airflow while skins finish setting and small wounds heal. Separate cut, bruised, or soft tubers for early kitchen use.
- Cellar shelfBrush off dry soil but do not wash storage potatoes. Keep them dark and cool; approximately 40–45°F is a practical target often cited for home storage. Check regularly and remove any that soften or rot.
Chapter nine · American greenhouse timing
Use the structure to lengthen the shoulder seasons.
Across much of the United States, potatoes suit late winter through spring and late summer into fall better than the hottest stretch of summer. In northern climates, a greenhouse can warm and dry the planting area earlier than an exposed garden bed, but wait until the medium is workable rather than cold and sodden. In the South and warm inland regions, aim to grow the main potato crop through the coolest available months and be ready to shade and vent aggressively as spring heat builds.
Do not interpret “greenhouse” as an invitation to force potatoes through every season. A spring crop may be the most elegant use of protected space, cleared in time for heat-loving tomatoes, peppers, or cucumbers. A fall crop can be equally satisfying where summer heat has eased and the greenhouse gives protection from early cold nights.
Rotation memorandum
Keep potatoes out of a bed where tomatoes, peppers, eggplants, or potatoes themselves have grown in the preceding two to three years. These nightshade relatives share several disease concerns, including early and late blight. Containers make rotation simpler: discard diseased material, sanitize pots, and begin each season with fresh, high-quality medium.
For more planning ideas beyond this crop, visit the Bloomcabin USA greenhouse journal. If you are designing a larger growing space around beds, staging, and a productive central path, the custom aluminum greenhouse guide offers useful inspiration for arranging the structure around the way you garden.
Final seasonal principle: greenhouse potatoes thrive on steadiness, not intensity. The best crop is rarely made by the hottest house, the richest feed, or the deepest last-minute mound. It is made by consistent observation.
Potato greenhouse FAQ
Questions from the potting bench.
Can I grow potatoes in a greenhouse year-round?
Usually, no—not without actively managing temperature and light well beyond ordinary home-greenhouse practice. Potatoes are best planned as cool-season crops. Use the greenhouse to start earlier, finish later, or avoid excessive rain, then choose another crop for the hottest period.
How many potato plants can I grow in a 10-gallon container?
One plant is the clearest, most reliable starting point. A 10–15 gallon opaque container with drainage offers adequate volume for one plant and leaves room to hill. Overplanting concentrates foliage, makes moisture management harder, and often produces a disappointing mix of undersized tubers.
Should I use potatoes from the grocery store as seed potatoes?
It is better not to. Grocery potatoes may have been treated to suppress sprouting and may carry disease organisms that are not visible. Use certified, disease-free seed potatoes from a specialist supplier for the most dependable start.
How often should I water greenhouse potatoes?
Water according to the root zone rather than the calendar. Check several inches down and irrigate thoroughly when the medium is beginning to dry, especially during tuber set and enlargement. Containers can need attention more often in sunny weather. The goal is even moisture and free drainage, never a constantly saturated pot.
Why are my greenhouse potatoes green?
They were exposed to light. Add soil over any visible tubers immediately and keep harvested potatoes covered. Extensive greening, bitterness, and sprouting are reasons to discard the tuber rather than attempt to use it.
Sources & further reading
Field notes behind this guide.
- University of Minnesota Extension — Growing potatoes in home gardens
- Penn State Extension — Potatoes in the Garden and the Kitchen
- Utah State University Extension — How to Grow Potatoes in Your Garden
- Utah State University Extension — Potato irrigation guidance
- UC Statewide IPM Program — Late blight
- Penn State Extension — Tomato-potato late blight in the home garden
- Utah State University Extension — Potato scab
Open the lower storey
Plan for yield beneath the visible canopy.
A fine greenhouse gives serious home gardeners more than a place for plants to stand. It creates an ordered climate for the overlooked crops—the soil-rich containers, the clean water line, the lifted hill, and the quiet harvest waiting below.
Explore the Classic Aluminum GreenhousePlan your greenhouse design and growing space