
How to Propagate Plants From Cuttings in a Greenhouse
Bloomcabin greenhouse notebook / propagation edition
How to Propagate Plants From Cuttings in a Greenhouse
A cutting is not a miniature plant yet. It is a precise piece of living material asked to hold moisture, make new roots, and adapt to a different life—under conditions you compose with care.
In a greenhouse, propagation becomes less dependent on a lucky windowsill and more like a repeatable small-scale nursery practice. The aim is not to force every species into one method. It is to match the right cutting, clean preparation, airy medium, moderated light, and responsive humidity to the plant in front of you.
For gardeners planning a dedicated bench, the Classic Aluminum Greenhouse offers the orderly footprint, roof ventilation, and year-round shelter that make a propagation routine much easier to maintain.
SourceHealthy, correctly identified stock plants—never stressed, diseased, or pest-affected growth.
ExposureBright filtered light, warm rooting media, even moisture, and fresh air rather than a sealed wet chamber.
RevealPot on only after roots branch enough to support the cutting beyond its protected environment.
The greenhouse advantage is not simply warmth. It is the ability to separate the fragile rooting phase from the weather outside—and then adjust one condition at a time.
Fresh cuttings have leaves that lose water, but no established roots to replace it. They also need oxygen around their bases, a medium that stays evenly moist without becoming airless, and enough gentle light to keep tissues functioning without overheating them. Outdoors, a hot afternoon, drying wind, pounding rain, or a sudden cold night can undo that balance quickly. Under glass, you can shade, vent, water, and observe with much finer control.
That does not mean a greenhouse should be kept hot and humid at all times. Too much heat raises leaf stress; excessive condensation and constantly saturated media encourage rot and disease. A good propagation bench is a modest climate within the larger greenhouse: protected, clean, lightly shaded, and ventilated when needed. Think of it as controlled exposure, not confinement.
Proof 01 / source material
Select stock plants before you select tools
The quality of the donor plant remains visible in the cutting. Start with a plant that is actively growing in the season appropriate to its species, well watered but not soft from recent overfeeding, and free of leaf spots, distorted growth, webbing, scale, or other signs of trouble. A cutting cannot outgrow a virus or a systemic pest problem simply because it has made roots.
For many leafy softwood and semi-ripe cuttings, early morning is practical because shoots are generally at their best hydrated. Put prepared material in shade immediately, work in small batches, and stick it promptly. Flowers, buds, fruit, and seedheads compete for the same limited stored resources needed for rooting, so remove them unless a species-specific method says otherwise.
Choose vigorous, pest-free shoots with normal leaf color and proportion.
Take material from a named plant you are permitted to propagate.
Favor nonflowering shoots of suitable maturity over dramatic but exhausted tips.
Water the parent plant in advance; do not collect from drought-stressed growth.
Proof 02 / choose the negative
There is no universal cutting
Use the plant’s growth habit and tissue maturity to choose the method. A node matters for many stem cuttings because it carries the growth points that can form shoots or roots, while leaf, cane, and root methods depend on species with the right dormant or adventitious tissues.
Softwood
New, flexible growth
Often taken in spring to early summer from actively growing shrubs and tender ornamentals. It roots quickly for some plants, but loses water quickly too.
Semi-ripe
Partly matured shoots
Useful for many broadleaf evergreens and woody ornamentals in summer through early fall; leaf reduction and humidity control are often helpful.
Hardwood
Dormant, fully woody sections
Commonly used for plants such as grapes, currants, willows, and some shrubs. These leafless cuttings have lower water loss, but their calendar and orientation matter. Keep the top and base unmistakable.
Leaf & cane
Species-specific pieces
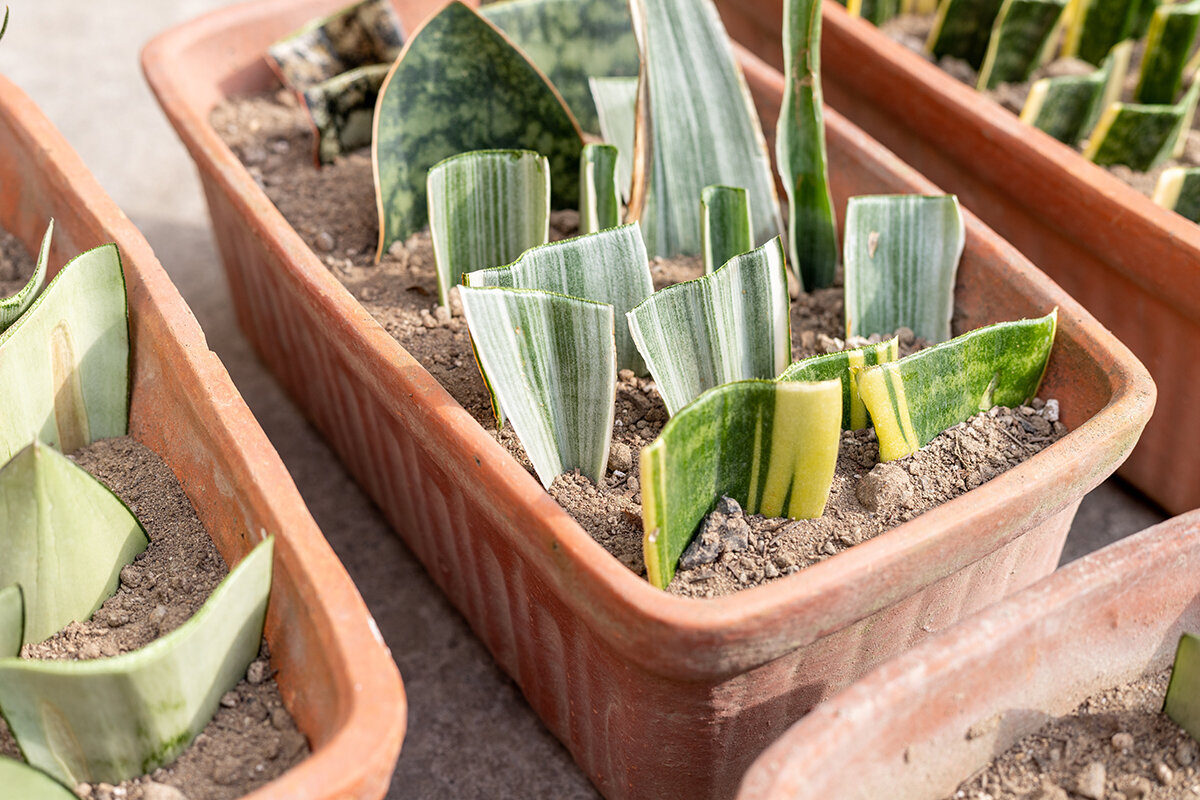
African violets and many begonias can produce plantlets from leaves. Cane cuttings can suit plants such as dieffenbachia or dracaena. A leaf that roots is not automatically a leaf that can make a complete new plant.
Root
Quiet, underground potential
Root cuttings work only for selected perennials and shrubs capable of making new shoots from root sections. Treat them as a separate method, not a substitute for stem cuttings.
Succulent exception
Dry the wound first
Many succulents, cacti, pelargoniums, and ficus cuttings benefit from a brief callusing period before they meet medium. High humidity can be counterproductive for them.
Proof 03 / crop marks
Prepare with clean, deliberate cuts
Use a sharp, sanitized knife, pruners, or scissors suited to the stem. Crushing tissue is not the same as cutting it. Clean the work surface and containers before starting, and sanitize tools between plants or batches—especially when working with valuable houseplants, collections, or material that may be shared. Prepare a hole in the medium with a dibber or pencil before inserting the cutting so the basal tissue and any hormone coating are not scraped away.
01
Sanitize
Begin with clean trays, labels, tools, hands, and fresh propagation medium. Do not reuse unwashed pots or bring garden soil to the bench.
02
Take the piece
For a typical leafy stem cutting, take a healthy tip or stem section with at least two nodes. Exact length is species-led; many home cuttings fall in the roughly 3–6 inch range.
03
Reduce demand
Remove lower leaves that would sit below the medium and remove flowers or fruit. If large leaves create excessive water loss or crowd the bench, reduce their area cleanly rather than stripping all useful foliage.
04
Respect polarity
Keep stem sections upright. A straight basal cut and an angled upper cut are a practical visual code for some hardwood cuttings, but follow the method suited to your species.
05
Stick, then label
Insert at least one appropriate node where the plant requires it, firm the medium lightly, water it in, and label the botanical name, cultivar, date, method, and batch number immediately.
Basal cut · lower node · retained leaves · medium line
Cutting anatomy
Read the anatomy, then vary it by species
The familiar leafy stem cutting is a useful starting point, not a rule that should override the needs of a particular plant. Consult reliable plant-specific guidance before wounding woody stems, burying a node, removing foliage, or applying hormone.
- Basal end: enters pre-moistened medium; make a clean cut and avoid crushing it.
- Lower node: commonly buried for standard leafy stem cuttings, while leaves remain above the medium.
- Retained leaf area: supports the cutting, but too much foliage increases water loss.
- Upper bud or tip: stays above the medium and later becomes the visible new shoot.
- Insertion depth: enough for stability, never so deep that leaves or tender tissue rot below the surface.
Proof 04 / controlled exposure
Build a rooting climate, not a wet box
Most fresh leafy cuttings appreciate high surrounding humidity because they are temporarily unable to replace water efficiently. Yet high humidity should not mean stagnant, dripping air. The target is turgid foliage and a fresh-smelling, evenly moist root zone.
Filtered lightUse bright indirect light or shade cloth. Direct summer sun through glass can scorch foliage under a dome.
Humidity coverA clear dome, tent, or bag can reduce water loss. Vent or open it when condensation is persistent.
Warm mediumMany tender cuttings root well with medium around 75–80°F. Warm the rooting zone instead of overheating the entire house.
Air exchangeUse roof vents, doors, or a small fan thoughtfully. Leaves should not sit in a strong drying draft.
DrainageElevate trays, use containers with drain holes, and never let the medium remain waterlogged.
In much of the United States, a greenhouse can heat surprisingly fast in spring and summer. Check the bench at the warmest part of the day, not only in the cool morning. In cold regions, the greenhouse buffers weather but does not replace frost protection or carefully managed heat for tender material.
Proof 05 / rooting substrate
Give the base water and air at the same time
The best medium is clean, free-draining, appropriately fine for the cutting, and able to hold it upright. Ordinary garden soil is generally a poor propagation choice: it is dense in small containers, uneven when wet, and can introduce disease organisms, insects, or weed seeds. Moisten the medium before use, then let excess water drain.
| Medium | Air-filled porosity | Moisture retention | Best use and caution |
|---|---|---|---|
| Perlite-led mix | High | Moderate | A light starting point for many houseplant and tender stem cuttings. It drains quickly, so check moisture before a small cell tray dries out. |
| Coir + perlite | Moderate to high | Moderate to high | Useful when you want steadier moisture while retaining porosity. Use clean material and avoid compressing it during filling. |
| Coarse sand + peat or coir | Moderate | Moderate | A traditional blend where clean, appropriate-grade materials are available. It provides firm anchorage but may be heavier at potting-on. |
| Water rooting | Low around the base | Very high | Convenient for a few easy houseplants. Roots formed in water may need a slower transition into potting mix, and water should be changed regularly. |
Proof 06 / developed image
Do not confuse callus, new leaves, and a root system
Some species form a callus before roots; others root directly from preformed initials or nodes. A cutting can also push a new leaf using stored energy while it still has weak or no roots. Resist the urge to tug repeatedly. Instead, look for steady new growth, a gently anchored cutting, roots visible at drainage holes or a transparent vessel, and a medium that begins to dry at a more normal pace.
Pot on when several roots have started to branch and can support water uptake outside the humidity enclosure. Move the cutting into a small container with a quality potting mix, water it in, and keep it in bright, indirect light. Then reduce humidity gradually over several days to a couple of weeks, depending on the plant and conditions. This hardening phase is where many otherwise successful cuttings fail: they are rooted, but not yet acclimated.
Stage 1Freshly stuck: tissue is hydrated, but no functional roots are present.
Stage 2Initiation: callus or first roots appear; humidity and moisture still need close attention.
Stage 3Branching roots: enough structure to harden gradually and transplant without shock.
Proof 07 / failure negatives
Read the symptom, then change the condition behind it
Discard obviously rotting or mold-covered material before it spreads trouble. Otherwise, diagnose calmly. The same symptom can have several causes, so alter one or two variables—not the entire bench—then record the response.
Negative A
Wilted but medium is wet
The cutting may be losing more water than it can absorb, or its basal tissue may be compromised. Heat, direct sun, too much leaf area, shallow insertion, or early rot are common suspects.
Correct: soften the light, check for rot, raise humidity briefly, and confirm the medium is moist—not saturated.
Negative B
Dark, soft stem bases
Rot often follows overwatering, poor drainage, contaminated materials, or a sealed cover with persistent condensation. Hormone cannot compensate for an airless root zone.
Correct: remove affected cuttings, sanitize, restart in fresh porous medium, and introduce measured air exchange.
Negative C
Bleached or crisp leaves
Greenhouse glass and a plastic dome can magnify solar stress. Cuttings want useful light, but exposed leaves can overheat before roots form.
Correct: move to bright indirect light, use temporary shade cloth, and inspect leaf temperature in midafternoon.
Negative D
Mold, algae, or no progress
Constantly wet surfaces, old medium, weak light, low temperatures, or a species taken at the wrong maturity can stall the process. Some plants simply need more time.
Correct: improve cleanliness and spacing, remove dead leaves, verify temperature, and compare timing with a reliable species-specific reference.
Proof 08 / edition record
Let each batch teach the next one
Propagation gets noticeably better when you stop treating it as a one-off experiment. Keep a small notebook or weatherproof label system on the bench. In a greenhouse, your own microclimate matters more than a generic calendar: a shaded northern bench in Minnesota behaves differently from a bright spring greenhouse in North Carolina or a dry backyard house in Arizona.
Record failures as carefully as successes. The goal is not a perfect percentage. It is to learn which stock plants, cutting maturities, media, temperatures, and dates produce sturdy young plants in your greenhouse.
Example bench log
BatchH-26 / semi-ripe rosemary / eight cuttings
SourceNonflowering, pest-free side shoots; morning collection
MediumMoistened coir-perlite blend in clean cell tray
EnvironmentBright filtered light; vented dome; warm bench, no direct sun
ObservationDay 8: no wilt; Day 18: firm anchorage; Day 25: branching roots
LessonNext batch: take fewer, more uniform cuttings and reduce leaf area slightly.
Greenhouse questions
FAQ
Use these answers as a starting point, then check species-specific guidance for valuable, woody, patented, or difficult-to-root plants.
Do all cuttings need rooting hormone?
No. Many easy-rooting houseplants and herbaceous plants root readily without it. Rooting hormones may improve rooting on harder-to-root plants, particularly some semi-hardwood and hardwood material, but use only the labeled rate. Put powder in a separate small container rather than dipping directly into the original jar.
Should I keep a humidity dome closed all day?
Not automatically. A cover can protect fresh leafy cuttings from drying, but it needs inspection. If leaves stay dripping, the medium remains soaked, or fungal growth appears, vent the cover and reassess light, watering, and air movement. Succulents and other rot-prone plants may need little or no enclosure.
Can I root cuttings directly in greenhouse soil?
It is usually better to use clean containers and a fresh, porous propagation medium. Raised beds and garden soil are harder to keep uniformly moist and may contain pests or pathogens. Small pots, cell trays, or shallow flats also make it easier to label and move batches.
How long does greenhouse propagation take?
It depends on the species, cutting type, season, stock-plant condition, and bench climate. Tender cuttings may root in days or weeks; woody material may take much longer. Check for a root system rather than relying on a fixed calendar date.
What greenhouse setup is most useful for a propagation bench?
Prioritize a level, washable bench, drainage, shade capability, accurate temperature monitoring, ventilation, and room to keep batches separate. Browse Bloomcabin’s greenhouse gardening guide for broader planning ideas, and consider the wider range of greenhouse design options when mapping out a dedicated growing space.
Sources & further reading
Trusted references for the propagation bench
- University of Georgia Cooperative Extension — Starting Plants From Cuttings for the Home Gardener
- University of Florida IFAS — Helpful Suggestions for Commercial Propagation of Woody Plant Stem Cuttings
- Iowa State University Extension — How to Propagate Houseplants by Stem Tip Cuttings
- Illinois Extension — Plant Propagation for Houseplants
- Oregon State University Extension — Safe Plant Propagation and Plant Sales
- United States Patent and Trademark Office — General Information About U.S. Plant Patents
