
Left- or Right-Hand Opening Windows and Doors: How to Specify Handing
US Window and Door Planning
A door can fit its opening perfectly and still feel wrong if its swing covers a light switch, blocks the route to the kitchen, or makes someone step around the leaf. Window handing causes quieter but equally frustrating mistakes: the sash may project toward a walkway, the handle may be awkward to reach, or the usable side may oppose the room layout. Before comparing color, glass, grilles, or hardware, decide what must move, which edge must hinge, and where the observer stands when describing it. Handing is not simply “left” or “right.” It is an instruction tied to a defined viewing side, hinge location, and opening direction. Recording all three consistently gives the dealer, installer, and project team a clear basis for the order.
Begin with the operation, not the label
Start by deciding where the moving panel should go after someone releases the handle. For a hinged door, imagine its full arc rather than only the first few inches. Check the walking route, appliance and cabinet doors, stairs, screens, seating, and nearby doors. For a window, consider the sash in its normal open position: can the handle be reached comfortably, and will the open sash project toward a path or work area? These observations establish the desired operation before anyone applies a left or right label. A single-sash inward-opening window identifies the opening type, but its hinge side still must be selected for the particular location.
“Left” changes when one person looks from the room and another looks from outdoors. Replace “make it left opening” with a complete instruction: “Viewed from the living room, the window opens inward and has hinges on the left.” A door note might read, “Viewed from the patio, the door opens outward with hinges on the right.” The supplier can match that statement to its own convention. If its terminology differs, compare the written orientation with the drawing instead of debating shorthand. The final record should leave no doubt about the observer’s position, the attached edge, or the panel’s direction of travel.
Fix one viewing side on every drawing
Choose a viewing side that everyone can identify in the project documents. For an exterior unit, either the interior or exterior may be used if it is named explicitly. “Viewed from interior” is often convenient for an operable window because that is where the handle is used, but it is not a universal rule. Multi-unit elevations need extra care: a window shown on the left from outdoors appears on the right from the room, although its physical hinge edge has not changed. Put the reference beside each unit or in a clearly applied schedule note rather than expecting everyone to remember an unwritten convention.
Support the words with visual marks. On a floor plan, show the closed frame, leaf, and opening arc. On an elevation, add a movement arrow or hinge notation from the declared viewing side. Assign each opening an identifier such as W-04 or D-02 and carry it into the schedule and quote. For a two-sash inward-opening window, describe each sash when necessary: identify its hinge edge, meeting edge, and whether it operates. “Two-sash” does not establish one universal arrangement. A simple annotated sketch makes it much harder for the pair to be ordered as the unintended mirror image.
Read a door swing as part of the room plan
An inswing occupies indoor space; an outswing occupies outdoor space. Neither is inherently better. An inswing may leave a terrace clearer, while an outswing can preserve room near an entry. Compare the space occupied while the leaf is open. Mark the approximate arc with painter’s tape or move a large piece of cardboard through the proposed path. Check where a person stands while entering, access to closets and switches, and whether another door can operate at the same time. A swing that looks harmless on an elevation can become inconvenient once circulation and furniture are shown on the plan.
Continue the check beyond an exterior threshold. An outward-moving leaf could overlap a chair, planter, grill area, or walkway. A leaf opening beside a wall may be practical if the handle remains easy to use. Where a swing cannot coexist with the furniture plan, sliding is an alternative operation rather than another handing label. The Patio Life sliding patio door should be evaluated by which panel moves, where it travels, and which part of the opening remains available. Record the selected operating panel and viewing side on the order drawing instead of describing the unit merely as opening left or right.
Plan windows around reach and clearance
Window handing begins with the person using the handle. Above a kitchen counter, the operating point may be easier to reach from one side. At a desk, an inward-opening sash should not enter the chair’s working space. In a bedroom, account for curtains, a headboard, and the route to the window instead of mirroring units solely for appearance. Outdoors, examine porch rails, vegetation, faucets, screens, and frequently used paths around an outward-opening sash. These are practical design checks, not substitutes for a qualified professional’s review of structural conditions or locally applicable project requirements.
Two-sash units deserve their own open-position drawing. With a two-sash outward-opening casement window, the title establishes two outward-opening casement sashes, but not the project-specific hinge arrangement. Ask where each sash hinges, where the meeting edges fall, and how the open leaves relate to a porch or terrace. If neighboring rooms use mirrored layouts, label them separately rather than assuming the factory view will match the floor-plan view. Review the unit fully open. A partial-opening image can conceal a conflict that appears only when a sash reaches the position occupants are likely to use.
Distinguish hinge side from handle side
The hinge side is the edge attached to the frame; the latch or handle side is the free edge. Errors happen when one person says “handle on the left” and another interprets that as “left-hand door.” State both edges whenever the hardware location affects use. From the designated viewing side, a complete note might say: “hinges left, handle right, opens inward.” If the leaf is reversed, reconsider the entire statement. Handle style, lock selection, and decorative details are separate decisions and should not replace confirmation of the edge on which the leaf actually pivots.
Do not treat an existing hinge position as an automatic template for replacement. The old swing may reflect a previous furniture plan or remodeling compromise. Photograph the opening from both sides, then annotate the pictures with the viewing direction and room name. For an outswing exterior door, the product name confirms an outswing exterior configuration, not a left or right hinge position. Ask the seller which side its production drawing represents, and compare the proposed unit against your viewing-side, hinge-side, and swing statement. Resolve any difference before approving the order rather than relying on how an unmarked photograph appears.
Coordinate pairs and adjacent fixed elements
Two-panel doors require more choices than a mirrored appearance. Establish which panel provides everyday passage, whether one or both panels operate, where they meet, and how each active panel travels. A centered arrangement can look balanced while closed yet work poorly if the commonly used leaf blocks the preferred route. Show furniture on both sides of the opening, including dining chairs and outdoor seating. If a second panel is intended for occasional use, make sure its controls can be reached without moving furniture. Use the supplier’s configuration drawing to confirm what “active,” “secondary,” and similar terms mean for the selected product.
A single-panel inswing patio door should be planned as a single-panel inswing unit rather than assumed to behave like one side of a pair. Its hinge can potentially be placed nearer a wall or away from it, subject to the offered configuration and project needs. Fixed sidelights do not have handing, but they influence the composition and the side from which people approach the handle. Label fixed and operable components separately. For a grouped entry, request an interior and exterior view. That comparison can reveal that everyone approved the same visual arrangement while imagining opposite operating sides.
Treat folding and sliding systems differently
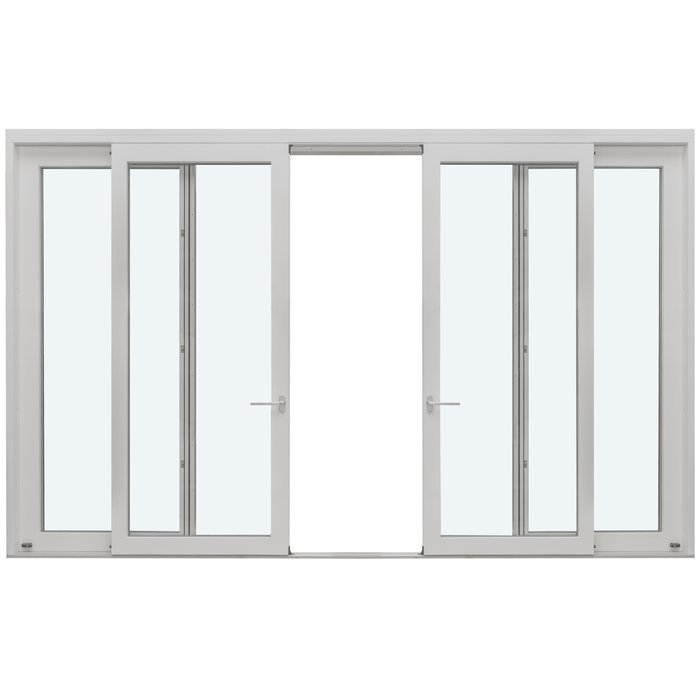
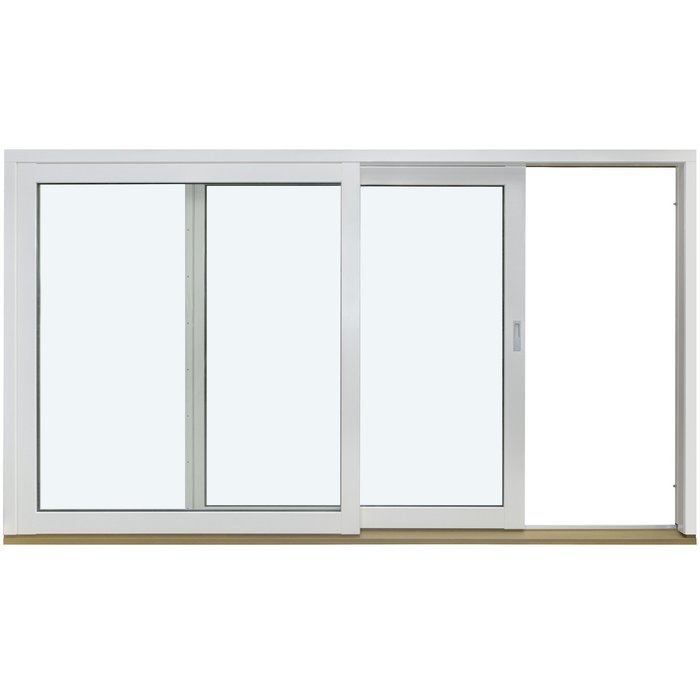
Folding and sliding doors do not use one simple swing arc, but their movement must still be specified. Determine where panels stack, slide, or park when open and which panel supplies daily access. The result affects furniture placement, views, and the portion of the threshold available for traffic. Ask for a diagram from a named side with arrows showing every moving panel. Avoid saying only “open left” unless the supplier has defined what left means and how the sequence appears in its drawings. A clear stacking or sliding instruction serves the same purpose as a hinge-and-swing note on a conventional door.
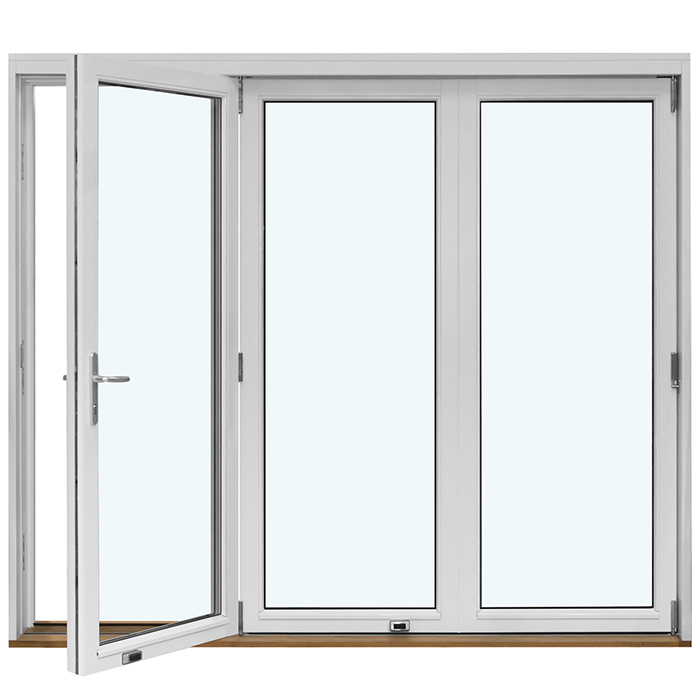
For outswing bifold doors, the product title establishes an outswing folding configuration. Project questions remain: From which side is the drawing viewed? Where do the panels gather? How far does the folded stack project into the patio area? Which panel provides everyday passage if the offered arrangement includes that function? Check the stack against exterior lights, pathways, railings, and outdoor furniture. Folding doors can free a broad passage, but only when the site has a practical place for the folded panels. Evaluate both the fully closed composition and the space occupied when the system is completely open.
Use symmetry deliberately
Matching windows across a front elevation or opposite sides of a room can be visually desirable, but symmetry has several meanings. Mirrored handing may create a balanced exterior pattern while placing interior handles on different sides. Identical hinge positions may support a repeated use pattern but look less mirrored outdoors. Decide which view matters most for the group, then test whether the other side remains practical. For two windows in one room, matching handle locations may help with shades and furniture even when the exterior opening arcs are not mirror images. Appearance should inform the choice without overriding comfortable operation.
A single-sash outward-opening casement window provides a useful point for making that choice explicit. The title establishes one outward-opening casement sash, not whether it hinges left or right. On the exterior elevation, show whether neighboring units mirror each other. On the interior plan, show the handle locations and the clear approach to each opening. A window beside a reading chair may need different handing from one above a cabinet despite their matching size. Resolve the operating logic first, then determine how closely the exterior composition can follow it without producing an awkward daily-use result.
Create an order record that resists reversal
A dependable record combines an opening identifier, declared viewing side, written operation, and diagram. Add the room and floor when several units share a size; “left casement” is not enough in a house with repeated openings. A useful entry might say: “W-07, second-floor office, viewed from interior, outward opening, hinges at right jamb.” List each operable panel in a multi-panel unit. Before approval, someone should be able to point to an opening on the plan, locate the matching schedule entry, and explain its movement without relying on memory or an unlabeled sample image.
Review the final quote and production drawing beside the floor plan. Confirm the opening ID, room, viewing side, inward or outward operation, hinge location, handle side, and movement of every panel. Ask what the supplier’s symbols mean and whether its drawing uses your reference side. Bloomcabin windows and doors carry a 5-year warranty. Delivery is generally 4–6 weeks, subject to order confirmation. Those business terms do not correct an ambiguous handing note, so settle the orientation before confirmation. Keep the approved drawing with the schedule used by the installer rather than leaving the decision in an email thread.
Complete a final walk-through
Visit the opening or review a scaled plan with the people who will use it. Stand where someone approaches with groceries, opens a window, or reaches for a shade. Trace the leaf path with a tape measure, cardboard template, or full-size mockup where space is tight. Include likely future items such as a desk, crib, sofa, closet door, or patio seating. Check both sides of an exterior opening and consider where a person pauses while operating the handle. A technically clear path is not automatically comfortable; the purpose is to test the operating zone against realistic movement through the space.
Finish with one approval note rather than scattered messages. For each revised unit, identify the drawing version and repeat the complete instruction in words. If anyone uses left-hand or right-hand, attach the viewing side immediately and follow it with the hinge and swing description. Request a corrected visual if the supplier’s drawing uses the opposite perspective or contradicts the schedule. Structural conditions and applicable local requirements can vary, so refer project-specific compliance questions to the appropriate qualified professional. Clear handing coordination ensures that later hardware, installation, and room-planning decisions all begin from the same orientation.
Common questions
Is a left-hand door always hinged on the left?
No. The label depends on the convention and the side from which the unit is viewed. State the viewing side, hinge edge, and whether the door opens inward or outward. Add an opening-arc drawing so the written description and visual direction can be checked against each other.
Which viewing side should I use for a window?
Use the side defined in the supplier’s documentation, or establish one explicitly in the project record. “Viewed from interior” is often convenient but is not universal. Apply the selected reference consistently on the plan, elevation, schedule, quote, and final order drawing.
Can I copy the handing of an existing door?
Use it as evidence, not as an automatic answer. Remodeling may have changed circulation, cabinets, furniture, or patio use. Photograph both sides, record the hinge edge, and trace the proposed swing. A replacement should not reproduce an inconvenient arrangement merely because it was already there.
How should I specify a double window or patio door?
Describe every moving panel separately. State the viewing side, hinge or movement direction, meeting point, and everyday operating panel where relevant. Request a configuration drawing from the supplier. Terms such as “double,” “pair,” or “opens left” do not fully explain which panels move or where they go.
What should I check immediately before approval?
Compare the final drawing with the plan at every opening. Verify the unit ID, room, viewing side, hinge location, inward or outward operation, handle side, and complete movement path. If the words, symbols, and drawing do not agree, pause and obtain a corrected confirmation before ordering.
Next step
Left- and right-hand opening decisions become manageable when treated as spatial instructions rather than shorthand. Begin with how the window or door must operate, choose and name one viewing side, identify the hinge edge, and show the panel’s movement. Give each opening a unique ID and compare the final schedule with the floor plan, particularly for pairs, folding systems, and repeated windows. Tracing the full movement and checking both sides of the opening takes little time compared with correcting a mirrored order. The objective is not merely to select “left” or “right,” but to make the intended operation unmistakable to everyone involved.
