
How to Protect the Bottom of a Wooden Garden House From Ground Moisture
Garden house planning
Ground moisture is easy to overlook where the lowest wood is hidden: a base frame may meet a damp support, a floor underside may face humid soil, or later landscaping may close the clearance intended at installation. A surface coating alone cannot correct those conditions. A sound buying decision starts with the entire bottom assembly—support, separation layer, floor, ventilation, and finished grade—and how those parts meet on the specific garden house. This guide explains what to identify, what to ask before ordering, and what to watch for later, without assuming that every wooden structure uses the same base design.

01
Identify the lowest wood before choosing a remedy
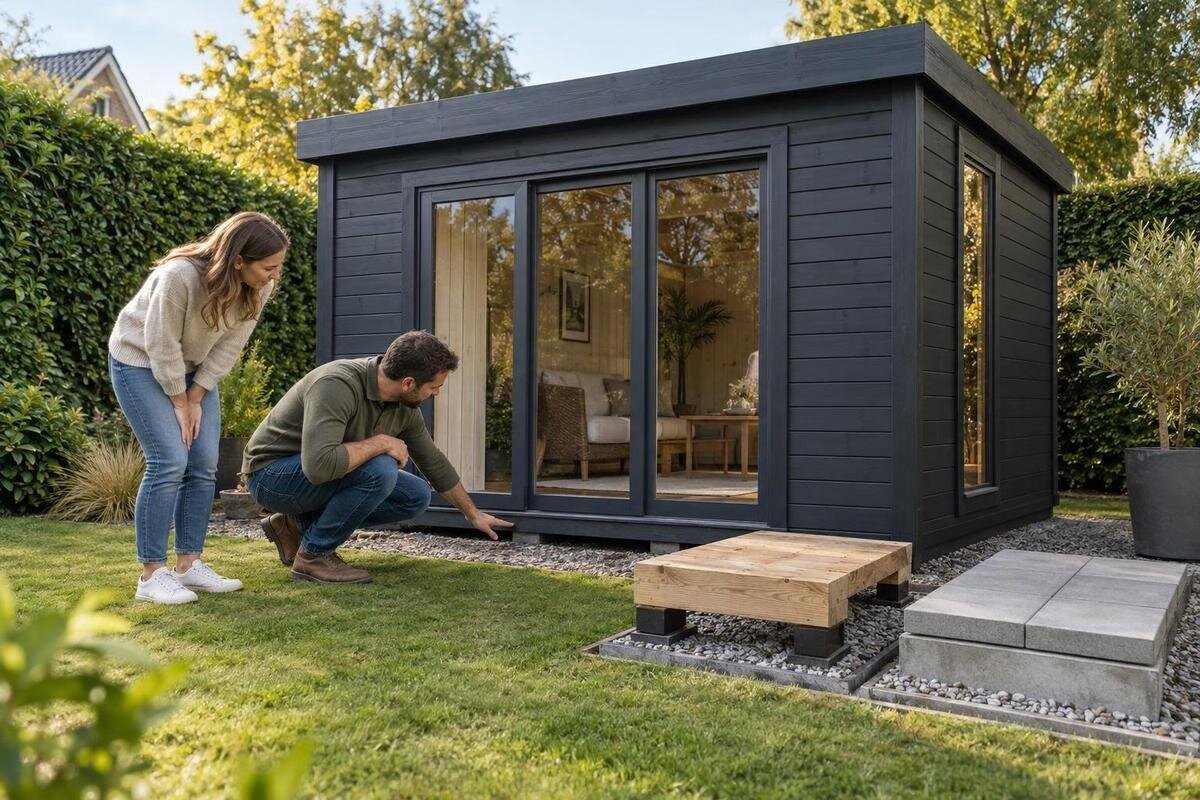
A wooden garden house has several possible “bottom” parts. The lowest wall board or sill, the perimeter base frame, floor joists, and the underside of the floor may sit in different positions and face different moisture sources. A house with a separate floor can have a different vulnerable point from one whose wall frame bears on a support. Before choosing a sealant, membrane, or foundation detail, identify each timber member nearest the ground and how it is supported. A drawing or installation manual is more useful than a general product description: it should show the support footprint, floor arrangement, and whether those pieces belong to the delivered assembly. Mark the lowest members on the drawing and compare them with the planned finished grade, not the current bare ground. This simple check can reveal when a future layer of mulch, gravel, or paving would end up closer to wood than expected.
For a candidate such as the Verdana 1 garden house, ask the seller or manufacturer for a base cross-section labeling the lowest wood, support surface, and any specified separation layer. Do not infer those details from a model name or photograph. Knowing precisely where wood meets masonry, another support material, or open air helps you address the actual transfer path; otherwise, a coating might be applied to an exposed wall while a hidden frame stays damp. If the manual is silent, request written clarification before ordering materials or arranging site work.
Understand how moisture reaches the base
Moisture moves through more than visible puddles. Soil can retain water after rain or irrigation and release water vapor as it dries. Wood in direct contact with damp soil or a moisture-holding support can absorb liquid; an underside above wet ground can also remain damp if the space below is enclosed or poorly ventilated. Rain splash against a low wall is another source, but it is not the same as moisture passing through a support. Separating these pathways matters: an exterior finish may slow surface wetting, but it cannot interrupt contact below a frame or correct a persistently damp underfloor space. Observe the proposed area after ordinary rain and after watering nearby beds. Note where moisture remains longest, whether vegetation keeps the ground shaded, and whether the base area receives spray from a hose or sprinkler.
Repeated or prolonged wetting is more concerning than one brief damp spell. Wood naturally takes up and releases moisture, and sustained dampness can contribute to swelling, movement, peeling finishes, and deterioration. A dark mark alone does not identify the source, so look at the support interface and floor underside as well as the outside wall. When considering the Verdana 2 model, ask which lower members need protection and what conditions the manufacturer specifies. Do not assume that a wooden product has a particular treatment or clearance just because of its appearance.
02
Keep the base clear of soil and yard debris
Unless the manufacturer’s design explicitly identifies a member suitable for ground contact, keep structural wood separated from soil, turf, mulch, and decomposing leaves. These materials can stay damp against the base and hide early signs of trouble. Use the clearance given in the installation instructions rather than applying a universal number; the required gap depends on the building’s construction and site conditions. Preserve the designed access and airflow around the underside, too. Later soil, edging, paving, or a raised planting bed can reduce clearance that was present on installation day, so plan for the final—not temporary—yard level. Make the boundary between landscaping and the house easy to maintain, so routine trimming and leaf removal do not require disturbing the base or leaning materials against it.
Before buying the Durano garden house, ask how much separation the base needs from finished grade and whether the underside is meant to remain open for inspection or airflow. Keep mulch, leaves, and stored items from bridging the gap or covering openings identified in the instructions. If planned landscaping will change ground levels, settle that layout first. The objective is not a large arbitrary void; it is preserving the intended separation while keeping the base accessible enough to notice soil buildup, trapped debris, or contact with damp material.
Match the foundation to the garden house
A suitable support must match the building’s specified footprint, support points, and floor arrangement; a generic hard surface is not automatically the right base. Ask for the required foundation type, layout, and levelness requirements in the installation documents. Have the actual site assessed if soil conditions, an existing slab, or a slope make the answer uncertain. Avoid improvising with loose blocks or bearing timber on bare earth unless the instructions explicitly call for that arrangement. Support decisions affect both stability and moisture exposure, so resolve them before delivery and assembly rather than hiding them under the finished structure. Keep the approved drawing with the site records, especially when the support will later be concealed by landscaping or a floor edge.
At a wood-to-masonry interface, ask whether the design calls for a capillary break: a compatible layer that limits liquid moisture transfer between materials. It must suit the specific contact and work with the support detail; a random sheet or coating can trap water, interfere with seating, or be unsuitable under compression. For the Veltor 1 garden house, request the maker’s base detail before purchasing a separate barrier. If a contractor is preparing the base, share the same drawing so the support, separation layer, and lowest frame are coordinated rather than chosen independently.

03
Confirm how the floor and underside are built
Confirm what “floor included” means before comparing garden houses. The delivered package may or may not include floorboards, joists, a perimeter frame, or a moisture-control layer; these are separate questions, and a floor surface does not explain how its underside is protected. Ask which pieces are supplied, what the base must support, and whether the walls sit on the floor frame or on a separate perimeter support. This helps prevent a gap between the house you order and the foundation or floor assembly you expected to prepare. Keep a copy of the written package contents and installation diagrams. It is also useful to confirm whether any separately sourced components must be installed before the walls are assembled, since access to the lower interface may be limited afterward.
Ask how the underside is intended to dry. Some designs leave an accessible space below the floor; others use a more enclosed assembly, and you need to know which openings and clearances the instructions require. Do not add skirting or block a designed opening just to hide the base, and do not assume that leaving every floor open is correct. If you are comparing the Orello 1 garden house, verify the floor package and underside details with the seller or manufacturer before planning the support. A clear answer helps you preserve inspection access without changing the intended assembly.
Choose a moisture break that fits the assembly
A moisture break is useful only when placed at the interface it is meant to protect. A specified layer between a foundation and a timber base can limit moisture traveling through the support, but it does not keep rain or splashing water away from exposed wood and cannot compensate for standing water. Confirm the permitted material, continuity, and exact location from the manufacturer’s detail or a qualified installer. If the lower frame is designed to contact a particular surface, do not insert a different material without approval; it can change how the parts seat or how loads are carried. Ask how the detail is meant to continue at corners, joints, and transitions, where an incomplete layer may leave a direct path for moisture.
A sheet on the soil below a floor is a different measure from a break beneath the wall frame. It may be part of a designed underfloor moisture-control system, but it is not a universal add-on: placement can affect drying, drainage, and access. Before considering one for the Modano 1 garden house, ask what the instructions say about the ground below the floor and whether the space is intended to be open or enclosed. Avoid wrapping the underside in an impermeable layer just to make it look sealed; trapped moisture can be harder to detect and may dry slowly.
04
Account for runoff and finished ground level
Ground moisture is only part of the picture at the base. Runoff from a roof, water splashed by irrigation, or rain held beside paving can repeatedly wet the lowest boards or support. During site planning, note where water arrives and whether the final surface could collect it against the base. This does not replace a separate drainage plan: the base instructions still need to work when the surrounding yard is wet. Keep sprinklers aimed away from the wall and avoid landscaping choices that bury the lower course or leave debris against it. Review the site across the seasons if possible, because a location that looks dry in one period can behave differently during frequent rain, snowmelt, or regular irrigation.
Tell the seller or installer the intended finished grade, paving, and planting-bed layout before ordering. With the Veltor 2 garden house as a candidate, ask what clearance the installation detail measures from and how that detail changes if the surrounding surface is later raised. If a downspout or runoff route is near the proposed site, resolve its position as part of site planning rather than expecting a coating to withstand regular wetting. Check that the chosen base remains accessible for inspection after landscaping is complete.
Use wood treatments only as a compatible layer
Surface treatments have a supporting role, not a base-design role. Ask whether the timber arrives treated or coated, which exposed areas need finishing after assembly, and what products are compatible with the supplied material. A factory treatment does not by itself prove that a member is intended for ground contact. Cut ends may need a specified treatment, but follow the manufacturer’s instructions rather than applying an all-purpose sealant to every underside surface. An impermeable coating can slow drying if moisture is already inside or entering from the other side. Apply any approved finish to clean, dry wood under suitable conditions specified by its manufacturer, and avoid treating over soil residue, biological growth, or an unresolved damp area.
Before ordering the Veltor 3 garden house, request care instructions that identify compatible finish types, any parts that should stay uncoated, and maintenance requirements. During routine checks, remove loose leaves or soil from the base and note finish failure instead of painting over damp wood. Recoating according to the approved schedule can protect exposed surfaces, but it does not replace a dry support interface or adequate underfloor drying. Avoid choosing a treatment solely because its label says waterproof; compatibility and the assembly detail matter.

05
Inspect lower boards and hidden interfaces
Look for changes at the base during routine visual checks, particularly after wet weather. Darkened patches, swelling, peeling finish, persistent dampness, wood that has become soft or crumbly, and a musty odor can indicate a moisture concern, but none proves where the water came from. Check the lowest wall course, visible support interface, floor edge, and underside only if those areas are safely accessible. Do not assume a sound-looking exterior means the hidden side is dry. A flashlight or small mirror can help with visibility, but do not remove structural parts just to inspect.
If you notice a sign, trace the likely route from the soil and support to the underside and lower wall. Note whether the area is repeatedly wet or simply stained from an older event, and record changes in ground level, irrigation, or landscaping alongside dated photos. Do not hide the area with trim or a fresh finish before the cause is understood. If wood is soft, deteriorating, or the source is unclear, have a qualified building professional or experienced carpenter assess the assembly and follow the manufacturer’s repair guidance before replacing or coating parts.
Get base details in writing before you order
Before placing the order, get answers to the same core questions in writing: Which floor, perimeter frame, and support parts are included? What support surface and support locations does the manual require? How is the lowest wood kept clear of finished grade, and is a capillary break specified? What ventilation, access, and maintenance clearances must remain open? Ask for the relevant drawing as well as a verbal summary. These answers let you compare candidate buildings by their base requirements, not just their layout or exterior appearance.
Coordinate those answers with whoever prepares and assembles the base, especially if the surface already exists or landscaping is planned. Confirm who is responsible for preparing the support and installing any specified separation or floor component. Check whether later finishes, skirting, paving, or raised beds would cover an opening or reduce clearance. If instructions conflict or omit the wood-to-support detail, pause material purchases and request clarification from the manufacturer or a qualified installer. The aim is an assembly that can dry as designed, not an improvised barrier hidden after construction.
Frequently asked questions
Can a wooden garden house sit directly on soil?
Only if the manufacturer has specifically designed the base member for ground contact and provides instructions for that arrangement. Otherwise, soil can keep timber damp and hide early damage. Follow the model’s installation guidance; a general-purpose coating does not make unapproved soil contact suitable.
Does a concrete pad keep ground moisture away?
Not automatically. A concrete slab can provide support, but moisture may remain in or on the concrete and reach wood at the interface. Follow the specified base and separation details, and have an existing slab assessed if its condition or moisture behavior is unclear.
Will exterior paint protect the bottom boards?
A compatible finish can help protect an exposed surface, but it cannot stop wet soil, a damp support, or inadequate underfloor drying. Use treatments specified for the wood, and resolve the source of persistent moisture before recoating.
How much clearance should I leave below the base?
There is no single clearance that applies to every model and site. Use the manufacturer’s stated requirement, measured from the planned finished grade, and keep required openings and inspection access clear. Confirm the detail before adding mulch, paving, or a raised bed.
Should I cover the soil under a garden house floor?
Not automatically. A ground vapor-control layer may be part of a designed assembly, but it is different from a barrier beneath the frame and can affect drying, drainage, and access. Ask the manufacturer or a qualified installer whether one is needed and where it belongs.
Protecting a wooden garden house from ground moisture begins with the connection between the lowest wood, its support, and the finished yard surface. Confirm the floor and base details before ordering, preserve the required separation and airflow, and use only compatible treatments as a secondary measure. After installation, keep the base visible enough to inspect and respond to signs of persistent dampness before covering or recoating the affected area.
