
Replacing Old Patio Doors: Check the Opening, Track and Floor

Patio door replacement planning
A patio door that sticks, rattles, or leaks at the sill can make replacement sound simple: remove the old unit and install a new one. The real decision is whether this is only a door replacement or also an opening, support, and floor-transition project. Begin by observing how the door operates. A slider needs a sound path for the moving panel, while a hinged door needs unobstructed swing space. Then examine the visible opening, track or threshold, surrounding finishes, and the relationship between the indoor floor and patio. These checks help separate a worn door from problems beneath or around it. They also give an installer useful evidence and keep the buying decision focused on the complete opening rather than the apparent glass or frame size alone.
Begin with the present door’s operation
Watch the old door through a complete opening and closing cycle before deciding what has failed. On a slider, note whether resistance occurs at one spot or throughout its travel. Dragging can relate to rollers, debris, a damaged track, frame movement, or inadequate support below the sill. On a hinged unit, observe where the leaf rubs and whether the latch aligns consistently. Photograph the door closed, partly open, and fully open. Include close views of any contact points. This record gives a supplier or installer more useful context than a single picture of the exterior and helps distinguish an operating symptom from its underlying cause.
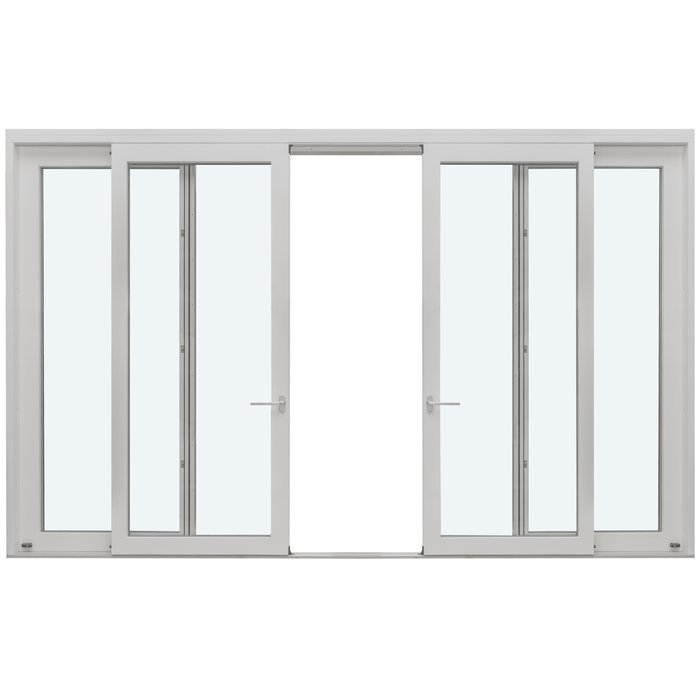
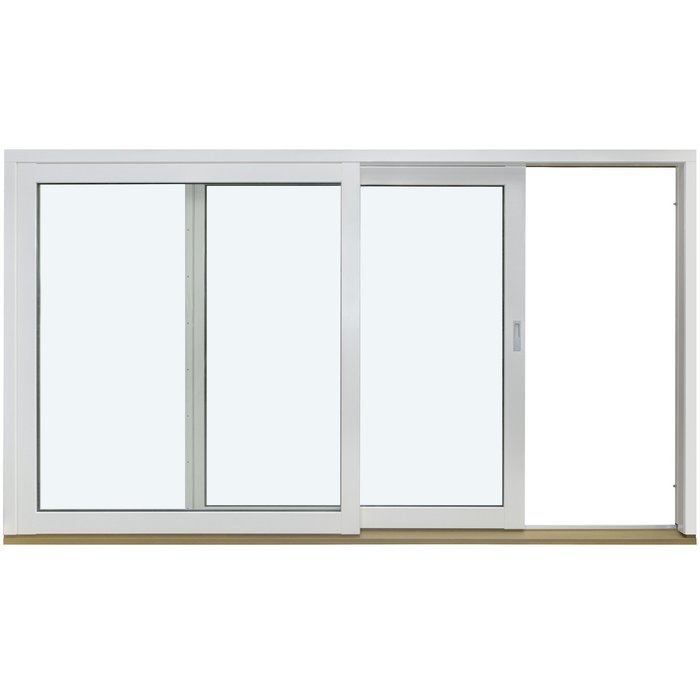
Separate the operation you want from the limitations of the old unit. A sliding layout preserves space beside the opening because its panels do not swing into the room or patio. If that movement suits the household, a Patio Life sliding patio door is one configuration to compare. A hinged alternative can provide a different passage arrangement but requires a clear swing path; a single-panel inswing patio door illustrates one such option. In either case, confirm the required opening, threshold, and clearance details. A new unit will not correct a settling sill, compromised subfloor, or distorted opening unless those site conditions are included in the work.
Define the project boundary before measuring
The phrase “replace the patio door” can describe several scopes. The narrowest retains the rough opening and covers removal, installation, trim, perimeter finishing, and the existing patio connection. Another changes the operating style or panel arrangement while keeping approximately the same wall opening. The broadest widens, raises, lowers, or otherwise alters the opening, potentially involving wall structure, cladding, interior finishes, and exterior surfaces. Decide which result you need before comparing products. A familiar replacement may reduce surrounding work, while a changed layout may improve circulation or furniture placement enough to justify a broader project assessment.
Write a brief that states which panel should move, where the handle should be when viewed from indoors, and which way any hinged leaf should swing. Mark furniture, planters, steps, railings, screens, and traffic paths that must remain clear. A category such as sliding doors can help with initial layout comparisons, but it cannot establish whether the existing opening is suitable. Ask who will verify dimensions, who will assess concealed conditions after removal, and how additional repairs would be approved. Also identify whether interior trim, exterior finish work, flooring transitions, painting, and patio repairs are included. Those answers define the project more clearly than the word replacement.
Measure the opening in three dimensions
Measure the visible frame opening and, where accessible, the rough opening, but label them separately because they are not interchangeable. Record width at the top, middle, and bottom. Measure height at both sides and the center, followed by both corner-to-corner diagonals. Differences help reveal an opening that is out of square or a sill that is not level. Record jamb depth, available sill depth, and distances to nearby obstructions. Use a rigid tape, keep measurements rather than rounded recollections, and take photos showing the tape’s start and end points. Early measurements support planning; the party responsible for ordering should confirm the production dimensions.
Document the finished surfaces as carefully as the frame. Record the threshold height above the interior floor, its relationship to the exterior surface, and the patio’s direction of slope immediately outside. Note tile, hardwood, carpet, concrete, or underlayment that meets the sill. State whether each finish will remain, be cut back, or be replaced. Planned flooring can change the eventual transition even if it is installed after the door. A unit may fit the measured width and height yet still produce an awkward step or difficult trim detail. Coordinate the completed floor, threshold, and patio relationship before fabrication rather than trying to correct a preventable mismatch afterward.
Inspect the sliding track and what supports it
After removing loose surface dirt safely, inspect the track in good light. Look for dents, worn areas, corrosion, broken pieces, packed debris, and sections that appear unsupported or loose. Check accessible drainage paths and weep openings for blockage, but do not enlarge or alter them without product-specific guidance. Examine lower corners and nearby exterior trim for staining, softened material, open joints, or recurring discoloration. These observations do not prove where water entered, but they identify areas that need closer assessment. A track can also look worn because the frame or support beneath it has moved, so the visible rail should not be evaluated in isolation.
A replacement slider should be considered as a complete door-and-sill arrangement, not merely as a new panel expected to run on a failing track. A Siegenia sliding door is another sliding configuration to discuss with a supplier while comparing the available layouts. Confirm which components belong to the selected door system and which existing materials will be removed or retained. Ask how the old sill will be lifted out, how the support beneath it will be inspected, and what preparation is expected before installation. These questions help distinguish a limited roller or track repair from replacement of the complete patio-door assembly and its connection to the opening.
Compare floor levels on both sides
Place a long straightedge or level across the interior approach to the door and then across the exterior surface nearby. This is a way to document changes in plane, not to certify the floor. A dip indoors may relate to the subfloor, a removed finish, or movement near the sill. An exterior surface directing water toward the opening deserves attention within the project’s water-management planning. Photograph the tool in position and record approximate changes over several feet. Cracked tile, separated flooring, lifting boards, patched concrete, or an uneven transition may also indicate earlier movement or previous attempts to alter the threshold area.
Plan the threshold around the completed surfaces rather than the temporary condition during construction. If new flooring will add height, decide how its edge should meet the door before ordering. If the patio will receive a new finish, coordinate its expected height and slope at the same stage. Avoid casually burying drainage features or building up one side merely to disguise a mismatch. The installer or other qualified project professional should evaluate support, drainage strategy, opening condition, and locally applicable requirements. As the buyer, make every planned floor and patio change visible in the drawings and written scope so the door is specified for the intended final condition.
Read the clues around the frame
Examine the interior casing, drywall, baseboard, paint line, and lower wall beside the door. Record staining, peeling paint, swollen trim, soft material, persistent odor, or recurring cracks, even if the door still opens. Outside, inspect the perimeter joint, lower corners, adjacent wall finish, trim, and visible sealant. None of these signs identifies a cause on its own. Moisture could be associated with the door perimeter, a connection above the opening, another wall component, or the patio side. Treat visible evidence as a reason to investigate the assembly before a new frame and fresh trim conceal the area.
Agree in advance on the process for concealed conditions. Ask what happens if removal reveals deteriorated wood, an uneven bearing surface, damaged finishes, or a gap between the assumed and actual opening. The proposal should distinguish the planned installation from exploratory or corrective work, explain who can authorize additions, and identify how findings will be documented. Do not let questionable material disappear behind trim solely to maintain the schedule. A new patio door depends on a stable, prepared opening. Repairing the substrate may broaden the project, but it prevents the selected unit from inheriting alignment, support, or finish problems that belonged to the old assembly.
Choose a configuration by real clearance
A slider is often practical where a dining table, sofa, or narrow deck sits near the opening. The panels stay within the frame, although the clear passage is limited to the open portion. Hinged leaves need an unobstructed arc. Mark that arc with painter’s tape and consider furniture, exterior steps, screens, prevailing site exposure, and the route people use to reach the patio. An inswing takes room from the interior; an outswing occupies exterior space. Neither is universally preferable. Compare the everyday open position, not only the appearance when closed, and include the handle, screen, and any panel that must remain accessible.
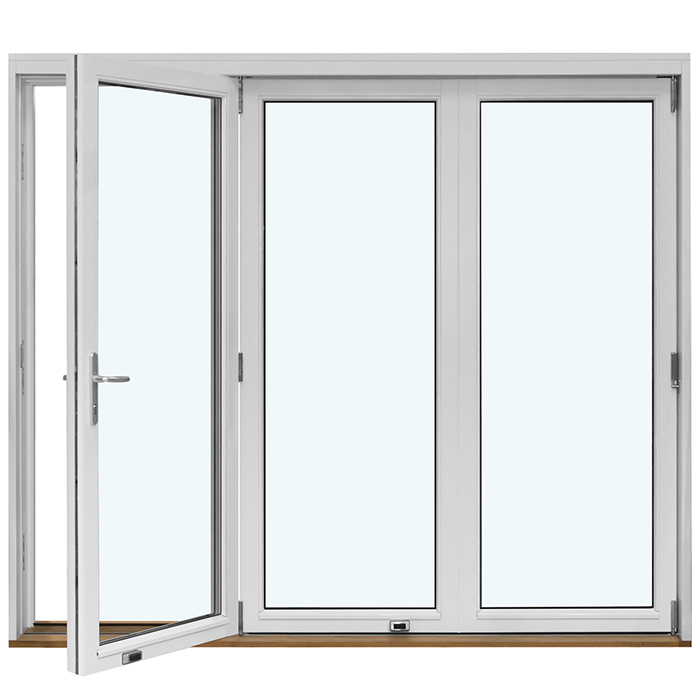
For a broad opening used frequently for indoor-outdoor access, outswing bifold doors are an alternative to evaluate. Folded panels require an appropriate stacking location, and the threshold still needs coordination with both finished surfaces. For a simpler one-leaf route, single-panel outswing patio doors present a different operating pattern. Draw the room and outdoor area approximately to scale, then mark furniture, paths, steps, and the open-panel positions. This quick study can expose conflicts that an elevation drawing misses. It also helps determine whether the desired wide opening would be used often enough to justify the extra surrounding coordination compared with a conventional slider or hinged door.
Let the opening guide, but not dictate, the design
Retaining approximately the same opening can limit disruption without requiring an exact copy of the old door. Within the available space, reconsider which panel operates, handle position, swing direction, frame color, sightlines, decorative bars, and whether adjacent fixed glazing belongs in the composition. Start with access and clearance, then refine appearance. Request drawings viewed from both inside and outside that label every fixed and moving panel. Verbal references to “left” and “right” are easily misunderstood when the viewing side is not stated. The drawing should also show the dimensions on which the proposed configuration depends and identify any site measurements that still need confirmation.
Two active panels may suit a household that wants a broad central path, provided both swing areas remain clear. A two-panel outswing patio door is a named option to compare with a slider rather than evidence that the existing opening can accept it. Discuss the header, jambs, sill support, floor interface, exterior surface, and surrounding finishes with the professionals responsible for the project. If the preferred arrangement requires a changed opening, ask for that work to be described separately from the door supply. A modest configuration change may deliver better daily use than forcing a visually ambitious design into a wall or patio condition that does not support it.
Settle appearance after the opening logic
Once operation, dimensions, and threshold coordination are understood, refine the visual specification. Compare frame color with interior paint and exterior cladding. Decide whether decorative bars support the intended character or whether uninterrupted glass better suits the room. Decorative bars describe an appearance choice, while glass-dividing bars refer to a different construction approach; use the appropriate term in the request. Review an elevation showing the actual panel arrangement, color, and bar pattern. This is particularly helpful when changing from a slider to hinged leaves because the visible frame proportions can differ. Avoid approving appearance from a generic product image that does not match the proposed configuration.
A traditional composition may complement the home, but it still requires a suitable opening and clear swing area. historic-style two-panel outswing patio doors provide one specific alternative for that discussion. Confirm the selected details in the order documents rather than relying on a showroom image or product-family name. Check the interior and exterior viewing sides, panel operation, swing, handle location, color designation, decorative-bar description, and dimensions used for production. Also verify which finishes and hardware are included in the quotation. Visual choices are easier to evaluate when they appear on the same approved drawing that records the functional arrangement and site assumptions.
Convert the inspection into an order review
Bring a compact site packet to the final consultation: a dimension sketch, diagonal measurements, level observations, close photos of the track and sill, full-wall photos from indoors and outside, and a list of planned floor or patio changes. Ask which measurements will control the order and which assumptions require field confirmation. Request a written description of removal, opening preparation, sill support, perimeter finishing, and cleanup. Identify whether screens, trim, paint, flooring transitions, disposal, or patio repairs are included, excluded, or assigned to another trade. This separates the door purchase from the related work needed to produce a finished, usable opening.
Before approval, compare the order drawing with the actual house. Stand indoors and verify the active panel, handle, swing, fixed-panel position, and viewing direction; repeat the exercise outside. Confirm how the threshold will meet each finished surface and how previously observed moisture or support concerns will be addressed. Bloomcabin provides a 5-year warranty for windows and doors. Delivery is 4–6 weeks, subject to order confirmation. Keep the approved drawing, site photos, written scope, option schedule, and later changes together. They provide one shared record against which the delivered configuration and installation work can be reviewed.
Common questions
Can I measure the patio door without removing the old frame?
Yes. Visible-frame measurements are useful for planning, but they are not necessarily the rough opening or final order size. Measure width and height at several points, record both diagonals, and photograph the tape position. The person responsible for the order should confirm production dimensions and address conditions concealed by the existing frame.
Does a dragging slider only need new rollers?
Not necessarily. Debris, roller wear, track damage, frame distortion, sill movement, or inadequate support can contribute to dragging. Cleaning or adjustment may clarify the symptom, but replacement planning should examine the full track, sill, frame, and supporting area. Do not assume rollers are the sole cause before the opening is assessed.
Should the new threshold be flush with the interior floor?
That should be resolved for the particular door and completed site, not assumed from the old threshold. Consider the final interior flooring, exterior surface, door system, support, and water-management plan. Record planned finish heights and ask the qualified professional responsible for the project to detail the intended transition before the unit is ordered.
Is changing from a slider to an outswing door straightforward?
It may be possible within a similar wall opening, but it is not automatically a direct swap. Check the exterior swing area, paths, furniture, steps, screen arrangement, threshold, patio level, framing condition, and finish work. A floor-plan sketch and a fully labeled elevation can reveal conflicts that width and height measurements miss.
What should I do about staining below the old door?
Photograph its exact location and ask for the surrounding materials and possible water paths to be assessed during the project. Staining alone does not establish where moisture entered. Agree before removal on how concealed deterioration will be documented, who can authorize repairs, and whether corrective work falls inside or outside the original installation scope.
Plan the next step
A successful patio-door replacement starts with the complete opening rather than a catalog image. Observe the present operation, measure at multiple points, inspect the track or threshold, and document both floor levels and nearby finishes. Then compare sliding, hinged, and folding configurations against actual clearance and everyday use. A clear site packet, labeled drawing, and written scope connect those observations to the order. If support, moisture, drainage, framing, or finish conditions remain uncertain, resolve them through qualified project assessment before committing to the final configuration.
