
When to Replace Windows During Insulation and Siding Work
Window replacement planning
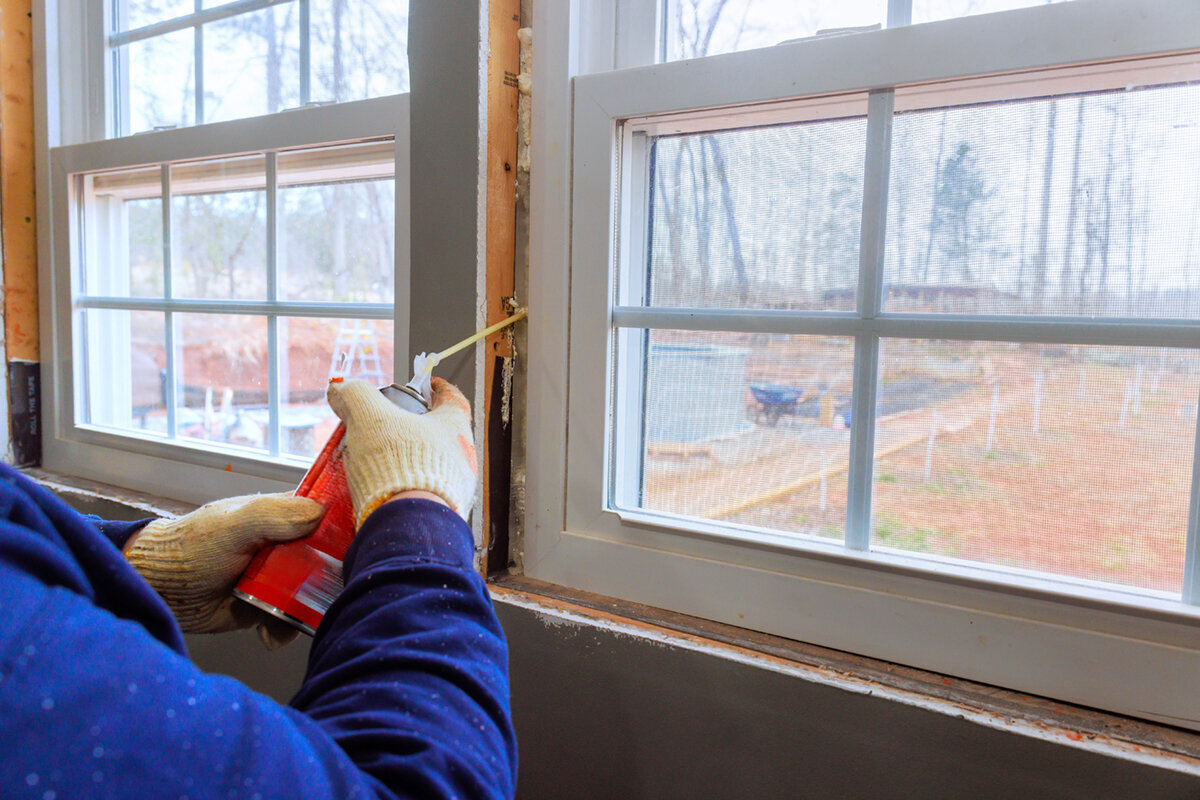
A window project can stall when the opening operation and work sequence are decided separately. An outward-opening sash may need clear exterior space while siding crews are present; a large patio door may be the best route for moving drywall, insulation, or equipment until it is installed. The dependable order is usually to plan windows before insulation, drywall or plaster repairs, and cladding, then install them after the rough openings and wall layers have been reviewed but before finishes conceal the connections. That does not mean every replacement happens on the same day. A staged renovation can protect occupied rooms and keep weather exposure manageable. The key is to define who prepares each opening, who completes the air and water-management connections, and when interior and exterior finishes are allowed to close the work.

01 / Survey the openings
Start with the opening operation and the project boundary
Begin by listing what is actually changing: isolated window replacements, a full exterior insulation upgrade, new siding, interior wall repairs, or a combination of these. The sequence differs sharply between a window that remains in its existing opening and a project that alters framing, sill height, or wall thickness. Identify every opening by room, exterior elevation, size category, and operation. Then record practical constraints: landscaping outside, furniture inside, a room that must remain usable, and whether the crew needs a temporary weather barrier. This prevents a schedule built around a vague promise that “windows come first.” It turns the project into a set of handoffs that can be reviewed before demolition begins.
Operation matters beyond ventilation. An outward-opening sash needs room outside its swing path after siding, trim, downspouts, railings, or plantings are complete. An inward-opening option changes interior clearance around shades, furniture, and wall finishes. A fixed unit removes opening clearance but makes the surrounding trim and glass proportions especially visible. For example, a fixed window may suit a view-focused location, while an operable opening beside it serves ventilation; the named configuration alone does not establish suitability for any particular room. Ask the designer or installer to mark the swing, cleaning access, screens, and future maintenance access on the elevation before cladding decisions are finalized.
Treat the wall opening as a transition, not a hole
The window is only one part of the assembly. Around it are framing, sheathing or other backing, a sill condition, layers intended to manage water and air, insulation, cladding, and interior finish. Replacing a unit after those layers are complete can force the crew to cut back work that could otherwise have remained continuous. Replacing it too early, before damaged framing or uneven surfaces are discovered and corrected, can leave a new unit surrounded by unresolved problems. The useful planning point is a clean, accessible opening whose condition and intended layers are known before the frame arrives.
At the pre-install walk-through, ask what will be removed, which substrate will be exposed, how the sill area will be assessed, and how the new frame will be positioned relative to the finished wall face. Request a clear answer on who provides and installs each connecting material and who checks the work before it disappears. Terms vary between crews, so diagrams and photographs of the actual opening are more helpful than assumptions. If the work includes a large group of windows, approve one representative opening first. That sample can reveal conflicts with interior returns, exterior trim widths, or changed wall depth before the same detail is repeated across the house.
02 / Confirm wall details
Schedule insulation after the frame connection can be inspected
Insulation work should follow a settled window-opening detail, not substitute for one. Whether insulation is in wall cavities, added on the interior, or added as part of exterior work, crews need to know where the window frame sits and where adjacent materials meet it. Installing insulation before window replacement can be practical when it is remote from the openings, but insulation that blocks inspection or must later be cut back creates extra repair work. Conversely, leaving broad areas open indefinitely exposes insulation to damage and makes occupied spaces harder to manage. Coordinate the work by elevation or room rather than treating the whole house as one continuous task.
The installer should be able to access the perimeter around the frame before interior coverings and exterior cladding hide it. Ask how gaps will be evaluated, what materials belong in the gap, and how the interior and exterior sides are differentiated in the project detail. Do not rely on a generic statement that foam or sealant will solve every transition; compatibility, placement, and continuity depend on the wall assembly and the selected product. A super-low-Uw outward-opening passive house window is a named window configuration, not a complete wall design. Discuss its placement and surrounding connection with the qualified professionals responsible for the project.
Keep drywall and plaster repairs deliberately late
Drywall and plaster are vulnerable to removal work, frame adjustment, perimeter repairs, and the movement of ladders and materials. The least disruptive time to make a durable interior return is after the window has been set and the room-side perimeter work is complete enough to inspect. A crew can then measure the actual reveal, choose a trim approach, and repair only what is necessary. Finishing too early often turns clean surfaces into demolition edges. Finishing much later, however, can leave a room drafty, dusty, and difficult to use, so a phased plan should include temporary protection and a defined return date for the finish trade.
Plaster deserves special attention because matching texture, thickness, and edge profiles may take more preparation than a simple drywall patch. Photograph existing reveals, stool details, casing, and decorative work before removal. Agree whether the window installer stops at the frame, whether a carpenter creates trim, and whether the plasterer or drywall contractor owns final patching and painting preparation. These are separate scopes even when one company coordinates them. Keep protective film, storage locations, and access routes in the schedule so a new frame is not scratched while interior materials are moved. The aim is not merely an attractive perimeter; it is a finish sequence that does not conceal incomplete work.
03 / Install windows and doors
Install before siding closes the exterior access
When siding or other cladding is being replaced, window installation usually belongs before final cladding and exterior trim. This enables the exterior crew to connect surrounding layers and form the intended transitions without repeatedly removing finished boards or panels. It also allows window placement, head details, side details, and sill area to be reviewed as part of one coordinated elevation. If the existing siding will remain, localized removal may still be necessary; discuss the size of the anticipated work area and how a visual match will be approached. A replacement sequence that ignores this question can leave the installer responsible for access but not for final exterior appearance.
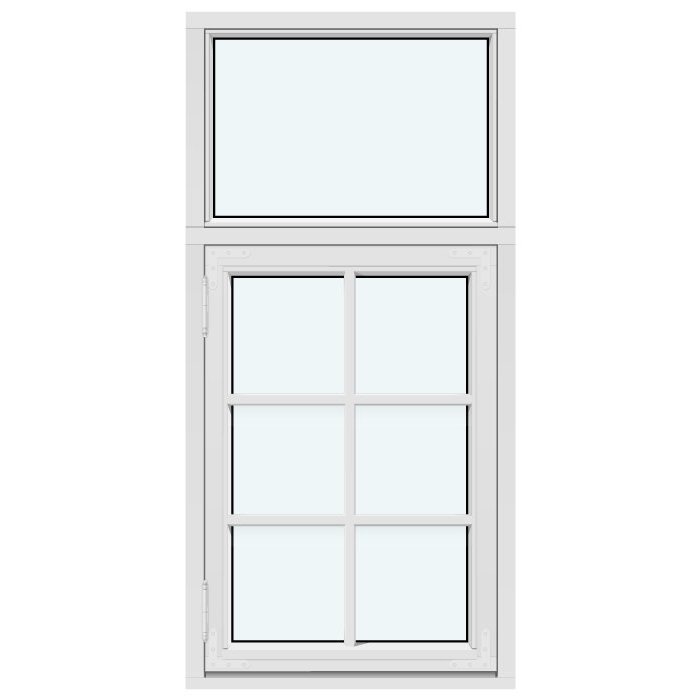
Ask for a written division of labor: who removes cladding, who prepares the substrate, who performs frame installation, who completes perimeter connections, and who reinstalls siding and trim. Clarify when each party considers the opening ready for handoff. A single-sash outward-opening casement window needs an exterior operation zone, so the siding layout, exterior fixtures, and finished trim should not conflict with its swing. Check the specific selected configuration rather than assuming all casements have the same clearance. Plan one finished mock-up area if the home has complex corners, decorative details, or multiple siding thicknesses.
Use exterior trim to resolve proportions, not hide uncertainty
Exterior trim can frame a replacement beautifully, but it should be measured after the wall and window position are understood. Changing from thin cladding to a thicker exterior layer may alter the apparent recess of the frame and the width needed for surrounding trim. Existing trim sometimes conceals uneven edges, water damage, or previous patching; removing it before the installation review gives the team a more honest condition to work from. Decide whether trim is being retained, replicated, resized, or omitted. Each choice affects the visible proportions as well as how siding terminates beside the opening.
This is particularly important with grouped units and shapes that are intended as a focal point. A round fixed window brings a strong outline to an elevation, so inconsistent reveal depth or improvised trim can be more noticeable than around a conventional rectangle. Confirm the opening dimensions, intended trim profile, and relationship to nearby windows before ordering. Avoid selecting a product title based on an image alone: color, decorative bars, glazing, hardware, and other details should be specified separately where available. Ask to see how the cladding installer expects to meet the trim and where future repainting or maintenance access will occur.
04 / Complete finishes
Stage occupied-home work room by room
A whole-house sequence is efficient on paper, but lived-in projects need a plan for security, dust, weather, pets, children, and daily access. Group work by a manageable exterior elevation or a small set of rooms that share the same trade path. Before work starts, identify which windows are removed each day, what temporary closure is available if conditions change, and who decides whether an opening is ready to close. Keep furniture far enough back for removal and interior repairs, and reserve a protected indoor area for components that must not be stored outdoors. A realistic daily plan is more useful than an ambitious calendar with no contingency.
Patio openings deserve their own logistics because they can affect both circulation and security. A Patio Life sliding patio door is a named sliding patio-door configuration; review the selected unit’s site handling, threshold relationship, and interior floor protection with the installation team. If that opening is used to bring in drywall or insulation, complete heavy traffic before final surfaces near it are vulnerable. If it must remain the household’s main exit, arrange an alternate route during removal and finishing. Mark exterior landing, drainage, railing, and screen questions for the responsible professionals instead of allowing them to become last-minute field decisions.
Coordinate design choices with the construction sequence
Window style choices can complicate or simplify the work order. A pair of operable sashes may require different clearance and trim decisions than a broad fixed-plus-operable composition. Decorative bars should be discussed early because they alter the visual balance of grouped openings, while glass-dividing bars are a distinct design and construction choice. Confirm whether you want the same sightline across old and new openings, or whether the renovation intentionally creates a new facade rhythm. Measure from stable reference points, not from temporary siding edges or unfinished interior surfaces that are about to change.
For a traditional facade, a historic-style two-sash outward-opening casement window may be a relevant style direction, but the product name does not confirm an exact match to an existing house. Compare proportions, sash division, color, hardware appearance, and trim context before committing. Hold a design review once the exterior wall build-up and rough opening condition are known; this is when apparent window size and recess can be judged more accurately. The practical benefit is fewer changes after materials are ordered and fewer visual compromises made because a crew has already begun closing walls around an unresolved choice.
05 / Review handoffs
Plan special openings and roof work independently
Roof windows, angled shapes, and unusually located openings should not simply be added to the standard replacement schedule. They may involve different access, temporary weather protection, interior shaft work, and finish repairs. A pivoting roof window should be coordinated with the roof and interior finishing work rather than treated like a wall window. Determine which trade opens the roof, which trade restores the surrounding roof surface, and when the interior shaft or ceiling finish can be completed. Keep materials and work areas protected from dust generated by cutting, plaster repair, or roof work. A separate mini-schedule helps prevent one specialized opening from holding up all the ordinary windows.
The same principle applies to combinations of windows and doors where structural alteration, interior flooring, or exterior hardscape could be involved. Establish the project scope with the appropriate qualified professionals before ordering products or setting irreversible finish dates. State and local requirements and site conditions can differ, and this guide does not establish permit, safety, egress, structural, or weather-performance requirements for a particular project. Ask the local authority having jurisdiction and the responsible project professional what applies to the exact address and scope. Their answer should be incorporated into the sequence, not treated as a task for after installation.
Turn the schedule into a handoff checklist
Before ordering, hold a single coordination meeting with the homeowner, installer, insulation contractor, drywall or plaster contractor, and siding or cladding contractor where relevant. Work through each elevation and identify the final decision-maker for dimensions, opening condition, frame position, room-side repair, exterior transition, trim, and cleanup. Record dependencies, including lead time. Bloomcabin windows and doors carry a 5-year warranty, and delivery is 4–6 weeks subject to order confirmation; align confirmed timing with opening preparation rather than exposing openings before the order is ready. Keep a change process for discoveries such as concealed deterioration or a dimension that differs from the survey.
At handoff, use photos and a simple checklist rather than relying on memory. The installer can document the opening before closure; the insulation crew can confirm its work area; the drywall or plaster contractor can verify repair boundaries; and the siding crew can confirm the exterior interface before final trim is installed. For door-like openings, a single-panel outswing patio door should be reviewed for its outward operation, exterior clearance, and relationship to planned finish levels as part of that checklist. Close each item only after the next trade has accepted the condition. This method makes responsibility visible and reduces the temptation to solve hidden details after completed finishes have made access expensive.
Common questions
Should windows be replaced before exterior insulation?
Usually, coordinate and install the windows before exterior insulation and final cladding close access around the openings. The exact order depends on the wall assembly and opening condition. The important point is that the frame position and surrounding transitions are agreed and inspectable before insulation or finishes make later corrections disruptive.
Can drywall be finished before replacement windows are installed?
It can be, but it often creates avoidable patching. Removal, adjustment, perimeter work, and interior trim can damage finished drywall. Leave the final return, patch, texture, and paint preparation until the frame and room-side perimeter work have been completed and reviewed, unless the finish area is well away from the opening.
What if the siding is not being replaced?
Discuss how much existing siding must be removed or protected to access the opening and complete the exterior work. Confirm who reinstalls it and what finish result is expected. Retaining siding does not eliminate the need to plan the window perimeter; it simply makes access and matching more important.
Who should handle flashing and air sealing around a window?
Assign the work explicitly in the contract or project checklist. The installer, cladding contractor, or another trade may have a defined role, but assumptions cause gaps. Ask for the intended sequence, materials, inspection point, and the person responsible for each side of the frame before the opening is covered.
Do I need to check local requirements for a replacement project?
Yes. Requirements can vary by location and by the work scope, especially if openings, structure, use, or exterior walls change. This article does not determine what applies. Verify the address-specific project with the local authority having jurisdiction and consult the appropriate qualified professional before finalizing the installation sequence.
Next step
The best time to replace windows is rarely a single universal milestone. It is the point after the opening and wall strategy are known, and before insulation, interior finishes, siding, and trim prevent proper access. Start with how each window or door operates, then map the work by elevation or room. Give every transition a named owner, use one sample opening to resolve details, and delay final drywall, plaster, cladding, and trim until the relevant connection can be reviewed. Where the project changes more than the window itself, obtain project-specific guidance from the appropriate qualified professionals and local authority before materials are ordered. A disciplined sequence protects both the new units and the finishes built around them.
