
Window Installation Joints: Tapes, Seals and Insulation
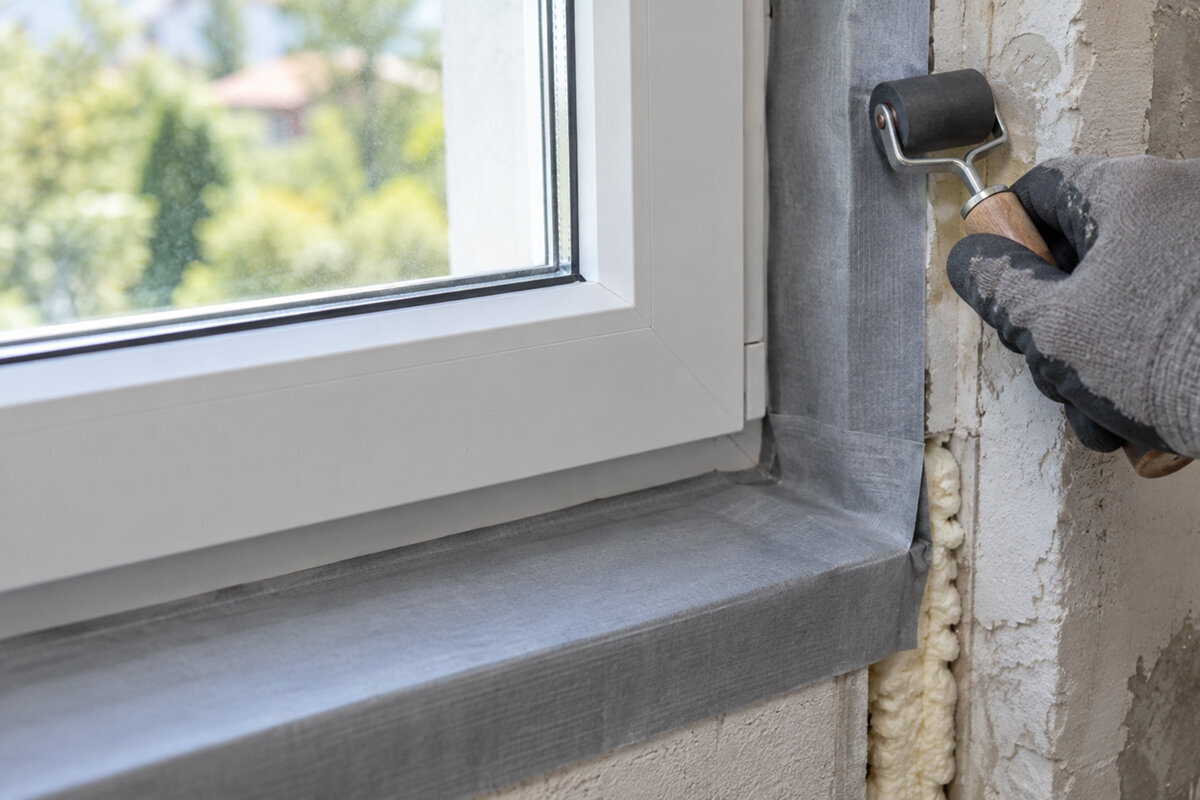
Window installation planning
A window can open smoothly and still leave the wall vulnerable if the joint around its frame was treated as an afterthought. This matters whether you are replacing one fixed window, adding an operable unit, or remodeling an entire elevation. Opening operation affects clearances and access, while project scope determines whether the crew can inspect and renew the surrounding wall layers. The installation joint is the site-built connection between the frame and the rough opening. Its work should not be assigned to one bead of caulk. A coordinated plan addresses outward water management, insulation within the perimeter gap, interior air control, compatible exterior materials, and support for the frame. Understanding those separate jobs makes contractor proposals easier to compare and exposes missing details before trim hides the work.
Start with operation and the true project boundary
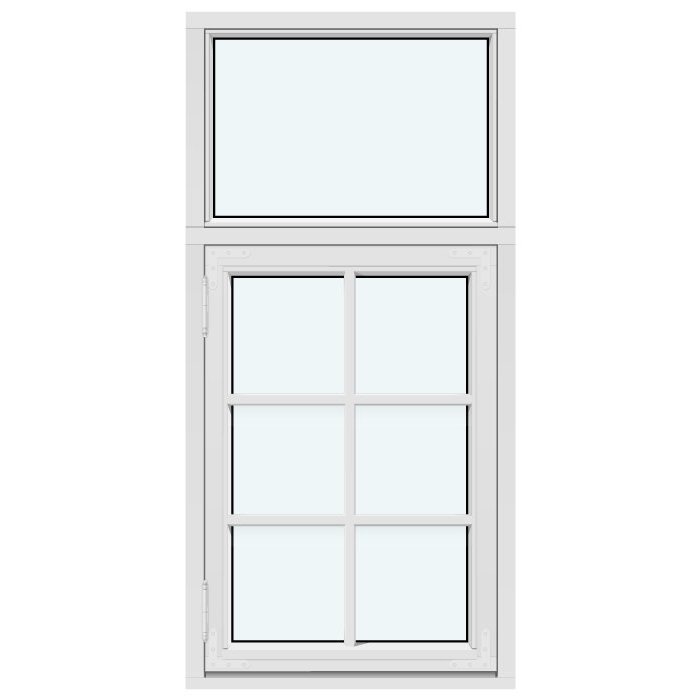
Define both the product and the amount of wall work before discussing tapes or sealants. A fixed unit needs no sash clearance, but it still requires support, shimming, insulation, and perimeter connections. An outward-opening unit changes the exterior clearance and finishing conditions. A single-sash outward-opening casement window, for example, should be reviewed with its swing area, exterior trim, and sill treatment in mind. Also distinguish an insert replacement within an existing frame from a full-frame replacement or a completely new opening. Each option exposes different parts of the wall and therefore offers different opportunities to inspect damage and renew flashing.
Ask the contractor to define what “installation” includes. The proposal should identify which existing components will be removed, whether the rough opening will be exposed, who handles deteriorated framing, and who restores siding, drywall, trim, and paint. It should also assign the tapes, insulation, flashing, sealant, and final adjustment to named parties. Establish a decision process for an opening that proves wet, uneven, or damaged after removal. Photographs of the exposed opening create a useful record before corrective work and finishes begin. The window is factory-produced, but the surrounding joint is assembled on site and must respond to the wall that is actually uncovered.
Give every layer one clear job
A practical installation-joint plan can be read from outdoors to indoors. Exterior layers shed rain and route incidental water toward the exterior. The middle gap accommodates adjustment and insulation without forcing the frame out of alignment. The interior connection limits air movement between the room and the joint. Flashing membranes, tapes, liquid-applied products, backer rod, sealants, insulation, and drainage components may all appear in the same opening, but they are not interchangeable. Position, sequence, and continuity matter more than an impressive product label. Water-facing layers should overlap to encourage outward drainage rather than create a concealed pocket behind trim.
The exterior and interior sides do not necessarily need identical materials or vapor characteristics. Wall assemblies differ in how they manage rain, indoor moisture, and drying. Ask for a section sketch that shows how the frame connects to the wall’s water-management and air-control layers. Request separate sill, jamb, and head views because each location handles different conditions. A bid that says only “foam and caulk perimeter” leaves unanswered questions: where can water drain, which component is the interior air seal, and how do the materials connect at corners? Resolve those questions before using the proposal to compare price or scope.
Plan the entire opening
Build the water path from the sill upward
The sill must support the window while avoiding a trap for incidental water. Depending on the wall and selected system, preparation may involve a drained or sloped surface, a pan or membrane detail, turned-up ends, and a defined outlet toward the exterior. The installer should explain the project-specific approach rather than apply one universal recipe. Shims and fasteners must fit that approach without defeating it. The frame itself is generally set level for proper operation even when the underlying water-management surface is arranged to drain. Structural alignment and drainage are coordinated requirements, not competing ones.
At the head, the transition should prevent water traveling down the wall from entering behind the unit. Jamb details must maintain continuity while allowing the sill strategy to function. Exterior trim can conceal these layers, but it cannot replace them. This deserves attention around a broad fixed window, where uninterrupted trim lines may make later investigation difficult. Before siding, masonry finishes, or drywall cover the opening, request photographs of the prepared sill, lower corners, jamb transitions, and head treatment. Label the images by opening so they remain useful if maintenance or later exterior work raises questions about the concealed assembly.
Insulate the gap without distorting the frame
The perimeter space allows the frame to be positioned, shimmed, fastened, and adjusted. Insulation reduces the uninsulated path around the unit, but it does not replace structural support, flashing, or an intentional air seal. When an expanding product is selected, its application must suit the gap and frame because excessive pressure can affect alignment or sash operation. Planned shims belong at appropriate support and fastening locations rather than being packed randomly around the opening. The installer should check frame dimensions and operation after fastening, after insulation, and before trim makes correction more disruptive.
Sprayed insulation is not the only option. Fibrous insulation can be used with a separate air-control detail when the gap, access, and system design make that approach suitable. Oversized or irregular openings may first need framing repair or a designed filler rather than more insulation. Geometry becomes especially important around a triangular or angled fixed window, where support points and perimeter gaps do not follow a standard rectangle. Ask how the crew will avoid voids at acute corners, maintain the intended frame shape, and inspect the joint before covering it. Adding sealant afterward is not a sound remedy for a distorted or unsupported frame.
Make the interior air seal continuous
Interior tapes and sealants connect the frame to the wall’s interior air-control layer. Evaluate them as continuity tools, not simply competing brands. Every corner, overlap, change of plane, and transition to another substrate needs a workable detail. Tape can form a broad connection on clean, stable surfaces. Sealant may suit smaller irregular transitions, sometimes with backer rod to establish the intended joint shape. Some openings use both. Selection should account for substrate, movement, accessibility, and confirmed compatibility with the frame and adjacent wall materials.
Adhesion depends on preparation. Dust, loose coatings, damp surfaces, rough masonry, and residue can undermine an otherwise suitable tape. Ask how the substrate will be cleaned, whether the selected manufacturer calls for primer, and how the tape will be pressed into place. The interior connection must also turn continuously around the sill and across grouped-unit transitions. A combination window can introduce more corners and frame junctions than one simple unit, making a drawn continuity path valuable. Interior casing or drywall may hide the work, but neither finish proves that an air seal exists behind it. Inspect that layer before finishes are installed.
Separate flashing duties from exposed caulk
Exterior flashing tapes and membranes commonly connect the opening to the wall’s weather-resistive layers. Their overlaps should direct water outward, especially at corners and at the sill-to-jamb transition. A product described as flashing is not automatically suitable for every frame coating, sheathing, housewrap, or sealant. Confirm approved substrates, required preparation, construction exposure limits, and installation sequence from the selected product information. When window, siding, and interior work involve separate crews, a written sequence should show who completes each transition and who inspects it before the next trade covers it.
Exposed sealant may finish a joint between the frame, trim, or cladding, but its geometry matters. The joint needs suitable bonding surfaces and room for expected movement; a very deep mass of caulk is not automatically better. Backer rod may be used where the selected sealant detail requires controlled depth. Sealant should not become the only defense after water reaches the space behind trim. A sliding patio door also needs careful coordination at its wide sill, threshold, tracks, and adjoining exterior surface. Ask the installer to mark intended sealant joints and any planned drainage openings so later finishing does not block the water path.
Plan the entire opening
Adapt the detail to the existing wall
Framed walls with accessible sheathing, masonry openings, stucco, brick veneer, walls with exterior insulation, and other assemblies offer different connection surfaces and drainage paths. A full-frame replacement can expose more of those layers, while an insert installation retains more of the existing frame and surrounding construction. Neither method is automatically preferable. Compare the existing frame condition, desired visible glass area, finish-repair scope, and ability to reconnect water- and air-control layers. Ask the installer to identify the actual substrate receiving each tape or sealant instead of describing a connection to a barrier that may remain inaccessible.
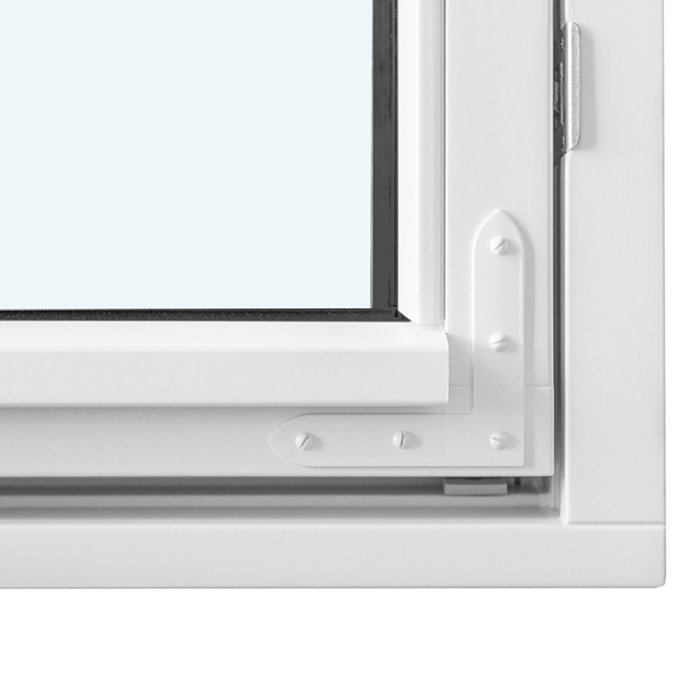
Older openings can reveal inconsistent materials or decay after trim is removed. A responsible proposal identifies what can be decided in advance and what requires an opening-up inspection. With a historic-style combination outward-opening casement window, coordinate the visual trim design with access to the installation joint rather than allowing decorative details to dictate the concealed water path. Discuss trim removal, repair, and repainting together with flashing continuity. If the finish cannot be opened widely, require the installer to explain the resulting limitations and the alternative detail. A specific limitation is more useful than an assurance that hidden conditions will present no difficulty.
Resolve corners, joined units, and door thresholds
Corners concentrate changes in direction and are vulnerable to folds, gaps, wrinkles, or punctures when no method has been chosen. The sill-to-jamb corner is particularly important because it joins several layers where water collects and changes direction. Ask whether corners will use preformed pieces, carefully shaped membrane, liquid-applied material, or another documented method. Grouped windows add separate connections at intermediate supports and joined frames. The product-to-product joint and the outer frame-to-wall joint do different work; both need to be shown. The crew should also know which drainage routes must remain open after exterior finishing.
Large doors add repeated panel movement, foot traffic, and critical elevation changes at the threshold. With outswing bifold doors, coordinate structural support, threshold integration, panel clearance, exterior paving or decking, and drainage before ordering. Provide the installer with planned finished-floor and exterior-surface elevations. If either remains undecided, record the working assumption and assign responsibility for final confirmation. A late change in deck height or flooring thickness can affect clearance and make the intended sill transition difficult to complete. Treat the threshold as part of the wall opening rather than selecting its finish separately from the door and perimeter-joint plan.
Convert the proposal into inspection stages
Request enough detail to make the work checkable: rough-opening condition, frame support and fastening, perimeter insulation, interior air seal, and sill, jamb, and head transitions. The material list should identify which products touch the frame and wall substrates, while the scope should assign supply and installation responsibilities. Include planned photographs and operation checks after setting, after insulation, and before trim. This approach replaces the vague promise of a “properly sealed” window with visible stages. It also makes competing bids easier to compare because omissions cannot hide behind a single installation allowance.
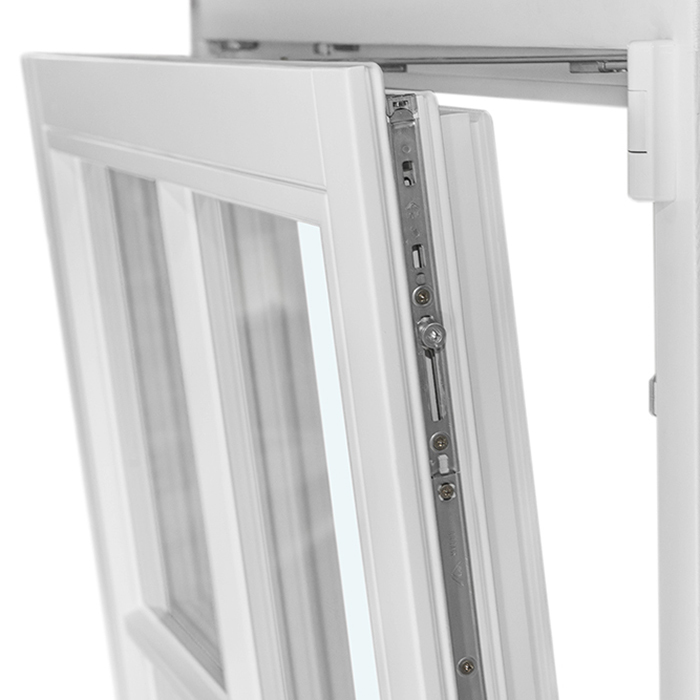
Do not judge the concealed joint by the final caulk line alone. A neat exterior bead can hide missing transitions, while a deliberate drainage opening may look unfinished to someone who has not seen the plan. Review the design intent before inspection. For a two-sash inward-opening window, also confirm that interior finishes do not obstruct sash swing, handles, screens, or cleaning access. Keep the approved detail, material information, photographs, and written field changes together. If an operating problem, finish crack, or moisture mark appears later, the file will help the project team distinguish the frame, installation joint, wall, and finish conditions.
Coordinate ordering, scheduling, and handover
Release the order only after product configuration, field measurements, wall thickness, finish build-up, and transition details have been reconciled. Clarify which figures are product dimensions and which are target rough-opening dimensions, who performs final measurement, and what happens if demolition reveals a different condition. A product title confirms only the named configuration; it does not determine a site-specific installation method. Bloomcabin windows and doors have a 5-year warranty. Retain the order documents and installation records so any later question can be assessed against the supplied product, the surrounding construction, and the work performed on site.
Bloomcabin delivery is 4–6 weeks subject to order confirmation. Use the planning interval to complete opening surveys, select compatible installation materials, settle finish elevations, and agree on inspection points. Do not let schedule pressure justify applying tapes or sealants to unprepared surfaces. At handover, ask the installer to demonstrate operation and identify accessible maintenance joints, intentional drainage routes, and materials used for exposed touch-ups. Record anything that must not be covered or sealed during future siding, painting, or deck work. A documented joint is less likely to be compromised when another contractor later works around the opening.
Common questions
Is spray foam enough to seal around a window?
No. Foam can insulate part of the frame-to-wall gap, but it does not by itself provide the complete interior air connection or exterior water-management path. It must also be installed without distorting the frame. Review the insulation, flashing, interior seal, support, and drainage details as one coordinated assembly.
Should window tape be installed inside or outside?
Tape can serve different purposes in each location. Interior tape may connect the frame to the wall’s air-control layer, while exterior flashing tape or membrane can support outward water management. Correct placement depends on the wall assembly, substrates, movement, and product compatibility rather than a universal rule favoring one side.
Why does the sill need more than perimeter caulk?
Incidental water moves downward, so the sill needs an outward route that avoids trapping moisture behind the frame or trim. Exposed caulk may finish part of the perimeter, but it cannot establish the concealed sill transition. Review the prepared sill and lower-corner details before the window is set or covered.
Can existing trim remain during replacement?
Sometimes. Retaining trim can reduce finish work, but it may also restrict access to the existing frame and hidden wall layers. Ask what will remain concealed, whether those conditions can be inspected, and how the proposed flashing and air-sealing connections will be completed. Include those limitations when comparing insert and full-frame options.
What should be photographed during installation?
Photograph the opening after removal, repaired framing, prepared sill, lower corners, jamb and head transitions, visible shims and fasteners, insulation before covering, and the interior air seal before trim. Label images by room or opening and save them with approved drawings, product information, and notes documenting field changes.
Next steps
A window installation joint succeeds when each material has a defined job and every transition remains continuous. Compare proposals by the planned water path, frame support, insulation, interior air seal, exterior interfaces, and inspection sequence—not by the size of the final caulk bead. Define the opening operation and demolition scope first, then request separate sill, jamb, and head details. Where existing trim hides uncertain conditions, establish a documented inspection and approval point after removal. That preparation helps the contractor price comparable work, lets you inspect critical layers before they disappear, and creates a useful record for future maintenance around the opening.
