
Window Reveals, Sills, and Trim During Replacement

US window replacement guide
A replacement window can retain the same rough opening yet change the room more than expected. The difference is not limited to glass area: sash operation, frame position, wall depth, existing jamb condition, and the decision to retain or replace trim all shape the finished opening. Before selecting a unit, determine whether the work is a limited replacement or a broader opening renovation. Then inspect each window from both sides. Is the interior sill a useful ledge? Does wide casing conceal an uneven wall edge? Will the sash need room to swing past a faucet, shade, or plant? Is exterior trim a prominent architectural feature or primarily a joint cover? Answering these questions before measurement helps define the product, finish work, responsibilities, and realistic project sequence.
Buyer checklist 1
Start with operation and the actual replacement scope
Opening operation comes first because it determines what must remain clear around the completed window. An inward-opening sash can conflict with a deep sill, faucet, blind, curtain, or objects kept on the ledge. An outward-opening sash transfers the clearance question outdoors. A fixed unit has no swing path, but its frame and surrounding finish remain prominent. Evaluate a single-sash inward-opening window from inside the actual room, not only on an exterior elevation. Use cardboard or painter’s tape to represent the sash edge and handle path. This quick test can expose a conflict that basic width and height measurements miss.
A limited replacement generally aims to preserve much of the existing jamb, wall finish, sill, and casing. A broader renovation removes more of the old assembly so the opening and its finishes can be rebuilt. Neither scope is automatically preferable. Retention can reduce disruption when existing components are sound and visually valuable. More extensive removal provides greater control over frame position and finish alignment but can expose concealed deterioration or irregular construction. Ask the estimator to identify every component that stays, every component removed, and who restores each visible surface. The phrase “replacement window” does not establish whether painting, trim, sill repair, or wall finishing is included.
Read the reveal as a three-dimensional part of the room
The reveal is the finished return between the wall face and window frame at the top, sides, and bottom of the opening. Its apparent depth depends largely on where the new frame sits within the wall. Moving the frame outward can deepen the interior reveal; moving it toward the room can make the window appear more flush. Either result may look intentional, but inconsistency is noticeable when neighboring windows are viewed together. Compare proposed frame locations from the doorway, primary seating area, and exterior approach. Paint color, shadow lines, and contrasting wood finishes can make even modest depth differences visually prominent.
Reveal depth also affects use. A deep side return can crowd a shade bracket or make a handle harder to reach. A shallow return may offer little space for correcting an uneven wall edge. Existing openings can be out of square or vary in depth from one corner to another, so one center measurement is insufficient. The field record should include width and height at several points, diagonals, wall thickness, and reveal depth on each side. Photograph cracks, tile edges, wallpaper seams, outlets, shelving, and other finishes before removal. Those records turn a vague request to “keep it looking the same” into conditions that can be reviewed before ordering.
Buyer checklist 2
Plan the interior sill as both finish and working surface
The interior sill may bridge the bottom reveal, overlap the frame, meet plaster or drywall, support a shade, or serve as a ledge. Its projection and profile are therefore functional choices as well as decorative ones. A replacement may leave the sill intact, require an altered back edge, or call for a new sill because the frame lands differently. Do not assume the new unit will tuck behind the existing board without a visible change. Request a simple cross-section showing the frame, bottom reveal, sill or stool, apron, and wall finish. This is especially valuable when several openings must align with existing millwork.
Inspect the sill for movement, staining, open joints, damaged coatings, soft areas, and evidence of recurring moisture. Refinishing alone should not be used to hide a condition whose source remains unknown. If the sill will stay, establish how it will be protected during removal and how disturbed edges will be repaired. If it will be replaced, wait until frame position and final reveal depth are confirmed before approving its projection. An especially deep sill can be useful, but it may reduce clearance for an inward sash or interfere with a window covering. Confirm its usable depth rather than choosing a profile from appearance alone.
Decide what the interior casing needs to accomplish
Interior trim, commonly called casing, frames the opening and often covers the joint between the wall finish and jamb. It may also connect the window visually with doors, baseboards, and other millwork. Existing casing can sometimes stay in place, be removed and reinstalled, or be replaced. Each option has limitations. Older trim may split during removal, and a seemingly common molded profile may be difficult to match exactly. If preservation matters, photograph the corner joints, measure the face width and projection, and retain a labeled sample when possible. Decide whether a close visual match is acceptable or an exact profile is essential.
Casing width should respond to the actual joint and nearby constraints. Very narrow trim may reveal a wavy wall edge or fail to cover the required transition. Wider casing can crowd cabinets, tile, switch plates, backsplashes, or an adjacent opening. Mark the proposed outer edge on the wall before ordering. Define decoration responsibilities just as carefully: who fills fastener holes, seals edges, primes cut ends, matches paint color and sheen, and applies the final coat? Installation and painting can be separate scopes, but their handoff needs a clear stopping point. A frame can be correctly installed while the room-facing opening remains visibly unfinished.
Buyer checklist 3
Treat exterior trim as part of the exposed opening
Exterior trim and sill details establish the visible transition between window and cladding. Inspect them outdoors for open joints, cracked coatings, loose sections, staining, softened wood, or layers of previous patching. These observations do not identify the cause, but they show where closer project review is needed. Retaining sound trim may preserve familiar proportions. Replacing it can allow cleaner alignment or a different color and projection. The choice depends on condition, appearance, frame placement, and how the window will meet surrounding exterior layers. Ask for a drawing or clearly marked photograph showing which exterior pieces remain and where new joints will appear.
Sash operation belongs in that review. An outswing unit needs usable space beyond the wall, so shutters, screens, railings, planting, walkways, and projecting trim should be checked on site. For a single-sash outward-opening casement window, have the supplier and installer verify clearance for the selected size and location rather than relying on a generic illustration. A deeper exterior reveal can affect handle access, cleaning, and the way trim returns to the frame. Agree on visible trim widths, joint positions, color transitions, and retained components before removal. Otherwise, a seemingly minor interface may be decided hurriedly after the opening is exposed.
Protect visible glass and coordinated sightlines
Rough-opening size and visible glass size are not the same. Frame, sash, mullion, and grille choices can alter the shape and amount of clear glazing even when the outside perimeter changes little. The effect is particularly apparent above a kitchen counter, in a compact room, or where several windows align. Request overall unit dimensions plus an elevation that shows frame and sash proportions. Compare it with straight-on photographs of the existing opening. A heavier visual frame may suit the intended design, but it should be a deliberate choice rather than an unexpected result discovered after installation.
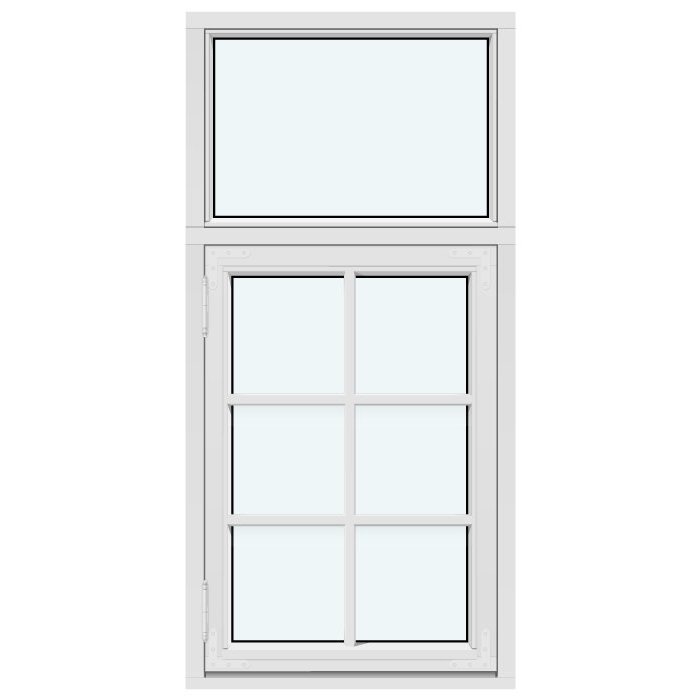
Assemblies with multiple sections need an additional alignment check because their internal divisions become strong visual lines. A combination window can place operable and fixed areas within one composition, but the divisions should be reviewed against countertops, furniture, casing, and neighboring windows. Ask where every horizontal and vertical line lands relative to the finished sill, not merely the framing. When discussing grilles, distinguish decorative bars from glass-dividing bars so the requested appearance is unambiguous. Tape the proposed divisions on a photograph or wall mockup. This makes it easier to compare ventilation needs with the desired view and room proportions before the configuration is released for production.
Buyer checklist 4
Plan shaped and fixed openings from the perimeter inward
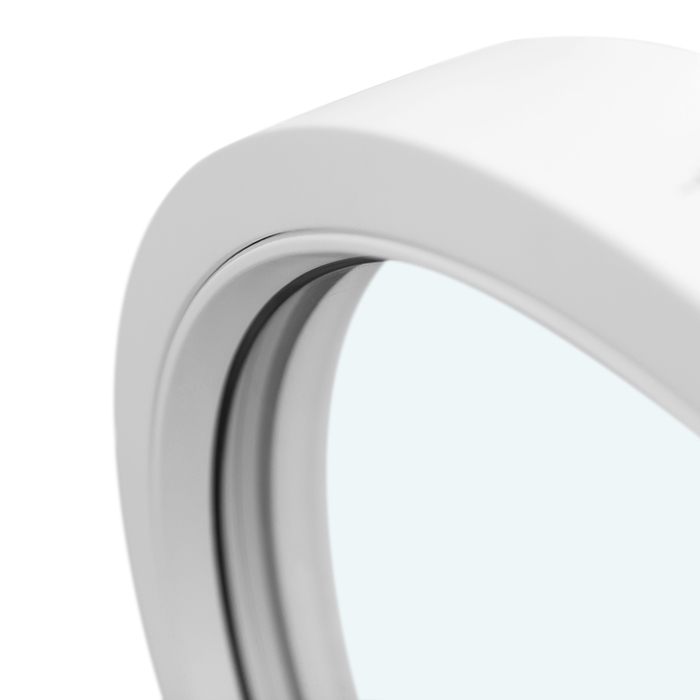
A shaped opening draws attention to every transition around it. A round fixed window may meet a curved plaster return, segmented trim, a squared casing treatment, or no casing. The product name alone does not establish how those surrounding surfaces will be finished. Obtain a project-specific drawing or full-size template before curved material is cut. The installer and finish carpenter should use the same reference for the frame edge, reveal, and outer trim line. Confirm the center point and orientation as well as width and height; a small positional difference can be more conspicuous on a geometric opening than on a conventional rectangle.
The same discipline applies to triangular and angled fixed windows, where sloped joints and acute corners can complicate trim layout. Decide whether casing will follow the shape, terminate into another surface, or be omitted in favor of a finished return. Fixed glazing removes sash-swing conflicts, but cleaning access, window coverings, sill use, and alignment with nearby units still require planning. Review the special shape as part of the entire wall rather than as an isolated feature. The written scope should identify responsibility for templates, curved or angled finish pieces, paint transitions, and exterior perimeter work. Specialized finishing should never be assumed merely because the window itself has been quoted.
Coordinate hardware, screens, and window coverings
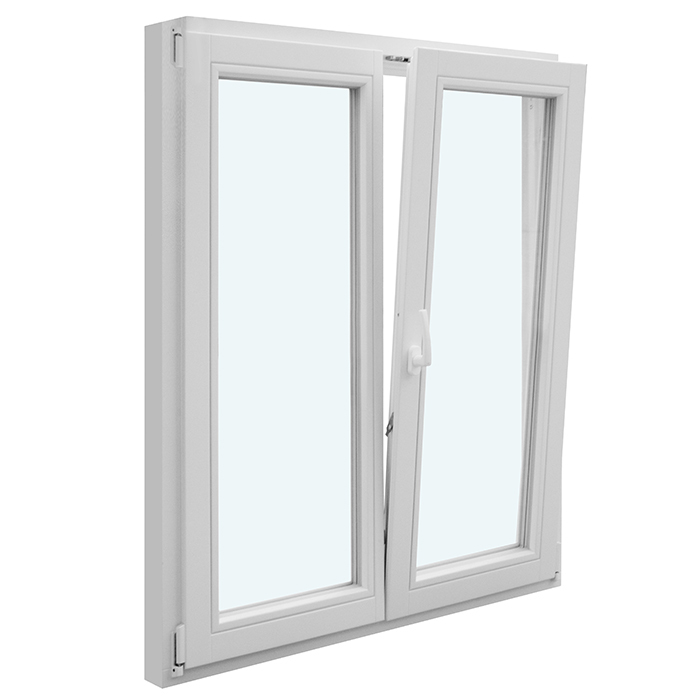
Handles, hinges, sash edges, and removable screens require clearance after the sill, reveal, and casing are complete. This is often missed when measurements are taken with blinds removed and furniture moved away. With a two-sash inward-opening window, review the center meeting area, handle reach, and movement of both sashes in the real room. Identify the sash expected to be used most often and check whether a desk, bed, counter, or deep ledge makes it difficult to reach. The opening should remain practical after the room returns to normal, not only while the installation area is empty.
Plan window coverings before finalizing trim. Inside-mounted shades consume reveal depth and need a suitable mounting surface. Outside-mounted treatments require accessible wall or casing around the opening. A decorative casing profile may leave no flat area for a bracket, while a projecting sill can cause a shade to hang awkwardly. Confirm how screens are installed and removed and whether trim or furnishings obstruct that process. If coverings have already been selected, bring the bracket dimensions or installation instructions to the site review. A small adjustment made before ordering is easier than modifying finished casing or accepting an inconvenient daily operation afterward.
Buyer checklist 5
Use an opening schedule and mockups to prevent surprises
Create an opening schedule that records room name, unit type, operation, measured opening, existing sill condition, proposed reveal finish, casing approach, exterior trim, covering type, and nearby obstructions. Add straight-on and side photographs, and label windows that must match one another. This document helps the supplier, installer, painter, and trim professional recognize dependencies before work begins. It also separates repeated decisions from exceptions, such as a tiled bathroom return, a kitchen opening behind a faucet, or a stairwell window with restricted access. Update the schedule when a decision changes so the order and finish scopes remain consistent.
Simple mockups can resolve questions that drawings leave abstract. Tape the proposed casing outline on the wall, hold a scrap board at the expected sill projection, and use cardboard to represent sash movement. For a fixed window, mark the visible frame perimeter and compare its sightlines with neighboring operable units. Review the mockup from normal indoor and outdoor viewpoints, not only from directly in front of the opening. Record the accepted arrangement with dated photographs or an approved sketch before ordering. Site adjustments may still be necessary, but the team will have a shared visual objective instead of relying on separate memories of a verbal conversation.
Convert the quote into a complete work plan
A useful quote separates window supply from work on the opening. Ask whether it includes removal, disposal, protection, frame installation, perimeter sealing, interface insulation, reveal repair, sill work, interior casing, exterior trim, relevant exterior transition work, caulking, and paint. For every exclusion, name the responsible party and expected sequence. Also ask how concealed deterioration or an irregular opening will be documented after removal, how additional work will be approved, and how the opening will be protected while a decision is pending. This process does not predict unknown conditions; it establishes how they will be handled without confusing an installed frame with a completed room finish.
Before approval, review dimensions, handing, operation, color, frame position, finish details, and trim responsibility together. An outswing exterior door provides a useful comparison: swing direction affects trim, threshold transitions, railings, and furnishings, so the named configuration is only the beginning of project planning. Obtain project-specific details instead of inferring unlisted features from a title. Bloomcabin states a 5-year warranty for windows and doors. Delivery is stated as 4–6 weeks, subject to order confirmation. Keep those commercial terms separate from the construction schedule, which must also account for measurement approval, opening conditions, finish trades, and the confirmed arrival of the ordered unit.
Common questions
Can I keep my existing interior window trim?
It may be possible when the trim is sound, compatible with the new frame position, and either able to remain or be removed without unacceptable damage. Ask whether casing will stay, be carefully reused, or be replaced. Confirm responsibility for patching, sealing, nail holes, paint preparation, and the final coat in writing.
Will a replacement window make the interior sill smaller?
It can. The result depends on frame dimensions, the frame’s position within the wall, and whether the existing sill remains. The ledge may become deeper, shallower, or require a new profile. Request a cross-section and test the proposed projection against sash movement, handle access, shades, curtains, and normal sill use.
What is the difference between a reveal and casing?
The reveal is the return surface running from the wall face to the window frame. Casing is applied trim around the opening, commonly used to cover the wall-to-jamb joint. An opening may use both, or it may have finished returns with little or no casing. Their dimensions and installation sequence should be coordinated.
Should exterior trim always be replaced with the window?
No. Sound trim that fits the proposed frame position and appearance may sometimes remain. Damaged, incompatible, or poorly aligned trim may warrant replacement. Base the decision on an exterior inspection and a clear frame-to-cladding detail. Ask specifically whether removal, new trim, sealing, coating, and disposal are included in the quoted work.
When is a broader opening renovation worth considering?
Consider it when surrounding finishes or old frame components are deteriorated, the opening requires correction, trim is being redesigned, or the intended frame position cannot be achieved within the retained assembly. A limited replacement may better preserve sound, valued finishes. Compare finished appearance, access, disruption, and repair responsibilities rather than removal scope alone.
Next steps
A successful replacement treats the complete opening as part of the buying decision. Start with sash operation, establish where the frame will sit, and trace the consequences for reveal depth, sill projection, casing, exterior trim, glass area, hardware, and coverings. Record existing conditions, mock up prominent proportions, and assign every finish task in the written scope. This allows useful details to be preserved, intentional changes to be approved, and visible finish work to be planned before the old window exposes the opening’s unknowns.
