
Wood Window Maintenance: Cleaning, Recoating and Long-Term Care
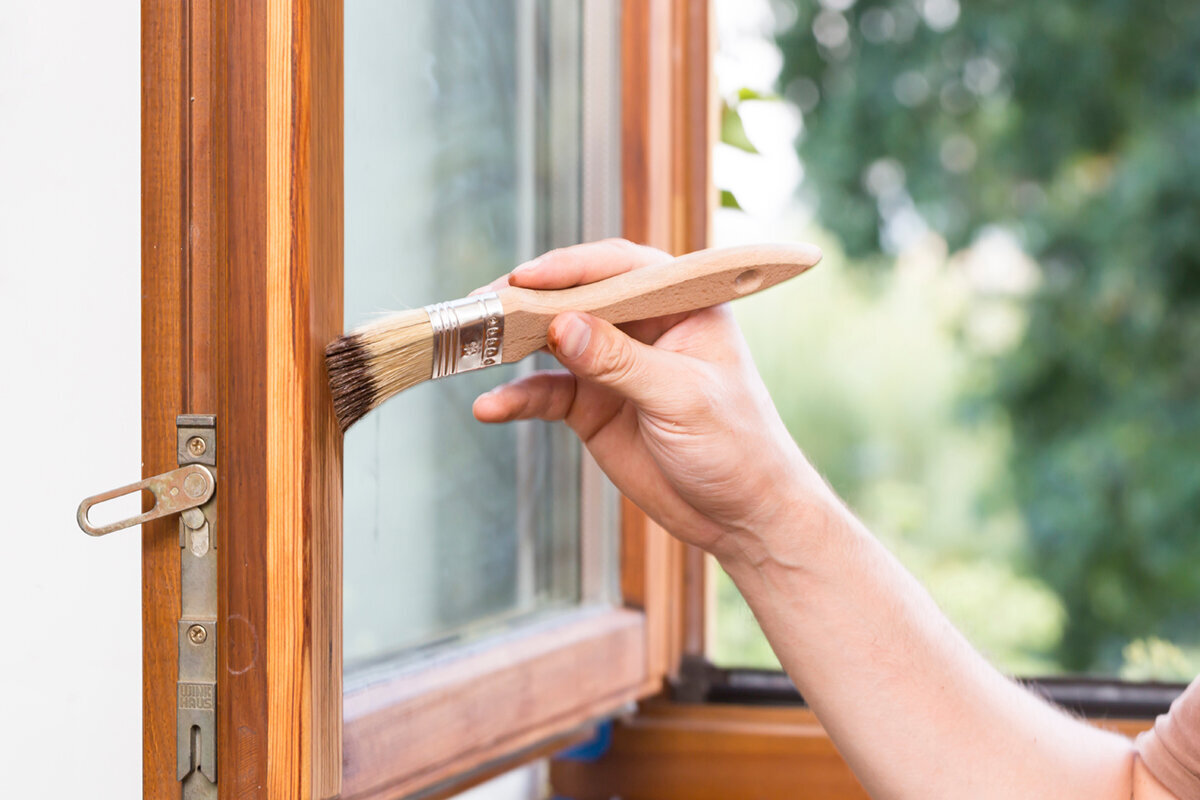
Wood window care guide
A wood window can still open smoothly while its finish is beginning to need attention, or look weathered while the underlying wood remains sound. Begin maintenance by operating every sash or panel rather than choosing a paint color. Open, close, latch, and inspect each window from indoors and, where safely accessible, outside. Note where water collects, where the finish has dulled, and whether a lower rail or exposed edge receives more weather than the surrounding surfaces. This first survey separates routine cleaning and touch-up from work that needs closer assessment. Long-term care is not about recoating on one universal calendar. It is about identifying small changes before bare wood, trapped moisture, damaged joints, or difficult operation create a larger repair. Dated photographs and brief notes make those changes easier to judge.
Begin with operation and a whole-window survey
Choose a dry day with good daylight and inspect one elevation at a time. Open every operable sash through its normal range, then close and latch it. Listen for rubbing, feel for resistance, and look for coating buildup at contact points. Examine interior and exterior faces, bottom edges, corners, glazing perimeters, sills, screens, and frame-to-wall transitions. A fixed window has fewer moving interfaces, but its finish, glazing perimeter, and surrounding joints still need attention. Take one wide photograph showing the location and one close-up of each concern. This record helps distinguish an old mark from deterioration that is actively changing.
Sort observations into cleaning, finish care, operation, and possible water management. Dust, pollen, insect residue, and surface film usually belong to cleaning. Dull color, checking, or an exposed edge belongs to finish care. Sticking, loose fasteners, and difficult latching belong to operation. Soft fibers, recurring stains, persistent dampness, or failure concentrated around one joint calls for investigation before repainting. Do not assume the coating caused the problem. Roof runoff, drainage, exterior interfaces, vegetation, condensation, or surrounding wall conditions may contribute. The goal is a prioritized work scope based on the whole opening, not a cosmetic judgment based on its most visible surface.
Clean without damaging the finish
Routine washing removes contaminants that can retain moisture and conceal small defects. Use a soft cloth or brush, clean water, and a mild cleaner suitable for the existing finish, following product and window-supplier instructions. Start with cleaner surfaces, rinse away residue, and avoid letting cleaner dry in corners. Abrasive pads, harsh solvents, pressure washing, and sharp tools can cut the coating or force water into joints. Clean the glass separately and do not leave concentrated glass cleaner on wood, seals, or hardware. A gentle process may take longer, but it preserves the surface that you need to evaluate after washing.
Pay particular attention to horizontal ledges, lower sash edges, and transitions where debris collects. On a single-sash outward-opening casement window, clean accessible exterior-facing edges only while the sash is safely supported in its normal operating position. Do not force it farther open to reach a concealed area. Remove loose material first with a soft vacuum attachment or dry brush, then wipe, rinse, and dry sufficiently for inspection. If grime repeatedly returns to one location, investigate whether it comes from splashback, roof runoff, nearby planting, or an obstructed drainage route. Correcting the source is more useful than repeatedly scrubbing the symptom.
Inspect the whole opening
Read the condition of the existing finish
A finish is easiest to maintain while it remains continuous. Look for fading, loss of sheen, chalky residue, fine checking, peeling, blisters, open end grain, and wear where sash and frame meet. Location matters as much as appearance. General dulling on an exposed elevation may indicate an approaching maintenance coat, while one sharply defined patch may result from abrasion or localized wetting. On a clean, dry surface, lightly feel for roughness, lifted edges, or a change in texture. Do not scrape sound coating merely to test it. The immediate question is whether the finish remains intact, is becoming thin, or has stopped protecting the wood consistently.
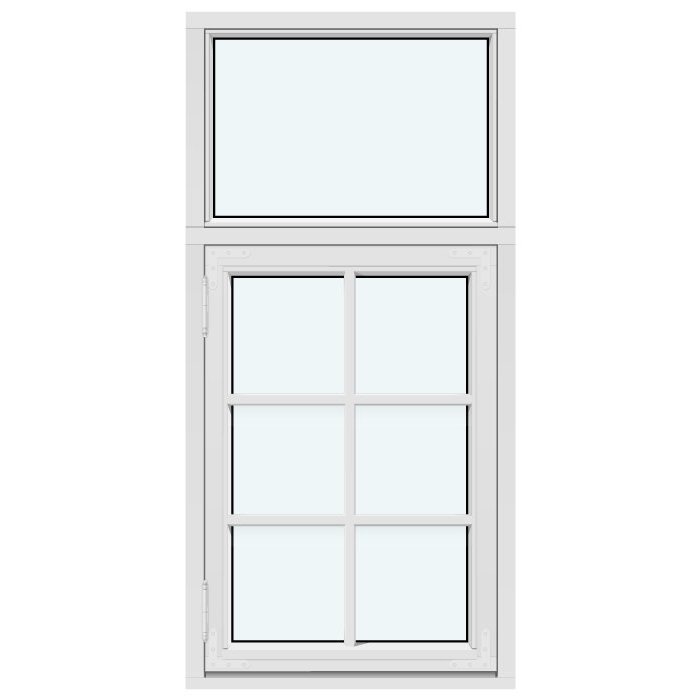
Color and detailing influence what you notice. Dark colors may make fading conspicuous, while pale finishes readily show grime and water marks. Assemblies with multiple parts also create more edges to inspect. On a Kombi outward-opening casement window, assess each sash, meeting area, exterior corner, and fixed-pane perimeter rather than judging the assembly by its broadest face. If bars are present, determine whether they are decorative bars or glass-dividing bars before planning work around their joints. One damaged seam may support a targeted repair; checking across several faces suggests a broader recoating discussion.
Match the treatment to the condition
Localized touch-up can be appropriate when the cause is understood, the surrounding finish remains sound, and preparation can blend the repair without leaving a raised edge that collects water. Partial recoating may suit one heavily exposed face if the coating system permits it and adjacent surfaces remain intact. A broader refinishing scope may be more coherent when failure is widespread or previous layers no longer adhere reliably. These are alternatives, not automatic stages. Compare access, coating condition, color matching, and the effort required to prepare corners, lower rails, and detailed edges before choosing the smallest credible scope.
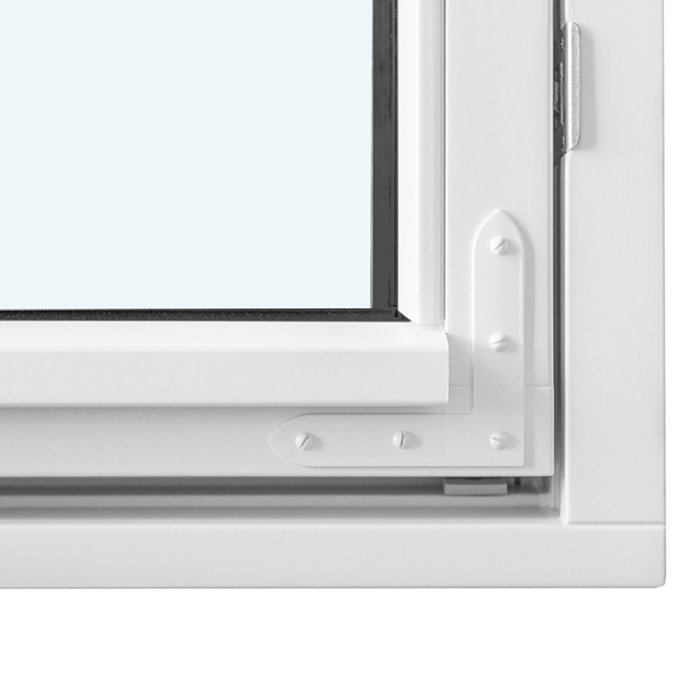
Before proceeding, identify the existing finish and ask whether the proposed coating is compatible. Confirm cleaning, drying, surface preparation, treatment of bare areas, and acceptable application conditions. Ask a contractor how loose edges will be feathered, how glass and hardware will be protected, and whether end grain and lower rails are included. With a historic-style two-sash outward-opening casement window, distinguish routine finish care from work that changes visible detailing. A new coating applied over contamination, loose layers, or an unresolved moisture source may improve appearance briefly without correcting the reason the surface failed.
Prepare surfaces with a controlled sequence
Effective preparation means controlled removal rather than indiscriminate stripping. Clean first and allow the window to dry as required by the selected finish system. Carefully remove material that is already loose, soften sharp transitions, and treat minor defects with products compatible with the planned coating. Protect glazing, seals, nearby cladding, and hardware from dust and finish. If the history of an older coating is unknown, pause before extensive sanding, scraping, or stripping and obtain qualified advice about evaluation and preparation. Managing uncertainty before disturbing an existing layer is both a practical safety measure and a way to avoid damaging sound material unnecessarily.
Work in manageable areas so preparation does not leave exposed wood unattended. Open joints, soft fibers, damaged end grain, or repeated failure at a sill can indicate a repair need beyond recoating. A shape such as a half-round fixed window may require patient preparation around the curved perimeter, particularly where access is difficult. Keep coatings out of intended drainage routes and avoid heavy buildup where components must move, seal, or close. The objective is a clean, stable, evenly prepared substrate that suits the selected finish—not the thickest possible coating layer or the removal of every sound previous layer.
Protect hardware and normal operation
Wood-window care includes function as well as appearance. Once the unit is clean and dry, inspect hinges, stays, pivots, handles, fasteners, and latch engagement for looseness, corrosion, rubbing, or wear. Follow the hardware maker’s directions for cleaning, adjustment, and lubrication because an unsuitable product can attract dirt or interfere with operation. Do not coat moving hardware, weatherstripping, or contact surfaces merely to create a uniform appearance. Difficult closing may reflect seasonal wood movement, finish buildup, debris, hardware wear, or frame alignment. Forcing the sash can turn a serviceable adjustment into damaged hardware or wood.
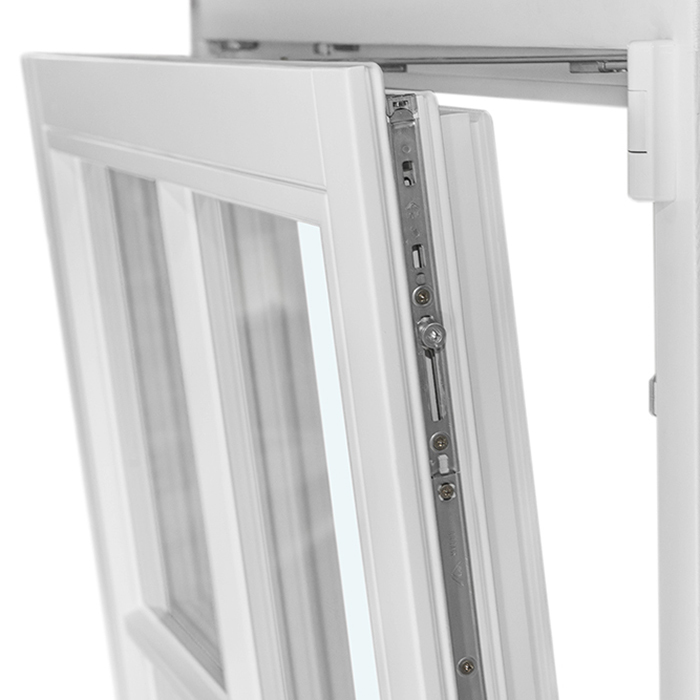
Opening style determines which interfaces need attention. An outward-opening pivot window has pivot points and movement paths that differ from those of a side-hinged casement. Observe whether the sash clears the frame evenly and whether the latch engages without lifting, twisting, or pushing the sash into place. Record whether sticking occurs after rain, during a particular season, or continuously; that context assists a service professional. Do not plane, cut, or aggressively sand a sash after one episode of rubbing. First eliminate debris, loose hardware, and localized coating buildup, then assess whether a wider alignment or moisture issue is present.
Inspect the whole opening
Use water clues as diagnostic evidence
Exterior window surfaces will get wet; the question is whether they drain and dry as intended. After rain, observe safely for standing water, streaks repeatedly beginning at one joint, and unusually wet lower corners. Indoors, record recurring stains, peeling finish, musty odors, swollen trim, or notable condensation patterns. None of these signs identifies a cause by itself, but each is a reason to delay cosmetic coating until the water path is understood. Include nearby gutters, roof runoff, landscaping, exterior sealant interfaces, and wall conditions in the survey rather than assuming the window is the sole source.
Large door openings need a similarly broad inspection because thresholds, traffic, and exposed lower edges have distinct wear patterns. For single-panel outswing patio doors, examine the door leaf, bottom edge, threshold, hinges, latch, jambs, and transitions to adjacent finishes. Remove dirt and leaves without blocking or modifying intended drainage features. Wear confined to the bottom edge suggests a different investigation from staining above the head or down one jamb. If water entry is suspected, have a qualified window, door, or building-envelope professional assess both the assembly and its surroundings before refinishing conceals useful evidence.
Plan around exposure, weather, and access
No universal recoating interval fits every wood window. Orientation, shade, roof protection, local weather, finish color, nearby vegetation, previous cleaning, and the specific coating system all affect visible aging. Make inspection part of a recurring home-maintenance routine and compare notes rather than relying on a calendar alone. Wash when surfaces can dry, and apply finish only within the temperature, humidity, drying, and weather limits stated by its manufacturer. Allow enough time for cleaning, preparation, application, and curing. Starting at the end of a short workday or before unsettled weather can compromise an otherwise sensible plan.
Access should shape the project scope. Ground-floor windows may be practical for a homeowner to observe and wash, while upper-story, roof-adjacent, or hard-to-reach exterior faces may need professional access planning. A pivoting roof window should be maintained only through its intended operation and access arrangement; do not improvise by leaning out or working from an unprotected roof position. When hiring assistance, grouping windows by elevation can make inspection and preparation more coherent. Label each unit by orientation and condition so the most exposed openings receive attention first instead of applying the same work to every window regardless of need.
Separate maintenance, service, and replacement
Maintenance does not automatically require replacement, and a fresh finish cannot correct every defect. Finish care may be suitable when the wood is sound, the issue is superficial, and operation remains reliable. Service is a separate scope when hardware, alignment, glazing interfaces, or localized joints need expert attention. Replacement becomes an alternative when condition, desired operation, appearance, access, and cumulative repair burden no longer match the project goals. Keep the choices separate while gathering assessments. Ask whether a focused repair remains credible, but also consider whether repeated patches are masking a larger condition that deserves a more comprehensive response.
If replacement is being considered, document what should remain and what should change. A two-sash inward-opening window describes an opening direction and sash arrangement, but suitability still depends on measured conditions, surrounding construction, glazing choices, finish, and professional project review. Ask which exterior surfaces will remain accessible for maintenance, how finishes should be cared for, and who handles service questions. Bloomcabin windows and doors carry a 5-year warranty. Delivery is typically 4–6 weeks, subject to order confirmation. These business details do not replace site assessment or establish that one configuration is appropriate for every opening.
Create a useful maintenance record
A maintenance log need not be complicated. Label every opening by room or exterior elevation, note its operating style and finish color, and save dated photographs. Record cleaning dates, materials used, touch-ups, operational changes, and professional service. At the next review, you can determine whether a dull patch stabilized after washing, a repaired edge remained sound, or deterioration returned at the same lower corner. A record also prevents the house’s most weathered window from defining the scope for all others. Contractors can compare present conditions with documented history instead of relying on one visit and an uncertain recollection.
Before requesting service, assemble overall photographs, close-ups, approximate opening dimensions, operating direction, finish condition, access constraints, and the result you want. Ask who will assess the substrate, which faces and edges are included, how existing coatings will be prepared, how nearby materials will be protected, and what should be monitored afterward. For a combination window, clearly identify fixed and operable sections so no sash or perimeter is overlooked. This turns care into a repeatable process: observe the complete opening, clean appropriately, select the correct scope, document the work, and return before small defects become neglected repairs.
Frequently asked questions
How often should wood windows be cleaned?
Clean when pollen, dust, insects, salt residue, or visible grime accumulates, and inspect the finish at the same time. Exposure matters more than a universal schedule; sheltered windows may stay clean longer than units near trees or runoff. Gentle washing also reveals worn edges, finish cracks, and debris that needs removal.
Can I recoat only the weathered side of a wood window?
Possibly, if the other surfaces remain sound and the coating system supports partial recoating. First identify why that face weathered faster and consider color matching, edge preparation, and access. If checking or adhesion failure appears across several surfaces, a broader scope may be more coherent than a series of isolated patches.
Should I paint over small cracks in the finish?
Not before the area is cleaned, dried, and assessed. Fine checking may signal routine finish maintenance, but lifted coating, open joints, soft wood, or recurring staining needs closer investigation. Prepare the surface according to the selected system. Painting over an unresolved water path can conceal the evidence without correcting the cause.
What should I do when a wood window starts sticking?
Stop forcing it and record where and when it binds. Remove debris, look for localized finish buildup or loose hardware, and follow the unit’s approved hardware-care instructions. Persistent rubbing, difficult latching, or a change associated with wet weather should be assessed before anyone planes, cuts, or aggressively sands the sash.
Does every maintenance task require a professional?
No. Safely accessible cleaning and visual inspection may be reasonable homeowner tasks when appropriate products are used. Professional help is prudent for elevated access, extensive coating removal, uncertain older finishes, damaged or soft wood, recurring moisture evidence, glazing concerns, and operating problems that basic cleaning or approved adjustment does not resolve.
What to do next
Effective wood-window maintenance begins with observation rather than a can of coating. Operate each unit, clean it gently, examine exposed edges and finish continuity, protect hardware, and investigate recurring water clues. Then match the work to the evidence: washing, localized repair, planned recoating, specialist service, and replacement are different scopes. Keep dated notes and photographs, especially for exposed elevations and detailed assemblies. If the existing coating, safe access method, substrate condition, or source of dampness is uncertain, pause and seek qualified advice before covering the evidence. A disciplined routine preserves function, appearance, and informed choices for future work.
