








Bloomcabin T-Model T-Shaped Orangery Greenhouse
T-Model Greenhouse — a T-shaped orangery for growing and outdoor living
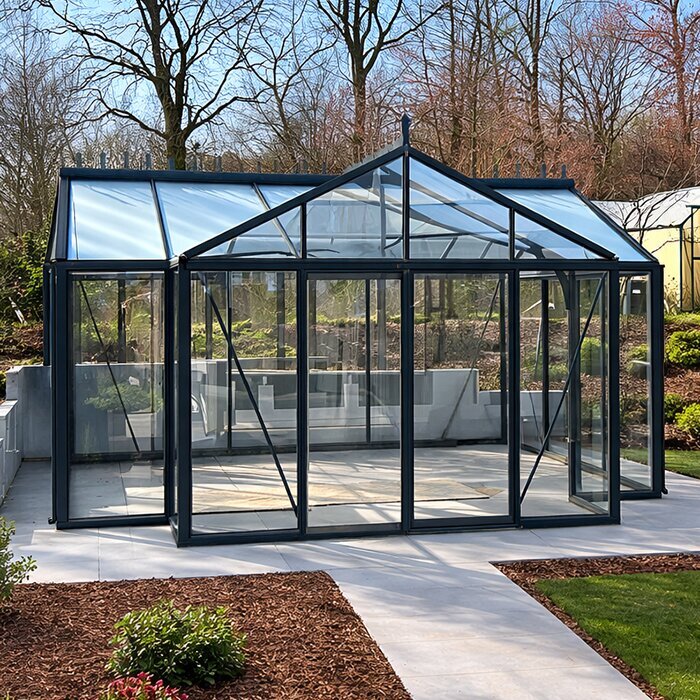
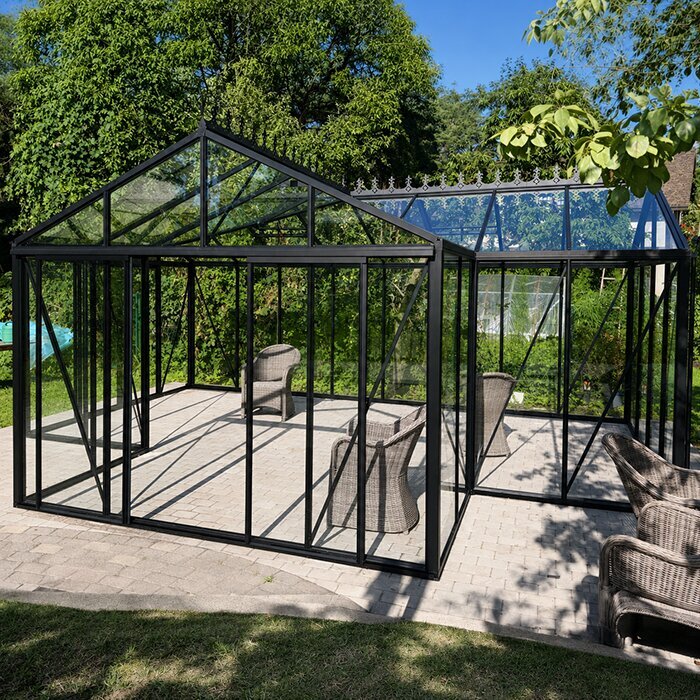
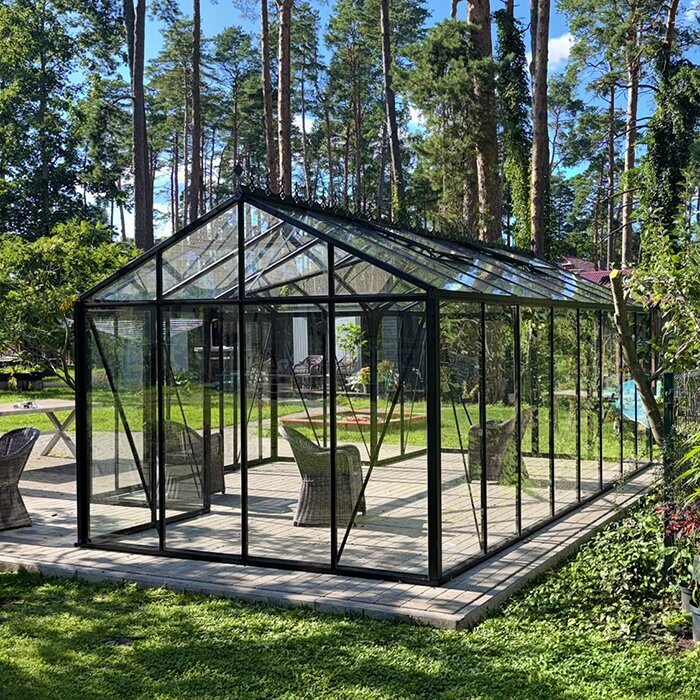
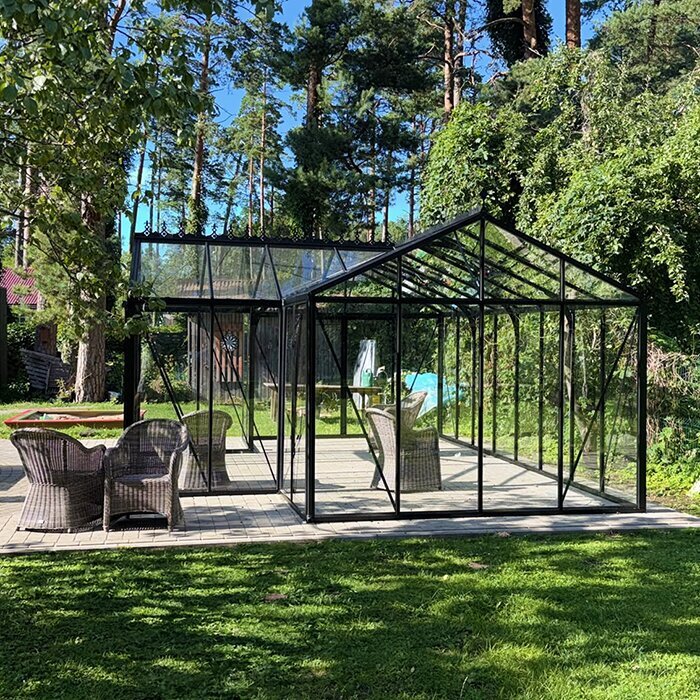
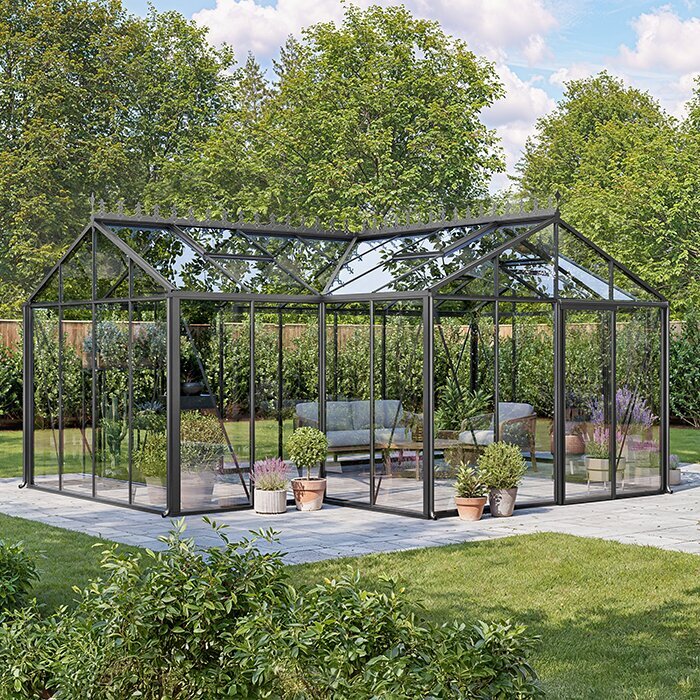
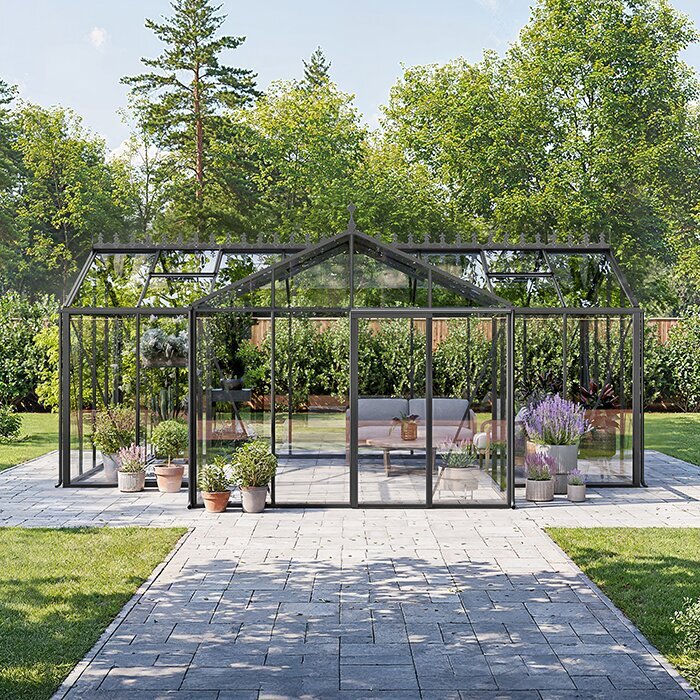
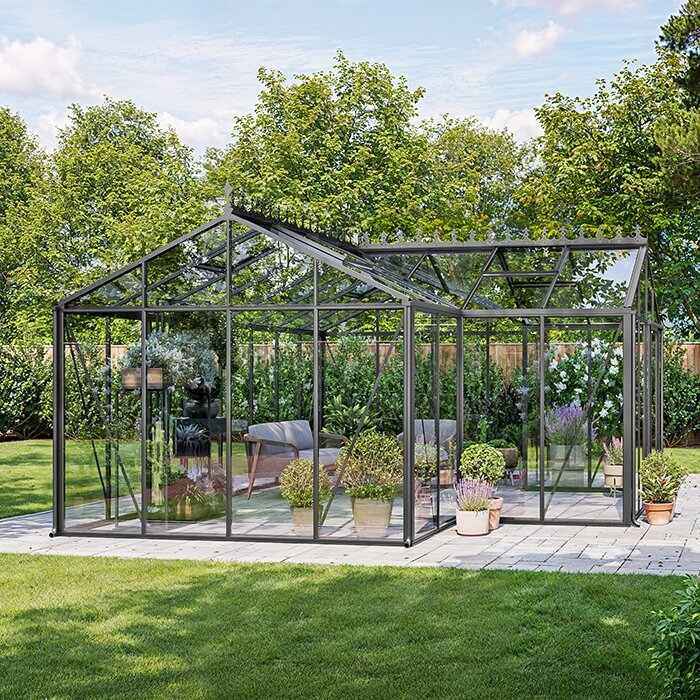
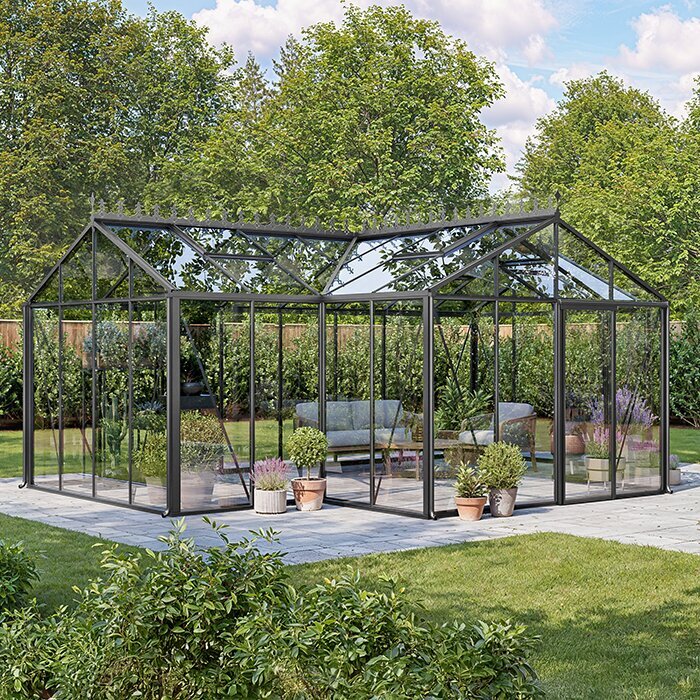
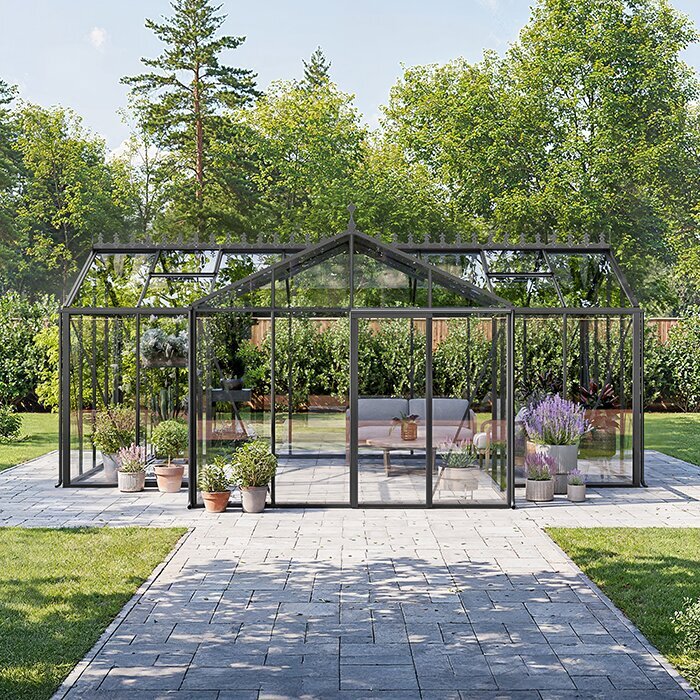
The Bloomcabin T-Model Greenhouse combines a long main section with a projecting cross-wing. This layout lets you separate crop growing, dining, relaxing, or creative work while keeping everything connected within one spacious glass structure.
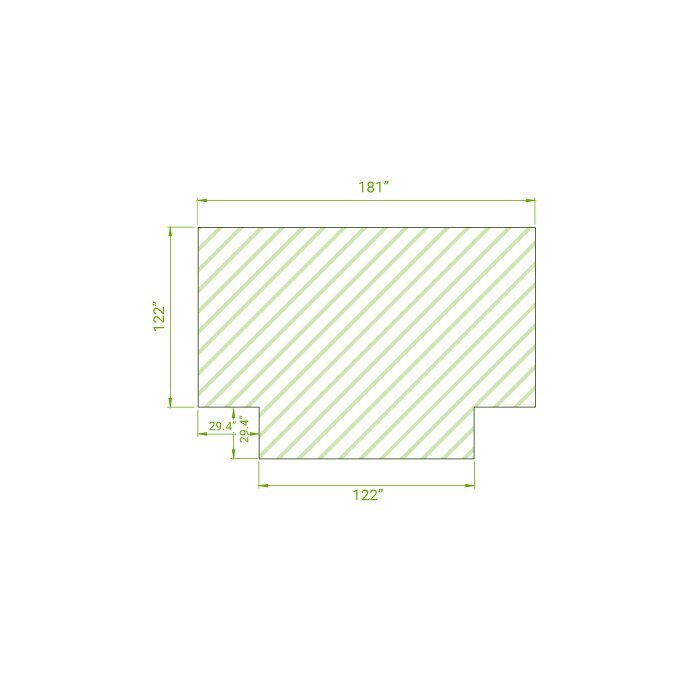
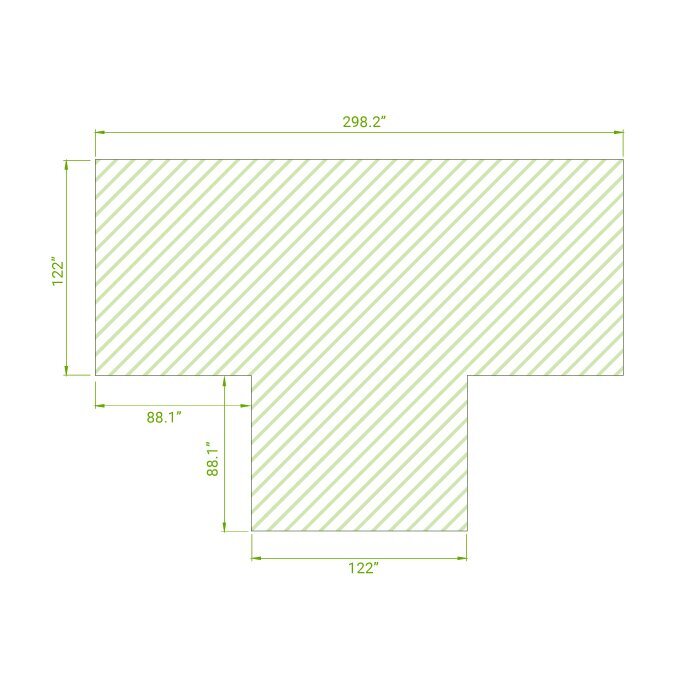
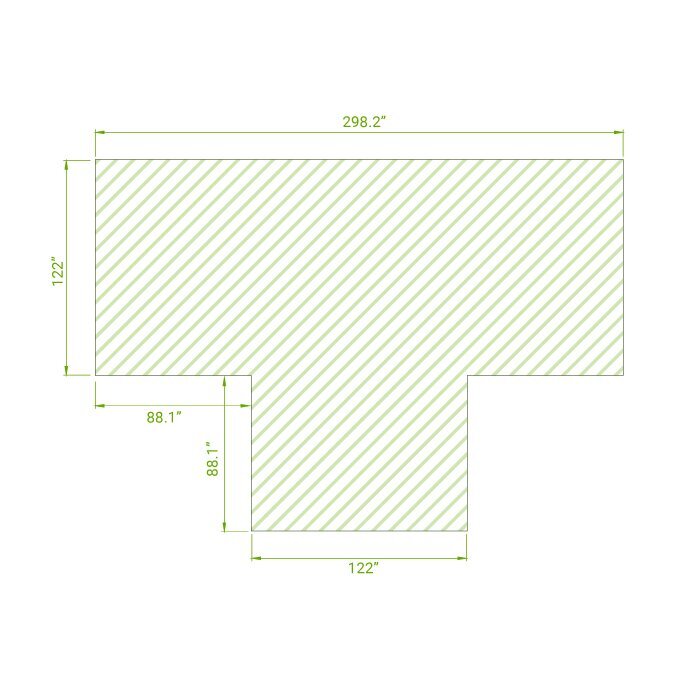
Three configurations are available, with approximately 178 to 323 sq ft of floor area. Compare the full length and cross-wing position of each option with your site and intended layout.
Before ordering, decide how you will use the main run and cross-wing. Check the selected footprint against sun exposure, prevailing weather, property access, HOA rules, permit and setback requirements, utilities, drainage, and foundation conditions. A crop-focused greenhouse needs a different interior plan and equipment from an orangery designed for people to spend time in. Bloomcabin USA.
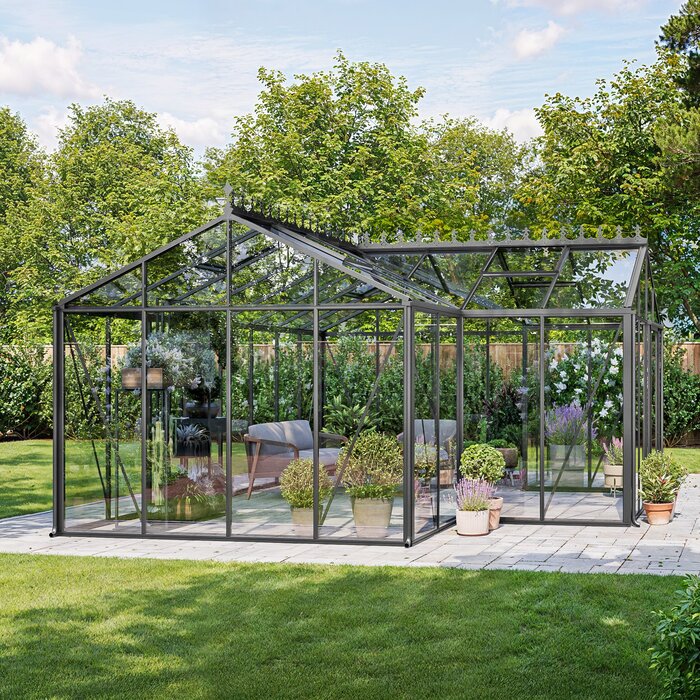
The signature T-shaped plan
A cross-wing creates two connected areas within one greenhouse
A conventional rectangular greenhouse directs movement along one main path. The T-Model adds a projecting cross-wing and a central junction without using solid interior partitions. Growing areas, seating, and entrances remain visually connected while serving distinct purposes.
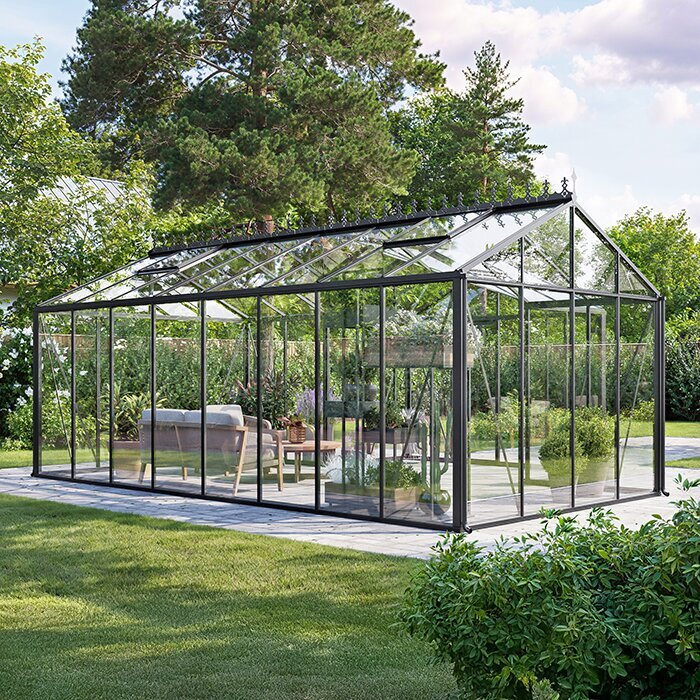
The main run is suited to orderly rows of crops, propagation benches, containers, and taller specimens. The wing can hold a dining table, lounge seating, a display collection, or a workspace. Assigning these roles before choosing a configuration helps determine whether plants, furnishings, and clear passageways will fit together comfortably.
The projecting wing also gives the greenhouse a strong focal point. It can face the garden, frame a favorite view, and provide a natural place to pause, while watering, pruning, and tray handling continue in the longer growing section.
Three size configurations
Choose a footprint for your site, plant collection, and living area
Aluminum and safety glass
High-grade aluminum frame with 4 mm tempered safety glass
Tall, open interior
Space for taller plants without blocking access to doors or roof vents
Color, access, and ventilation features
RAL color choices, roof vents, single or double sliding doors, and an optional chimney outlet
Plan each part of the T
Give the main greenhouse and cross-wing distinct roles
Growing zone
Use the main run for crops, continuous benches, propagation equipment, and plant collections arranged in a logical care sequence. Group plants with similar watering and temperature needs, and keep frequently used supplies close to the benches they serve.
Position vigorous vines and tall vegetables where mature growth will not shade lower plants, narrow a doorway, interfere with a roof vent, or obstruct the central junction. Plan for mature plant size rather than seedling size.
Set durable work surfaces, tool storage, and irrigation equipment near the growing areas. Keeping soil handling and repotting in the main run helps prevent debris from spreading into the furnished cross-wing.
Orangery and living area
Use the projecting wing as the visual center, and decide which outdoor view you want to emphasize from the main seating position. Orienting a table or chairs toward that view creates a more intentional connection with the garden.
Dining furniture, lounge chairs, a reading corner, or a studio setup can sit under glass while planted edges soften the boundary between work and leisure. Choose furnishings that tolerate the humidity, condensation, bright light, and temperature variation typical of a glazed garden structure.
Do not crowd furnishings against every glazed edge. Preserve enough perimeter access to clean the glass, inspect lower frame areas, and move containers without lifting them across occupied seating.
Product construction
High-grade aluminum, 4 mm tempered safety glass, and integrated drainage
The T-Model pairs a high-grade aluminum frame with 4 mm tempered safety glass. When reviewing a configuration, use the final product drawing to plot the overall dimensions, cross-wing orientation, ridge line, and door openings accurately on your site plan.
Door sections can be configured with single or double sliding doors. Roof vents provide high-level ventilation, while integrated rainwater drainage collects roof runoff. The supplied aluminum base is part of the greenhouse system, but the foundation beneath it must still be level, stable, and suitable for the site.
The greenhouse is rated for winds up to 67 mph and a snow load of 43 lb/ft². Proper anchoring, careful assembly, and a level foundation suited to the site are essential to the completed installation.
Product facts
T-Model Greenhouse specifications at a glance
Sizes
Three configurations
178–323 sq ft (16.5–30.0 m²)
Width
Approx. 10 ft 2 in / 310 cm
Listed overall width
Height
Ridge: 105 in / 267 cm
Door: 73 in / 185 cm
Glazing
4 mm tempered safety glass
Included
Doors
Single or double sliding doors
Configuration varies by door section
Built-in features
Roof vents, rain gutters, aluminum base
Optional chimney outlet; 12-year structural warranty
Four ways to use it
What can you do with a T-shaped greenhouse?
01
Organized crop production
Organize the long section by stage of work—for example, propagation, active growth, and harvest—so supplies and plant movement follow a clear sequence. Use the wing as temporary sorting space when rotating containers or preparing for a larger task.
02
Dining and gatherings
Place dining or conversation furniture in the cross-wing to separate it from potting activity while preserving views of the plants. Movable pieces let the area shift between everyday seating, plant display, and larger gatherings without altering the growing benches.
03
Creative studio
The glazed enclosure can support painting, reading, photography, or other quiet work that benefits from abundant natural light. Materials and equipment should be selected and stored with moisture, direct sun, and daily temperature changes in mind.
04
Collection greenhouse
Use varied heights, specimen containers, climbers, and flowering pots to compose views from the wing and exterior. Leave operating clearance at vents and doors, and preserve access for cleaning behind display plants.
Planning for your region and property
Consider the selected footprint in relation to the entire property. Orientation affects sunlight, available shade, views from the house, access to the doors, and where roof runoff can be directed. Record these conditions before foundation work begins so the location supports the way you intend to use the greenhouse.
Hot-summer regions
In areas with intense summer sun, a large glazed orangery can heat up quickly. Study the proposed location at different times of day, including during afternoon exposure, and note whether existing buildings or trees provide useful seasonal shade. The largest configuration may not be the most practical if the additional space cannot be ventilated or shaded effectively.
Before choosing a configuration, assess how much vent and door opening can be used during the hottest periods and whether the site can accommodate compatible shading or powered ventilation. Plan these measures before benches, tall plants, or furnishings restrict installation space or airflow.
Crop areas and occupied areas may need different responses to heat. Some plants tolerate conditions that would make dining or studio use uncomfortable, while tender collections can require protection even when people would prefer open doors. Establish which zone takes priority during the hottest part of the season and position sensitive contents accordingly.
Cold northern states
On sites with freezing conditions, the foundation design should reflect local soil conditions and frost depth. Have a qualified local professional assess excavation, drainage, and support requirements rather than adapting a detail intended for another region.
If winter use is important, first decide whether the goal is frost protection, plant-specific growing conditions, or comfort for people. The optional chimney outlet can be included in a separately designed heating arrangement, but qualified professionals should handle appliance selection, clearances, ventilation, fuel routing, and installation.
Door use also affects winter conditions. Frequently opening an entrance can cause quick temperature changes nearby, so consider placing cold-sensitive plants farther from the busiest route. Decide whether the furnished area will be used occasionally or throughout the season when planning the layout and heating approach.
HOA rules, permits, and setbacks
Because the T-shaped structure has a substantial footprint and a prominent profile, check property requirements using the exact configuration you plan to order. The cross-wing may affect how an HOA or local authority reviews boundary clearance, visibility, and total covered area.
Confirm zoning, setbacks, permit requirements, easements, and HOA design rules in writing where possible. Include the proposed foundation, overall height, door locations, color, utility work, and any heating plans in the information submitted for review.
Review the entire delivery path from the street to the assembly area. Gates, fences, steps, roof overhangs, soft ground, narrow side yards, parked vehicles, and landscaping can complicate component handling. Reserve a clean staging area where the glass, frame, and hardware can be organized without blocking household access.
Plan movement and daily use
Before committing to fixed benches or utility points, map which activities may happen at the same time. Check whether one person can tend crops while another enters, uses the wing, or carries a container through the junction. Conflicts during busy periods are more revealing than an empty-space plan.
Hosting without disrupting plant care
For entertaining, orient the cross-wing toward the most convenient connection to the house, patio, or garden. Position the guest entrance so carrying food and tableware does not require passing through the main growing area, and keep compost, tools, and potting supplies near a separate work route.
If guests usually approach from one side, avoid placing hoses, low planters, or movable trays across that route. Locate frequently used gardening storage nearer the productive run so the furnished portion does not become a passage for equipment.
Lighting can reinforce this organization after sunset: task lighting belongs near benches and work surfaces, while softer lighting can serve seating. Any electrical design must be suitable for the environment and completed in accordance with applicable local requirements.
Moving through the T-shaped layout
Treat the central junction as shared maneuvering space rather than available floor area. It must support turns between the long body, wing, and entrances, including movement with a watering can, tray, chair, or container in hand.
Check the narrowest point along every regular route. Bench corners, projecting foliage, stored bags, and chair backs can gradually reduce a passage that looked adequate when empty. Wall-mounted accessories should not create hazards at shoulder or head height.
Clear routes also make daily plant checks easier. When every growing position can be reached without moving furniture, you are more likely to notice pests, dry pots, blocked drainage, or damaged components before they cause wider problems.
Furniture at real scale
Measure furniture as it will be used, not just by its stored footprint. Dining chairs need room to pull out, lounge chairs may recline, and studio equipment may require working clearance. Leave additional space where people will pass behind someone who is seated.
Use tape, cardboard, or temporary objects to represent benches and furniture on the proposed floor area. Walk the routes while carrying an item comparable to a plant tray or chair. This practical trial is more informative than judging capacity solely from total square footage.
Favor movable planters, modular benches, and freestanding furnishings until the space has been used through changing seasons. The best arrangement may shift as plants mature, sun angles change, or the orangery takes on a different role.
Plan for long-term use
Keep a permanent file with the final drawings, utility locations, care instructions, and installation notes. Make shutoffs, connection points, drainage outlets, and operating hardware accessible so routine service does not require dismantling benches or finished surfaces.
Plan utilities before installation
Identify where water will enter, where excess water can drain, and where lighting or outlets would be genuinely useful. Utility routes should avoid door tracks, foundation fasteners, drainage paths, and places likely to be penetrated later by bench anchors.
Hire qualified local professionals for electrical, plumbing, heating, and other regulated work.
Give each contractor the final greenhouse drawings and foundation layout. Conduits, sleeves, and pipes placed without reference to the plan can emerge under a doorway or conflict with the aluminum base. Photograph utility routes before they are covered and keep the images with the greenhouse records.
Rainwater and drainage
Plan a discharge or collection point for each relevant section of the integrated gutter system. Direct the water away from the foundation edge, walkways, and neighboring property, and avoid locations where runoff could wash soil across a path or create ice near an entrance.
Collected rainwater may be used for irrigation when the storage arrangement and water quality suit the plants. Include a controlled overflow route and a practical way to clean the container. Screens or covers can help keep leaves and debris out of the system.
Inspect outlets during heavy rain to confirm that water moves freely. Fallen leaves, growing vines, and windblown material can obstruct gutters over time, so collection hardware must remain reachable without standing on unstable furnishings.
Maintenance access
Create a simple inspection routine for the glass, roof vents, gutters, sliding doors, seals, visible fasteners, and frame joints. Test moving parts, clear accumulated debris, and investigate leaks or misalignment promptly so small issues do not interfere with access, ventilation, or drainage.
Keep vigorous plants from attaching themselves to moving components or forcing against the glazing. Containers and furniture should be movable enough to expose lower frame areas, door tracks, and drainage points for cleaning.
Clean glass with suitable nonabrasive tools and follow the supplied care guidance for the frame and operating parts. Plan safe access from the ground wherever possible; roof-level work and difficult exterior locations may require appropriate equipment or professional help.
Four-season planning
Plan ventilation, heat, shade, and seasonal comfort
Coordinate roof vents and sliding doors rather than adjusting each opening in isolation. Keep nearby foliage and storage clear, observe where heat lingers in both arms of the T, and change the opening pattern as sun exposure and outdoor conditions shift. Close and secure openings when changing weather requires it.
Heating does not make the T-Model perform like a conventionally insulated room. Plan around conditions in the productive run, central junction, and furnished wing, and keep the doors and roof vents usable for ventilation when heat is operating.
Operate the T-Model according to seasonal priorities. Spring may emphasize propagation and quick ventilation on bright days; summer may require shade management and frequent watering; fall can involve moving tender plants under cover; and winter may focus on frost protection and keeping roof drainage clear. A brief record of temperature patterns, vent settings, and plant response can help guide future adjustments.
Turn daily activities into a floor plan
Choose the configuration by testing what must fit
Separate the contents into fixed essentials and items that can move seasonally. Place entrances, permanent benches, storage, large containers, and occupied furniture first, then trace the routes needed for harvesting, cleaning, moving plants, and serving guests. This shows which configuration provides usable space rather than simply the greatest stated floor area.
Compare the remaining open area with the way the greenhouse will be used on its busiest day. A plan that works for one gardener may become congested when chairs are occupied or containers are awaiting repotting. If essential activities overlap, revise the layout or assess another configuration before ordering.
Check vertical space as well as floor area. Consider hanging plants, climbing supports, lighting, and the operating path of the roof vents. Use the ridge area for taller features without making ventilation, cleaning, or safe movement more difficult.
Site preparation
Plan the site and delivery route carefully
A stable, level foundation is essential for aligning the aluminum frame, tempered glass, roof drainage, and sliding doors. Confirm the finished elevations and squareness before assembly. Even small errors at the base can affect alignment across the long main section and projecting wing.
Designate one area for installation and another protected area for staging components. Unpack, identify, and organize the parts without placing glass where it could be knocked over or mixing hardware with soil and landscaping materials. Keep children, pets, and unrelated foot traffic away from the work area.
The T-Model is supplied as a DIY-friendly kit with instructions, but its scale, glass components, and intersecting roof layout require careful assembly. Read all instructions before starting, follow the specified sequence, use appropriate protective equipment, and line up enough capable helpers for steps that should not be completed alone. Consider experienced installers if the site is complex or you are not comfortable handling a project of this size.
Continue planning with Bloomcabin
Find greenhouse options, product guidance, ordering help, and warranty information
Frequently asked questions
T-Model Greenhouse FAQs
What is a T-Model Greenhouse?
A T-Model combines a long main greenhouse with a projecting cross-wing. The two sections meet at a central junction, making it easier to organize growing and orangery-style living within one connected glass structure.
What door configurations are available?
Door sections use single or double sliding doors depending on the selected configuration. Review the product drawing to confirm each entrance location and ensure a clear approach on your site.
How should I choose among the available configurations?
First eliminate any configuration that does not suit the available footprint, cross-wing orientation, delivery route, or foundation plan. Among the remaining options, compare the usable room for required plants, furnishings, storage, and circulation.
Is total floor area enough to compare the configurations?
No. The position of the cross-wing, doors, central junction, benches, and furnishings determines how much of the floor will be usable for your plan. Compare each product drawing with your intended layout rather than relying on square footage alone.
How can I keep gardening supplies from taking over the cross-wing?
Keep soil, tools, irrigation equipment, and active potting work near the main growing run. Use orderly storage for any supplies kept near the wing, and avoid treating the central junction as overflow space.
Can the cross-wing be used as a plant display instead of a seating area?
Yes. The wing can hold specimen containers, climbers, and flowering pots instead of furniture. Keep operating and cleaning access open around the doors, vents, glazing, and frame components.
Will passive ventilation always be enough in hot weather?
Not necessarily. Roof vents and open sliding doors support airflow, but performance depends on outdoor conditions, sun exposure, and an unobstructed interior path. Plan compatible shading or powered ventilation when passive airflow will not meet the needs of the plants and occupants.
Does the optional chimney outlet include a heating system?
No. The outlet is an option for a heating system designed separately. A qualified professional should determine the equipment, capacity, installation method, ventilation, and required clearances for your location and intended use.
Where can I review the warranty terms? Use the Warranty information link above for coverage details and conditions.
Bloomcabin T-Model T-Shaped Greenhouse
Combine productive growing and orangery-style living in one T-shaped greenhouse
Start with how you will use each part of the T: what you plan to grow, how the cross-wing will be furnished, which routes must remain clear, and when the greenhouse will be used during the year. Then confirm that the selected configuration fits the property and installation plan before ordering.
Before ordering
✓ Select the configuration using a scaled interior and site plan
✓ Assign clear roles to the main run, central junction, and cross-wing
✓ Verify approvals, setbacks, delivery access, and component staging space
✓ Arrange for a stable, level foundation suited to the site
✓ Confirm the RAL color, door arrangement, and ventilation approach
✓ Plan drainage, utilities, installation help, and any professional heating work
