








T-Shaped Orangery for Masonry Bases
T-Shaped Orangery on a Masonry Base: Greenhouse Growing Space Meets a Backyard Garden Room
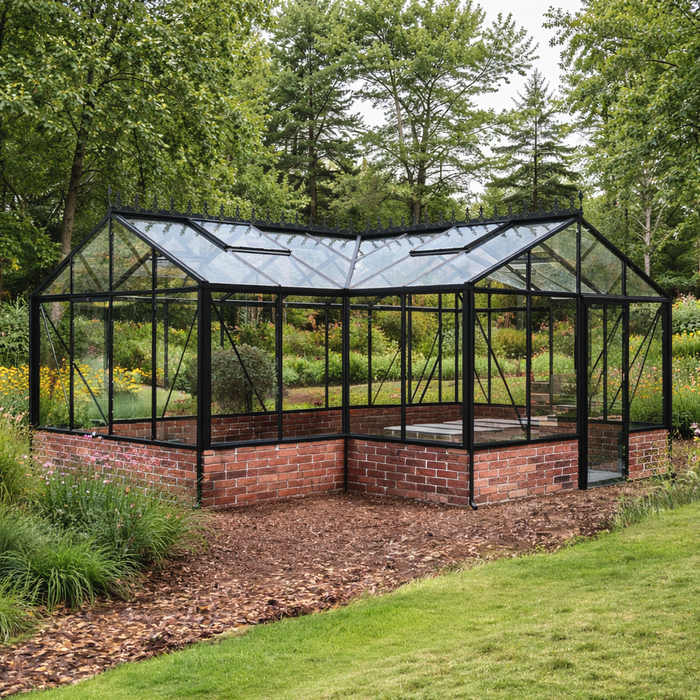
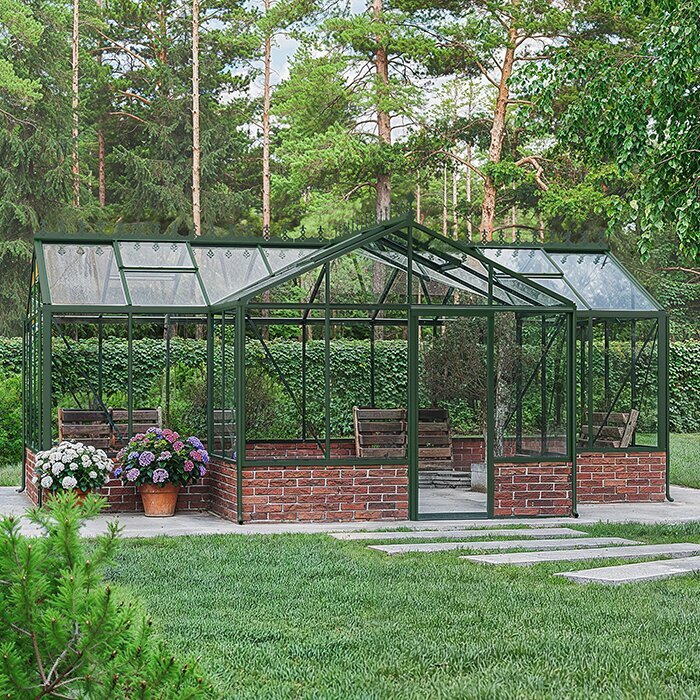
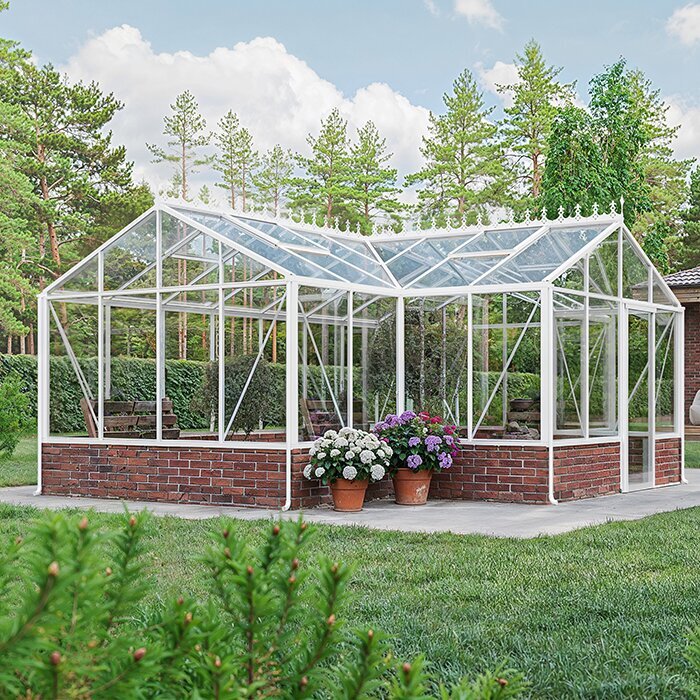
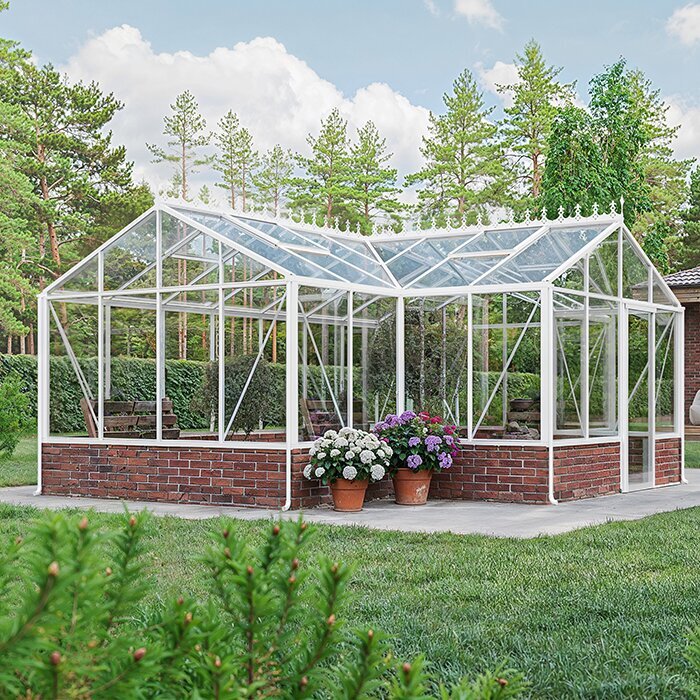
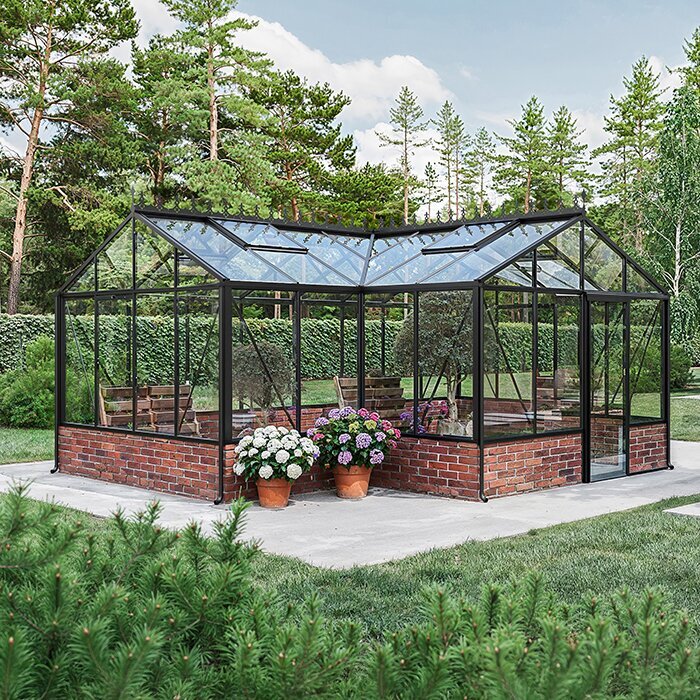
Our T-Shaped Orangery on a Masonry Base combines a freestanding aluminum-and-glass structure with a low masonry base built from brick, stone, concrete block, concrete, or another suitable material.
Each configuration has its own overall dimensions, door arrangement, and usable floor area. Compare the detailed specifications with the confirmed drawing before selecting a size and planning the masonry base.
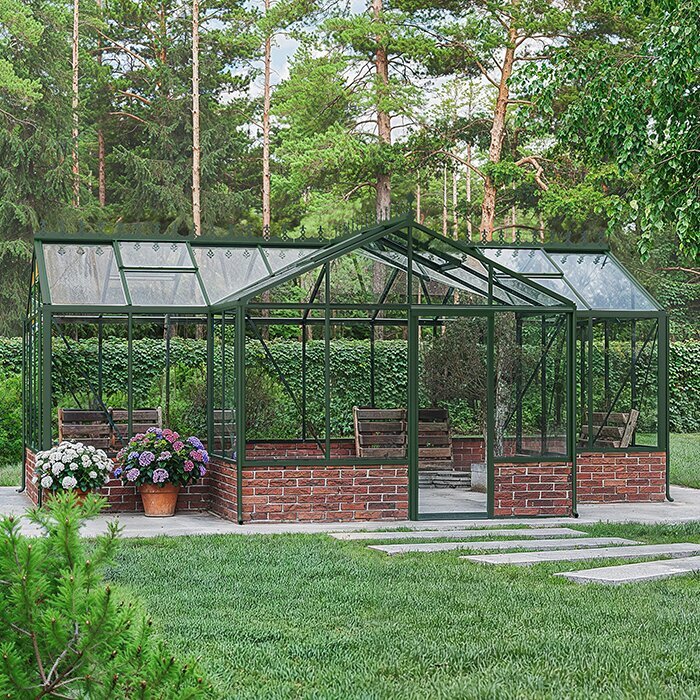
Within the T-shaped footprint, the long stem can serve as the main growing area while the cross-wing provides space for seating, dining, propagation, or plant displays without requiring interior partition walls. Explore Bloomcabin USA.
Designed around distinct activity zones
The cross-wing changes how the greenhouse can be used every day
Organize the stem around recurring plant-care tasks, then use the cross-wing for activities that benefit from a broader side-to-side layout.
Because no partition separates the zones, temperature and humidity are shared; furnishings and plant choices should suit the same greenhouse environment.
Before choosing a configuration, sketch the intended use of each arm of the T and compare that plan with the usable floor area and door arrangement.
T-Model essentials
Core T-Model features at a glance
These construction and layout details distinguish the masonry-base T-Model.
Two-zone layout
Dedicated areas for growing and relaxing
Custom masonry
Brick, stone, block, or concrete base
4 mm safety glass
Clear tempered glazing
Roof ventilation
Roof vents support adjustable airflow
Accurate masonry construction
Build the base only from the confirmed greenhouse dimensions
The masonry base is not merely decorative. Door geometry, frame alignment, and finished floor height all depend on accurate construction.
The finished top of the base must follow the greenhouse bearing geometry shown on the confirmed drawing, regardless of the masonry face pattern or joint layout.
Foundation depth, drainage, utility routes, door openings and finished elevations should be resolved before masonry begins.
Key specifications
Available U.S. T-Model dimensions and features
Area: approximately 178–323 sq ft.
Main width: 122 in.
Ridge height: approximately 105 in.
Door height: 73 in.
Frame: powder-coated aluminum frame.
Glazing: 0.16 in. (4 mm) tempered safety glass.
Doors: single or double sliding doors, depending on the configuration.
Ventilation & drainage: roof vents and integrated rainwater drainage.
Warranty: 12-year structural warranty subject to applicable terms.
Local foundation design
Frost depth and soil conditions change across the United States
The aluminum greenhouse dimensions remain fixed, but foundation design varies by site. Properties in colder regions may require foundation details that account for local frost depth.
Warm regions may focus more on drainage, expansive soils, stormwater or local structural requirements. Use site-specific building practice for the actual property.
Below-grade foundation details may vary, but the above-grade bearing geometry must still match the confirmed greenhouse drawing.
Lay out the complete footprint
Start from one reference line before excavation or masonry work begins
Mark the entire stem and cross-wing on the site before construction. Verify every major leg, return and door opening from a common reference line.
Even a small error in the cross-wing can affect alignment across the aluminum frame. Checking the full layout before concrete is placed is far easier than correcting finished masonry.
Include finished floor heights and sliding-door thresholds in the same layout checks.
Shade for hot climates
In sunny regions, controlling heat may matter more than retaining it
A large glass orangery can gain heat rapidly even with roof vents. The cross-wing used for people may need shade sooner than heat-loving plants in the growing stem.
Seasonal exterior shading, the selected door arrangement, and roof ventilation should be planned together rather than treated as unrelated features.
Evaluate shade needs during the site's hottest, brightest periods; spring observations alone can understate summer heat gain.
Cold-climate use
Plan realistically for spring and fall use in colder regions
In northern states, the masonry-base orangery can protect early seedlings, extend fall growing, and provide a bright garden room during spring and fall.
An unheated glass structure is not automatically freeze-proof or equivalent to an insulated living room. Heating expectations should be realistic.
If year-round comfort is the goal, plan the power supply, insulation approach, heater choice, and applicable local requirements as a separate part of the project.
Choosing the masonry
Coordinate the masonry base with the house, landscape, and frame
View brick, stone, block, or concrete alongside the selected frame finish and nearby exterior materials. Consider how the combination will look from both the yard and inside the orangery.
Choose the masonry before finalizing the frame color, since the two finishes will remain visually connected.
Also consider how the inside face of the masonry base will look behind furniture and plants, not only how it appears from outside.
Flooring by zone
The cross-wing and growing stem do not need the same floor finish
A tiled or stone cross-wing can feel more like a garden room, while the crop zone may use a more utilitarian water-tolerant surface.
Keep thresholds, drainage and finished levels coordinated so sliding doors operate cleanly and chairs do not sit on awkward transitions.
Show each floor finish and transition on the project drawings, including its relationship to door thresholds and drainage points.
Rainwater routing
A T-shaped roof sends water in more directions than a simple rectangle
Plan downspouts, drains or collection points before patios and planting beds are finished around the greenhouse.
Locate each outlet so discharged water stays clear of the main entrance and regular maintenance paths.
Overflow should be routed away from the masonry and foundation so repeated runoff does not undermine or stain the base.
Furniture clearance
Draw chairs in use, not just the tabletop footprint
A dining table may fit on the plan but still block circulation when the chairs are pulled out. Draw the full occupied area and the space needed to move around it.
Maintain a clear path between the main door, cross-wing and growing stem so daily crop work does not depend on moving furniture.
Pay particular attention to the T-junction and cross-wing ends, where chair clearance can narrow the route even when the center of the room looks open.
Planning for tall plants
Use tall specimens to frame views while keeping vents and doors clear
Citrus, bananas or climbing plants can become strong focal points in a glass orangery, but they should not obstruct roof vents or sliding-door airflow.
Lower pots work better along primary circulation lines and near seating where views across the T should stay open.
Group plants by height and care needs so watering and routine inspection remain efficient without taller specimens unnecessarily shading smaller plants.
Planning for heat
A future heater affects clearances, power and furniture placement
If the chosen configuration includes a chimney option, select the heating system early enough to coordinate clearances, utilities, and masonry details.
Local requirements govern the final installation; the greenhouse layout alone cannot define a safe heating system.
A properly planned heater can extend garden-room use, but its location should be resolved before plants and furniture fill the space.
Maintenance access
Keep a clear maintenance route around the entire exterior
Glass, gutters, vents and frame joints remain easier to inspect if landscaping does not grow directly against the structure.
Leave enough room to reach the inside corners of the T, where rooflines, frame sections, and drainage routes converge.
Allow for the mature width of hedges and planting beds rather than spacing them around newly installed plants.
T-Model or rectangular greenhouse?
Compare the shape with the way you intend to use the space
A rectangular greenhouse may be more efficient if every square foot is intended for linear crop rows and no human-use zone is needed.
The T-Model is the stronger choice when the cross-wing will become a genuine dining, lounge, display, or propagation area beside the growing stem.
The masonry base adds another layer of value by turning the lower edge into a visible architectural material rather than a hidden foundation.
One integrated project
The best result comes from designing masonry, frame and interior use together
Do not build the base first and decide doors, flooring, power and furniture later. Those decisions influence each other.
Set the sequence for foundation work, masonry, utilities, flooring, frame installation, and landscaping before construction begins, and identify who must approve any change.
A clear sequence helps each trade work from the same elevations and openings without altering completed work.
Local requirements and project coordination
Before ordering materials or scheduling trades, determine which local approvals may apply to the greenhouse, its masonry base, excavation, utilities, and any heating equipment. Requirements can differ by jurisdiction and by the proposed location on the property.
Give the relevant contractor or design professional the confirmed T-shaped footprint rather than a rough overall rectangle. The stem, cross-wing, door openings, frame bearing surfaces, and finished floor elevations all need to appear clearly in the project information used for approvals and construction.
Keep approved drawings, greenhouse documents, and site notes together so changes are communicated consistently. If a utility route, foundation detail, or door location changes during planning, review its effect on the masonry and aluminum structure before work continues.
Delivery access and staging
Plan how long frame members, glazing, masonry supplies, and installation equipment will travel from the street or driveway to the building area. Narrow gates, steps, overhead branches, soft lawns, and tight turns can complicate handling even when the finished greenhouse fits comfortably on the site.
Reserve a level, protected staging area near the foundation so components can be organized without blocking access. Store and handle the glass as directed, away from regular foot traffic and anything that could damage its edges.
The work area should also allow installers to reach the outside of the stem, both ends of the cross-wing, and the inside corners of the T. Resolve temporary access before new fences, planting, or finished landscape surfaces restrict movement.
Structural exposure and anchoring
The greenhouse is rated for wind speeds up to 67 mph and a snow load of 43 lb/ft². These ratings provide an important product reference, but they do not replace evaluation of the actual site, foundation, masonry construction, anchoring, exposure, or local requirements.
An open property, hillside, coastal site, nearby roof edge, or area where snow drifts can form may warrant additional professional review. Because the T-shaped footprint has several exterior faces, every side must be supported and anchored as intended.
Do not rely on the greenhouse frame to correct an uneven or unstable base. Accurate masonry bearing surfaces and the prescribed connections are essential to maintaining frame geometry, sliding-door operation, glazing alignment, and dependable performance over time.
Utility routes before finishes
Decide whether the orangery will need electricity, water, controls, data connections, or routes for future equipment before the floor and masonry are finished. Early planning avoids exposed cables, inconvenient hoses, and cutting into completed work later.
Locate services according to the tasks they support. A growing area may benefit from convenient access for irrigation or propagation equipment, while the cross-wing may need lighting or outlets positioned around the planned furniture rather than behind benches and large containers.
Use qualified trades and equipment suited to a greenhouse environment, and follow the requirements that apply at the property. Keep service points accessible for inspection and repair rather than concealing them behind permanent masonry, fixed cabinets, or heavy planting beds.
Electrical layout and lighting
Create the lighting plan around actual activities rather than trying to illuminate the entire orangery in the same way. Task lighting may be useful near a potting or propagation area, while the furnished cross-wing may call for softer lighting that does not produce uncomfortable reflections across the glass.
Switches and outlets should remain accessible after plants mature and furniture is in place. Consider watering areas, cord routes, and sliding-door travel before choosing locations. Controls for vents, heating, or other equipment should also be easy to inspect.
If electrical work may be added later, reserve an accessible conduit route to avoid disturbing the finished floor and masonry base. Final electrical design and installation should be completed by qualified professionals according to the conditions and requirements at the property.
Door use and everyday access
Choose the door configuration with daily movement in mind. Consider the width and turning space needed for trays, bags of growing medium, tools, furniture, and large pots, not only the way a person enters the greenhouse empty-handed.
The approach outside the door should be firm, reasonably level, and free of runoff that could deposit soil at the track. Inside, avoid placing mats, containers, or floor transitions where they can interfere with sliding operation. Keeping the threshold area clear also makes routine sweeping simpler.
Plan the route from the driveway or storage area to the growing stem before finalizing the cross-wing layout. A direct work path keeps soil, watering equipment, and seasonal plants from passing through the seating area during routine greenhouse tasks.
Managing condensation and airflow
Condensation can occur when moist greenhouse air meets cooler glass. Water droplets alone do not indicate a glazing defect, but persistent moisture should prompt a review of watering habits, plant density, airflow, and the way vents and doors are being used.
Space pots and benches so air can move around foliage and along the inside of the masonry base. Remove dead plant material promptly, avoid standing water on the floor, and ventilate when conditions allow. The cross-wing and stem may behave differently because their use, shade, and plant density differ.
Adjust vents as conditions change rather than relying on one setting throughout the year. After storms or sudden temperature changes, check for unusual moisture around frame junctions, roof drainage points, and the interior corners where the two parts of the T meet.
Cleaning glass and aluminum
Regular cleaning preserves clear views and makes it easier to notice loose debris, glazing damage, blocked drainage, or developing masonry issues. Begin by removing grit gently so it is not dragged across the glass or powder-coated aluminum during washing.
Use cleaning methods and products compatible with the glass and powder-coated aluminum, and avoid abrasive tools that could scratch either surface. Do not lean ladders or heavy equipment against the glazing; use suitable access equipment for roof-level cleaning.
Clean gutters and drainage outlets before accumulated leaves restrict flow, especially where roof sections converge. While working around the structure, check that doors travel smoothly, vents open freely, and plants or ties have not become attached to moving frame components.
Seasonal inspection and records
Set a simple inspection routine around seasonal changes and significant weather. Check accessible fasteners, glazing, vents, door tracks, drainage components, masonry joints, and the connection between the aluminum frame and its base. Address minor maintenance needs before they affect nearby parts.
Keep installation documents, warranty terms, configuration details, finish information, and records of professional work in one place. Photographs of concealed utility routes taken before floors or masonry details are closed can be useful when future maintenance or alterations are considered.
Record replacement parts and adjustments so future service begins with accurate information. Note which configuration and finish each entry applies to, and retain any instructions supplied with the replacement component.
Common questions
FAQ – T-Shaped Orangery on a Masonry Base
Is this a lean-to greenhouse?
No. This T-shaped greenhouse is freestanding. Its frame sits on a purpose-built low masonry base rather than relying on an existing house wall for support.
Which materials can be used for the base?
Brick, stone, concrete block, concrete, or another suitable masonry material may be used when the base is designed and built to the confirmed greenhouse requirements.
Does the floor need to be finished before greenhouse installation?
No—not necessarily. Complete the floor at the stage specified in the confirmed construction plan so its height, drainage, thresholds, utility routes, and frame-support surfaces remain accurate.
Can the two parts of the T serve different purposes?
Yes. The stem and cross-wing can support different activities, provided circulation, ventilation, access, and plant care are considered across the complete interior.
Why is a confirmed drawing essential?
It defines the exact T-shaped footprint, openings, and frame-support locations that the masonry contractor must reproduce. Overall length and width alone are not sufficient for setting out the base.
How should roof vents be used?
Adjust them according to temperature, humidity, plant needs, and seasonal conditions. Keep plants and furnishings clear of the openings and inspect the mechanisms as part of routine maintenance.
Can a heating system be included in the plan?
Yes. Choose the heating system before construction so its utilities, clearances, and masonry details can be coordinated. If the selected configuration includes a chimney provision, incorporate it into the confirmed plan.
Can roof runoff be collected for irrigation?
Yes. Route the integrated rainwater drainage to a suitable collection system while providing an overflow path that directs excess water away from the masonry and foundation.
Bloomcabin T-Model
Plan a T-Model that fits the way you garden and relax
Start with the configuration whose dimensions, usable floor area, and door arrangement best fit the site and your intended mix of growing and garden-room use.
Use the checklist below to turn that choice into a coordinated, buildable masonry-base plan.
Before masonry work begins
✓ Provide the confirmed T-shaped drawing
✓ Confirm the site-specific foundation design
✓ Mark door openings, thresholds, and finished floor height
✓ Mark drainage outlets and utility entry points
✓ Approve masonry and frame finishes together
✓ Check planting, furniture, and circulation layouts
Explore Bloomcabin USA