
Greenhouses for Windy Locations: Structure and Glazing Choices
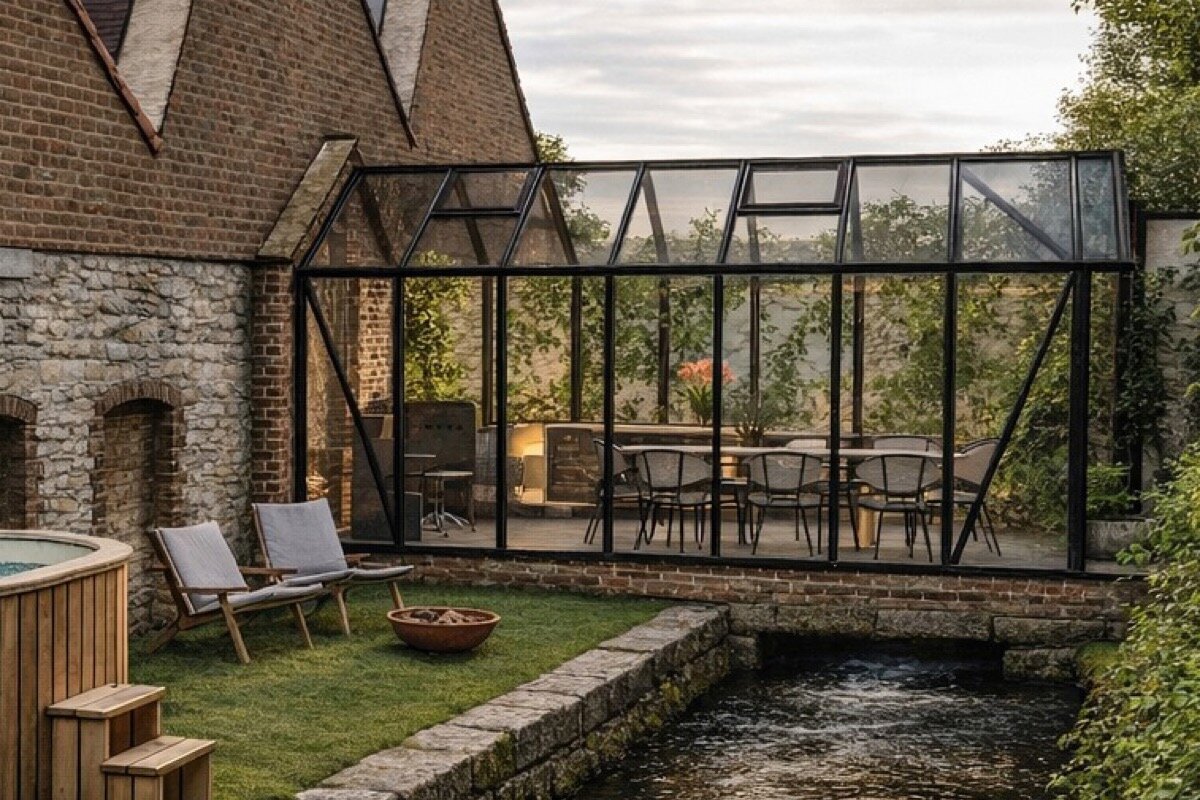
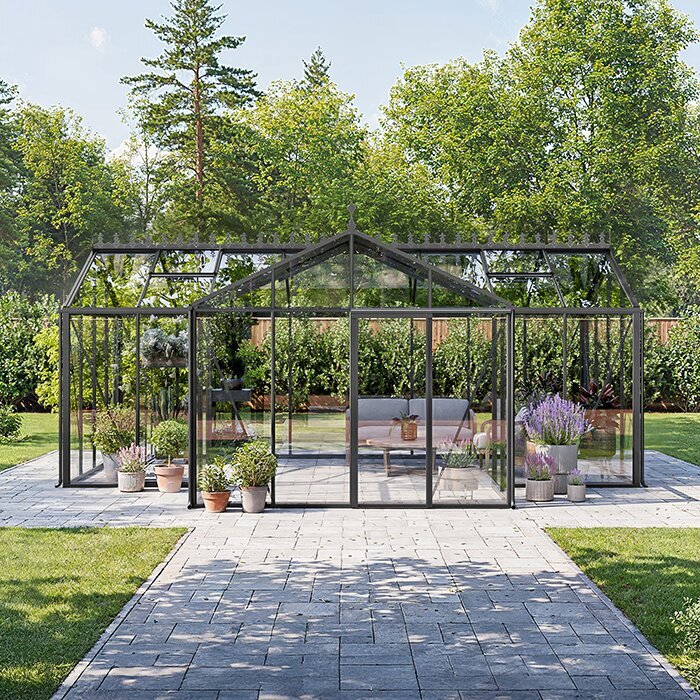
Wind rarely arrives as a simple, steady force. It accelerates around house corners, funnels through side yards, tumbles over fences, and catches at a greenhouse door left ajar. A garden that feels calm at ground level may still expose a roof, ridge, or end wall to strong gusts. Before comparing styles, walk the intended location in several weather conditions and look for the evidence already present: bent shrubs, loose fence panels, wind-scoured soil, and branches moving before the rest of the yard does.
For an exposed garden, a greenhouse should be considered as a system. Its frame, glazing, foundation, anchors, roof shape, openings, surrounding landscape, and installation quality all contribute to how confidently it can serve the garden. No single choice replaces the others. A heavier panel does not compensate for a poorly prepared base, and a sheltered wall cannot make up for hardware that has not been checked after seasonal weather.
This guide helps you compare free-standing and wall-supported layouts, glazing, placement, foundations, and ownership routines without assuming every exposed site is alike. Use it to prepare questions for an installer, the relevant local building or planning department, and an insurer where appropriate, then review current product details and configuration guidance before choosing a greenhouse.
Stage one: read the yard
Understand exposure before choosing a shape
Start by defining what “windy” means on your property. A hilltop, open field edge, coastal lot, broad backyard, and narrow urban passage can all experience wind differently. Observe the site during ordinary breezes as well as after a front passes through. Note the direction that brings the strongest gusts, whether wind runs along the house, and where it curls back after striking a wall or fence. Mature trees, hedges, neighboring buildings, and grade changes can either soften airflow or create turbulence.
Allow room for a proper foundation, access on every side, and routine maintenance. Do not force the greenhouse into a tight gap simply because it seems sheltered: nearby walls or fences can create eddies, while restricted access complicates cleaning, repairs, and door use. Consider seasonal changes in shelter from trees and hedges as well.
Look for physical clues such as permanently leaning plants, worn mulch, rattling gates, and recurring debris paths. They often reveal localized gust routes more reliably than a calm-day impression.
Leave practical clearance for installation, cleaning, repairs, and safe movement around the structure. Shelter is useful only when it does not compromise drainage, light, access, or foundation work.
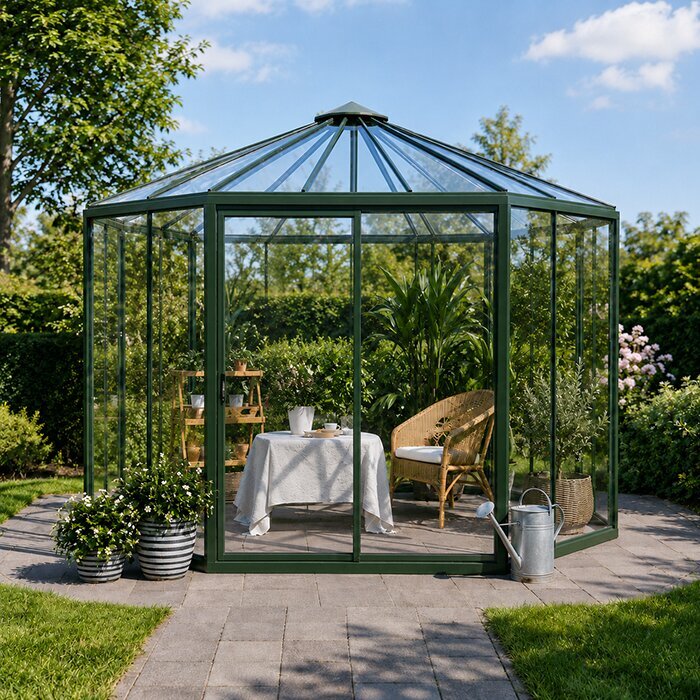
For a free-standing starting point, explore a standard Classic greenhouse and compare its footprint with sheltered areas that remain accessible in your yard.
Stage two: select the form
Match free-standing or wall-supported layouts to the wind path
A free-standing greenhouse gives you flexibility in orientation and planting layout, but every exterior face is exposed to the site. Its success depends on positioning, a stable base, and careful assembly. Consider the roofline and end walls in relation to the strongest wind rather than choosing a location solely for visual symmetry. The best position is often one that captures useful light while avoiding the yard’s most forceful wind corridor and allowing secure, accessible installation.
A wall-supported greenhouse may gain shelter from a building, but rooflines, downspouts, and corners can redirect airflow. Confirm wall condition, drainage, access, and suitability of the attachment approach. Check placement or construction questions with the relevant local building or planning department before finalizing the project.
Treat a house wall as one part of the site strategy, not an automatic wind solution. Watch how wind drops from the roof, turns around corners, and moves through adjacent passages.
Choose the layout that leaves comfortable access to doors, vents, and glazing. A form that is difficult to reach during a storm is less practical than one with slightly less interior room.
Where a suitable wall and access route are available, review a full-size regular Lean-To greenhouse to see whether a wall-supported layout fits the site's wind path.
Stage two: frame details
Look beyond the headline material of the structure
For a wind-exposed installation, frame design deserves close attention. Examine how uprights, roof members, braces, corners, and glazing supports work together, as well as how the greenhouse connects to its base. Aluminum is widely valued for outdoor structures, but the configuration and assembly are as important as the material itself. Follow the current product instructions exactly, use the specified components, and do not improvise substitutions for fixings or connections simply because they appear similar.
Choose a frame that can be inspected easily. After severe weather, check fasteners, panel retainers, doors, vents, and the foundation connection for visible movement or misalignment. Follow applicable product guidance or consult a qualified local professional if anything is uncertain.
Compare the complete structural arrangement, including base connection and panel retention, instead of judging resilience from profile thickness or appearance alone. Installation instructions are part of the product system.
Plan an inspection after major weather events. Small changes in alignment, hardware tightness, or glazing position are easier to address promptly than after repeated wind exposure.
To assess frame layout and daily access, review a standard Classic greenhouse configuration that matches your planting needs and allows straightforward seasonal inspections.
Stage three: choose glazing
Balance light, visibility, and practical panel management
Glazing is a key choice in a windy greenhouse, but it should not be treated as a stand-alone upgrade. Consider the panel type offered for the specific model, the method used to retain it, the visual effect you want, and the maintenance you are prepared to do. Clear glazing can create an open garden-room feeling and make plant observation easy, while other glazing approaches may change light diffusion and privacy. Review current model options rather than assuming every configuration uses the same panels.
Correct panel installation matters in windy conditions. Follow supplied instructions for seating, seals, retainers, and handling, and keep branches, furniture, tools, and climbing plants from creating contact risks. In storm-prone areas, secure loose pots and trellises and manage nearby debris before it reaches the glazing.
Ask how the selected glazing is held within the chosen greenhouse model, then ensure the installation team or homeowner follows the supplied sequence without shortcuts or incompatible additions.
Manage the zone around the greenhouse. Prune only with appropriate local advice, secure movable garden items, and keep hard objects away from areas where gusts could drive them into panels.
For wall-adjacent growing where light and access matter, consider a full-size wall-attached Lean-To greenhouse while reviewing its glazing options and final orientation.
Stage three: build the foundation
Treat anchoring as part of the greenhouse, not an afterthought
Greenhouse anchoring begins with a foundation that is level, stable, and appropriate for local ground conditions. The right approach depends on soil, slope, drainage, frost movement, existing paving, and the greenhouse configuration. A surface that looks flat may still have poor bearing conditions or hold water around the perimeter. Discuss the project with a qualified local contractor when the site is uncertain, and establish who is responsible for base preparation, anchoring, and final checks before delivery or assembly begins.
Drainage supports both stability and daily use. Prevent water from collecting at the threshold or washing soil from the base, and account for paths, grade, and roof runoff. Do not modify the structure without checking current instructions, since changes can affect fit, drainage, or the intended load path.
Confirm the foundation dimensions, level requirements, fixing locations, and drainage strategy from the current product documentation before work begins. Correcting a base after assembly is usually far more disruptive.
If the yard has a slope, made ground, standing water, or visible erosion, seek site-specific guidance. These conditions affect foundation decisions beyond the greenhouse itself.
Once the foundation strategy is clear, assess a standard Classic greenhouse for a prepared base as a complete installation rather than a stand-alone purchase.
Stage four: manage openings
Plan doors, vents, and routines for gusty weather
Doors and vents are necessary for a functional growing environment, but they need deliberate operation in a windy setting. Consider where the entrance faces, the available standing room outside it, and whether a gust could catch the door during everyday use. Keep the threshold clear and make closing checks part of the gardening routine when weather changes. If automatic or manual ventilation is being considered, review the relevant product information and use it within its intended conditions rather than assuming it can be left unattended in every forecast.
Keep shelves, pots, tools, and lightweight accessories from shifting into glazing or blocking an exit. Do not use unsecured items as door stops. A clear aisle and a simple routine for doors, vents, and loose items make it easier to respond when weather changes.
Orient access with real-life use in mind: unloading plants, entering during rain, and closing the door in a crosswind should all be manageable without stepping into an exposed pinch point.
Create a pre-storm routine covering vents, doors, loose accessories, and nearby objects. Consistent habits provide more value than last-minute improvisation when weather deteriorates quickly.
For a garden beside the home, a full-size regular Lean-To greenhouse layout can support convenient access alongside a dependable closing routine.
Stage four: use landscape shelter wisely
Reduce exposure without creating new turbulence
Thoughtful landscaping can moderate wind, but solid barriers are not always the answer. A completely closed fence or wall may force airflow over the top and create turbulence on the sheltered side. Planting, permeable screening, and carefully placed garden structures can influence how the site feels, yet their effectiveness depends on height, distance, density, and prevailing direction. Treat landscape work as a complement to good siting and anchoring, not as a replacement for either. Preserve the access and light your greenhouse needs.
Trees can provide seasonal shelter but may also bring branches, debris, roots, shade, and runoff concerns. Avoid locations that make tree maintenance difficult or collect leaf litter against the structure. For major changes to trees, fences, or grading, check applicable local requirements and seek appropriate professional advice.
Prefer a layered site strategy: sensible positioning, solid anchoring, clear drainage, manageable openings, and landscape measures that do not block access or create debris hazards.
Review shelter across seasons. Deciduous planting, temporary screens, and neighboring vegetation can change dramatically between summer growth and winter exposure.
When comparing proportions and surrounding planting, see how a standard Classic greenhouse in an exposed garden can fit into a broader shelter, drainage, and access plan.
Stage five: buy and maintain with confidence
Turn product research into an installation-ready decision
Before ordering, gather the information that turns an attractive greenhouse into an appropriate project: intended location, base type, available access, exposure observations, utility plans, and local questions. Request the current configuration information and read the installation and operating guidance carefully. If permits, homeowner association rules, setbacks, or utility locating may apply, check with the relevant local authority or provider rather than relying on general online advice. For insurance questions, ask your insurer how your particular policy treats the planned structure.
After installation, keep drainage routes clear and inspect hardware, panel retention, and visible alignment regularly. Review the applicable written warranty conditions and scope for the selected greenhouse. Keep configuration, installation, and maintenance records together to support future service or professional advice.
Bring a site sketch, foundation plan, exposure notes, and access measurements to product conversations. These details lead to more useful guidance than asking for a universal “windproof” recommendation.
Keep installation documents, current product guidance, and maintenance records together. They support sensible inspection, clearer conversations with contractors, and review of applicable warranty terms.
When ready to review a wall-supported option in detail, browse the full-size regular Lean-To greenhouse range with site notes and a foundation plan close at hand.
Comparison
Compare the main decisions for an exposed site
Use this matrix to connect common windy-site conditions with the questions that matter most. It is not a substitute for current product documentation or site-specific advice, but it can help you avoid choosing on appearance alone and prepare for a more productive product or contractor conversation.
| Decision area | What to assess | Practical buying focus |
|---|---|---|
| Site placement | Prevailing direction, gust corridors, grade, nearby walls, fences, and trees across seasons. | Choose a location with workable access, useful light, drainage potential, and room for correct foundation preparation. |
| Greenhouse form | Whether a free-standing or wall-supported layout fits the actual wind path and circulation needs. | Compare orientation, door use, wall condition, roof runoff, and maintenance access before favoring one form. |
| Frame and base | Structural layout, specified assembly process, base type, anchors, and visible inspection points. | Treat frame, foundation, and fixings as one system; use supplied instructions and qualified local help when conditions demand it. |
| Glazing | Available panel options, retention method, desired light quality, nearby debris risks, and maintenance needs. | Select glazing within the model’s offered configuration and protect the surrounding zone from unsecured objects and branches. |
| Openings | Door direction, vent operation, outdoor standing space, and the household’s storm routine. | Favor an arrangement that can be closed, checked, and used safely when gusts arrive rather than only on calm days. |
A five-step plan for a windy greenhouse project
Work through these stages before choosing a final model. They keep the decision rooted in the actual yard, give contractors and product specialists useful information, and reduce the chance that a late discovery forces a compromise on placement or anchoring.
01
Observe the location
Walk the yard in different wind conditions. Mark strong directions, corner effects, fence gaps, roof runoff, shade, wet spots, and routes used for bringing materials into the garden.
02
Sketch viable footprints
Draw the realistic locations, including clear space around the greenhouse for assembly, cleaning, door use, and future repairs. Remove options that conflict with drainage, access, or obvious debris risks.
03
Define the foundation approach
Use current product requirements to discuss a level, stable, appropriately drained base and anchoring method. Where ground conditions are unclear, obtain site-specific guidance before ordering materials or scheduling work.
04
Compare configurations
Review free-standing and wall-supported choices against orientation, glazing options, openings, and internal use. Keep the chosen footprint connected to how you actually intend to garden, not just to maximum floor area.
05
Prepare ownership routines
Set up a simple plan for closing openings, securing loose items, clearing drainage, and inspecting after severe weather. Keep documents and product details available for maintenance or professional support.
Windy-location buyer checklist
Use this list before moving from inspiration to an order or installation date. Each item is designed to expose a practical issue early, when changing location, orientation, or foundation plans is still straightforward.
01. I observed the proposed area during windy weather or collected reliable site observations from several seasons, including likely gust directions and the effects of buildings, fences, and vegetation.
02. I selected a location with enough perimeter space for installation, maintenance, glazing inspection, cleaning, and safe door operation rather than placing the greenhouse tightly against obstacles.
03. I considered free-standing and wall-supported options based on airflow, drainage, access, and usable light, not only on the visual appeal of the greenhouse style.
04. I confirmed the current foundation and anchoring requirements for the intended configuration and understand who will prepare the base, install fixings, and verify level conditions.
05. I assessed drainage around the footprint, including grade, existing paving, roof runoff, and areas where water accumulates after rain or snowmelt.
06. I planned how doors, vents, and any accessories will be operated in gusty conditions, with a practical routine for closing and checking them before storms.
07. I removed or addressed avoidable nearby hazards such as loose pots, unstable trellises, overhanging debris, and objects that could strike the greenhouse in high winds.
08. I will check relevant local building or planning department requirements, property rules, utility considerations, and insurance questions for my particular project before construction begins.
Frequently asked questions about greenhouses in windy locations
Where is the best place for a greenhouse in a windy yard?
The best location is usually the one that balances light, usable access, drainage, and reduced exposure to the site’s strongest gust path. Watch for wind accelerating around house corners, through gates, and over solid barriers. Leave enough space to build the foundation correctly and maintain every side. A seemingly sheltered nook can be troublesome if it traps water, lacks access, or receives falling debris from trees or roofs.
Does a fence make a greenhouse safe from wind?
A fence can change airflow, but it should not be assumed to create a calm zone. Solid barriers may send wind over the top or around the ends, creating turbulence nearby. The result depends on the fence’s height, gaps, distance from the greenhouse, and prevailing wind direction. Treat fencing as one layer of a site strategy that also includes careful placement, a proper foundation, correct anchoring, and sensible operation of doors and vents.
Should I choose glass or another glazing option for an exposed site?
Start with the glazing options available for the exact greenhouse configuration, then consider light preference, appearance, panel retention, maintenance, and the debris risks around the site. There is no universal answer based on wind alone. Correct installation is essential regardless of the chosen option. Review current product documentation, keep loose objects away from the structure, and avoid modifying panel systems or retainers without guidance.
What should I ask about greenhouse anchoring?
Ask about the specified foundation type, dimensions, level tolerance, fixing points, and anchoring method for the configuration you are considering. Also discuss soil, drainage, slope, access, and responsibilities for each phase. If the site has filled or disturbed soil, persistent wetness, or visible movement, seek qualified local advice before preparing the base.
Can I put a Lean-To greenhouse against any exterior wall?
Not automatically. Consider wall condition, orientation, roof runoff, access, attachment details, and the way wind moves around the building. A wall can offer useful shelter from one direction while creating acceleration at a corner or below an eave. Confirm that the proposed location is appropriate for the selected product and installation method. Check relevant local rules and obtain professional guidance where wall condition or site details are uncertain.
How often should I inspect a greenhouse in a windy area?
Make a visual check part of regular gardening, with an additional inspection after notable storms or periods of repeated gusts. Look at doors, vents, hardware, glazing retention, drainage, and the foundation connection for changes. Clear leaves and debris that could interfere with gutters or thresholds, and secure nearby loose items. If you notice movement, misalignment, or damage, consult the applicable product guidance and arrange suitable assistance rather than continuing to use it as normal.
Plan your greenhouse
Choose for the conditions you actually have
A greenhouse in a windy location can be a rewarding, practical addition when the decision begins with the site. Give equal attention to placement, structure, glazing, foundation, anchoring, openings, and maintenance. The most successful plan is usually not the one with the boldest feature; it is the one that respects the garden’s airflow, allows correct installation, and remains straightforward to care for through changing seasons.
Take site notes, a sketch, and drainage observations into the next stage of research. Compare current Bloomcabin greenhouse configurations against those facts, review installation guidance, and seek local advice when ground conditions, wall attachments, permits, or insurance questions need project-specific answers.
Explore greenhouse layouts with your exposure and foundation plan in hand.
