







BloomCabin U.S. Greenhouse Guide
Lean-To Greenhouse for American Homes and Gardens
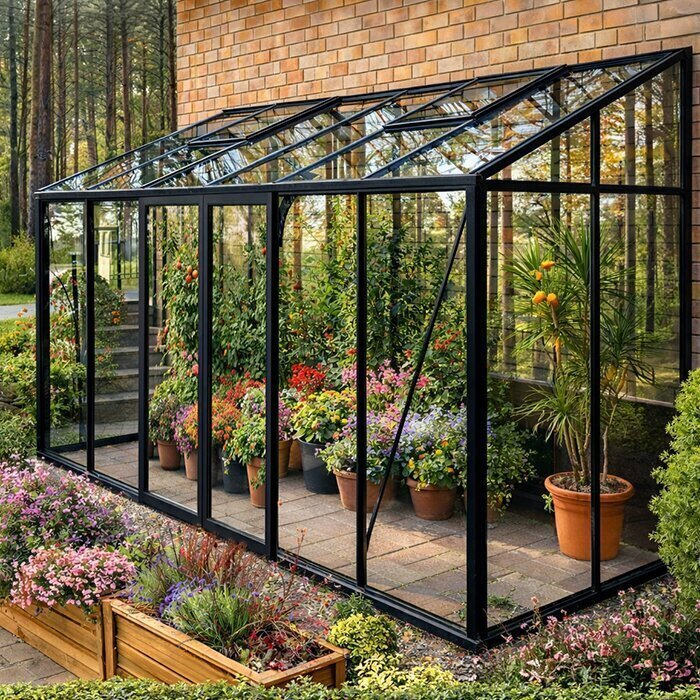
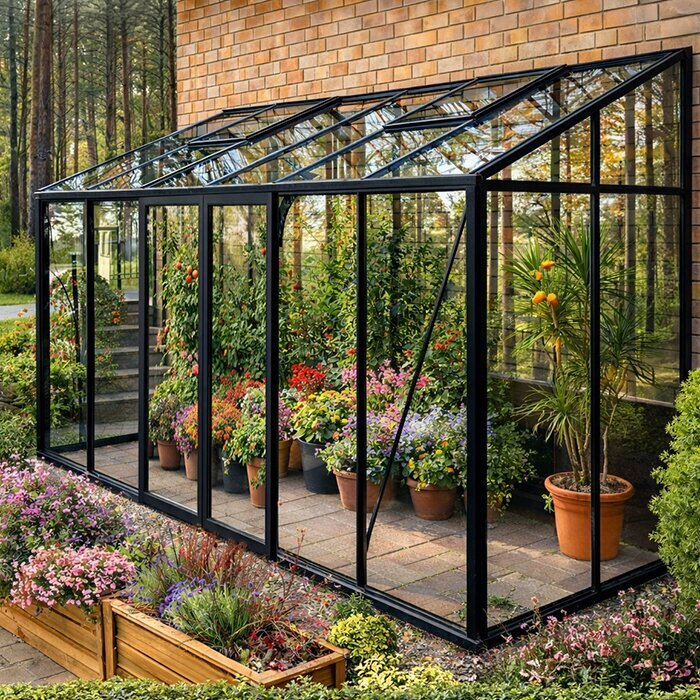
A BloomCabin Lean-To Greenhouse is an aluminum greenhouse designed for installation against a suitable exterior wall. It provides a bright, dedicated growing area without requiring a freestanding structure elsewhere in the yard. Before ordering, confirm the usable wall dimensions, foundation conditions, drainage route, and overhead clearance. Its position beside the home also keeps plants, tools, and freshly harvested produce within convenient reach.
BloomCabin's current U.S. range includes 12 sizes from about 40 to 154 sq ft and two height options. To compare other greenhouse layouts and styles, browse the full BloomCabin greenhouse collection and decide which design best suits your property.
Site planning
Choose a location that works with the house
A lean-to design can make productive use of a patio edge, side yard, or another open area beside the house. Since the greenhouse will remain visually connected to the building, consider how the frame color, glazing, roofline, and nearby paving will look together. Appearance matters, but the chosen wall must also provide unobstructed space, suitable construction, and a practical route for roof runoff.
A nearby greenhouse makes brief, regular plant checks easier to fit into the day. You can monitor seed trays in the morning, gather herbs while cooking, and respond quickly when plants need water or ventilation. Plan a clear route for carrying soil, containers, tools, and harvested crops. If you intend to add water or electrical service, investigate the route early and use qualified professionals where appropriate.
For more information about frame materials, glazing, and design options, read the U.S. aluminum greenhouse guide.
Key benefits
A space-saving design with practical options
Evaluate each configuration as a working space, not simply by its listed floor area. The entrance and aisle should be comfortable to use, and the interior should accommodate the plants, work surfaces, or seating you plan to include. Height, door arrangement, glazing, frame color, and foundation conditions all influence the final choice.
Make better use of a side yard
Create protected growing space along a suitable wall while keeping more of the main yard open.
Keep gardening close at hand
Place plants, tools, and harvests within an easy walk of the kitchen, patio, or utility area.
Choose a look that suits the house
Select from available sizes, glazing choices, door layouts, and RAL frame colors.
Plan for straightforward upkeep
The aluminum frame does not need routine repainting for basic protection. Safety glazing choices, integrated drainage, and a built-in base also support regular greenhouse use. Keep the gutter outlet clear and make sure surrounding surfaces carry discharged water away from both the greenhouse and the house.
Construction and options
Aluminum framing, sliding doors, drainage, and a built-in base
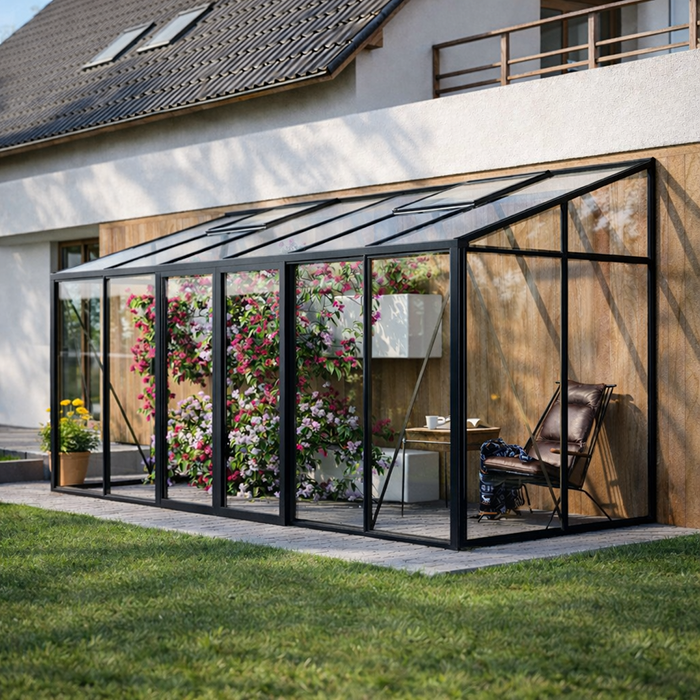
BloomCabin's Lean-To Greenhouse uses high-quality aluminum profiles and is available with polycarbonate or 0.16-inch tempered safety glass. The clean-lined frame suits a structure positioned beside the home, while the available RAL colors can coordinate with windows, doors, trim, and other exterior finishes. Compare colors at the intended location and consider how the greenhouse will look from both the yard and nearby rooms.
Single or double sliding doors save space because they do not swing outward. Choose an opening that works with nearby paths, steps, gates, and the route used for wheelbarrows or large containers. The greenhouse also has an integrated gutter system and a built-in aluminum base for installation on a properly prepared foundation. Decide where roof water will discharge before assembly begins.
The current U.S. Lean-To Greenhouse is backed by a 12-year warranty and is rated for winds up to 67 mph and a snow load of 43 lb/ft². Review coverage, exclusions, owner responsibilities, and current terms on the BloomCabin U.S. warranty page.
Glazing
Tempered safety glass or polycarbonate?
The best glazing choice depends on how you plan to use the greenhouse and how sunlight reaches the selected wall. Consider whether you prefer clear views, softly diffused light, greater visual privacy, or lower panel weight during assembly. Make this decision before finalizing shelves, shading, and seating so the interior plan works with the resulting light conditions.
0.16-inch tempered safety glass
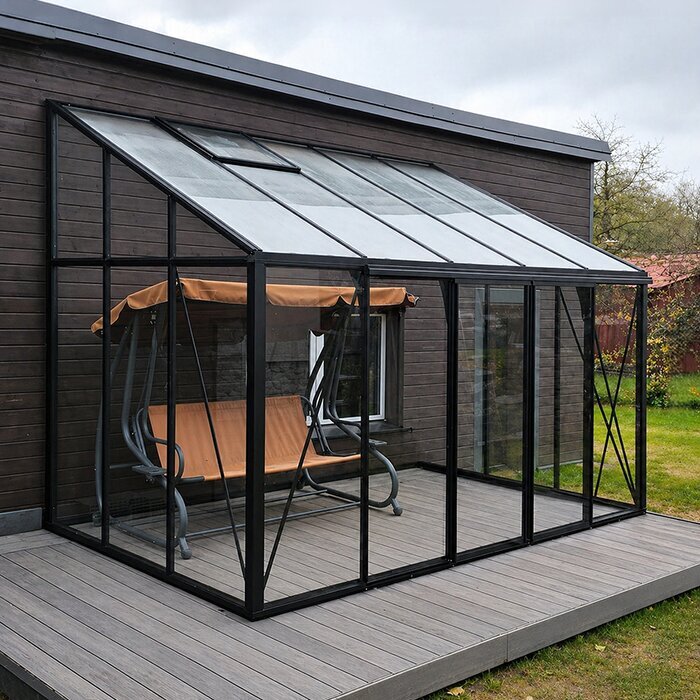
Choose tempered glass when you want a clear visual connection among the greenhouse, garden, and home. It works particularly well for showcase plantings or a seating area visible from the patio or an interior window. Clear glazing makes dirt, mineral deposits, and condensation marks easier to see, so regular cleaning will help maintain its appearance. Handle and support every panel according to the supplied installation instructions.
✓ Clear, unobstructed views
✓ Bright, polished appearance
✓ Tempered safety-glass panels
✓ Well suited to showcase plantings and seating
Polycarbonate
Polycarbonate is lighter and distributes sunlight more evenly throughout the greenhouse, reducing the contrast between bright and shaded areas. It is a practical choice when impact resistance and diffused light matter more than a completely transparent view. The less transparent finish can also provide greater privacy in a side yard facing neighboring property. Use products and tools intended for cleaning polycarbonate, and confirm availability for your preferred greenhouse size and configuration.
✓ Lightweight material
✓ Diffused sunlight
✓ Impact resistance
✓ Useful insulating properties
Plan your configuration
Choose a greenhouse that fits your wall, yard, and gardening plans
Measure the usable wall area, the distance the greenhouse will extend into the yard, nearby structures, and the space needed to walk around the outside. Take measurements at several points rather than assuming walls, paving, and rooflines are perfectly even. A model may fit on paper but still be inconvenient if it narrows a gate route, blocks access for home maintenance, or leaves too little room to clean the outer glazing.
01. Floor area
Compare the available footprints by planning the usable interior rather than looking only at total area. Benches, shelves, containers, and the clear route from the door all take up room. Mark the proposed outline at the site and walk around it before ordering. This can reveal conflicts with paths, hose connections, utility equipment, and frequently used parts of the yard.
02. Overall height
Available height options are approximately 98 or 106 inches. Check clearance beneath eaves, soffits, windows, lights, vents, cameras, awnings, and other projecting features. Review the complete roof profile, not only its highest point, and leave practical access for window cleaning, exterior maintenance, and roof drainage components. If the measurements are close or the wall construction is uncertain, seek appropriate professional advice before selecting a height.
03. Doors
Choose single or double sliding doors if the selected size offers both options. Position the entrance on the side that provides the most direct route from the house or yard, and make sure nearby steps, gates, and stored items will not obstruct access.
04. Glazing
Choose tempered glass for clear views or polycarbonate for lighter panels and diffused sunlight. Also consider cleaning, privacy, and how the glazing will affect the planned interior.
05. Foundation
Prepare a stable, level base that meets the installation requirements for the selected greenhouse and the conditions at your site. Accurate foundation work supports frame alignment, glazing fit, smooth door operation, and effective drainage. Check levels across the entire footprint and make sure the surrounding grade does not direct surface water toward the greenhouse or house. Consult an appropriate local professional if ground conditions or structural requirements are uncertain.
06. Accessories
Check the compatibility and placement of shelves, benches, shading, plant supports, and other accessories while selecting the greenhouse. Keep doors, ventilation openings, gutters, glazing edges, and areas that require inspection accessible. Movable benches and containers provide flexibility as crops change, while compatible mounting hardware helps prevent damage to the frame or glazing. Follow the instructions for each accessory and the greenhouse itself.
For U.S. properties
Account for local weather, sunlight, and property requirements
Growing conditions vary widely across the United States, so a setup that works in Arizona may not suit Pennsylvania, Colorado, or the Pacific Northwest. Consider summer heat, winter weather, wind exposure, hail, falling branches, and the amount of direct sunlight reaching the wall. Paving can reflect extra heat, roof overhangs can create deep shade, and narrow gaps between buildings can channel wind. Observe the location at different times of day before planning glazing, ventilation, and shading.
Do not choose a location by compass direction alone. Trees, fences, neighboring buildings, and the house roof can shade a wall during important growing hours. Another wall may receive better seasonal light but need more summer shading. Notice how deciduous trees change the pattern through the year, and check for runoff or debris from the roof and overhanging branches. The best location balances useful light, manageable heat, convenient access, sound installation conditions, and compatibility with the building.
Before construction, check all building, setback, property-line, utility, homeowners' association, and permit requirements that apply to your address. Local rules vary, so confirm whether the project affects drainage routes, required access, or existing utilities. Ask an appropriately qualified local professional to assess structural questions involving the wall or foundation. Keep approvals, product documents, photographs, and installation records together for future reference. For additional greenhouse planning and buying advice, visit BloomCabin's greenhouse planning resources section.
Flexible use
How to use your BloomCabin Lean-To Greenhouse throughout the year
A BloomCabin Lean-To Greenhouse can serve as a productive growing space, a carefully arranged garden retreat, or a combination of the two. Decide on its main purpose before choosing the size and interior fittings. A crop-focused setup needs generous bench space and clear working routes, while a mixed-use layout should separate wet gardening tasks from seating. Establishing priorities early prevents plants, supplies, and furniture from competing for the same space.
Vegetables and herbs
Grow tomatoes, peppers, cucumbers, herbs, salad crops, and seedlings that suit the conditions you can provide. Position taller crops so they do not unnecessarily shade shorter plants, and leave enough room for harvesting, installing supports, and inspecting foliage. Keep containers and growing media clear of sliding doors and drainage routes. Monitor watering and ventilation inside the greenhouse rather than relying on an outdoor garden schedule.
Propagation and potting
Use benches and shelves to organize seed starting, transplanting, and potting while keeping the main aisle clear. Place the main work surface at a comfortable height and store frequently used small items nearby. Keep heavy bags and unstable stacks off elevated shelves, and use trays or other suitable measures to contain water and loose growing media. A dedicated propagation area is also easier to clean between batches.
Plant collection
Arrange flowering plants, citrus, climbers, and decorative containers as a bright collection. Group plants with compatible growing needs and preserve access for watering, pruning, cleaning, and ventilation.
Backyard retreat
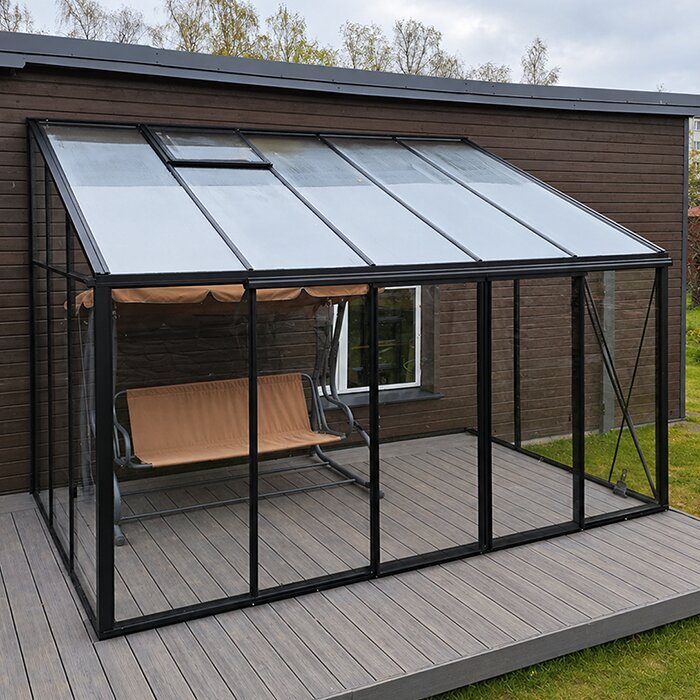
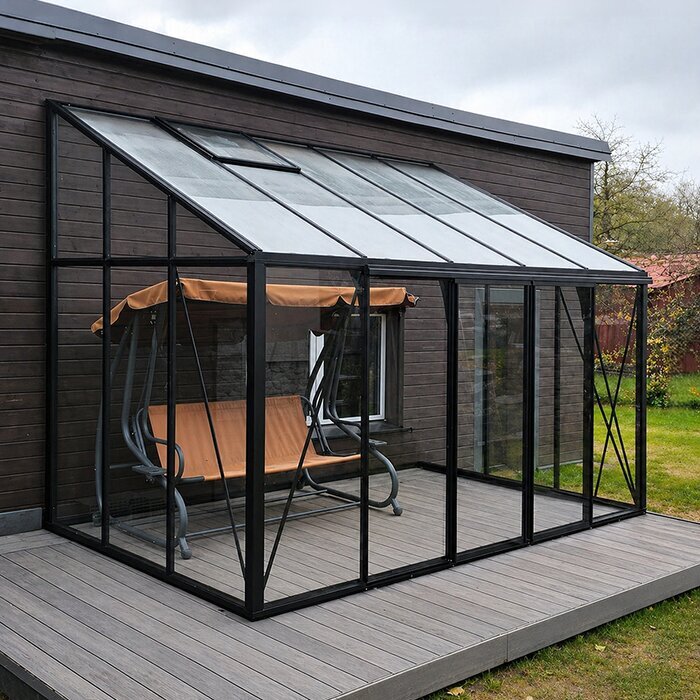
A larger Lean-To Greenhouse can include seating as well as plants. Reserve enough floor space for chairs and a clear route to the door, and separate seating from wet potting areas. Tempered glass keeps sightlines open, while polycarbonate provides diffused light and greater visual privacy. Choose furniture and fabrics that can handle greenhouse moisture, sunlight, and temperature changes without blocking plants or ventilation.
Installation
Prepare the wall, foundation, and work area before assembly
Inspect the installation wall for windows, vents, exterior doors, gutters, downspouts, electrical equipment, hose connections, meters, and roof projections. Identify visible or concealed utilities before drilling or excavation. Measure several parts of the site and confirm that there is enough clearance for assembly, cleaning, and future home maintenance. The wall must be suitable for the required attachment; do not assume exterior cladding alone provides adequate support. Seek a professional assessment if the building construction or attachment method is uncertain.
BloomCabin provides detailed instructions, and the greenhouse is designed for self-assembly. Read all instructions before beginning, inventory the delivered parts, and protect glazing and finished frame components during storage. Sort hardware in assembly order so similar pieces are easy to distinguish, and arrange enough people to lift and position components safely. For answers about product options, delivery, and installation, see the U.S. aluminum greenhouse FAQ and consult it alongside the instructions for your exact greenhouse configuration. Before assembly day, confirm that the required tools are available and plan how packages and glazing will move from the delivery point to a protected staging area without obstructing the work site.
Complete a final site check before unpacking components in the work area. Verify the finished foundation dimensions and levels, clear the assembly area, and confirm the gutter discharge route. Resolve questions about the wall, utilities, anchoring, or drainage before partially assembling the frame. Follow the supplied instructions rather than altering structural components to compensate for inaccurate site preparation.
Maintenance
Routine care protects light, drainage, and appearance
Clean the glazing and aluminum with mild products intended for the material, using soft tools that will not scratch surfaces or damage finishes. Remove leaves, soil, and other debris from the integrated gutter and discharge route. Check sliding-door movement, ventilation openings, seals, joints, and visible fasteners, and address any changes according to the product instructions. While cleaning, remove plant ties, shelves, or climbing growth that press against the glazing or interfere with moving parts.
Set the maintenance schedule according to conditions at your property. Pollen and dust can reduce light or collect in tracks, while falling leaves may block gutters quickly. In snowy areas, monitor accumulation and follow safe removal practices without striking or unevenly loading the glazing. Coastal exposure and irrigation overspray may require more frequent rinsing. Avoid abrasive pads, harsh chemicals, and forceful cleaning methods unless the instructions specifically permit them.
When you are ready to buy, review BloomCabin's current U.S. purchase and delivery terms.
Placement alternatives
Choosing between a lean-to and a freestanding greenhouse
A freestanding greenhouse can be placed where sunlight, ground conditions, and yard access are most favorable. Access around every side can also make exterior cleaning easier. It may be the better option when the property has ample open garden space or no suitable building wall. Although placement is less restricted by windows, eaves, and wall construction, a freestanding greenhouse still needs a prepared foundation, planned drainage, and a clear delivery route.
A BloomCabin Lean-To Greenhouse is especially useful when you want to keep the center of the yard open and maintain a short route from the house. It can turn a narrow side area or patio edge into a dedicated growing zone connected to the home. However, available wall dimensions, overhead clearance, building utilities, and assembly access limit where it can be installed. Choose the type that best fits the property and your gardening routine rather than simply selecting the larger model.
To compare the design flexibility of BloomCabin models, see BloomCabin greenhouse design options.
Inside the greenhouse
Plan an efficient interior before choosing the final size
Draw the interior to scale before selecting a final greenhouse size. Mark the sliding door, a comfortable working aisle, benches, shelves, large containers, and the crops you expect to grow most often. Include enough room to turn while carrying a tray or watering can. This exercise shows whether a compact model can support your routine or whether a larger configuration would make daily work easier. It can also reveal permanent fixtures that would obstruct cleaning, ventilation, or access to plants at the back of a bench.
Use vertical space without crowding the floor. Shelves can hold seed trays, narrow benches can provide a propagation area, and suitable supports can accommodate tomatoes or climbing plants. If the greenhouse will include a place to sit, reserve that area first rather than squeezing furniture between containers later.
Allow for changing summer conditions when planning the interior. Where overheating is a concern, preserve clear airflow, keep ventilation openings unobstructed, and reserve appropriate space for shading. Arrange crops by mature height to limit unnecessary shade, and keep water within reach without running hoses or placing containers across the aisle. Adjust ventilation and watering as foliage fills the greenhouse through the season.
A flexible arrangement is easier to adapt as gardening priorities change. Spring propagation may require many small trays, summer crops may need tall supports and larger containers, and cooler-season protection may call for wider spacing. Movable benches let you reorganize the interior without rebuilding it. Leave room to sweep, clean glazing edges, inspect the frame, and reach every plant; a manageable layout is more useful than the maximum possible number of containers.
Frequently asked questions
Lean-To Greenhouse FAQ for U.S. buyers
What should I check before choosing an installation wall?
Measure the usable width and height, then check for windows, doors, vents, downspouts, meters, roof projections, and other obstructions. The wall must be suitable for the required attachment, with enough surrounding access for assembly, cleaning, drainage, and future home maintenance.
How should I choose the right greenhouse size?
Mark the proposed footprint at the site and plan the interior with benches, containers, door access, and a clear aisle. Choose a size that supports your normal gardening routine without blocking paths, utilities, or access to the outside of the house.
Which glazing option should I choose?
Choose 0.16-inch tempered safety glass for clear views and a more open appearance. Choose polycarbonate for lighter panels, diffused sunlight, and a more screened interior. Availability may depend on the selected configuration.
Where should the gutter water discharge?
Route the collected roof water to a suitable location where it will not pool at the greenhouse base, erode nearby soil, create an icy walkway, or flow toward the house. Keep the integrated gutter, outlet, and discharge path clear during routine maintenance.
Why does the greenhouse need a level foundation?
A stable, level, correctly prepared base helps the frame align properly, the glazing fit as intended, the sliding doors move smoothly, and the drainage system work effectively. Review the installation requirements before ordering and seek local professional advice if the ground or structural conditions are uncertain.
Can I combine growing space with seating?
Yes. Larger sizes can accommodate both plants and seating when the layout preserves a clear route to the door and separates wet gardening tasks from the sitting area. Choose glazing and furnishings that suit the desired level of visibility, sunlight, and greenhouse moisture.
How do I order a BloomCabin Lean-To Greenhouse?
Follow BloomCabin's How to Order guide for the current U.S. ordering steps and the information you will need before purchasing.
BloomCabin
Turn an underused wall into a practical growing space
Start with the fixed site constraints: usable wall dimensions, overhead clearance, foundation conditions, drainage, and access. Once those are confirmed, choose glazing, door layout, and interior fittings around the way you plan to garden. This sequence keeps appearance and convenience in the decision without overlooking installation requirements.
For details about materials and construction, review BloomCabin's quality and materials information and then verify your site measurements and selected options.
Before ordering
✓ Measure the available wall width, projection, and height
✓ Check rooflines, windows, utilities, and downspouts
✓ Choose tempered glass or polycarbonate
✓ Plan sliding-door access, ventilation, and interior aisles
✓ Prepare a stable foundation
✓ Confirm the requirements that apply to your property
Order your BloomCabin Lean-To Greenhouse