
How to Grow Cauliflower in a Greenhouse
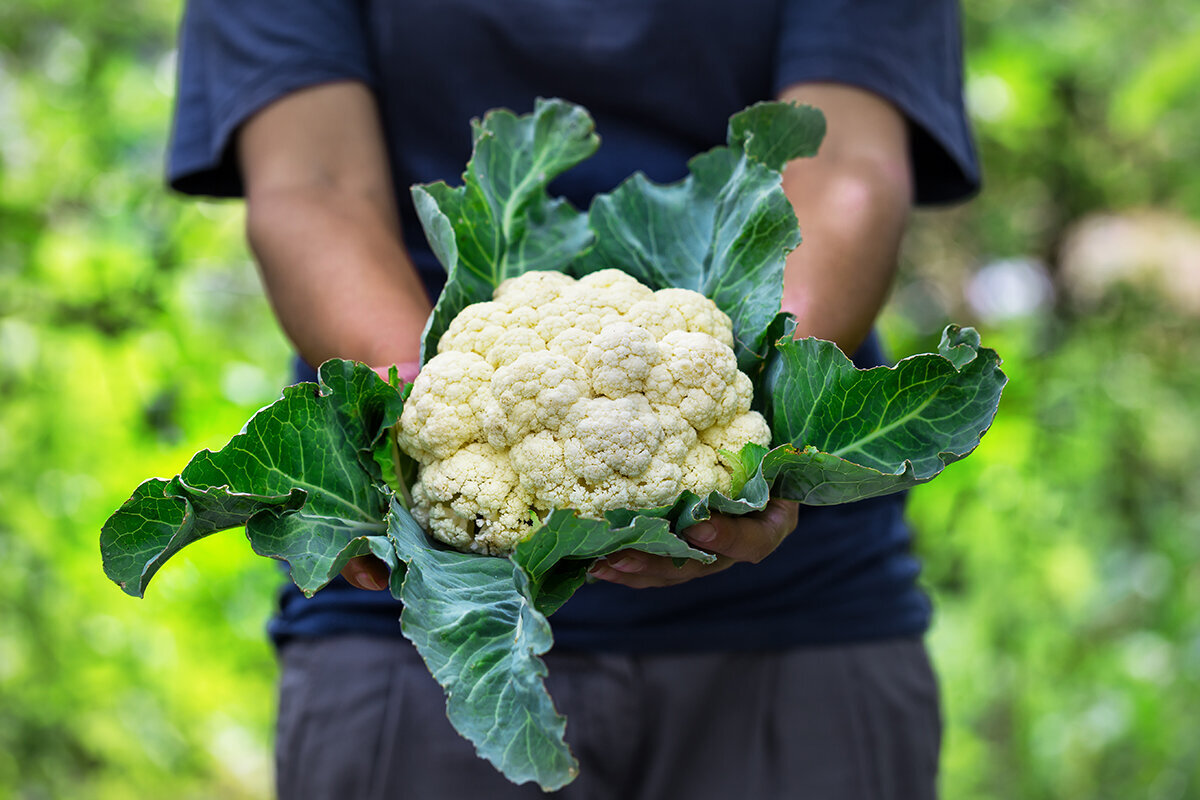
Bloomcabin growing atelier / cool-season crop
How to Grow Cauliflower in a Greenhouse
A flawless cauliflower curd is not a product of luck or brute force. It is the visible finish of a plant that has encountered cool air, even root-zone moisture, generous leaf room and almost no interruptions in its growth.
In a greenhouse, that finish can be exquisitely consistent—but only when the structure is managed as a cool-season room rather than a warm shelter. Use a greenhouse to begin earlier, carry a fall crop later, protect plants from erratic weather and refine water management. Do not ask it to turn July heat into cauliflower weather.
Crop fitting noteBest greenhouse window: late winter through spring, or late summer through fall, depending on your local climate. Plan for broad mature leaves, a cool ventilation strategy and a single, decisive harvest.
For a structure with room to give a full-sized brassica proper spacing and airflow, explore the Bloomcabin Classic Aluminum Greenhouse.
01 / The desired finish
“The pale curd is a record of consistency: broad leaves made first, a cool threshold crossed at the right moment, and a protected head harvested before it loosens.”
Cauliflower is more exacting than many greenhouse vegetables because it has a narrow aesthetic window. A tomato may recover from a missed watering with a scar or a smaller fruit. Cauliflower responds to disruption while it is building leaves or initiating a curd with a small button, loose texture, leafy bracts or a head that never properly forms.
That sensitivity is also why a greenhouse can be so useful. You can keep irrigation deliberate, protect young plants from wind, exclude much of the rain that spreads disease and vent with intent. The essential principle is simple: grow a substantial leafy plant first, then keep conditions even enough for that plant to make one firm, clean curd.
02 / Cultivar, maturity class and season
Fit the crop to the coolest part of your calendar.
For most American home greenhouses, cauliflower is a shoulder-season crop. A spring planting can be excellent where the greenhouse is vented early and often; a late-summer planting for fall harvest is frequently more forgiving because declining day temperatures help preserve curd quality. In hot regions, the fall-to-winter window is usually the more realistic choice. In cold regions, the greenhouse provides useful protection at both ends of the outdoor season, but you may still need modest heat protection during sharp freezes.
Choose named varieties by their maturity days, regional suitability and blanching habit rather than by a promise of an enormous head. A short-season, heat-tolerant selection is the sensible spring fitting. A main-season or fall selection can be better where you can carry the crop into reliably cool weather. For white curds, self-blanching varieties—with leaves that naturally curl upward over the head—reduce handling and are particularly graceful in a home greenhouse.
Short-season / spring fit
Fast, compact, heat-aware
Use where the crop must finish before a warm spell arrives. Start only when you can prevent both chilling of young plants and sudden greenhouse heat at curd formation.
Main-season / autumn fit
Measured growth, cooler finish
The strongest choice for many temperate US gardens. Sow in midsummer, transplant while outdoor heat is beginning to ease, then exploit greenhouse protection as autumn advances.
Self-blanching / white curd
Leaves made to close
Useful when you cannot inspect daily. Still check curds: naturally wrapping leaves reduce light exposure, but they do not correct heat, hunger or drought stress.
03 / Propagation
Raise plants that are young, rooted and unhurried.
01 / Seed
02 / Module
03 / Young plant
04 / Transplant
Make a clean start
Sow in sterile seed-starting mix about ¼–½ inch deep. Keep the medium evenly moist, never saturated. Label the cultivar and intended transplant date immediately.
Build roots, not length
Give seedlings strong overhead light and enough airflow that foliage dries promptly. Feed lightly after the first true leaf; aim for a sturdy, compact plug rather than a tall indoor plant.
Hold the juvenile phase
Do not let seedlings become crowded, root-bound or starved while awaiting a bed. Cauliflower is unusually unforgiving of an overgrown transplant that has already been stressed.
Set at five to seven weeks
Transplant when plants have several true leaves and a cohesive root ball. Water the hole first, set at the same depth as the cell, firm gently and water again.
Think of transplant production as the first quality-control stage. University of Maryland Extension recommends setting out 5–7-week-old transplants and specifically cautions that stressed or overly mature plants, as well as poorly timed cold exposure, can lead to premature button heads. In a greenhouse, it is tempting to keep extra plants “just a little longer.” Resist that instinct. If the bed is not ready, sow a second small batch instead of carrying plugs past their prime.
Before planting, harden plants to the greenhouse rather than moving them from a protected propagation shelf into intense sun and moving air in one step. Over four to seven days, increase light and airflow while keeping the root ball moist. Then transplant on an overcast day or late afternoon when possible. The objective is a nearly invisible transition: no wilt, no check in growth, no pause that the eventual curd will remember.
04 / Mature plant pattern
Space for the leaves you will have, not the plug you are holding.
24 in centers30 in access path12 in glass marginClear vent route
Plant centers
Allow about 24 inches between plants for a full-sized greenhouse crop. This sits comfortably within Extension guidance of 18–24 inches in-row, while giving leaves room to dry.
Access aisle
Reserve a clear 30-inch working path where practical. You need to reach the bed to scout undersides of leaves, check moisture and fold leaves over curds.
Glass margin
Keep the outside leaves away from glazing and the greenhouse wall. A 12-inch buffer helps air circulate and reduces cold or heat stress at the boundary.
Vent corridor
Do not let a packed bed block low vents, doors or a circulation fan. Cauliflower needs gentle air movement, not a stagnant leaf canopy.
A row of young transplants can look absurdly sparse. Leave it that way. The mature leaves are the solar panels that finance a generous curd, and foliage pressed together creates the humidity and leaf wetness that greenhouse growers work hard to avoid. A two-row bed is practical in a larger structure, but only if both rows remain accessible without stepping into the soil.
If space is limited, grow fewer plants beautifully rather than squeezing in a nominally productive row. Explore the wider Bloomcabin greenhouse collection when your crop plan calls for broad brassicas, propagation space and a real central path—not simply a place to put pots.
05 / Temperature, ventilation and light
Make the greenhouse a cool room with bright edges.
Cauliflower has no interest in the classic sun-baked greenhouse. Once daytime air rises quickly, open roof vents and doors early rather than waiting for the interior to feel hot. Use shade cloth during exceptional heat only as a supporting measure; ventilation and cultivar timing are the primary tools. A minimum/maximum thermometer at canopy height is more useful than a vague sense that the space feels comfortable.
For curd quality, aim to keep the crop generally in cool conditions, with the 50–70°F range as your reference point. When temperatures approach the mid-80s by day and remain above the high 70s at night, cauliflower may stay vegetative or develop inferior curds. In a sunny greenhouse, those thresholds can arrive surprisingly early even in spring.
Ventilation is also a disease-management tool. Water at the root zone in the morning, ventilate after irrigation and avoid wetting curds late in the day. If you use a fan, arrange it for a soft, continuous sweep through the foliage, not a hard stream that dehydrates one side of the bed. For broader siting, layout and care principles, see Bloomcabin’s greenhouse setup guide for US gardens.
06 / The consistency room
Every interruption passes forward into the curd.
A cauliflower crop should never alternate between lush, wet growth and a thirsty pause. It should also not receive a sudden late feast of nitrogen in an effort to “catch up.” The plant translates uneven root conditions into uneven leaf growth, then carries that instability into the developing head.
01 / Root zone→
02 / Leaf factory→
03 / Curd initiation→
04 / Finish
Keep soil evenly moist at rooting depth. Check below the surface with a trowel or probe rather than judging only the dry-looking top layer.
Steady water and balanced nutrition create broad, healthy leaves. Those leaves supply the energy needed before curd initiation.
Cool conditions and an unstressed plant allow the curd to form at a useful size rather than as a premature button.
Uniform growth supports a compact, smooth curd. Heat, drought or abrupt fertility pushes can make the finish loose, leafy or grainy.
Water with a measured hand
In an in-ground bed, irrigate deeply enough to moisten the active root zone, then recheck before watering again. The classic field rule of roughly 1 inch of water per week is only a starting reference; a greenhouse receives no rain, and sandy soil, radiant heat and plant size alter demand. Drip irrigation or a low, slow hand-watered soak is better than repeated shallow splashing.
Feed from a soil test
Cauliflower is a nutrient-demanding crop, but “more” is not a fertility program. Build the bed with finished compost, use a soil test to guide phosphorus and potassium, and apply a balanced vegetable fertilizer according to the label and test recommendations. A modest side-dress while plants are actively leafing out is often appropriate; avoid forcing tender, excess vegetative growth as curds begin.
For everyday irrigation, ventilation and monitoring routines that suit a home structure, Bloomcabin’s US greenhouse gardening guide is a useful companion.
07 / Curd initiation
Watch closely when the first pale dome appears.
Once the center begins to thicken, inspect each plant every few days. This is not the stage for radical correction. Keep the soil moisture stable, continue ventilation and remove only damaged lower leaves that touch the soil or obstruct access. Do not strip healthy leaves; they are still feeding and later protecting the curd.
Expect white cauliflower curds to be most attractive when shielded from direct sun. The leaf canopy is both a built-in shade system and a visual signal: a plant with good leaf coverage has had the opportunity to make a good head. Colored cauliflower and Romanesco are different. Their color and form need light, so do not tie their leaves over the curd.
08 / Blanching and leaf protection
Close the leaves like protective shutters—never like a sealed package.
Blanching means shading a white cauliflower curd with its own outer leaves. It preserves the clean ivory color by limiting sunlight, which can cause yellowing or purple discoloration. Begin when the developing head is approximately 2 inches across. In ordinary conditions, the curd may need four to eight days under cover; it can take longer in cool weather.
Self-blanching types may complete the job naturally, but do not assume every plant has wrapped perfectly. A quick inspection lets you catch a curd that is exposed on one side. In warm or humid conditions, always gather leaves loosely. Trapping wet foliage against a curd invites decay; the aim is shade with ventilation.
01 / Open
02 / Shade
03 / Secure
04 / Check
Open growth
Wait for a visible, firm curd around 2 inches wide before moving leaves.
Initial shade
Bring three or four clean outer leaves upward over the head without snapping their ribs.
Loose secure
Use a soft tie or tuck a leaf over another leaf; preserve an air space around the curd.
Daily check
Open briefly to inspect for dryness, compact texture and concealed pests, then re-cover if needed.
09 / Finish inspection
Read the curd before you blame the cultivar.
Not every imperfect head is unsafe to eat, but each finish tells you something about timing and growing conditions. Diagnose early enough to adjust the next planting rather than trying to repair a head that has already declared its quality.
Compact
Buttoning
Riceyness
Bracting
Soft rot
Compact and creamy
This is the desired finish: a tight, firm, fairly smooth curd with no bud separation. Cut while it holds this texture.
Buttoning
A small, premature head usually follows stress: old transplants, chilling, heat, drought, poor fertility, pests or root disturbance.
Riceyness
Grainy, separating buds are often linked to temperature swings around head formation and development. Harvest promptly if the curd remains usable.
Bracting
Small leaves in the curd can follow heat or low soil moisture during early head formation, sending the plant back toward leafy growth.
Discoloration or decay
Yellowing, brown spots or softness call for a check of sun exposure, leaf wetness, sanitation and airflow. Do not store decayed heads.
What to change next time
Review transplant timing, ventilation and irrigation before reaching for extra fertilizer. A finished curd cannot be rebuilt, but the next crop can be timed better.
Buttoning is the classic greenhouse warning: the plant forms a head before it has made enough leaf mass to support it. The cause may have occurred weeks earlier, during propagation or immediately after transplanting. A button cannot be enlarged by extra fertilizer. Remove it and learn from it, or harvest it as a small kitchen head while the texture remains pleasant.
Riceyness and bracting deserve a climate review. University and Extension guidance consistently links loose or fuzzy curds and leaves within the head to heat, drought and unstable growing conditions. Start the next batch so curd formation lands in cooler weather, vent earlier and keep the root zone reliably moist rather than soaking it after a dry spell.
10 / Pests, disease and hygiene
Keep the workroom clean and the crop visible.
Protected growing does not exclude brassica pests. Scout twice weekly, lifting leaves to look for imported cabbageworms, cabbage loopers, diamondback moth larvae, aphids and flea-beetle damage. Hand-remove caterpillars on a small crop. If a treatment is needed, identify the pest first and use only a product labeled for edible brassicas, following its current label exactly. Keep leaves open enough that you can see what is happening before pests reach the curd.
Start with clean seed or disease-free transplants, rotate brassicas away from the same soil for several years where possible, remove crop debris promptly and avoid splashing irrigation. Alternaria leaf spot thrives with extended humidity and leaf wetness; black rot can travel with infected seed, debris and splashing water. If you see target-like dark spots, yellow V-shaped leaf-edge lesions, slimy tissue or a soft curd, isolate the issue, improve airflow and remove badly affected plants rather than composting them in the greenhouse.
After the crop is cleared, wash benches, tools, trays and pathways, remove all roots and leaves, and give the house a period with no brassica crop. Hygiene is not ornamental maintenance—it breaks the bridge between one carefully grown crop and the next.
11 / Harvest service
Cut at peak compactness, then remove the field heat quickly.
Readiness cues
Harvest when the curd is firm, dense, white and fairly smooth, before segments begin to separate. Do not wait for a catalog-size head if warmth is forecast or the first sign of graininess appears. A slightly smaller head at its peak is a far better meal than an oversized head one day too late.
Use a clean, sharp knife and cut the stem below the curd, retaining a protective ruff of leaves. Those leaves reduce handling damage and help preserve quality on the way to the kitchen.
Cooling
Bring harvested heads indoors promptly. Refrigerate unwashed cauliflower in a perforated bag or loosely covered container; wash only before use. Cold, moist storage is ideal, but home refrigerators are drying environments, so the leaves are useful protection.
Storage and preserving
Use fresh cauliflower within about a week for its finest eating quality. Under very cold, humid conditions it can keep longer—up to roughly two to three weeks—but flavor and texture are best when the harvest is not delayed. For freezing, cut into 1-inch florets and blanch in boiling water for three minutes before cooling and packing.
12 / Questions from the greenhouse bench
Cauliflower greenhouse FAQ
Can cauliflower grow in a greenhouse year-round?
Only in places and seasons where you can maintain genuinely cool conditions. In much of the United States, cauliflower is best used as an early-spring or fall greenhouse crop. Summer heat is the principal obstacle, not winter cold. If daytime temperatures regularly climb into the mid-80s°F and nights remain warm, curd formation and quality suffer.
Do I need to blanch self-blanching cauliflower?
Usually not, because these varieties produce leaves that naturally arch over the curd. However, inspect each head. If sunlight reaches part of a white curd, gently bring a few outer leaves together to shade it. Never tie leaves tightly when foliage is wet or the greenhouse is humid.
Why did my cauliflower make a tiny head?
This is buttoning: a premature curd formed before the plant made enough leaves. Common triggers include transplanting plants that were too old or root-bound, chilling young plants, heat stress, low moisture, inadequate nutrition, pests and rough transplanting. Start a new batch with a more carefully timed transplant date rather than trying to force the small head larger.
How many cauliflower plants fit in a home greenhouse?
Count the mature footprint, not just the bed length. With plants around 24 inches apart and an accessible aisle, a modest greenhouse may be better suited to four to eight cauliflower plants than a densely packed row. Reserve enough space to open vents, irrigate, scout and harvest without brushing foliage constantly.
Can I grow cauliflower in containers under glass?
Yes, but use a large, stable container with drainage and a generous volume of high-quality mix. Container roots dry and heat faster than in-ground beds, making consistency harder. Containers work best when you can monitor moisture daily and keep them away from the hottest glass edges.
13 / Sources and further reading
Technical notes for a better finish.
The following horticultural resources informed the crop timings, spacing, temperature, blanching, disorder and storage guidance in this article.
- University of Minnesota Extension — Growing cauliflower in home gardens
- University of Maryland Extension — Growing cauliflower in a home garden
- University of Maryland Extension — Cole Crops production notes
- Utah State University Extension — Brassica production problems
- Cornell Vegetables — Alternaria leaf spot of brassicas
- UC Davis Postharvest Research and Extension Center — Cauliflower produce facts
- University of Minnesota Extension — Blanching vegetables for freezing
The final fitting
Give the curd a greenhouse that knows when to breathe.
- Timing: schedule curd formation for the coolest reliable part of your season.
- Leaf spread: give each plant mature-scale room, an accessible path and a clean glass margin.
- Ventilation: open early, water at the roots and keep protective leaves dry enough to do their work.
Explore the Classic Aluminum GreenhousePlan more cool-season greenhouse crops →
