
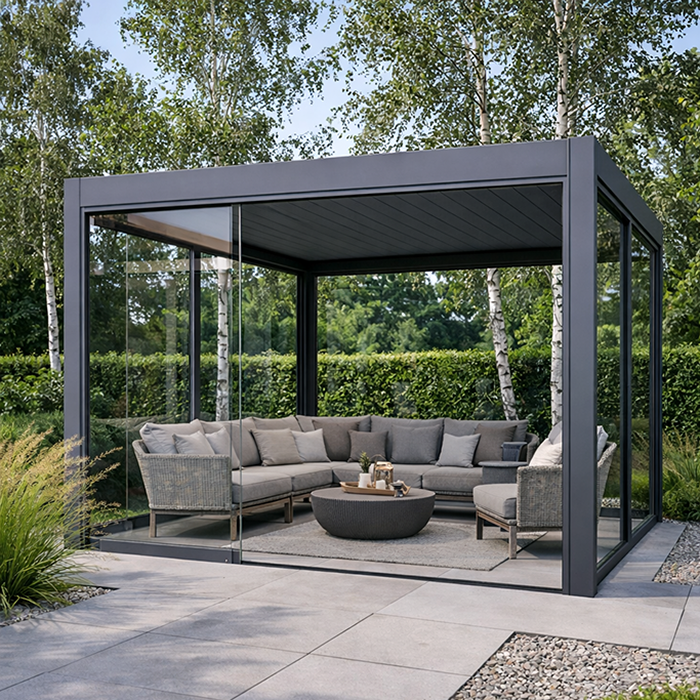
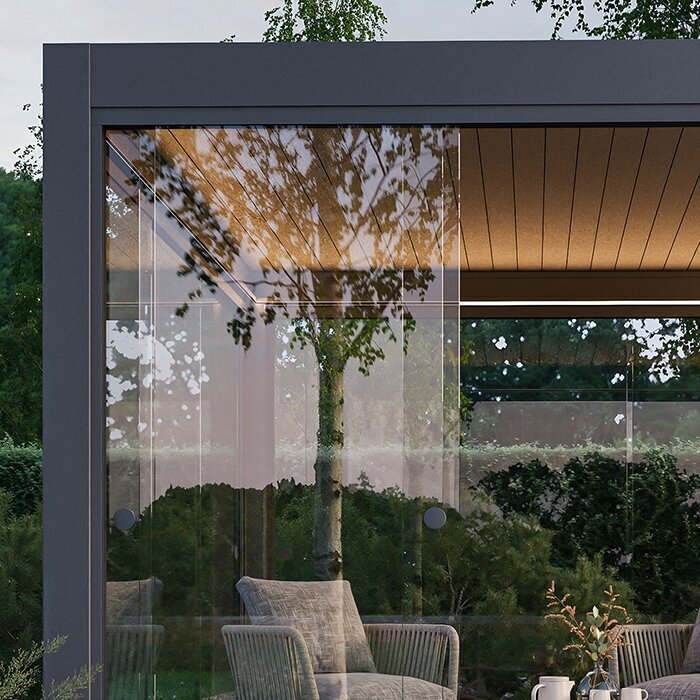

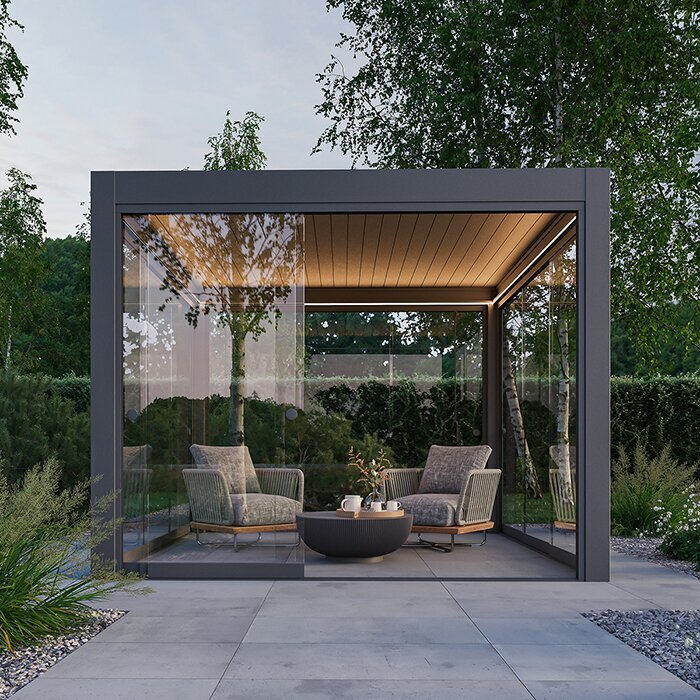
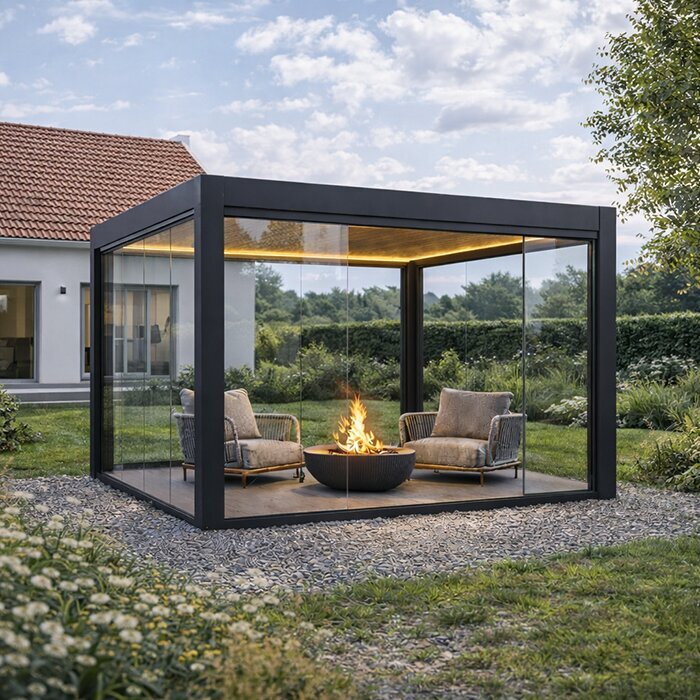








Bloomcabin Bioclimatic Pergola
Bioclimatic Pergola with Adjustable Aluminum Louvers for Sun, Shade, Airflow, and Rain Protection
The Bloomcabin Bioclimatic Aluminum Pergola is designed for U.S. patios where a fixed cover does not offer enough control over direct sun, heat, airflow, and occasional rain. Its adjustable aluminum louvers can open, tilt, or close as the weather and your plans change. Open louvers maintain an open-air feel in mild weather, an angled position can reduce overhead sunlight while allowing warm air to escape, and a closed roof provides more shelter when needed. The pergola keeps the same footprint while adapting to different activities and times of day.
Available configurations cover approximately 97–258 sq ft, or about 9–24 m², with an overall height of approximately 98.4 in / 8 ft 2 in. Integrated drainage and RAL color options are standard, while automation, LED lighting, screens, side panels, and glass walls are optional.
Begin with a survey of the actual site rather than a generic backyard template. Record the patio orientation, house openings, nearby trees and structures, existing paving, grade changes, utility locations, and installation access. Use that information to position the footprint and posts, then coordinate any work that must happen before the surrounding finishes are completed. Confirm local requirements and site-specific structural needs for the property. A single coordinated plan reduces conflicts between the pergola, house, landscape, and utilities. Explore Bloomcabin USA.
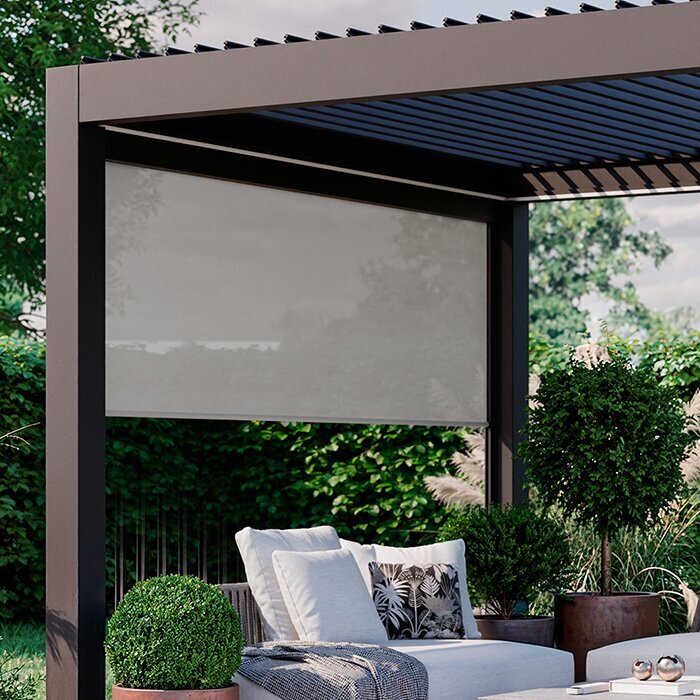
Flexible overhead coverage
Adjustable Louvers Help the Patio Adapt Throughout the Day
The same patio may need different roof positions over the course of a day. Open the louvers when daylight and sky views are priorities. As overhead sun intensifies, adjust the angle to balance shade with an outlet for rising warm air. Close them when more overhead coverage is needed. Because each change occurs within the same footprint, furniture and circulation can remain in place while the roof setting changes.
Roof position should reflect both the weather and the activity below it. A dining setup may need moderated light during a meal, while a lounge can be opened to the sky after the strongest sun passes. Before rain, close the louvers and confirm that the drainage path is unobstructed. Furniture, textiles, and electronics still need to be planned for side exposure, including low-angle sun and wind-driven rain.
Optional automation provides convenient control of the roof and selected side elements when included in the project.
Adjustable louvered roof
Manage direct sun, overhead shade, airflow, and rain protection
Flexible footprint options
Configurations for a range of patio and outdoor-room layouts
Optional automation
Motorized roof control and selected powered side elements are optional
Outdoor-room upgrades
Add LED lighting, screens, side panels, or glass walls
Premium aluminum structure
Aluminum Profiles, Integrated Drainage, and Clean Architectural Lines
The pergola uses high-quality aluminum profiles designed for permanent outdoor use and straightforward maintenance. Its clean edges and balanced proportions suit contemporary homes, pool decks, landscaped courtyards, and traditional patios that need a simple architectural addition. Consider the structure in relation to the house: frame color, post locations, rooflines, doors, windows, and surrounding paving all affect how well the installation fits the property. Routine cleaning is still important, especially where pollen, leaves, dust, or coastal residue can collect.
Rainwater management is integrated into the pergola, keeping the collection path visually discreet rather than adding a separate exposed gutter arrangement. The system still needs an appropriate destination at ground level. Before installation, identify how water will leave the structure, how the patio is sloped, and whether the discharge could create splashback, staining, erosion, or standing water near a post. The route should also avoid sending runoff toward the house foundation or a frequently used walkway. A coordinated drainage plan is essential because the pergola collects water overhead but cannot correct an unsuitable patio grade.
A choice of RAL colors allows the frame to coordinate with window frames, patio doors, siding, masonry, railings, pool surrounds, and other exterior finishes. Color selection can either reduce visual contrast or make the pergola a deliberate architectural feature. Review samples outdoors beside the actual materials when possible, since daylight, reflected landscape color, and adjacent surfaces can change how a finish appears. It is also worth considering the view from inside the home: the frame and louvers may be visible through large doors or windows throughout the year, not only while the patio is occupied.
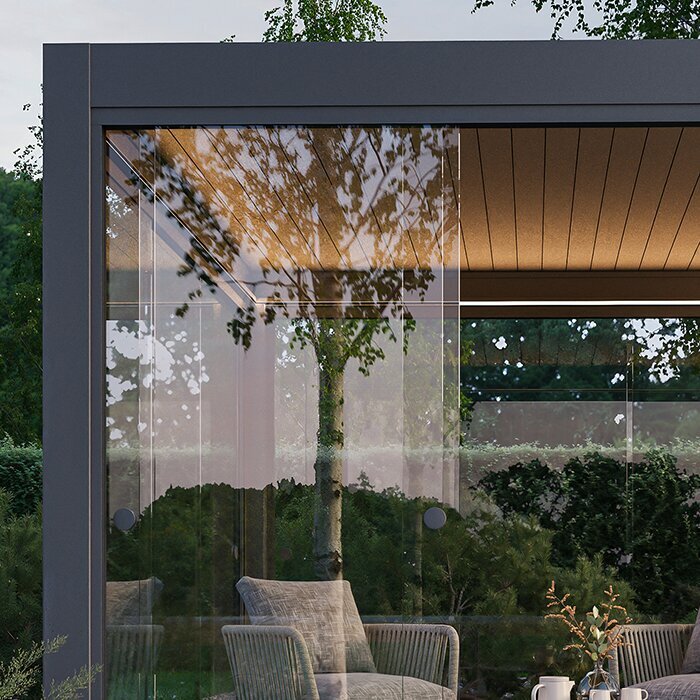
Roof + optional enclosure
Start With the Adjustable Roof, Then Decide How Protected the Sides Should Be
Adjustable louvered roof
Treat the roof as the first configuration decision and side protection as a separate layer. Map the hours of use against the sun path before choosing extras. If discomfort comes mainly from above, louver control may be sufficient; if low sun, privacy, or exposure comes through one edge, address that side specifically. This sequence keeps optional enclosure focused on actual site conditions.
Outdoor-room upgrades
Optional screens, side panels, and glass walls let you configure each edge independently. Screens suit conditions that change during the day, fixed side panels provide a permanent visual screen, and glass forms a more substantial boundary while retaining outward views. Each option affects openness, airflow, or cleaning access differently, so place it only where that function is needed.
Product facts
Bloomcabin Bioclimatic Pergola Specifications
Coverage area
97–258 sq ft / 9–24 m²
Available coverage range
Overall height
Approx. 98.4 in / 8 ft 2 in / 250 cm
Approximate overall product height
Structure
High-quality aluminum profiles
Aluminum frame for permanent outdoor installation
Roof
Adjustable aluminum louvers
Louvers open, tilt, or close to suit current conditions
Drainage
Integrated rain gutter system
Plan a suitable final water-discharge route for the site
Finish options
RAL color options are included as standard
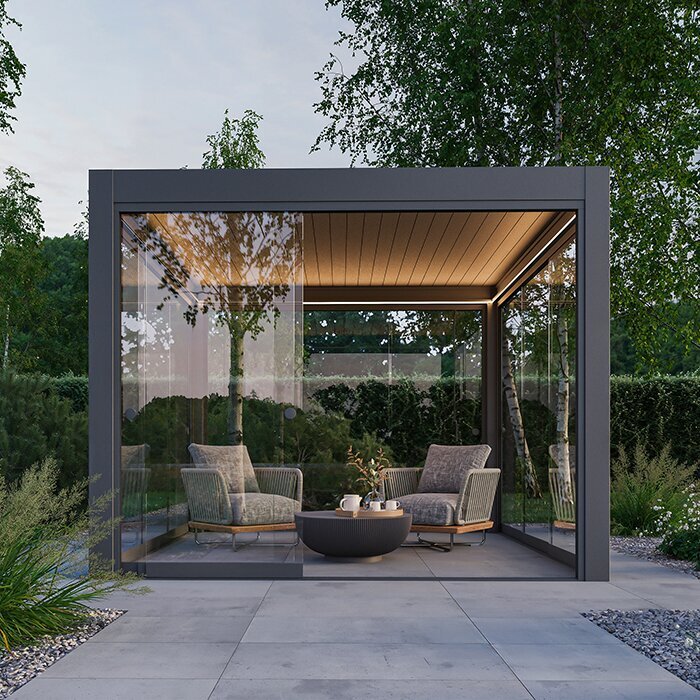
Managing outdoor comfort naturally
Use the Roof and Side Elements Together to Manage Outdoor Comfort
With the louvers partly or fully open, warm air can rise through the roof while the patio remains connected to the sky and landscape. This works best when air can also enter from the sides, so screens, panels, glass walls, furniture, and planting should be planned together. Tall cabinets, outdoor kitchens, or dense planting close to the perimeter may interrupt breezes. The aim is not to create an air-conditioned room, but to use the roof position and clear openings to make outdoor conditions more comfortable.
When the roof is closed, side openings become more important to natural airflow. Avoid adding barriers to every edge unless the site requires them. Keep views and ventilation open where possible, and verify that screens or other moving side elements can operate without contacting furniture, doors, paths, or planting.
Even with optional side elements, the bioclimatic pergola remains an outdoor structure, not a fully insulated interior room.
Outdoor living ideas
Four Ways to Use the Same Adaptable Patio Structure
01
Outdoor dining
Create a permanent dining zone with controllable shade and optional integrated lighting.
02
Garden lounge
Create a relaxed seating area that retains an open-air feel while offering adjustable overhead coverage.
03
Hot tub area
Pair a hot tub or relaxation area with side elements chosen for the required level of privacy.
04
Entertaining space
Accommodate breakfast, casual gatherings, or evening drinks without dedicating the patio to a single use.
Climate & orientation
Plan roof operation, side elements, furniture, utilities, and local weather conditions together to create a comfortable outdoor space.
Hot, sunny regions
In Arizona, Texas, Nevada, and inland California, intense sunlight can dominate patio comfort. Begin by identifying whether exposure comes mainly from overhead sun, reflected surfaces, or a low morning or afternoon angle.
Angled louvers can reduce high overhead sun while allowing warm air to leave through the roof. Their usefulness will vary as the sun moves, so assess the patio during the hours it will actually be occupied rather than relying only on a compass direction. Note where shadows from the house, trees, fences, and neighboring structures already occur. Existing shade may reduce the need for side protection in one location while reflected heat or late-day glare makes another edge more important. This observation helps separate useful options from additions that would provide little practical benefit.
Use those observations to place side protection only where it will make a practical difference. Finalize hard-to-change decisions—including foundations, drainage, electrical service, and glass walls—before arranging movable furnishings or planting.
Humid and rainy regions
In the Southeast and other wet regions, convenient roof control and a well-planned drainage route can make the patio easier to use during changing weather.
Frequent rain makes grading and routing problems more disruptive. Inspect door thresholds, low areas, planting beds, and nearby drains as one connected path from the pergola outlet to the final destination. Resolve any section that sends runoff across circulation areas or back toward the house before posts are anchored or paving is completed. If the route is uncertain, include a qualified professional in the site-preparation process.
Select glass walls only for the sides that need a more defined edge, leaving other sides open to support natural airflow.
Cold and freeze-thaw regions
In northern states, confirm local frost and soil requirements before finalizing post locations.
The pergola structure does not replace site-specific foundation design. The supporting base must suit the property, the selected configuration, and local ground conditions, and the finished surface alone should not be assumed to provide an adequate structural footing. Confirm installation and anchoring requirements before demolition, excavation, or patio construction begins. This is especially important when the project involves existing pavers, a raised deck, utilities below grade, or a surface whose underlying construction is unknown. Early confirmation helps avoid locating posts where the base cannot be prepared correctly or where buried services create a conflict.
Mark the proposed post positions and check them against buried utilities, drainage routes, and electrical plans before site work begins.
Pool and entertaining patios
A bioclimatic pergola can shelter a dining area, poolside seating, or a hot-tub zone. Configure the space around its intended use.
Each activity requires different furniture clearances, privacy, lighting, and circulation. A dining layout needs space behind occupied chairs and a clear route between the house and table. Poolside seating should not interfere with normal movement around the water, while a hot-tub setting needs practical access to equipment and covers. Mark the post locations as well as the roof area on a scaled drawing, since the posts influence furniture placement and sight lines. Testing the plan with the actual furniture dimensions is more reliable than choosing a pergola solely by its stated coverage area.
For a multipurpose patio, test the layout as it will be used during a gathering, with chairs pulled out and routes to the house, water, serving area, and equipment kept clear.
Configuration & comfort
Translate the planned activities into a measured layout before choosing the configuration and options.
Furniture at real scale
Measure the actual table, chairs, sofas, and other furniture, including the space each piece needs while in use.
The same square footage can feel open or crowded depending on furniture depth, door swings, post placement, and the number of people using the patio. Prepare a scaled plan showing the house wall, exterior doors, steps, fixed planters, cooking equipment, tables, seating, and access paths. Include chairs in both tucked-in and occupied positions rather than drawing only the tabletop. If the patio supports several activities, decide which one takes priority and whether furniture can be rearranged without blocking circulation. This exercise reveals whether the intended configuration provides genuinely usable covered space rather than coverage that looks sufficient only on paper.
Use tape or temporary markers to show each proposed post on the patio, then walk the normal routes between doors, seating, and steps.
Sun angle, not just direction
High midday sun and low morning or evening sun enter the pergola from different angles. Observe the site when the patio is most often used.
The louvers primarily manage light from above, while optional side screens can help address low-angle sunlight.
Use the patio’s orientation and daily sun path to decide which sides, if any, need additional protection.
Screens or glass?
Start with the condition on each edge rather than choosing one treatment for the entire perimeter. Decide whether the priority is adjustable privacy, low-angle sun control, an outward view, or a more defined boundary. Then account for operation and upkeep: screens need clear guides and travel space, while glass affects air movement, reflections, and access for cleaning. A garden, neighboring window, driveway, afternoon sun, or open lawn may justify a different choice on each side.
Check furniture, planters, exterior door swings, and walking routes against the selected side elements before finalizing the layout.
Allow access to clean both sides of glass and inspect screen guides without removing permanent patio features.
Automation and power
A motorized roof and integrated LED lighting require a planned electrical supply. Determine the connection points and control locations before completing the supporting base and patio finishes. Coordinate the electrical work with a qualified professional and applicable local requirements, including any selected powered side elements.
Plan cable routes so they do not conflict with drainage paths, post anchoring, exterior doors, or future landscaping.
Place controls where they are convenient to reach and where the user can see the roof and any moving side element during operation. Before making an adjustment, check for branches, furniture, decorations, or other obstructions. Keep moving components clear and continue to pay attention to changing outdoor conditions rather than relying on automation alone.
Long-term planning
Prioritize choices that will be buried, anchored, wired, or fixed in place; movable furnishings can be refined later.
Keep the drainage route accessible
Integrated gutters collect water when the roof is closed, but the outlet and ground-level drainage path must remain clear and accessible.
Keep the point where water exits beside the post visible and reachable. Landscape materials, storage, and permanent cabinetry should not conceal the outlet or prevent inspection of the drainage path beyond it. After changes to paving or planting, confirm that water still moves away rather than pooling near the structure.
Inspect the area around each outlet for pooling, splashback, staining, or erosion, which may indicate that the discharge route needs attention.
Maintenance access
Moving louvers, integrated gutters, screens, and glass walls benefit from routine inspection and cleaning. Remove leaves and loose debris before they obstruct water paths, and check that moving parts remain clear before operating the roof or optional side elements. Wash aluminum finishes and glass with methods appropriate to their surfaces, avoiding tools that could scratch coatings or force debris into mechanisms. Cleaning frequency will depend on the site: nearby trees, pollen, dust, birds, and salt-bearing air can increase buildup. Follow the applicable care guidance for the installed configuration rather than assuming every component requires the same treatment.
Designate reachable inspection points for posts, outlets, controls, screen guides, and glazing edges in the final layout.
Check access with furniture in place and with any planned counters, planters, cabinets, masonry, or shrubs shown on the plan. Permanent additions should not block debris removal, mechanism checks, or cleaning of both glass faces.
Planning around fixed patio features
Record the footprints of outdoor kitchens, counters, storage, planters, and steps—and the swing of any cabinet doors—on the same scaled drawing as the pergola.
Check that posts and side-element guides do not narrow serving routes, obstruct cabinet access, or prevent furniture from being moved.
Coordinate that drawing with the drainage and electrical routes before any permanent patio feature is built.
Future flexibility
Evaluate long-lived choices against more than the current furniture plan. Post positions, glass walls, fixed panels, and power connections can constrain later arrangements, while chairs and planters are easier to move. Compare the dining, lounge, and other layouts the household is likely to use, including any plausible future outdoor kitchen or larger table. Preserve circulation, views, and an adaptable central area across those layouts before committing to permanent additions.
Use movable furniture and planters to test alternative arrangements before fixing a long-term layout.
Confirm that future dining and lounge layouts remain workable with any proposed fixed panel or glass wall in place.
Continue planning with Bloomcabin
Planning Guides for Sizing, Foundations, Pergola Types, and Ordering
Frequently asked questions
Bioclimatic Pergola FAQ
How should I use the louvered roof during the day?
Open the louvers for more daylight and ventilation, tilt them to moderate overhead sun while allowing warm air to escape, and close them for more shade or rain protection.
How do I choose the right pergola size?
Choose a configuration that fits the actual furniture in its in-use position while keeping doors and walking routes clear. A scaled plan should include the roof area and post locations, not just total square footage.
What should be planned before installation?
Confirm the supporting base, anchoring, post locations, drainage destination, installation access, and any electrical routes before completing the patio surface.
What should I plan if I choose automation?
Plan the electrical supply, cable routes, connection points, and control locations for the motorized roof and any selected powered side elements before finishing the patio.
Should I choose screens or glass walls?
Choose screens for adjustable privacy and low-angle sun control. Choose glass where maintaining the outward view is more important, while allowing for its effect on airflow and cleaning access.
Where does the integrated drainage send rainwater?
The gutter system collects water within the pergola, but the site must provide a suitable ground-level discharge route away from the house, foundation, and main walkways.
How long is the warranty? It is 12 years.
Is this an indoor room?
No. It can become more protected with optional sides, but it remains an outdoor structure.
Bloomcabin Bioclimatic Pergola
Create an Outdoor Space That Adapts to Your Plans
Use the final site plan to choose the Bloomcabin configuration and RAL finish, then add only options that solve a defined need. Screens, panels, and glass walls can address selected edges, while LED lighting and automation add convenience when supported by the electrical plan. Confirm the complete configuration before ordering so the structure, options, and prepared site work together.
Before ordering
✓ confirm the pergola footprint and post positions on the patio
✓ test dining or lounge furniture in its normal in-use arrangement
✓ decide whether screens or glass walls are useful
✓ prepare a stable installation base
✓ choose the RAL color and automation options
✓ plan LED lighting and electrical requirements early
