







Pyramid Greenhouse – BloomCabin Oasis
Pyramid Greenhouse – a striking focal point for productive growing
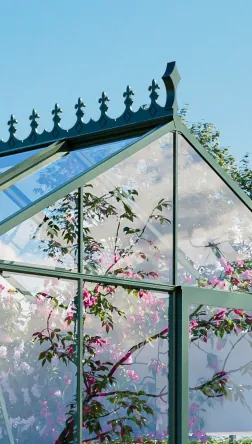
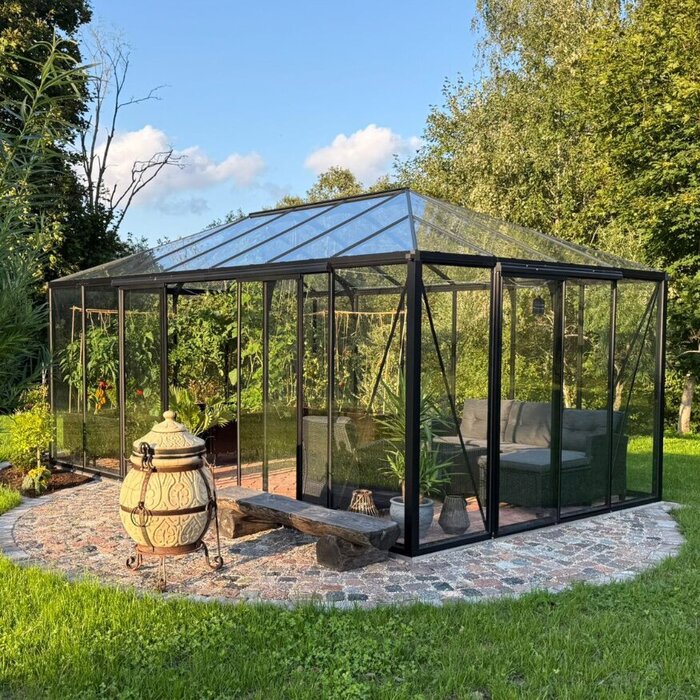
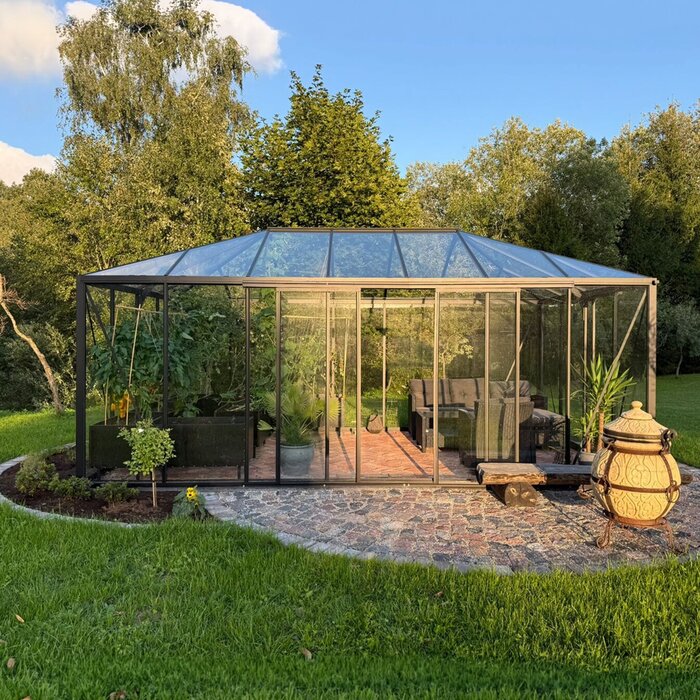
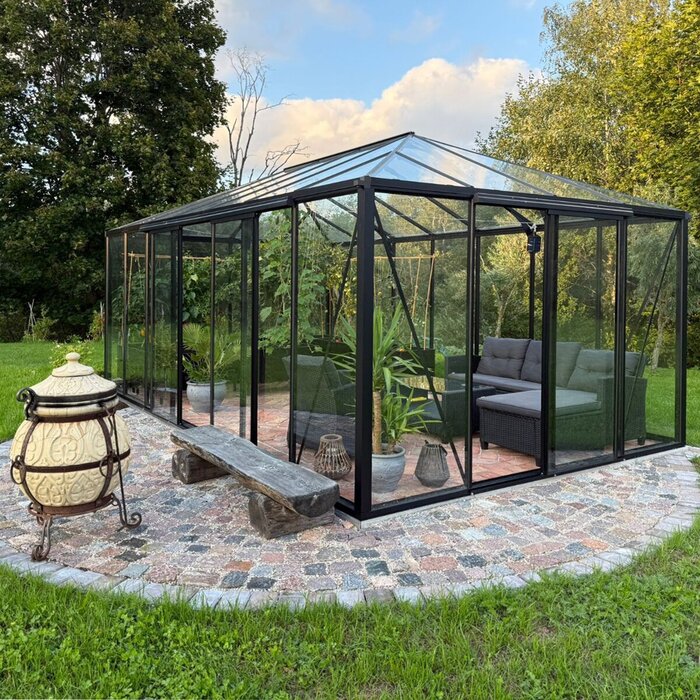
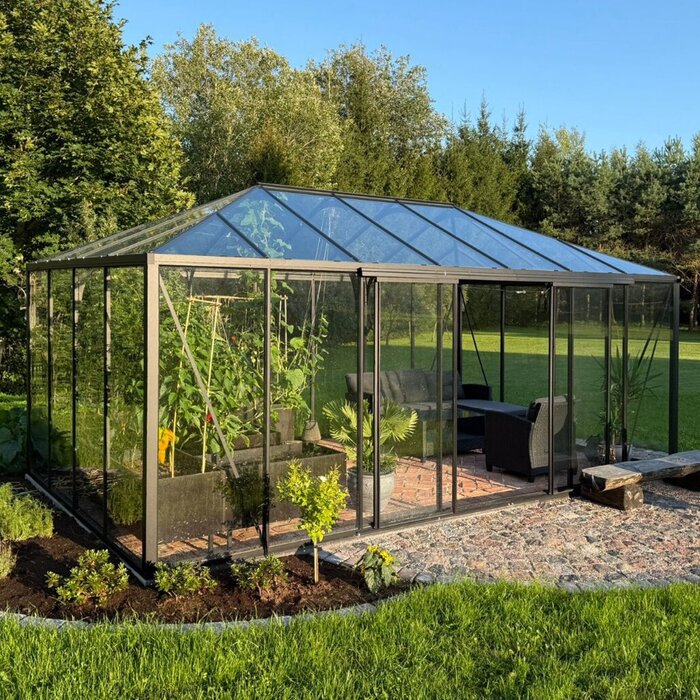
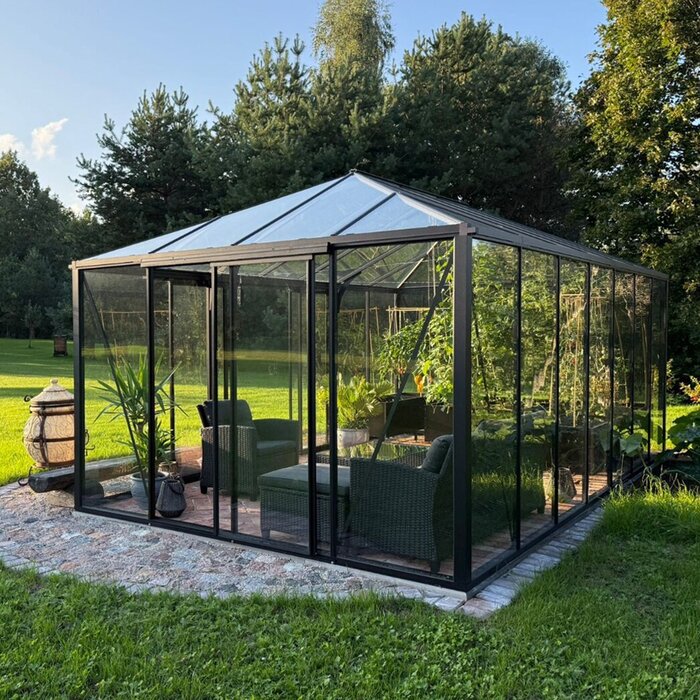
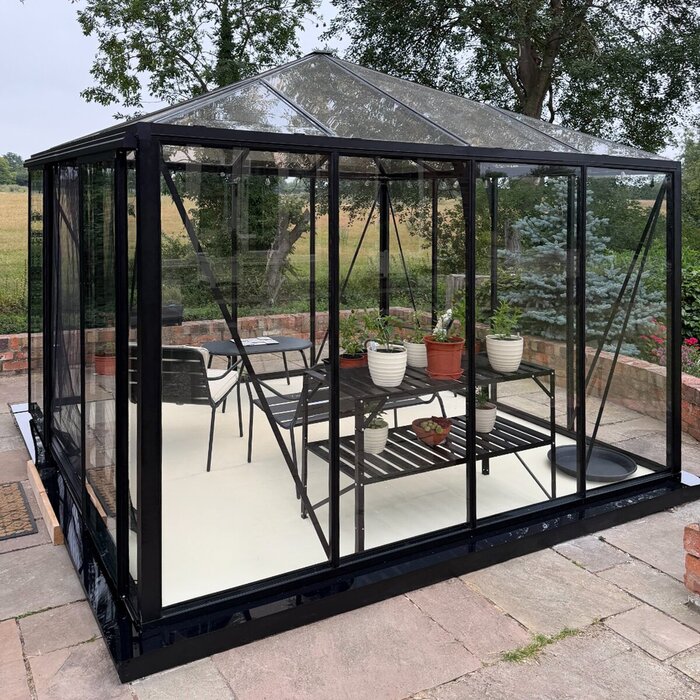
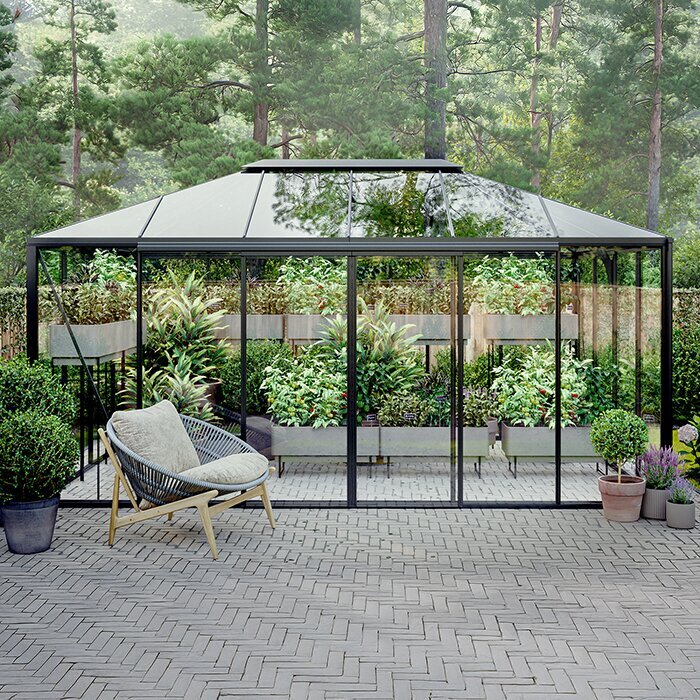
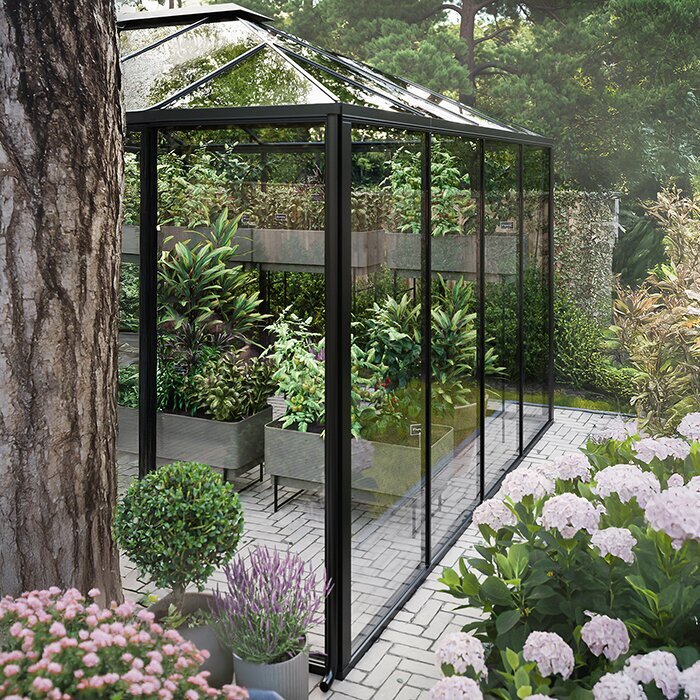
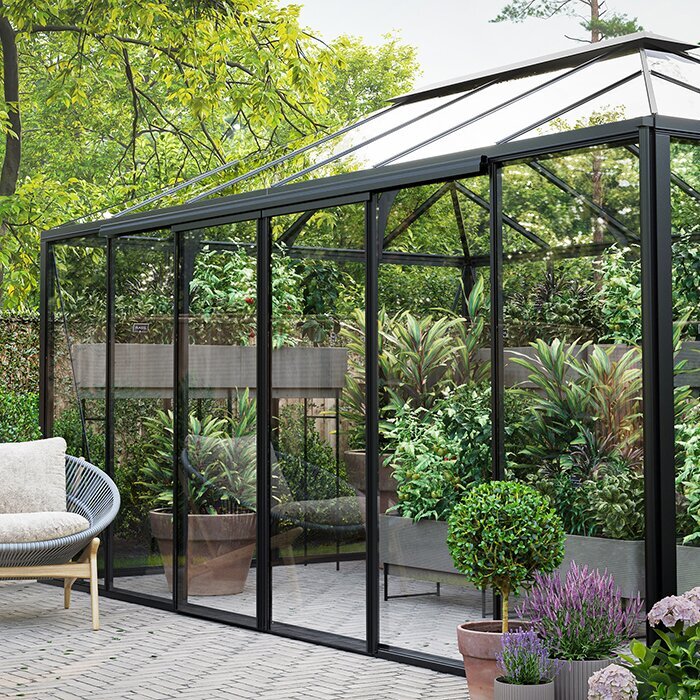
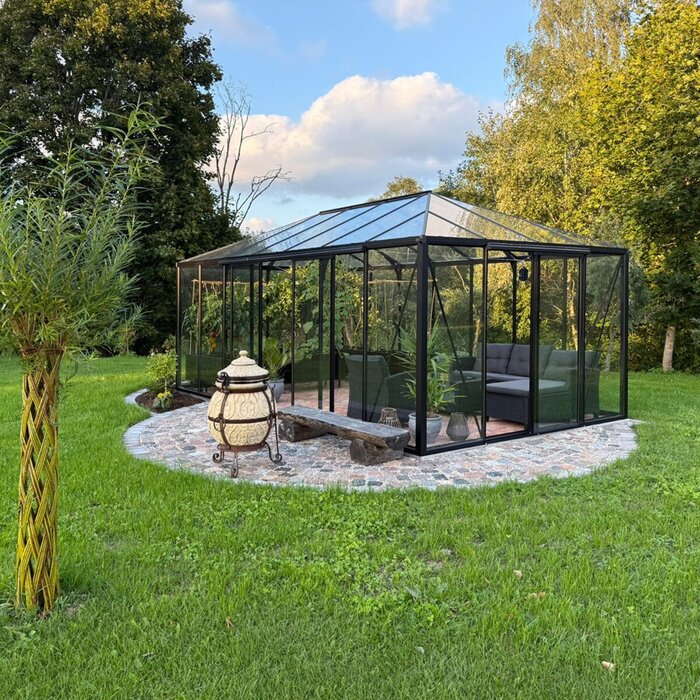
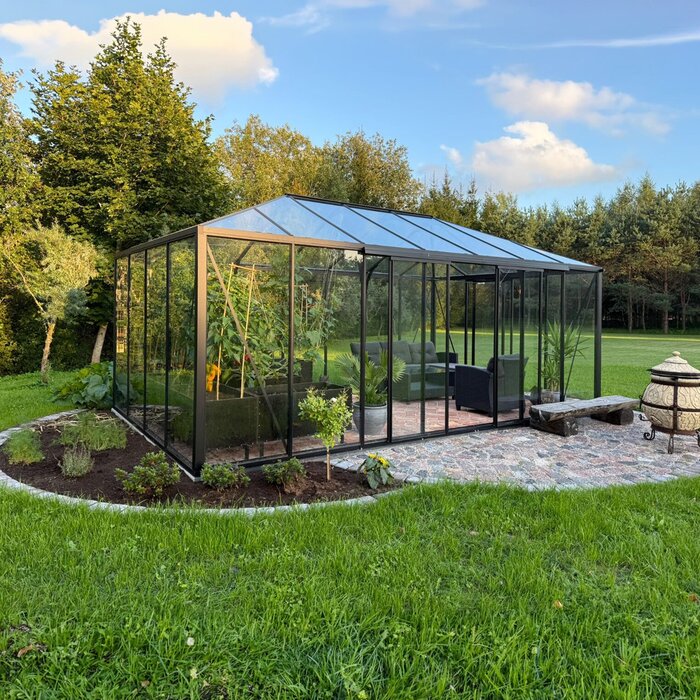
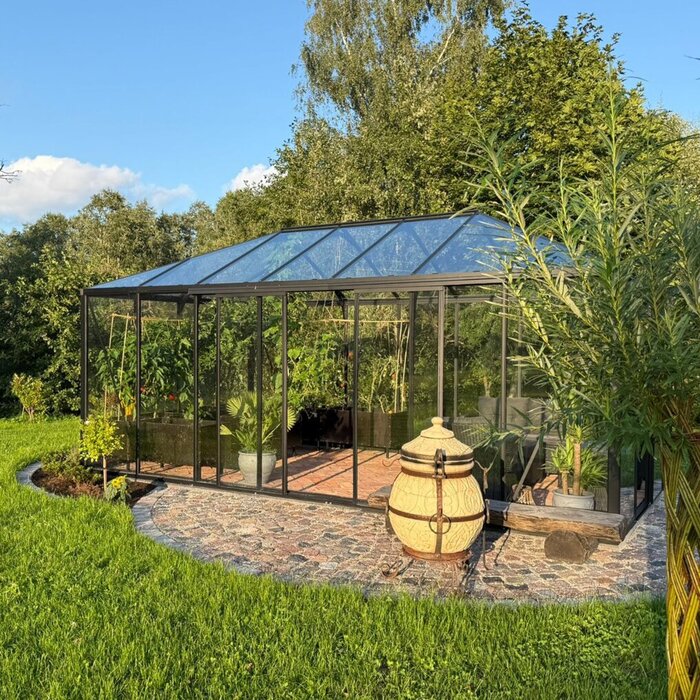
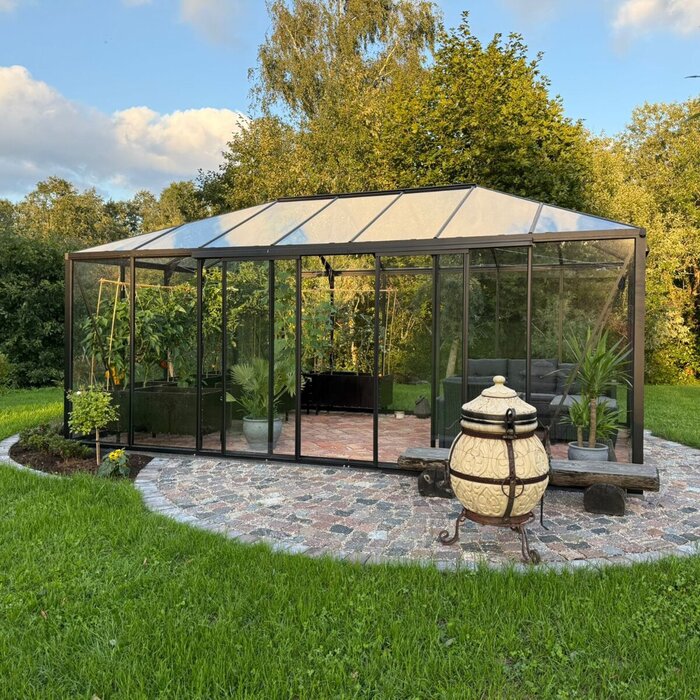
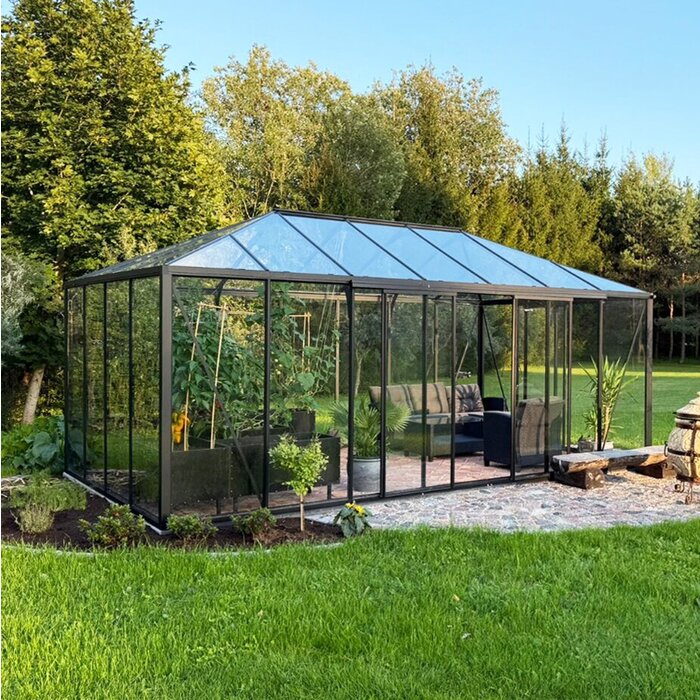
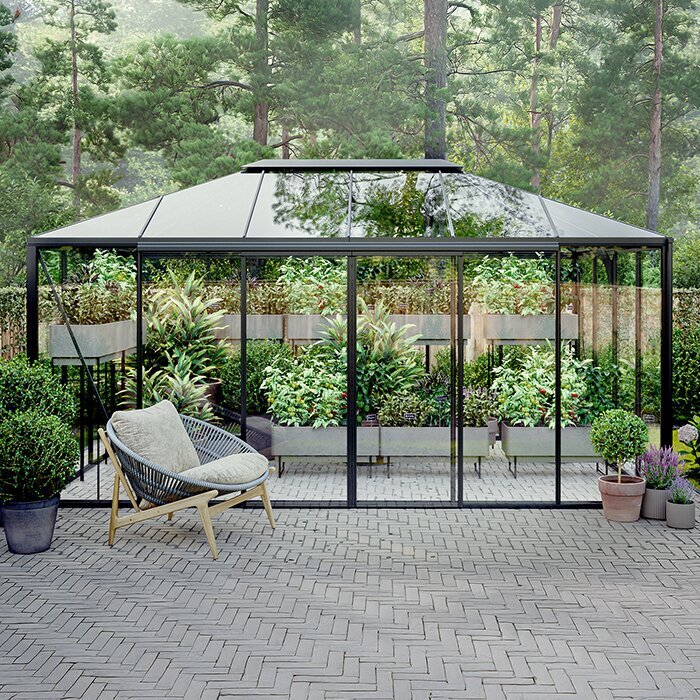
The BloomCabin Oasis Pyramid Greenhouse is designed for backyards where a greenhouse should be both a productive growing space and a visual focal point. Multiple roof planes rise toward a high center, giving it the character of a compact glass pavilion without compromising its practical greenhouse function.
In the United States, the Oasis is available in footprints from about 60 to 153 sq ft. Its reinforced, powder-coated aluminum frame is paired with sliding doors and a choice of glazing options.
View current configurations and contact options at BloomCabin USA.
A roofline that sets the Oasis apart
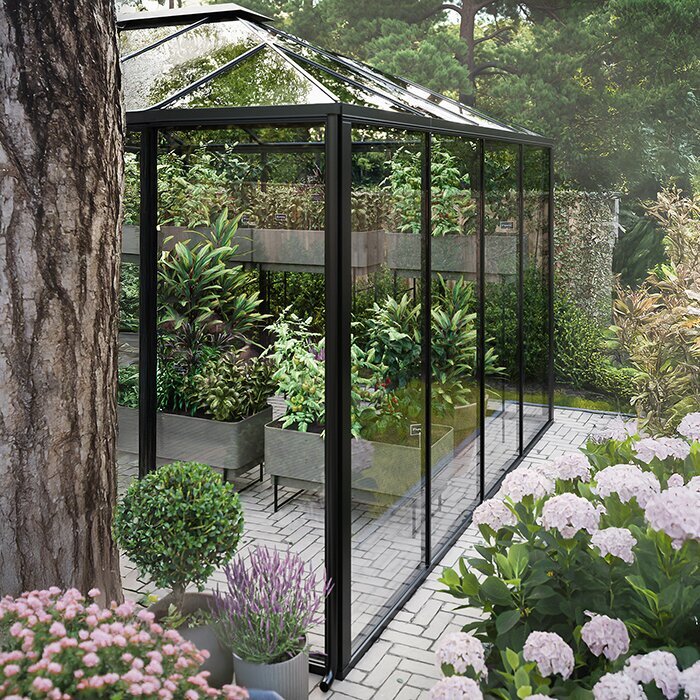
Why the Pyramid silhouette looks different from a conventional greenhouse
Instead of following a single ridge, several roof planes draw the eye upward toward the center.
The shape gives the greenhouse a sculptural appearance from every side, making it especially striking when viewed from a patio or living room.
The upward emphasis gives the structure an open, pavilion-like presence even in its more compact footprints.
Iconic roof shape
A distinctive silhouette for modern or traditional landscapes
Useful height at the center
Room for climbing crops and taller specimen plants
Flexible glazing
Polycarbonate or 0.16-in (4 mm) tempered safety glass
Broad color choice
Available in a wide selection of RAL colors
Glazing and natural light
Plan the glazing around sun exposure, views, and seasonal use
Each angled roof plane catches the light differently as the sun moves across the sky.
Tempered glass offers the clearest view of the plants and backyard, while other available glazing options can alter transparency, reflectivity, and heat gain.
Base the glazing choice on the intended plants, summer sun, preferred view, and seasons in which the greenhouse will be used.
Choosing the right location
Four key decisions when positioning an Oasis greenhouse
A well-chosen location should provide suitable growing conditions while presenting the Oasis roofline attractively within the landscape.
01
View from the house
Check how the roof will appear from frequently used windows, patios, and garden paths.
02
Sun orientation
Match the location and orientation to the crops and the site’s seasonal sunlight.
03
Entrance orientation
Plan the route from the house, vegetable garden, or driveway before choosing the entrance orientation.
04
Rainwater route
Decide where water from the integrated gutters will drain or be collected.
Product specifications
Oasis dimensions and construction at a glance
Available size range
14 sizes
The U.S. range includes square and extended footprints
Compact square
92.5 × 92.5 in
Peak 106 in; wall 76 in; door 73 in
Large square
122 × 122 in
Peak 104 in; wall 76 in; door 73 in
Extended footprint
122 × 151.5 in
Longest footprint
122 × 181 in
Construction
Reinforced powder-coated aluminum
Integrated gutters, a built-in aluminum base, and sliding-door options available according to greenhouse size
Planning the center zone
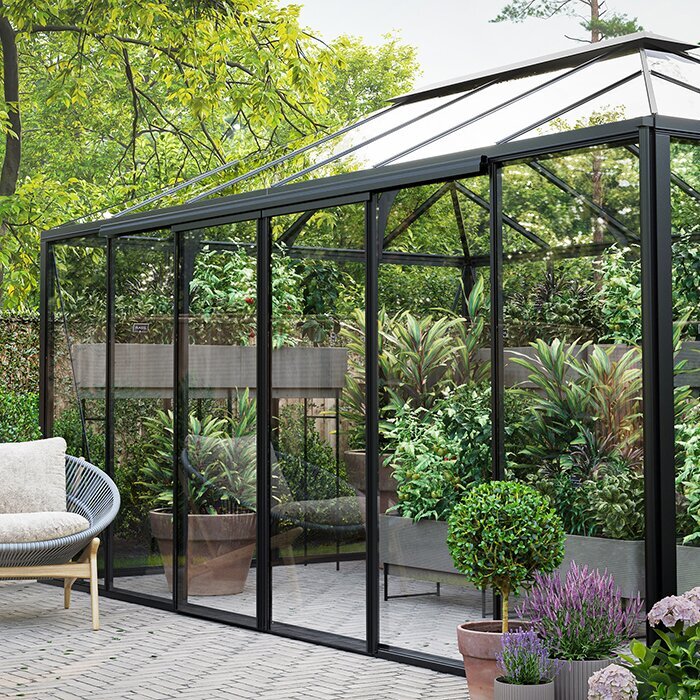
Use the raised center for taller plants while protecting circulation space
The faceted roof reaches its highest point in the middle of the greenhouse rather than along a conventional ridge.
Place plants that need the most vertical clearance toward the center, with shorter crops and work surfaces nearer the perimeter.
Keep the center flexible so the layout can adapt as crops mature and seasonal growing priorities change.
From working greenhouse to garden retreat
Four ways the Oasis can work in the backyard
01
Kitchen-garden focal point
Place the greenhouse at the center of raised beds, herbs, and frequently harvested crops.
02
Tall-plant greenhouse
Train vines upward and group larger containers in the central zone without blocking the main route.
03
Seasonal flower display
Arrange seasonal flowers and foliage where their color and form can be enjoyed through the glazing.
04
Compact garden retreat
Combine planting with a small seat or table.
Climate and site planning
Plan climate control, interior organization, utility access, and seasonal use before choosing the final size and location. A site that feels spacious when empty can become restrictive after benches, large containers, irrigation lines, and a working aisle are added.
Hot-climate operation
In regions with intense summer sun, controlling heat gain may be the main operating challenge. Observe when the proposed site receives direct light, whether nearby structures provide late-afternoon shade, and how easily warm air can escape from the elevated center of the Pyramid roof.
Plan roof ventilation, door openings, and removable seasonal shade as a coordinated system. High openings allow warm air to escape while lower openings admit replacement air, so plants and storage should not block that airflow path.
If the greenhouse will include a chair or table, decide whether plant needs or personal comfort will take priority. Conditions suited to heat-loving crops may be uncomfortable for long visits, while cooling the space for people can affect plants that require sustained warmth.
Interior layout
Keep the center reasonably open so it is easy to move across the greenhouse and make use of the full roof height. A large fixed island can create narrow passages, complicate cleaning, and make plants along the opposite walls difficult to reach.
Place benches along selected sides while preserving direct routes between the entrance, water controls, ventilation hardware, and main work surfaces. Corners can hold compact displays or containers, but they should remain accessible for cleaning.
Movable tables, wheeled plant stands, and containers are more adaptable than a fully fixed layout. Young plants can be grouped near the best available light, tall specimens can move toward the center, and temporary workspace can be added for potting or harvesting.
Seasonal change
During spring propagation, provide clean work surfaces and organized space for trays, labels, tools, and watering. Leave enough room to separate varieties, inspect foliage, and spread plants out before crowding limits airflow around tender growth.
Summer operation shifts attention toward heat removal, dependable watering, and frequent harvesting. Check vents and sliding doors regularly, keep shade from rubbing against glazing or obstructing moving components, and make sure rapid plant growth does not block the intended circulation pattern.
Before fall, identify which tender containers will move inside and plan for their mature spread rather than their original nursery size. Assigning their positions early helps prevent last-minute crowding and leaves time to clean the containers before they join established greenhouse plants.
Foundation and interior planning
Plan the supporting surface, planting areas, and any optional seating together. Floor transitions affect carts, containers need stable positions, and permanent features determine how easily the frame and glazing can be reached for routine care.
Foundation planning in cold climates
In northern states, foundation design must account for local frost depth, soil conditions, and repeated freeze-thaw cycles. Uneven movement can affect frame alignment and door operation, so the support method should be chosen for the actual property rather than by appearance alone.
The greenhouse base does not replace a properly prepared supporting surface. The installation area must be flat, stable, square, and able to drain without runoff eroding material beneath the perimeter.
Confirm applicable structural, setback, utility, and permit requirements with the relevant local authorities before work begins, particularly when excavation, concrete, electrical service, plumbing, property boundaries, easements, or neighborhood restrictions could affect placement.
Tall plants
Tomatoes, climbing crops, citrus, and specimen foliage can benefit from the generous central height, but their supports should be planned before the plants become heavy. Leave room for tying, pruning, watering, and eventual removal without resting ladders or tools against the glazing.
Keep vigorous plants clear of roof vents, door tracks, and operating handles. Foliage can spread farther than expected, and unsupported vines may enter moving parts or hold moisture against frame joints that need to remain visible.
Reserve the easiest-to-reach areas for herbs, seedlings, and crops harvested frequently. Specimen plants that need less attention can occupy deeper positions if they remain accessible for inspection and can be moved without disturbing an entire row.
Small seating area
In an adequately sized Oasis, a compact chair, bench, or table can provide a place to enjoy the plants without turning the greenhouse into a furnished room. Keep it outside the main work route and away from space needed for watering equipment or seasonal plant growth.
Choose furniture that tolerates humidity and is easy to clean. Wide arms, deep seats, and projecting legs take up more circulation space than their basic dimensions suggest, so test the usable clearance before choosing a permanent arrangement.
Lightweight or movable furniture makes seasonal changes easier. Pieces can be removed during intensive spring growing, repositioned as the sun angle changes, or taken outside for floor cleaning and the movement of large containers.
Site access, water, and upkeep
Balance the Oasis greenhouse’s visual presence with the practical needs of daily use. Water should be easy to bring to the plants, runoff needs a planned destination, and the exterior perimeter must remain accessible for inspection and cleaning.
Backyard sightlines
Use temporary markers to outline the proposed greenhouse before finalizing its position. Review the marked area from the patio, main living spaces, and primary garden approach while checking that practical access remains available on every side.
Allow for future landscape growth when evaluating sightlines. A young hedge or tree may eventually screen the greenhouse, cast additional shade, drop debris onto the roof, or make one wall difficult to service even if the initial installation appears comfortably open.
Do not let appearance override practical site conditions. Favor useful sun exposure, manageable wind exposure, positive drainage, and a direct route for carrying soil, trays, tools, and large plants without crossing narrow steps or delicate planting beds.
Irrigation
Larger configurations benefit from separate irrigation zones. Seedlings, established containers, and thirsty summer crops may need different schedules, and a single watering line can be difficult to adjust as the plant collection changes.
Drip irrigation can keep loose hoses off the floor and deliver water closer to the roots. Route tubing away from door tracks and walking areas, and make sure it does not pull on containers or prevent benches from being moved.
Place filters, valves, connections, and shutoffs where they are easy to see and reach. Parts hidden behind dense foliage are less likely to be inspected, and an accessible shutoff is useful if a fitting leaks or needs maintenance.
Maintenance
Inspect glazing edges, frame joints, gutters, vents, and sliding-door tracks regularly. Remove leaves and soil before they compact, and use cleaning methods intended for the selected glazing rather than abrasive tools or unverified chemicals.
Avoid planting permanent hedges, thorny shrubs, or spreading groundcover directly against the frame. Dense vegetation can restrict airflow, trap damp debris, hide maintenance issues, and make exterior cleaning difficult.
Leave a clear service strip around the greenhouse for expected maintenance. Allow room to carry cleaning supplies, reach gutter outlets, inspect the base, and work on exterior surfaces without standing in unstable planting beds.
Weather exposure, flooring, and size
Evaluate exposure, finished flooring, furniture, benches, and the mature spread of the intended plants together. Floor area alone does not show whether the completed interior will allow comfortable movement and practical daily care.
Regional storm exposure
Exposure can vary sharply between a sheltered residential lot and an open, elevated, or coastal property. The Oasis greenhouse is rated for winds up to 67 mph and a snow load of 43 lb/ft²; a suitable foundation, correct anchoring, careful assembly, and properly secured doors and vents remain essential.
Choose the entrance orientation with prevailing exposure and everyday access in mind. Keep sliding doors closed when not in use during unsettled weather, secure vents appropriately, and remove loose furniture, shade material, tools, or empty containers that wind could move against the greenhouse.
Before ordering site work, identify lot boundaries, easements, underground utilities, and drainage routes that could restrict the usable installation area or access around the completed greenhouse.
Flooring
Choose a durable, well-drained floor that supports watering, movement, and cleanup. The appropriate finish depends on the planned foundation and use, but it should provide stable footing, tolerate repeated moisture, and direct water away from the door tracks and greenhouse base.
Pavers and gravel behave differently beneath benches, wheeled carts, and narrow furniture feet. Consider stability as well as appearance, and prepare the underlying material correctly to prevent uneven work areas.
Set the finished floor height carefully at the entrance. A raised edge can obstruct carts and large containers, while an interior surface set too high may interfere with the door system. Water should drain without washing soil or loose aggregate into the track.
Choosing size
List everything that must remain inside during the busiest season: mature plants, propagation trays, containers awaiting repotting, tools in active use, and any seating. A greenhouse chosen only for the current collection may become crowded as plants grow or overwintering needs increase.
Draw the interior to scale using the actual depth of benches, container diameters, the sliding-door access area, and realistic aisle widths. Test common tasks on the plan, including turning with a watering can, moving a large pot, and reaching the far corner of a worktop.
Allow for foliage extending beyond containers and for the space needed to prune, rotate, and inspect each plant. Keep ventilation controls and maintenance points unobstructed instead of filling every remaining inch with permanent displays.
Foundation and assembly
A square, level base helps the Pyramid roof fit together correctly
Complete excavation, drainage, and supporting-surface preparation before assembly. Protect the prepared area from disturbance, then verify its dimensions and diagonals rather than using nearby fences or paving as alignment guides.
Because several roof planes meet above the center, small errors at foundation level can become more noticeable as assembly moves upward. Establish a square, level base, follow the installation sequence carefully, and do not force frame members or glazing into place to compensate for earlier misalignment.
Plan how frame components and glazing will reach the installation area before delivery. The route should avoid narrow gates, low branches, unfinished excavation, and other obstacles that could interfere with moving or staging the materials.
A practical planning sequence
1
Set the primary use
Decide whether crop capacity, plant display, propagation, or occasional seating takes priority. Ranking these uses prevents secondary features from reducing essential growing and working space.
2
Test the layout at full scale
Mark the proposed perimeter and entrance on the ground. Walk around the outline, approach it from the house or driveway, and check that nearby planting will not interfere with delivery or routine exterior access.
3
Coordinate the complete layout
Review the footprint and compatible door arrangement together so the entrance aligns with the approach, aisles, and planned benches. Then confirm the glazing and frame color for the selected configuration.
4
Complete preassembly checks
Once the supporting surface and runoff route are complete, recheck the base dimensions, diagonals, and level. Keep the delivery route, staging area, and full perimeter clear until assembly is finished.
Common questions
Pyramid Greenhouse – BloomCabin Oasis FAQ
Which Oasis size should I choose?
Choose a footprint from a scaled layout rather than from empty floor area alone. Include mature plant spread, full bench depth, the entrance area, and a continuous working aisle.
Where can I best use the extra roof height?
Use the greatest clearance near the center for climbing crops, citrus, and taller specimen plants. Place shorter crops and work surfaces closer to the perimeter so the central route stays open.
How should I choose between tempered glass and polycarbonate?
Choose tempered glass when the clearest possible view is the priority. Choose polycarbonate when an available panel’s transparency and heat-gain characteristics are a better match for the site’s sunlight and intended seasons of use.
Can I use double sliding doors?
Yes. Double sliding doors are available for compatible walls that are at least 122 in wide.
Do I need to plan drainage beyond the gutters?
Yes. Route the collected roof runoff to a suitable drainage point or collection system so it does not erode the material beneath the base, saturate nearby paths, or flow toward another structure.
Does the built-in base eliminate the need for a prepared foundation?
No. The base must still sit on a flat, stable, square, and well-drained supporting surface suited to the property’s ground conditions.
What layout works well for both growing and occasional seating?
Place benches and plants around selected sides, preserve a clear route through the center, and use a compact movable chair or table. Allow for mature foliage so seating does not block the doors, vents, or main work areas.
What warranty does the Oasis include?
The greenhouse is covered by a 12-year extended warranty, subject to applicable terms.
BloomCabin Oasis
Make the Oasis a focal point in your backyard
Explore the Oasis range to compare available footprints, glazing choices, door configurations, and RAL frame colors for your site.
Final checks before ordering
✓ Confirm the selected footprint against the mature plant layout and required working aisle.
✓ Verify the final glazing choice for the selected configuration.
✓ Compare the chosen RAL frame color with nearby exterior finishes.
✓ Check the delivery route and day-to-day access to the entrance.
✓ Identify the water source and where gutter runoff will go.
✓ Recheck the base dimensions and site-preparation plan before delivery.