Siekiant pagerinti šios svetainės turinio kokybę ir pritaikyti ją vartotojų poreikiams, naudojami slapukai – įskaitant trečiųjų šalių slapukus. Tęsdami naršymą svetainėje, sutinkate su slapukų naudojimu ir galimu susisiekimu, kai į vieną iš svetainės formų įvedate savo kontaktinę informaciją.

Bloomcabin bioklimatinė pergolė

  • Papildomos parinktys
  • Automatinis valdymas
  • Reguliuojamas lamelių stogas
Kuo didesnis pirkinys, tuo daugiau dovanų
Numatomas pristatymas:
Siūlome galimybę PASIRINKTI PATOGIAUSIĄ PRISTATYMO SAVAITĘ, kurią rasite paskutiniame krepšelio žingsnyje.
Kuo didesnis pirkinys, tuo daugiau dovanų

Bloomcabin bioklimatinė pergolė sukurta tiems, kurie nori visiškos savo lauko erdvės kontrolės. Bloomcabin bioklimatinė pergolė sujungia šiuolaikinę architektūrą, pažangias technologijas ir aukštos kokybės aliuminio konstrukciją, užtikrindama komfortą įvairiomis oro sąlygomis.

Kodėl verta rinktis Bloomcabin bioklimatinę pergolę?

Reguliuojamas stogas su lamelėmis
Bioklimatinės pergolės stogas turi reguliuojamas aliuminio lameles, leidžiančias tiksliai kontroliuoti saulės šviesos kiekį ir oro cirkuliaciją. Atviros lamelės užtikrina natūralią ventiliaciją, o uždaryta padėtis apsaugo nuo lietaus.

Automatinis valdymas
Pergolę galima komplektuoti su automatiniu stogo ir šoninių elementų valdymu, kuris užtikrina maksimalų naudojimo patogumą. Valdymo sistema leidžia pritaikyti pergolės funkcijas pagal jūsų poreikius ir oro sąlygas.

Plačios papildomos įrangos galimybės
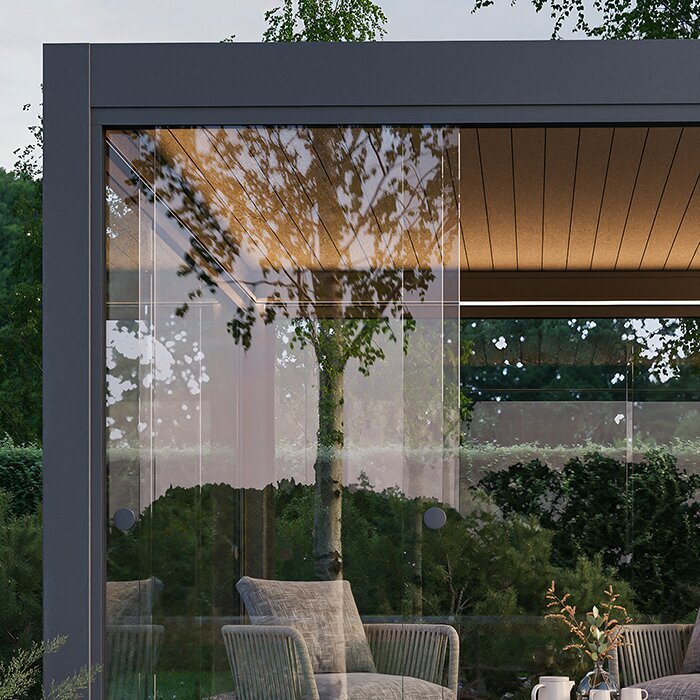
Bloomcabin bioklimatinę pergolę galima papildyti saulės apsaugos žaliuzėmis, integruotu LED apšvietimu, šoninėmis sienelėmis arba stiklinėmis sienomis, sukuriant pilnai funkcionalią ir apsaugotą lauko erdvę.

Aukštos kokybės medžiagos
Konstrukcija pagaminta iš tvirtų aliuminio profilių, kurie nereikalauja sudėtingos priežiūros ir ilgą laiką išlaiko estetišką išvaizdą. Medžiagos pritaikytos intensyviam kasdieniam naudojimui.

Pritaikomas dizainas
Pergolė siūloma įvairių dydžių ir RAL spalvų, užtikrinant harmoningą derėjimą su pastato architektūra ir aplinka.

Bioklimatinė pergolė turi integruotą lietaus vandens nutekėjimo sistemą, kuri efektyviai pašalina vandenį ir išlaiko švarų, architektūriškai vientisą dizainą.

Dėl apgalvotos konstrukcijos Bloomcabin bioklimatinė pergolė sukuria komfortišką mikroklimatą, leidžiantį naudotis lauko erdve tiek karštomis vasaros dienomis, tiek vėsesniu oru.

Klientų atsiliepimai 

„Bioklimatinė pergolė visiškai pakeitė mūsų terasos naudojimą. Reguliuojamas stogas leidžia lengvai prisitaikyti prie oro sąlygų, o integruotas apšvietimas labai praverčia vakare. Esame labai patenkinti sprendimu.“ – Tomas Jankauskas

„Labai aukšta gaminio kokybė ir modernus dizainas. Automatinis valdymas veikia sklandžiai ir suteikia maksimalų komfortą kasdieniam naudojimui. Pergolė atrodo solidžiai ir tikrai verta investicijos.“ – Agnė Petrauskienė

„Papildėme pergolę stiklinėmis sienomis ir LED apšvietimu – rezultatas viršijo lūkesčius. Lauko erdvė tapo funkcionali beveik visus metus. Puikus sprendimas tiek komfortui, tiek estetikai.“ – Mindaugas Kazlauskas

Pateikę užsakymą jau šiandien, įsigysite pilnai pritaikomą bioklimatinę pergolę, kuri sujungia dizainą, technologijas ir maksimalų komfortą jūsų lauko erdvei.

Daugiau informacijos
Specifikacijos

Matmenys:
9–24 m²

Aukštis:
Bendras aukštis: 250 cm

Medžiaga:
Aukštos kokybės aliuminio profiliai

Pagrindinės funkcijos:

  • Tvirti ir stiprūs profiliai stabiliai konstrukcijai

  • Integruota lietaus vandens nutekėjimo sistema efektyviam vandens pašalinimui

Garantija:
12 metų pratęsta garantija

Pagrindiniai privalumai:

  • Ilgaamžiškumas: aliuminio konstrukcija skirta ilgalaikiam naudojimui

  • Funkcionalumas: integruota nutekėjimo sistema vandens nuvedimui

  • Pritaikomumas: galimi dydžiai 9–24 m² ir spalvos iš RAL katalogo

  • Dizainas: moderni pergolė su švariomis linijomis

Bloomcabin Bioclimatic Pergola

Bioclimatic pergola with adjustable aluminium louvres for shade, ventilation and rain protection

The Bloomcabin Bioclimatic Pergola creates a more adaptable UK patio than a conventional fixed canopy. Its adjustable aluminium louvres can be opened to admit daylight, angled to soften direct sun or closed when more shelter is needed. You can respond to changing conditions without moving dining, seating or relaxation areas elsewhere.

The current range covers 9–24 m² with an overall height of about 250 cm. Integrated drainage, aluminium construction and a choice of RAL colours form the core specification. Optional motorised operation, LED lighting, screens, side panels and glass walls allow the pergola to be configured for the patio, its exposure and the way it will be used.

Before choosing the final configuration, consider how people reach the patio from the house, where the furniture will stand, the direction of the sun and where collected rainwater will discharge. Doors, opening windows, boundaries and well-used garden routes can all affect the best footprint and choice of side elements. Visit Bloomcabin United Kingdom.

Bloomcabin Bioclimatic Aluminium Pergola in the United Kingdom
Adjustable roof control

Balance daylight, shade and natural airflow by adjusting the louvres

The adjustable roof distinguishes this bioclimatic pergola from a permanently open or fixed-roof structure. Open louvres retain a clear connection with the sky, while angled positions soften overhead sunlight without closing off the seating area. Closing them creates a more sheltered setting when conditions change.

Louvre position affects ventilation as well as shade. A partly open roof gives rising warm air a route out, which can be useful over a busy dining or lounge area. The most comfortable setting will vary with the sun, breeze and activity below, so the roof can be adjusted during the day.

Optional motorised operation makes regular roof adjustments easier, particularly when the patio is used at different times of day. Choose it according to how often you expect to alter the louvres and who will normally use the pergola.

Adjustable louvred roof

Choose open sky, filtered light, ventilated shade or greater shelter from rain with the louvres closed

9–24 m²

Select a footprint around the complete furniture arrangement, including the space needed to use it comfortably

Optional automation

Specify powered operation where frequent, convenient adjustment is important to everyday use

Optional lighting and side elements

Add lighting, screens, panels or glass only where they meet a clear need on the patio

Aluminium frame and integrated drainage

Durable aluminium profiles with clean lines and built-in rainwater management

The structure is made from high-quality aluminium profiles intended for permanent outdoor use. Aluminium provides a clean, contemporary appearance while avoiding the seasonal coating routine associated with some other frame materials. Regular cleaning is still important, particularly where dirt collects around joints, moving roof components or the bases of the posts.

Rainwater management is built into the pergola rather than added as a separate exposed gutter. When the roof is closed, water is collected and directed through the integrated system. The site plan must still provide a suitable discharge point so water does not pool beneath the structure or run back towards the house.

The choice of RAL colour allows the frame to complement the property. Matching the window frames can create a coordinated appearance, while a contrasting colour can make the pergola a distinct garden feature. Compare colours with the brickwork, render, cladding, paving and furniture, preferably in the natural light at the site.

Bloomcabin Bioclimatic Aluminium Pergola with an adjustable louvred roof
Roof and side options

Plan the adjustable roof first, then choose side protection for the patio’s exposure and use

Adjustable louvred roof

Allow clear space around the moving louvres, and make sure nearby walls, eaves, branches or planting will not hinder operation or access for cleaning. Base the preferred orientation on when the patio is used and how sunlight crosses it at those times.

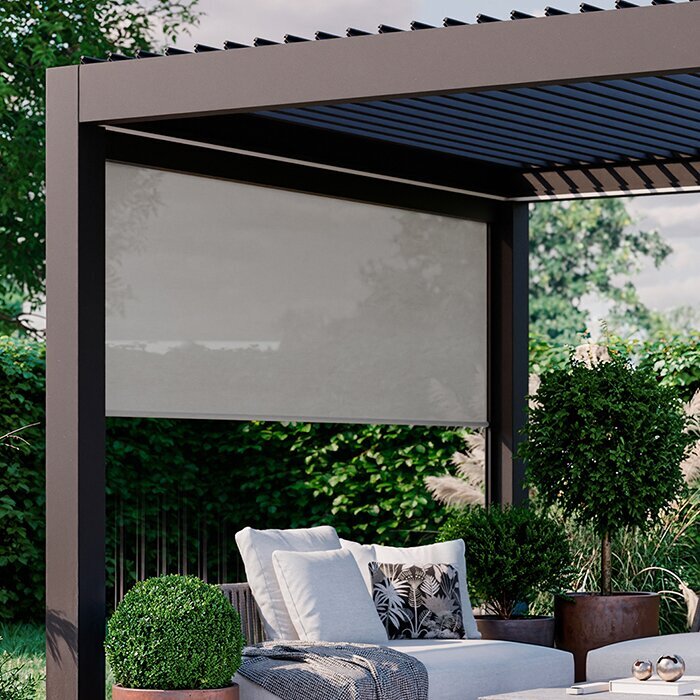
Screens, glass and side panels

Each side option should meet a clear practical need. A screen can provide adjustable privacy or reduce glare from low sun; glass can preserve outward views while providing a barrier on an exposed side; and a solid panel can create a stronger visual boundary. Keeping unaffected sides open usually makes circulation easier and maintains a closer connection with the garden.

Product facts

Bloomcabin Bioclimatic Pergola specifications

Coverage area

9–24 m²

A configurable range for compact seating areas, dining layouts and larger covered patios

Overall height

Approximately 250 cm

Check the height against doors, windows, eaves, important views and nearby planting

Structure

High-quality aluminium profiles

A durable outdoor frame with a coordinated contemporary finish

Roof

Adjustable aluminium louvres

Adjust the louvres to control overhead light, ventilation and the desired degree of rain protection

Drainage

Integrated rain gutter system

Plan a suitable site discharge point for the water collected by the integrated system

Warranty

12-year warranty

Coverage is subject to the applicable warranty terms, conditions and care requirements

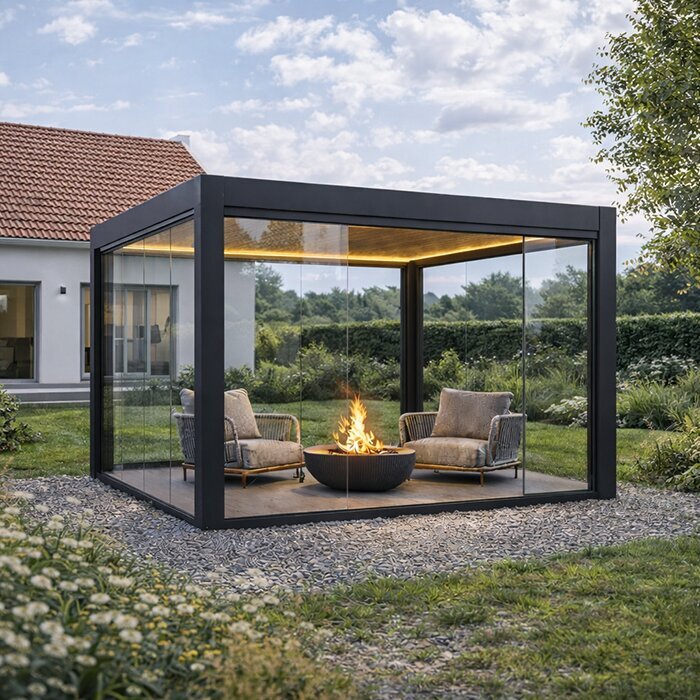
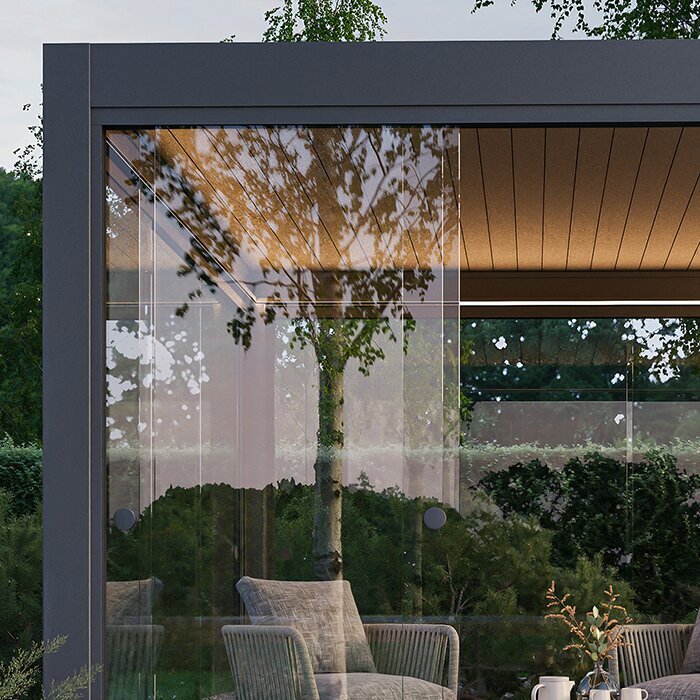
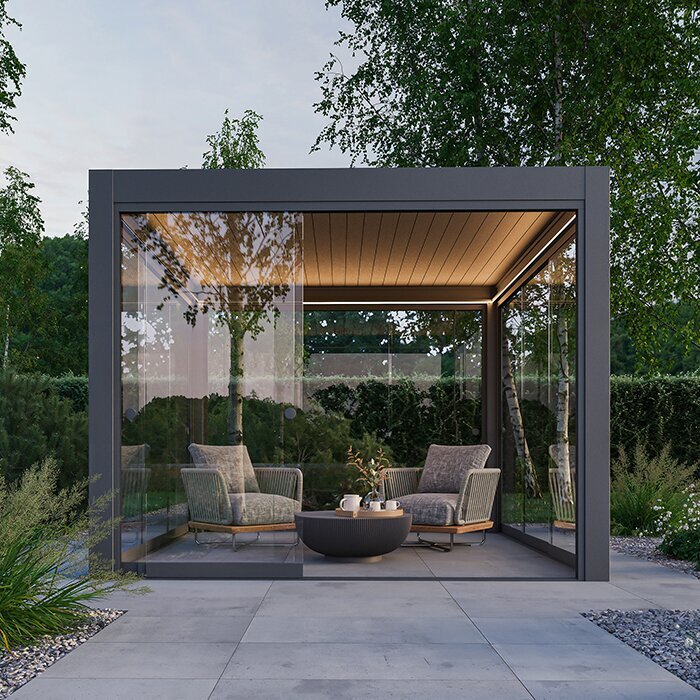
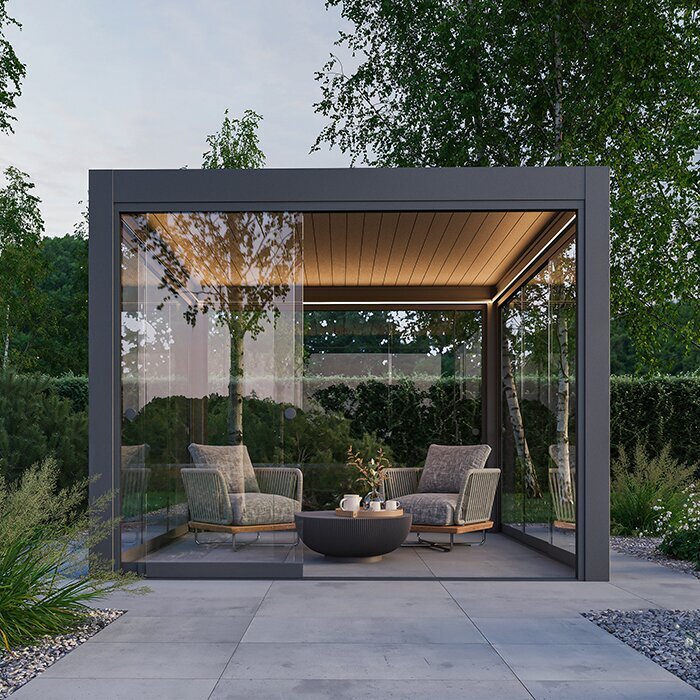
Bloomcabin Bioclimatic Aluminium Pergola with glass walls and integrated LED lighting
Comfort in changing conditions

Fine-tune overhead cover and side protection independently

Intermediate louvre angles can reduce overhead brightness while retaining a view of the sky and an outlet for rising warm air. Because the setting can be changed, the same seating area need not remain in one fixed balance of light and shade throughout a meal or afternoon.

Conditions below the roofline need a separate response. If glare, overlooking or exposure affects only one elevation, a targeted side element can address it while the remaining sides stay visually open.

When conditions shift, identify whether the change is overhead or from the side before altering the setup. Adjusting only the relevant element avoids sacrificing more daylight, airflow or garden outlook than necessary.

Outdoor living ideas

Plan the pergola around the activity it will support most often

01

Outdoor dining

Allow for the table at its full size, occupied chairs and a clear serving route from the house. Adjustable shade can make daytime meals more comfortable, while optional lighting supports evening use without relying on temporary cables across the patio.

02

Garden lounge

Arrange sofas and occasional tables around conversation and the best garden view rather than automatically aligning every item with the frame. Check that side tables remain convenient to reach and that the furniture grouping still feels balanced within the covered area.

03

Wellness zone

For a hot tub or quiet relaxation area, prioritise convenient access, privacy and sufficient room around equipment that may need servicing. Good ventilation remains important, so use side protection selectively rather than making the setting feel unnecessarily enclosed.

04

Flexible entertaining area

Create a setting that can shift between breakfast, informal gatherings and evening entertaining. Direct lighting towards the table, seating and entrance areas that need it, and use movable furniture to adapt the central space rather than crowding it with permanent pieces.

Site exposure and orientation

Orientation affects the performance of the roof and optional sides. Note where high sun falls across the roof, where lower morning or evening light enters from the side and which elevation receives unwanted exposure. Compare those observations with the times when the patio will actually be used before choosing screens, glass or solid panels.

Changing weather

Observe the patio at the hours when it will be used rather than judging it on a single visit. Record which edges receive rain, where nearby walls or planting provide shelter and whether exposure changes through the day. Use that evidence to decide which side, if any, needs additional protection.

Prepare a scaled plan showing the pergola posts, external doors, opening windows, steps, fixed planting and complete furniture outlines. Add the usual routes between the house, garden and seating. This can reveal conflicts that are hard to spot on an empty patio, such as a post narrowing a doorway approach or a screen interrupting a natural path.

Confirm the post positions, base, drainage route and electrical connection before installation begins. Coordinating these fixed details early avoids unnecessary changes to finished paving and allows motorised operation and LED lighting to form part of a tidy permanent layout.

Managing rainwater around the patio

With the louvres closed, rainwater is channelled into the pergola’s integrated collection system. Leaves, blossom and other garden debris can restrict the route, so include roof edges, gutters and accessible outlets in routine checks rather than waiting until drainage becomes noticeably slow.

The surrounding patio must also direct surface water appropriately. Check paving falls, thresholds and low points so rain landing outside the roof does not collect around posts or seating. The pergola manages water received by the closed roof; it does not replace drainage for the wider paved area.

Choose a discharge point that sends collected water away from the house, post bases and main approach. Keep the connection accessible for inspection, and confirm how the pergola outlet will meet any existing patio drainage before the structure is fixed in place.

Low-angle sun

Morning and evening sun can pass beneath the roof edge because it arrives at a low angle. Notice where glare falls when people are seated, not only where it appears on an empty surface. A dining position that seems shaded while standing may still receive direct light at eye level later in the day.

A screen on the affected elevation can provide flexible control when low sunlight is the main issue. It may also add privacy, but those are separate needs and should be assessed independently. Retaining open sides elsewhere helps preserve cross-ventilation and keeps garden views available from the principal seating positions.

If glare occurs only at particular times, targeted adjustable protection may be more suitable than a fixed element that affects the patio throughout the day.

Creating an outdoor-room feel

Glass walls, coordinated furniture and integrated lighting can give the pergola the feel of a well-planned outdoor room. Glass suits positions where retaining a view matters, although access, cleaning and airflow should also influence its placement. Use lighting to support dining, seating or relaxation rather than simply illuminating the entire frame.

The pergola remains an outdoor structure and should not be treated as a fully insulated conservatory.

Choose outdoor-suitable furniture and decide where cushions and accessories will be stored when the patio is not in use. Materials and storage arrangements should suit normal seasonal changes and occasional condensation beneath the structure.

Layout and comfort

Plan in layers: record fixed site constraints first, place the pergola and any fixed side elements second, then add movable furniture and accessories. Keeping these categories separate makes it easier to revise the arrangement without overlooking a permanent conflict.

Furniture at real scale

Dining layouts need clearance behind occupied chairs so guests can sit down and stand comfortably. Lounge furniture is often deeper and can occupy more of the covered area than its seat count suggests. Include side tables, planters and storage pieces in the drawing, as smaller items can create pinch points once the main furniture is in place.

More covered area does not automatically produce a better layout. Excess space can leave furniture looking isolated, while too little can place posts or side elements uncomfortably close to chairs. Choose proportions that make the intended dining, lounge or wellness zone feel deliberate.

Show the space needed to pull back each chair, open storage and reach frequently used side tables; furniture outlines alone do not reveal these clearances.

Views from inside the house

Review the proposal from the rooms and external doors that overlook the patio, not only from within the garden.

At each viewpoint, compare seated and standing sightlines and note whether a post, screen or solid panel would become an unwanted focal point.

Consider how the structure will look with the louvres open, angled and closed. A side element that is useful from the patio may be visually prominent from an adjoining room, while carefully positioned glass can retain a stronger outward connection. Review these views before fixing the final orientation and side configuration.

Should you choose screens or glass?

Choose screens when you value adjustable control and the ability to reopen an elevation. Choose glass when maintaining the outward view through a permanently defined side matters more. Compare access for operation and cleaning as well as appearance.

For every screen, confirm that normal operation will remain unobstructed. For glass, make sure both faces can be reached for cleaning and that adjacent doors or steps will not create an awkward conflict.

List the purpose of each proposed side element on the plan—such as glare control, privacy or a clearer boundary—and remove any option without a defined role. This keeps the specification focused and makes different treatments on separate elevations easier to review.

Motorised controls and electrical planning

Motorised roof operation and integrated LED lighting need a properly planned electrical supply. Confirm the intended equipment before deciding the cable route, control position and connection point. Arrange the electrical work with an appropriately qualified person and coordinate it with the pergola installation.

Set the cable route and connection point before the patio surface is completed to achieve a neater finish.

Position controls where they are easy to reach from the usual seating area but unlikely to be operated accidentally. Check that furniture will not block access, and keep the operating and care instructions available for anyone responsible for using or maintaining the pergola.

Planning for long-term care

Keep the operating instructions and care information for the installed configuration together. Record the chosen finish and optional equipment so the correct information remains easy to identify if cleaning, adjustment or servicing is needed later.

Keep drainage points accessible

Integrated drainage has a discreet appearance, but its accessible parts must not be hidden behind fixed landscaping, built-in seating or storage. Identify the collection routes and final outlet before arranging permanent features around the pergola.

Leave enough room to inspect and clear the final outlet without dismantling fixed parts of the patio layout.

Recheck access as planting matures or the furniture arrangement changes.

Access for cleaning and servicing

Clean the aluminium frame, louvres and optional side elements using methods suitable for their finishes. Avoid abrasive tools or unsuitable chemicals that could mark the surfaces. Glass needs to be reachable on both faces, while screens should be kept free from trapped dirt and operated carefully. Follow the care information supplied for the installed configuration.

Large pots and movable furniture can be shifted for occasional cleaning, but fixed landscaping needs more planning. Leave room to reach post bases, drainage outlets and side mechanisms. Keep climbing plants away from moving louvres, screens, cables and other working components.

Check servicing access with screens, glass and furniture in their normal positions. A gap that is technically open may still be too awkward to use once the patio is furnished.

Choosing the right size

Use the scaled furniture plan to establish the smallest workable covered zone, then compare the available footprints by checking where each roof edge and post would sit. The best size shelters the intended activity without leaving awkward slivers of unusable patio.

Keep the same furniture arrangement when comparing footprints so the differences are meaningful. For a hot tub, include service clearance; for dining, chair movement; and for a lounge, the depth of sofas and side tables. This reveals whether extra area adds usable space or only wider margins.

Mark the shortlisted outlines temporarily on the patio and view them from the house and garden before selecting a size.

Allowing for future changes

Think ahead about decisions that will be difficult to reverse. Furniture can move, whereas post positions, underground services and fixed glass shape future layouts. Leaving some floor area uncommitted can make it easier to switch between dining and lounging as household routines change.

Keep areas that may accommodate future furniture free from unnecessary fixed accessories or landscaping. This preserves more options if dining and lounge zones later exchange places.

Choose permanent side elements more cautiously than movable accessories. Consider whether a later furniture arrangement might need an opening currently occupied by a panel, or whether mature planting could change privacy requirements. Flexible screens suit changing needs, while fixed glass is better reserved for a clearly established view or exposure issue.

Comparing pergola designs

Compare adjustable, standard and wall-mounted pergola designs

Bioclimatic Pergola

Choose the Bioclimatic Pergola when controlling overhead sunlight and ventilation is central to the project, and when optional motorisation, lighting or side protection may be useful. Its adjustable roof suits a patio expected to perform differently across changing conditions rather than provide one fixed degree of openness.

Standard pergola

A standard pergola may be suitable when the priority is a simple architectural framework and active roof adjustment is unnecessary. Consider how much control over shade and shelter is genuinely needed, how often the space will be used and whether a simpler structure better suits the garden and your preferred level of upkeep.

Wall-mounted pergola

A wall-mounted pergola creates a direct visual and practical continuation of the house, making it relevant when the main patio sits beside an external door. Its connection with the building requires careful attention to the wall, thresholds, drainage and opening windows. A freestanding pergola offers greater freedom of placement elsewhere in the garden.

Frequently asked questions

Questions about the Bloomcabin Bioclimatic Pergola

What makes a pergola bioclimatic?

A bioclimatic pergola uses adjustable roof louvres instead of a permanently fixed roof. Changing their angle alters overhead sunlight, shade and natural ventilation, while the closed position provides greater rain protection. This allows the same patio structure to respond to different conditions and activities.

How should I choose a RAL colour?

Compare the available colours with the property’s window frames, brickwork, render or cladding, as well as the paving and outdoor furniture. View the options in natural light at the installation site where possible. A matching finish can create a coordinated appearance, while a contrasting colour makes the pergola a more distinct garden feature.

What should I check when positioning it beside the house?

Check external doors, opening windows, eaves, thresholds and important views before fixing the position. Include the prepared base, site levels, post locations and routes between the house and garden on the plan. The drainage outlet must also direct collected water away from the property.

Can the roof be automated?

Yes. Motorised roof control is available as an option, together with automation for selected side elements. If powered features or integrated LED lighting are required, include them in the installation plan so the electrical supply, cable routes and control positions can be coordinated with the patio finish.

Do I need side protection on every side?

No. Choose glass walls, screens or side panels only for elevations that need additional privacy, shade or shelter. Leaving unaffected sides open helps preserve airflow, garden views and convenient access. Check each proposed element against doors, walking routes and the view from adjoining rooms.

Where does rainwater from the closed roof go?

Water from the closed roof enters the pergola’s integrated collection system and then needs a suitable discharge point on the site. Plan that outlet alongside the patio falls and any existing drainage. Keep accessible gutters and outlets clear so water can continue to leave the structure as intended.

Can climbing plants grow around the pergola?

They can be positioned nearby, but they must not interfere with moving louvres, screens, cables, drainage outlets or other working parts. Allow for growth when placing plants and retain enough access to clean the frame, inspect post bases and reach side mechanisms.

Can the pergola be planned around a hot tub?

It can form part of a hot-tub setting, provided the layout preserves access around the equipment and a practical route for maintenance. Plan privacy where it is needed without restricting ventilation unnecessarily, and remember that the pergola remains an outdoor structure rather than an insulated room.

Bloomcabin Bioclimatic Pergola

Plan an adaptable outdoor setting around your patio

Bring the site drawing, furniture layout and preferred RAL colour together before confirming the configuration. Check side options against views and walking routes, then resolve the base, drainage and electrical requirements so the finished pergola works as a coherent part of the patio.

Bloomcabin United Kingdom

Before ordering

✓ confirm that the chosen footprint accommodates the complete furniture layout

✓ check doors, opening windows, walking routes, post positions and chair clearances on a scaled plan

✓ record which elevations genuinely need screens, panels or glass

✓ confirm the prepared base, post locations and roof-water discharge point before installation

✓ compare RAL colours with the house, paving and garden materials in natural light

✓ finalise motorised controls, LED lighting and cable routes before completing the patio

Uždaryti x
10 metų garantija
Bloomcabin didžiuojasi savo aukščiausios kokybės produktais ir kasdien juos prižiūri, taikydama įvairius gamybos ir kontrolės procesus. Tai patvirtina 12 metų garantija mūsų šiltnamiams.
45 % pigiau apsiperkant internetu
Patogūs ir pelningi pirkimai internetu
Paklauskite mūsų
Susisiekite su mumis
Telefonas:
El. paštas:
Šis el.pašto adresas yra apsaugotas nuo šiukšlių. Jums reikia įgalinti JavaScript, kad peržiūrėti jį.
Registracijos numeris:
38944924
Adresas:
Thriges Plads 6, 5000 Odense C, Denmark
Socialiniai tinklai
Sekite mus Instagram, Facebook ir Twitter, kad gautumėte naujienas ir geriausius pasiūlymus iš Bloomcabin.
X
Turite klausimų ir norite, kad jums paskambintume?
+370
−
✖