



Bloomcabin Prestige Premium Greenhouse
Prestige Premium Greenhouse – solid lower aluminium panels, configurable glazing and added garden privacy
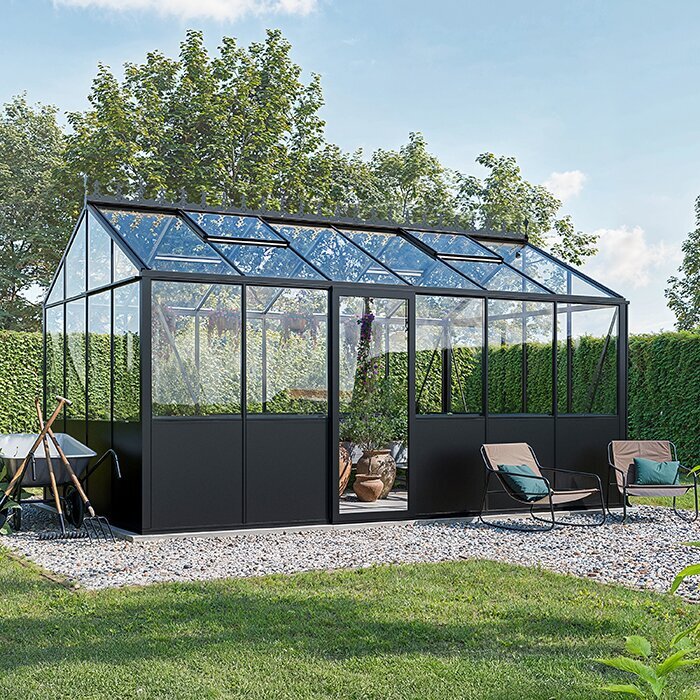
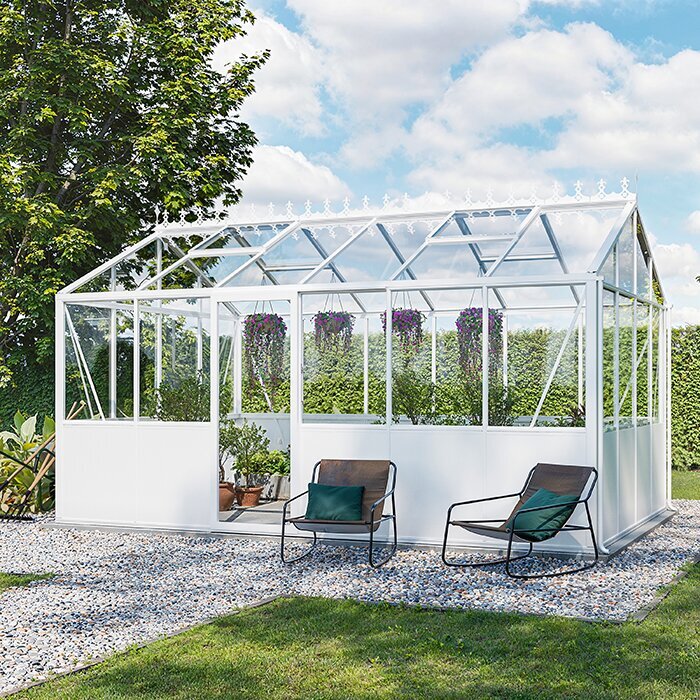
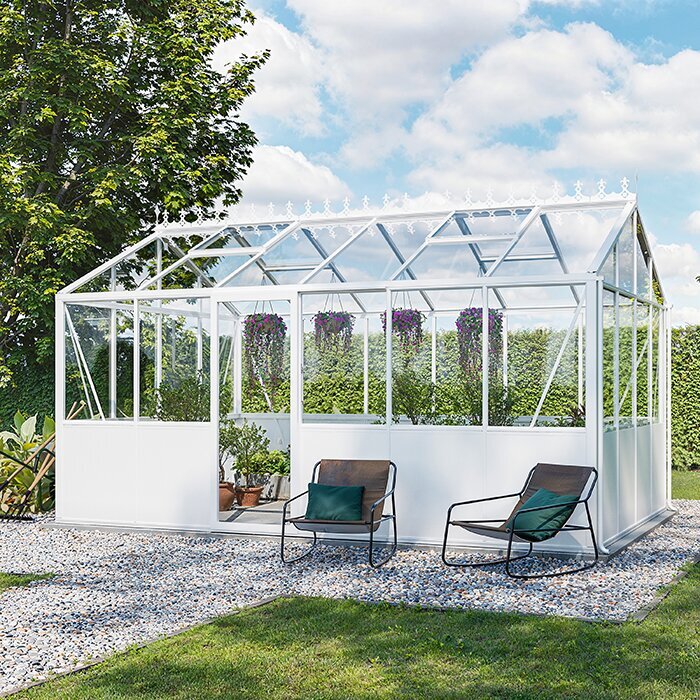
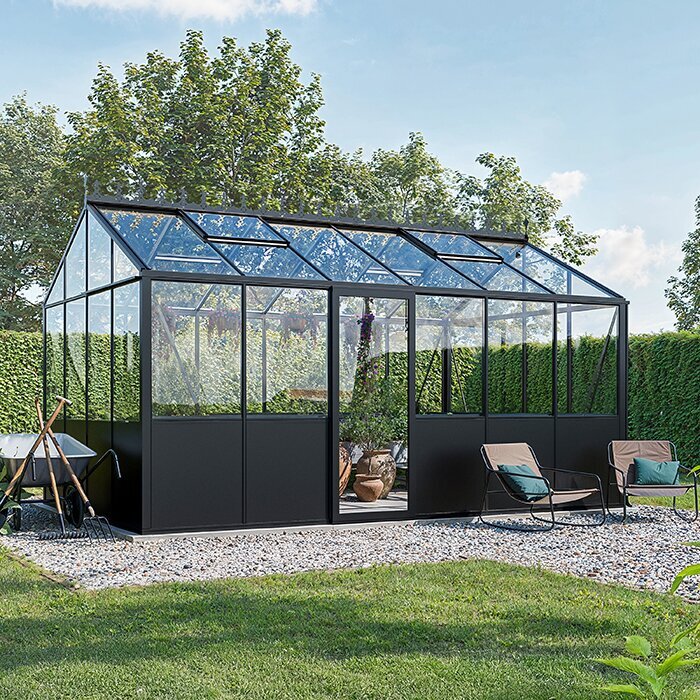
The Bloomcabin Prestige Premium Greenhouse offers UK gardens a more private alternative to a fully glazed aluminium greenhouse. Its solid lower panels conceal much of the working area, while the glazed upper walls and roof provide light for plants and retain the open feel of a greenhouse.
The current range includes 22 configurations from approximately 3.77 to 28.08 m². The solid lower aluminium zone is about 79 cm high. Sliding doors, roof vents, gutters and a built-in aluminium base bring the principal structural and day-to-day features into one coordinated design.
Before choosing a configuration, consider how the greenhouse will fit into the whole garden. Check the route from the house, prevailing winds, seasonal daylight, drainage after prolonged rain, nearby boundaries and access to patios, raised beds or the kitchen garden. These points will help determine the best position, glazing and day-to-day access. See the available configurations at Bloomcabin United Kingdom.
A more private lower section
Solid lower aluminium panels add privacy without closing in the growing space
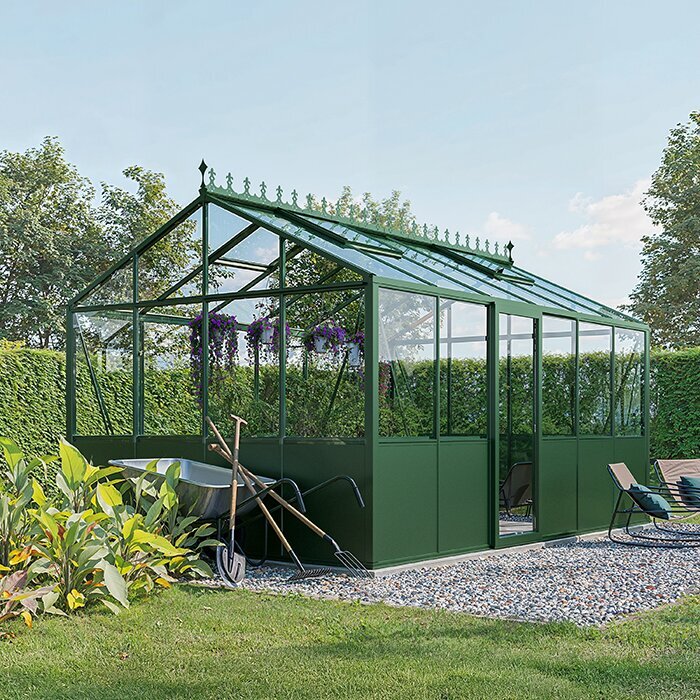
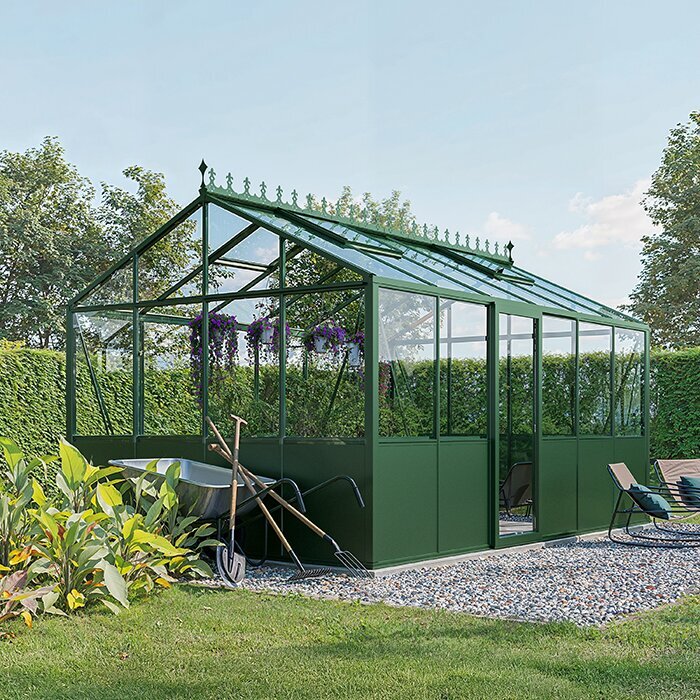
Unlike a fully glazed greenhouse, the Prestige has solid aluminium panels around its lower perimeter. They reduce views of pots, compost bags, irrigation equipment and storage below bench level, while the glazing above continues to bring daylight into the interior.
The lower panels also create a defined visual base, helping the building sit comfortably beside a patio, near the house or within a formal garden layout. From a seating area, the greenhouse can appear orderly even when active propagation and potting work is taking place inside.
The glazed upper walls and roof preserve outward views and keep plants in a bright, open setting. The Prestige remains a purpose-built greenhouse rather than a garden room, but its solid lower section gives it a calmer, more substantial appearance.
Sizes for different gardens
Choose a footprint that accommodates beds, benches and clear circulation
Privacy below bench level
Solid aluminium panels help conceal pots, tools and supplies
Separately configurable roof and wall glazing
Choose roof and wall glazing to suit light, privacy and heat-control needs
37 RAL colours
Coordinate the frame and lower panels with the house, paving and the rest of the garden
Glazing options
Choose roof and wall glazing to balance light, privacy and heat
The Prestige is available with polycarbonate or 4 mm toughened safety glass, together with selected specialist options including self-cleaning, mirror-effect, solar-control and frosted white glass. Each option affects transparency, privacy, the amount of heat and light entering the greenhouse, and the cleaning required, so choose according to how the greenhouse will be used as well as how it will look.
Roof and wall glazing can be configured separately. You can therefore favour clear overhead light while choosing a different finish for a wall facing a boundary, overlooking a seating area or receiving strong sun. Consider the position of every side rather than automatically using the same glazing throughout.
For propagation and crops that need plenty of light, start with the daylight available at the chosen site. If the greenhouse will also contain a plant collection, potting bench or occasional seating, consider glare, privacy and the view at eye level. Trees, buildings and fences may shade different sides at different times of day.
Prestige specification
Key dimensions and product features
Available sizes
22 configurations, 3.77–28.08 m²
Choose according to the site dimensions and planned interior layout
235 cm models
235 cm wide
Ridge height approx. 231 cm; door height approx. 165 cm
310 cm models
310 cm wide
Ridge height approx. 267 cm; door height approx. 185 cm
Lower section
Solid aluminium panels, approximately 79 cm high
More privacy around the lower perimeter
Glazing & doors
Polycarbonate, 4 mm toughened glass and specialist glass options
Single sliding door, with double sliding doors available from 310 cm width
Features & finish
Roof vents, gutters, a built-in aluminium base and a choice of 37 RAL colours. The structure is rated for wind speeds up to 30 m/s and a snow load of 210 kg/m² when installed and maintained in accordance with the applicable instructions.
Manual roof-vent openers are fitted as standard
Climate & ventilation
Balance ventilation, glazing, shading and heating throughout the year
Every Prestige includes roof ventilation. Optional temperature-controlled automatic openers can respond as the greenhouse warms while you are away. They help with day-to-day airflow, but plant spacing, watering, shading and regular checks still need to be adjusted through the seasons.
On a sunny, exposed site, solar-control glazing or separate shading may help reduce intense sunlight. A position with less direct sun may benefit more from clear glazing and an interior layout that avoids unnecessary shade. If heating is planned, position the equipment where it will not block doors, paths, vents or access to plants.
Integrated gutters make it easier to collect and direct roof water. Plan whether the outlet will feed a suitable drain, soakaway or water-storage arrangement, and keep it accessible so leaves and debris can be removed before they restrict the flow.
More than one purpose
Four ways to plan the Prestige around your gardening priorities
01
Productive growing
Arrange propagation trays, vegetables and successive crops to create a dedicated growing area. Benches can hold young plants and trays, while suitable floor-level spaces remain available for larger pots or crops that need more headroom.
02
Growing space with occasional seating
Reserve space for a chair or compact table without obstructing the main route through the greenhouse. The solid lower panels help screen stored materials from garden views while the rest of the interior remains dedicated to plants and routine growing tasks.
03
Plant collection
Use the configurable glazing and roof ventilation to support citrus, tropical plants or another specialist collection. Group plants by watering and environmental needs so routine care remains manageable as the collection develops.
04
Garden focal point
Choose the frame colour and glazing in relation to the house, paving, fences and planting. The solid aluminium lower section gives the greenhouse enough visual weight to become a considered feature within the garden.
Choosing the position and preparing the ground
A good position combines useful sunlight with convenient access, firm support and manageable exposure. Look at the proposed area after rain and at different times of day. Bright light is of limited benefit if water collects around the entrance, nearby branches could damage the glazing or the route from the house is awkward.
Drainage on wet ground
Prolonged wet weather can reveal settlement, poor falls and drainage weaknesses around paving. Choose a position that does not naturally collect run-off, then prepare the supporting foundation to the required level before assembly. Do not rely on the greenhouse frame to compensate for an uneven or unstable surface.
Give the integrated gutters a deliberate discharge route. Water should move away from the greenhouse, its entrance and neighbouring structures without eroding soft ground or repeatedly wetting the foundation edge. Where water is collected for reuse, provide convenient access to the storage point without creating a trip hazard.
Accurate base preparation supports frame alignment, glazing fit and smooth sliding-door movement. Confirm levels and diagonals before installation proceeds, and follow the relevant assembly and anchoring instructions. Correcting the supporting surface at the outset is preferable to attempting to resolve operational problems after the greenhouse has been glazed.
Humidity and changing conditions
Humidity can remain high in mild weather when compost is wet, plants are closely spaced and the outside air is damp. Persistent condensation, still air in corners or foliage that stays wet for long periods may mean watering, plant spacing and ventilation all need adjustment.
Arrange benches so air can pass around and beneath plants, and avoid pressing dense foliage directly against glazing or lower panels. Keep the central route open enough to inspect both sides of a crop. Good visibility helps identify watering problems, pests or damaged leaves before they spread through a closely planted interior.
Keep the area around each roof vent clear when adding tall plants, hanging supports or shelving. Opening the doors can increase airflow while you are working inside, but close or secure them before leaving and whenever the weather deteriorates.
Dwarf-wall look without masonry
The Prestige creates the substantial appearance associated with a dwarf-wall greenhouse without requiring a separately built brick plinth. This can simplify visual coordination where matching old brick, stone or render would be difficult, while retaining an integrated aluminium lower section.
Leave sufficient space to reach glazing bars, corners and paths for cleaning. Keeping tools and supplies together in accessible storage also makes routine plant care more efficient.
When choosing from the RAL palette, compare the proposed finish with permanent exterior materials in daylight. Roofing, window frames, paving, fences and walls are usually more reliable references than seasonal planting. A carefully chosen colour can connect the greenhouse to the property without needing to match it exactly.
Kitchen-garden use
Near raised beds or a productive garden, the Prestige can provide a sheltered space for sowing, potting and crop preparation. Place it close enough for regular visits but allow adequate working room outside the door. A convenient position encourages the short, frequent checks that are valuable during germination and rapid growth.
Think about the everyday route to the greenhouse, not just the doorway. Compost bags, trays, watering equipment and harvested produce may need to pass through gates and around corners. A firm approach is particularly useful when moving heavy or awkward items in wet weather.
In larger configurations, draw the interior to scale before fixing benches, beds or storage. Mark the door opening, primary walkway, turning space and positions needed for watering. This prevents generous floor area from being fragmented into narrow gaps that are difficult to clean or use while carrying trays.
Interior layout for everyday use
Organise the interior around routine tasks: bringing in supplies, filling pots, moving trays, watering, checking foliage and carrying produce out. Keep frequently used tools near the working area but away from the sliding-door track and main walkway.
Benches and clear access
Choose benches that allow you to reach the back comfortably without leaning against the glazing or frame. Avoid inaccessible gaps where leaves, compost or water can collect, and retain enough space to clean along the lower panels.
Keep the main walkway wide enough for normal watering and potting tasks, including carrying a loaded tray without brushing against plants or glazing. If seating is included, place it outside the main working route so it does not need to be moved whenever crops require attention.
Freestanding or movable furniture keeps panels, glazing bars and vents accessible. Before fixing anything in place, check the movement of roof openers and ensure that cleaning tools, water and replacement parts can reach the relevant areas. Do not use the frame or ventilation components as supports unless they are specifically designed for that purpose.
Tall crops
Tomatoes, climbers and tall specimens can use the height beneath the glazed roof, but their final size should influence placement from the beginning. Site them where they will not shade propagation areas unnecessarily or narrow the route once stems, supports and foliage have expanded.
Relate tall planting to the direction of useful light and leave room for air to move around the canopy. Dense growth near roof level can trap warmth and moisture even when a vent is open. Regular training and removal of spent foliage may be as important as the original bed position.
Keep tall crops away from the entrance and the moving parts of automatic openers. Supports should remain stable without pressing against the glazing. Leave enough access to tie, prune and harvest plants comfortably instead of reaching across benches or standing on unsuitable furniture.
Automatic vent openers
Temperature-controlled roof-vent openers can respond as conditions warm, which is useful when a cool morning turns into a bright afternoon and you cannot visit the greenhouse at short notice.
Automatic opening is only one part of temperature control. Plant density, watering, door use, shading and glazing all affect conditions inside. Observe the greenhouse after installation and adjust the arrangement for different crops and seasons.
Keep each opener visible and easy to reach. Clear dirt from moving parts, make sure plants and supports do not obstruct them, and follow the relevant care instructions when cleaning or carrying out seasonal maintenance.
Specialist glazing
Solar-control, frosted, mirror-effect and self-cleaning glass address different priorities and should not be treated as interchangeable upgrades. Solar-control glazing is intended to manage incoming heat and light; frosted glazing changes visibility; mirror-effect glass influences outward appearance and privacy; self-cleaning glass is designed to reduce, rather than eliminate, routine exterior cleaning.
Choose a specialist option only where its particular effect meets a clear need. A wall facing a neighbour may require a different solution from the roof above crops that need plenty of light. Mixing several finishes without a practical reason can make the design unnecessarily complicated.
Record the direction each wall faces and note nearby reflections, shade and viewpoints before confirming the glazing. Consider the result from inside and outside, as the light available to plants, seated eye-level views and the outlook from a patio may call for different choices.
Plan fixed choices before movable fittings
Confirm the structural configuration, glazing and finished floor level before fitting benches, beds, irrigation or storage. These fixed choices are harder to alter later, so keep service routes and maintenance points accessible from the outset.
Floor and working surface
A durable working surface makes spilled compost, fallen leaves and excess water easier to clear. The right finish depends on the prepared base and intended use, but it should provide firm footing, withstand regular greenhouse work and meet the sliding-door threshold neatly.
Paving can create a firm route for wheeled or heavy items, while a suitable gravelled area may support drainage in parts of the interior. Whichever approach is selected, coordinate levels and falls with the foundation rather than adding a finish that traps water against the lower panels.
Establish the finished floor level before installing permanent benches, beds or services. Check that the door can travel freely and that loose material cannot migrate into its track. A slight layout adjustment at this stage can prevent repeated sweeping, awkward steps or inaccessible edges later.
Irrigation
A planned irrigation system can be useful in larger Prestige configurations, especially where numerous pots or beds have different watering needs. Group plants sensibly rather than giving everything the same amount, and retain a way to water individual specimens by hand.
Drip irrigation can reduce the need to draw a hose through the main walkway and can deliver water close to the growing medium. It still requires observation: emitters can move or become restricted, and plant demand changes with size, weather and season. Inspect the compost rather than relying solely on a fixed routine.
Position filters, shut-off valves and connections where they can be reached without moving mature plants or crawling beneath fixed furniture. Keep hoses away from door mechanisms and sharp edges, and arrange them so leaks can be spotted promptly rather than draining unnoticed beneath storage.
Maintenance access
Glazing, gutters, sliding doors, vents and lower panels need periodic inspection and cleaning. Use methods suitable for the selected materials and follow the applicable care guidance. Avoid abrasive tools or improvised chemicals that could mark finishes, glazing surfaces or seals.
Leave enough room outside instead of placing thorny plants, dense hedges or permanent furniture directly against the greenhouse. Access to every side makes it easier to wash the glazing, clear gutters and inspect the base, while also preventing vegetation from rubbing against the panels in windy conditions.
Build simple care into the gardening calendar. Clear debris before it blocks drainage, clean the door track if dirt begins to affect movement and inspect vents before periods when they will be used heavily. Prompt attention to small obstructions is easier than dealing with avoidable wear or overflowing water.
Future flexibility
The way a greenhouse is used often changes as gardening interests, plant collections and available time develop. Prioritise clear circulation and distinct usable areas rather than filling the interior with permanent fittings.
A Prestige used initially for vegetables may later accommodate citrus, ornamentals, propagation or a compact sitting place. These activities have different requirements for bench height, open floor area and shading, so retain at least some furniture that can be repositioned without structural work.
When changing the layout, recheck access to glazing, vents and door tracks, and make sure irrigation lines still reach the correct groups of plants. Label the runs and keep spare fittings together so seasonal changes remain straightforward.
Before you order
Confirm the site, foundation, access and glazing choices before ordering
Measure the available footprint and the full delivery route for the components. Check gates, steps, narrow passages, overhead obstacles and turning points, as well as the clearance around the completed greenhouse. Before committing to the site, confirm any relevant planning or property requirements with the appropriate authority.
Note where direct sun reaches the proposed position in different seasons and identify the sides facing neighbours, patios or main rooms. Include shade from buildings and deciduous trees. These observations will help you choose clear, privacy-focused or solar-control glazing for the relevant parts of the greenhouse.
Prepare the foundation to the required dimensions, level and stability, following the installation instructions for the chosen configuration. Plan drainage and gutter outlets before assembly, and leave installers enough room to work around the full perimeter. Store glazing and frame components where they will not obstruct access or be damaged.
Continue planning with Bloomcabin
Useful UK pages for greenhouse selection, warranty details, ordering and product information
Frequently asked questions
Frequently asked questions about the Bloomcabin Prestige Premium Greenhouse
How many Prestige configurations are available?
The range includes 22 configurations with floor areas from approximately 3.77 to 28.08 m². Compare individual model dimensions with the prepared site, the required perimeter clearance and the delivery route.
Should I plan the interior before choosing the floor area?
Yes. Mark out the positions of beds, benches, storage and the main walkway before selecting a model. This helps ensure the chosen floor area remains practical once the greenhouse is furnished and in regular use.
How do the solid lower panels affect the interior layout?
They reduce views of pots, supplies and low storage from the garden, while providing a defined backdrop for benches. Consider their approximately 79 cm height when planning storage, seating and sightlines into and out of the greenhouse.
Which glazing is best for my site?
The best choice depends on available daylight, privacy, exposure to strong sun and the amount of cleaning you want to undertake. Options include polycarbonate, 4 mm toughened safety glass and specialist self-cleaning, mirror-effect, solar-control and frosted white glass.
Can I specify different glazing for the roof and walls?
Yes. Roof and wall glazing can be configured separately, allowing you to prioritise overhead light while choosing different glazing for privacy, appearance or heat control on a particular side.
Which models offer double sliding doors?
Double sliding doors are available on suitable configurations from approximately 310 cm wide. Check the entrance arrangement for the selected model, as it is not the same across every footprint.
How should rainwater from the integrated gutters be managed?
Direct the outlets to a suitable drain, soakaway or water-storage arrangement. Keep them accessible for clearing debris, and route water away from the greenhouse base, entrance and adjoining paths.
How long is the Prestige warranty? It is covered by a 12-year warranty.
Bloomcabin Prestige Premium Greenhouse
Create a practical greenhouse with added privacy at low level
Choose the Prestige configuration according to the measured site, available light and the way you plan to use the interior. Its solid lower aluminium panels, independently configurable roof and wall glazing, integrated features and broad colour choice can then be tailored to the garden and your growing plans.
Prestige checklist
✓ choose the footprint around the measured site and planned layout
✓ plan benches, storage and seating around the solid lower panels
✓ choose roof and wall glazing for their different roles
✓ compare the chosen RAL colour with permanent exterior materials
✓ confirm door access, vent clearance and the gutter discharge route
✓ prepare a level, stable foundation and clear space for installation
