Siekiant pagerinti šios svetainės turinio kokybę ir pritaikyti ją vartotojų poreikiams, naudojami slapukai – įskaitant trečiųjų šalių slapukus. Tęsdami naršymą svetainėje, sutinkate su slapukų naudojimu ir galimu susisiekimu, kai į vieną iš svetainės formų įvedate savo kontaktinę informaciją.

Bloomcabin sieninė pergolė

  • Tvirtinimas prie sienos
  • Terasos sprendimas
  • Pritaikomas dizainas
Kuo didesnis pirkinys, tuo daugiau dovanų
Numatomas pristatymas:
Siūlome galimybę PASIRINKTI PATOGIAUSIĄ PRISTATYMO SAVAITĘ, kurią rasite paskutiniame krepšelio žingsnyje.
Kuo didesnis pirkinys, tuo daugiau dovanų

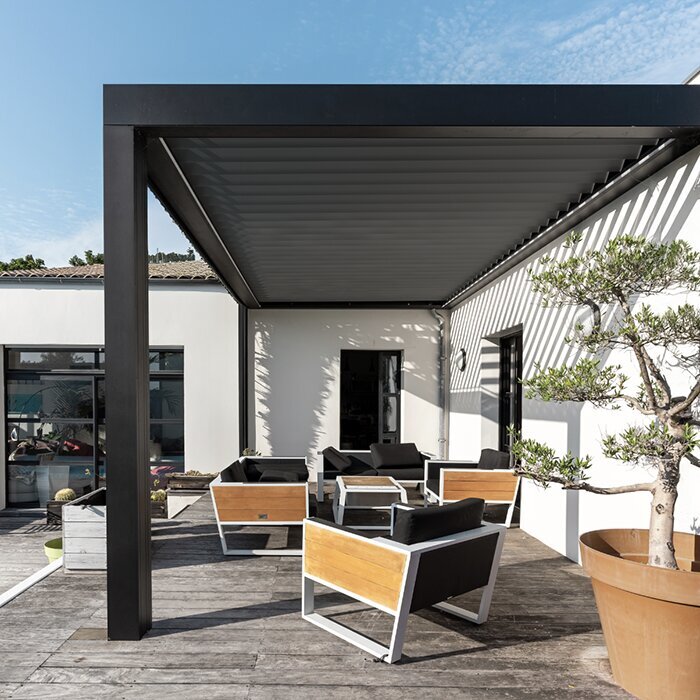
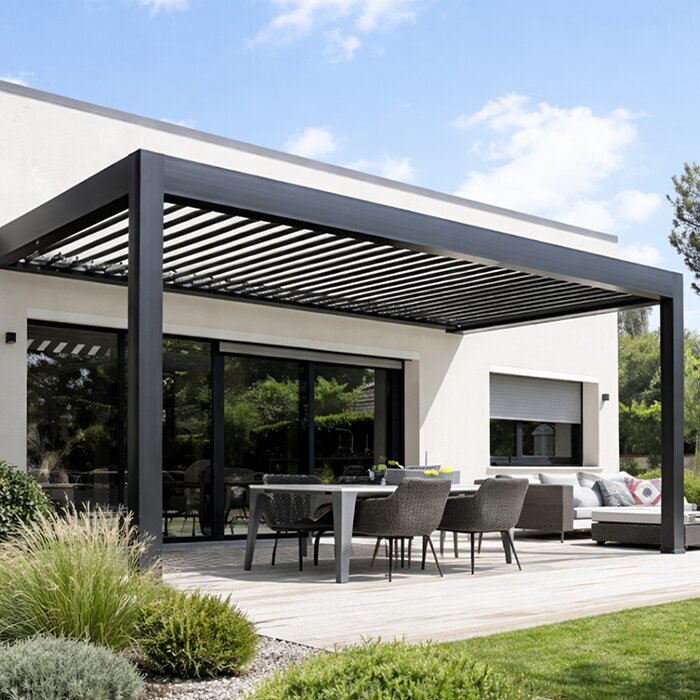
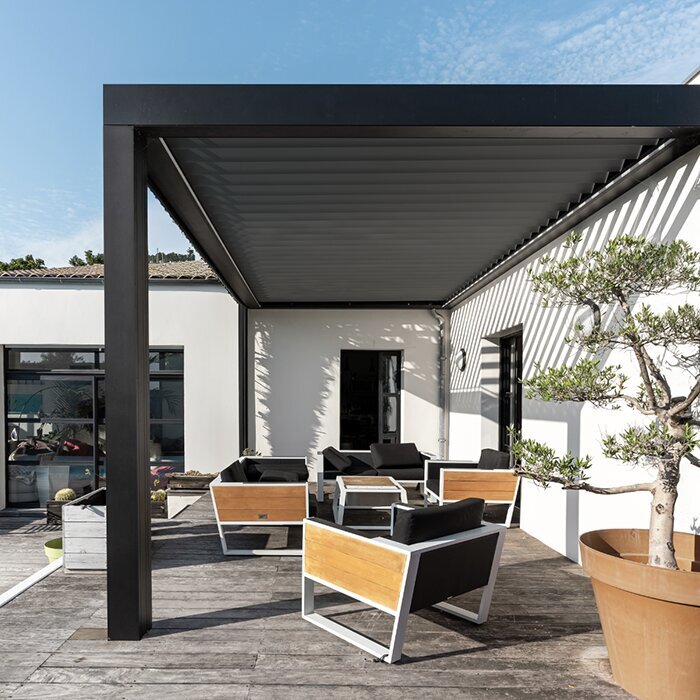
Bloomcabin sieninė pergolė – tai praktiškas ir estetiškas sprendimas, leidžiantis praplėsti lauko gyvenamąją erdvę tiesiai prie pastato. Bloomcabin sieninė pergolė sujungia modernų dizainą, apgalvotą konstrukciją ir aukštos kokybės aliuminio profilius, užtikrindama komfortą ir vizualią darną su pastato architektūra.

Kodėl verta rinktis Bloomcabin sieninę pergolę?

Tvirtinimas prie pastato sienos
Sieninė pergolė saugiai tvirtinama prie pastato, užtikrinant aukštą stabilumą ir optimalų lauko erdvės išnaudojimą. Toks sprendimas idealiai tinka terasoms, balkonams ir poilsio zonoms prie namo.

Funkcionalus terasos stogelis
Pergolė suteikia malonų pavėsį ir apsaugotą lauko zoną, kartu išlaikydama atvirą ir lengvą erdvės pojūtį. Ji puikiai tinka kasdieniam poilsiui, valgymui gryname ore ir ramiam laiko leidimui.

Platus dydžių pasirinkimas
Bloomcabin sieninė pergolė siūloma įvairių dydžių – nuo 9 iki 24 m², todėl ją galima pritaikyti tiek kompaktiškoms, tiek didesnėms terasoms.

Aukštos kokybės medžiagos
Konstrukcija pagaminta iš aliuminio, kuris nereikalauja sudėtingos priežiūros ir ilgus metus išlaiko estetišką išvaizdą. Medžiaga užtikrina ilgaamžiškumą ir stabilumą kasdieniam naudojimui.

Pritaikomas dizainas
Sieninę pergolę galima užsakyti įvairių RAL spalvų, taip užtikrinant harmoningą derėjimą su pastato fasadu ir aplinka.

Pergolė turi integruotą lietaus vandens nutekėjimo sistemą, kuri efektyviai pašalina vandenį ir išlaiko švarų, architektūriškai vientisą dizainą.

Bloomcabin sieninę pergolę lengva montuoti dėl tiksliai suprojektuotos konstrukcijos. Tai estetiška ir praktiška investicija, didinanti terasos komfortą ir bendrą nekilnojamojo turto vertę.

Klientų atsiliepimai 

„Sieninė pergolė puikiai papildo mūsų terasą ir namo fasadą. Ji stabili, labai elegantiška ir praktiška kasdieniam naudojimui.“ – Tomas Vaitkus

„Pasirinkome sieninę pergolę terasai prie namo uždengti – rezultatas atrodo tikrai kokybiškas ir apgalvotas iki smulkmenų.“ – Rasa Balčiūnienė

„Labai patenkintas konstrukcijos kokybe ir dizainu. Pergolė puikiai atlieka savo funkciją ir atrodo moderniai.“ – Darius Petraitis

Pateikę užsakymą jau šiandien, įsigysite kokybišką sieninę pergolę, kuri sukurs komfortišką ir estetišką lauko erdvę tiesiai prie jūsų namų.
Daugiau informacijos
Specifikacijos

Matmenys:
9-24 m²

Aukštis:
Bendras aukštis: 250 cm

Medžiaga:
Aukštos kokybės aliuminio profiliai

Pagrindinės funkcijos:

  • Tvirti ir stiprūs profiliai stabiliai konstrukcijai

  • Integruota lietaus vandens nutekėjimo sistema efektyviam vandens pašalinimui

Garantija:
12 metų pratęsta garantija

Pagrindiniai privalumai:

  • Ilgaamžiškumas: aliuminio konstrukcija skirta ilgalaikiam naudojimui

  • Funkcionalumas: integruota nutekėjimo sistema vandens nuvedimui

  • Pritaikomumas: galimi dydžiai 9-24 m² ir spalvos iš RAL katalogo

  • Dizainas: moderni pergolė su švariomis linijomis

Bloomcabin Wall Pergola

Wall-mounted pergola – create a practical outdoor space beside your home

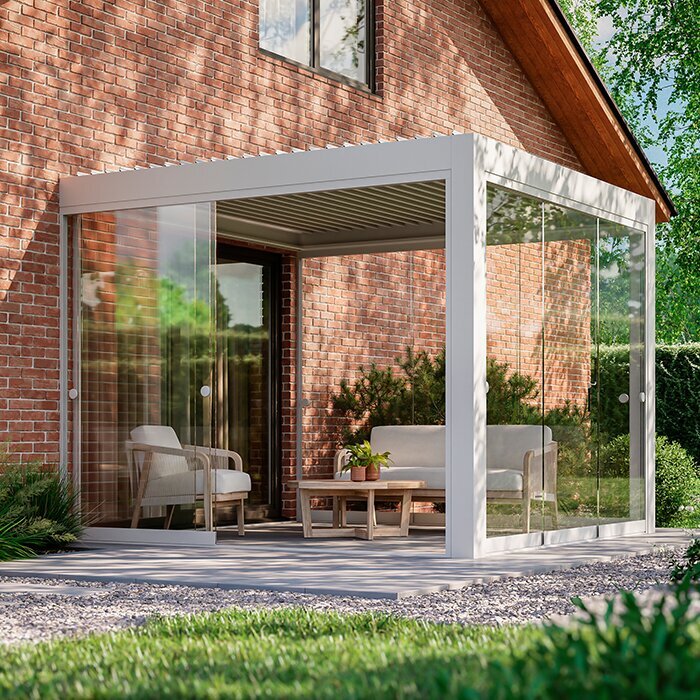
The Bloomcabin Wall-Mounted Pergola creates a practical outdoor area immediately beside your home, making the patio easy to use from the kitchen, dining room or living room. Because it fixes to the building, it feels connected to the house while remaining open towards the garden.

Depending on the configuration, the pergola covers 9–24 m² and has an overall height of 255 cm. Aluminium profiles, integrated drainage and a choice of RAL colours give it a clean, contemporary finish for residential patios.

Before selecting the final size, consider the construction of the supporting wall, the depth and fall of the patio, door thresholds, existing rainwater goods and the routes people use between the house and garden. Resolving these details early helps the pergola sit comfortably against the building without obstructing windows, services or everyday access. Explore the Bloomcabin UK range.

Bloomcabin wall-mounted pergola beside a UK home
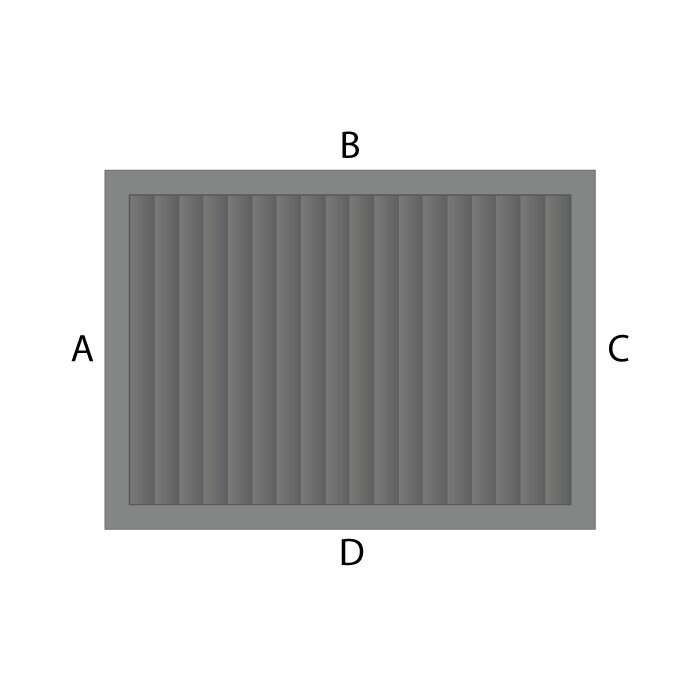
Wall-side patio layout

Make a well-used patio an easy extension of your home

A wall-mounted pergola works particularly well where the patio is already the main link between the house and garden. Positioned outside a kitchen, dining room or living area, it creates a clear place for meals, conversation or quiet time outdoors without feeling separate from the household.

Its position beside the house keeps the route from indoors short and direct. Serving food, carrying cushions and bringing belongings inside is easier than with a structure further down the garden, while the open garden-facing side preserves the outward view.

Treat the pergola, house wall and paving as one layout. Its width should make sense beside nearby doors and windows, while its depth should cover the intended area without taking over the patio. An off-centre position can work well when it follows how the space is actually used.

Choose a footprint that suits the activity

Allow for furniture when it is in use and for the clear routes needed around it, rather than matching the pergola to the full paved area.

Check the available wall height

Confirm that the proposed fixing position works with door and window heads, eaves and other features on the outside wall.

Streamlined aluminium frame

High-quality profiles create neat lines and an understated appearance beside both traditional and contemporary homes.

Coordinate the finish

RAL colour choices allow the frame to complement window frames, doors, roofline details or other permanent exterior finishes.

Positioning priorities

Balance access, outlook and usable space when positioning the pergola

Observe how the patio already works before settling on the position. The places where people naturally pause, sit and pass through may reveal a better location than the largest uninterrupted section of paving.

Decide whether the layout should relate most closely to a doorway, dining area, garden view or established seating spot. The best position may not be in the centre of the wall if daily use naturally happens elsewhere.

Consider how the frame will look from indoors as well as from the garden. Thoughtful alignment with doors, windows or established paving joints can help it feel like a planned part of the property rather than a later addition.

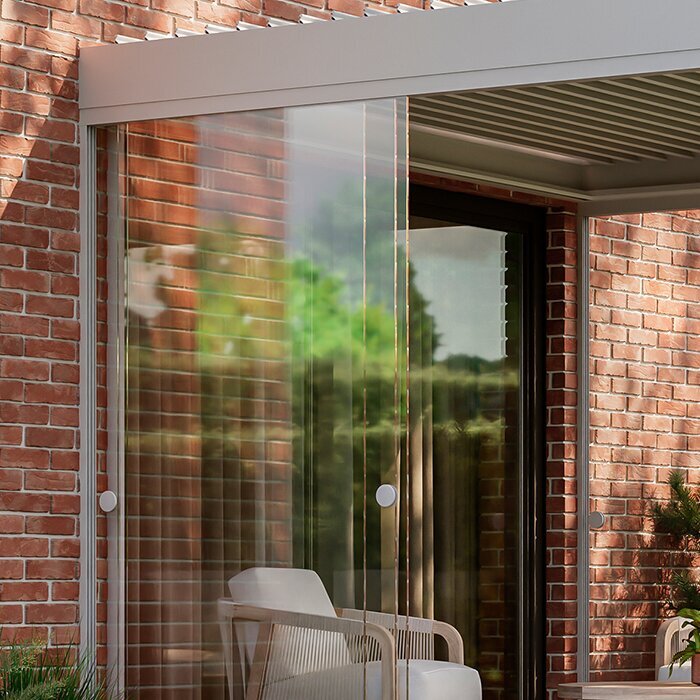
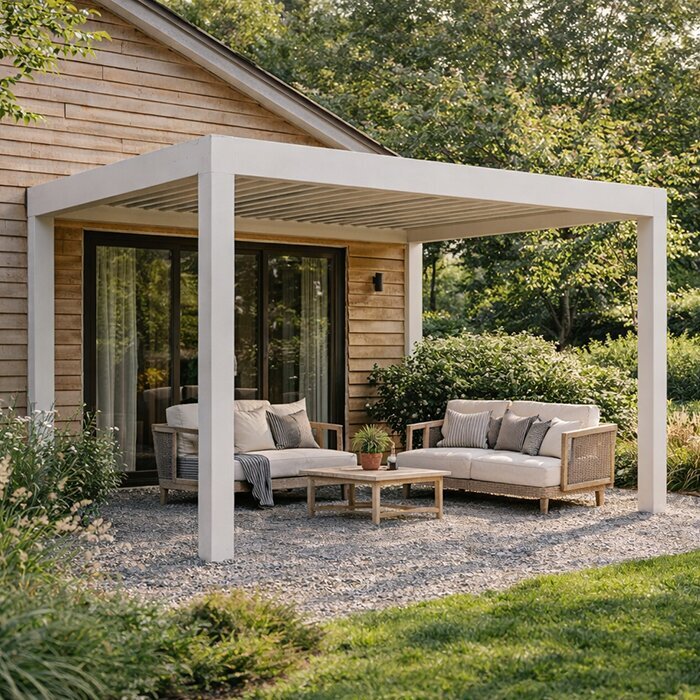
Bloomcabin wall-mounted pergola over a patio
Site checks before you order

Four details that can change the final position

Measure the complete installation area before choosing a configuration. Include projections, fittings and changes of level rather than treating the patio and wall as an empty rectangle.

01

Wall position

Choose a position that works with the wall construction and avoids doors, windows, eaves and other obstructions. The visible finish alone cannot confirm whether a wall is suitable, so its condition and construction should be assessed before installation.

02

Patio and threshold levels

Check the condition and fall of the paving, along with steps, raised thresholds and local changes of level. These details can affect the available footprint, the base preparation and the most convenient route from the house.

03

Existing wall fittings

Record downpipes, vents, exterior lights, taps, sockets and other fittings across the proposed width. Items that need inspection or regular use should remain accessible after installation.

04

Delivery and working access

Check how components and equipment will reach the patio. Narrow gates, side passages, planting and access through the house may all influence how the installation needs to be organised.

Specifications at a glance

Bloomcabin Wall Pergola specifications

Size range

9–24 m²

Compare the available configurations with the measured width and projection at your property. The stated area is a useful starting point, but the final choice must also fit the actual patio layout and clearances.

Overall height

255 cm

Check this stated overall height against the proposed fixing position and every nearby façade feature before confirming the layout.

Structure

High-quality aluminium profiles

The aluminium profiles form a crisp, open-sided structure that visually connects the covered patio area with the house and garden.

Installation

Designed to be mounted on a suitable house wall

The supporting wall and patio must suit the proposed installation. Confirm the property-specific fixing approach and any required base preparation before work is booked.

Water management

Integrated gutter and drainage system

The built-in system requires a suitable final discharge point, which should be agreed as part of the patio and installation plan.

Warranty

12 years

Integrated drainage on a Bloomcabin wall-mounted pergola
Aluminium frame

A clean finish with straightforward routine care

High-quality aluminium profiles suit a structure that remains permanently visible beside the home. Straight edges and a consistent finish help the pergola complement the building, while aluminium avoids the regular repainting normally associated with unfinished timber.

Review the frame from the garden as well as on a patio plan. Relating its outer edges to the proportions of the façade helps the installation look deliberate, particularly where doors and windows are not arranged symmetrically.

RAL colour choices let you decide whether the frame should blend with permanent exterior elements or provide a deliberate contrast. Treat the finish as part of the overall façade scheme so it works coherently with the materials already present.

Patio layout ideas

Four ways to organise the patio around a wall-mounted pergola

01

Patio dining beside the kitchen

Place the everyday table close enough to the kitchen or dining room for convenient serving. Arrange it so seated guests can face the garden and the table does not interrupt the main route through the patio.

02

Garden-facing sitting area

Arrange sofas or armchairs to look towards the garden, using the house wall as a natural backdrop. Keep windows, exterior sockets and fittings accessible, and avoid squeezing seating against posts or busy walkways.

03

Space for entertaining

Use the direct connection with the house for gatherings that move naturally between indoor and outdoor areas. A single, unobstructed route is usually easier to manage than seating arranged across every side of the patio, particularly when carrying food and drinks.

04

A clear transition to the garden

Keep the area immediately outside the principal door relatively open, with the main furniture beyond the through-route. This gives the entrance room to function and separates circulation from seated activity during everyday use and gatherings.

Wall, paving and drainage checks

A wall-mounted pergola depends on both the building and the patio. The following checks help identify property-specific issues that may affect fixing, finished levels, access or rainwater disposal.

Brick house walls

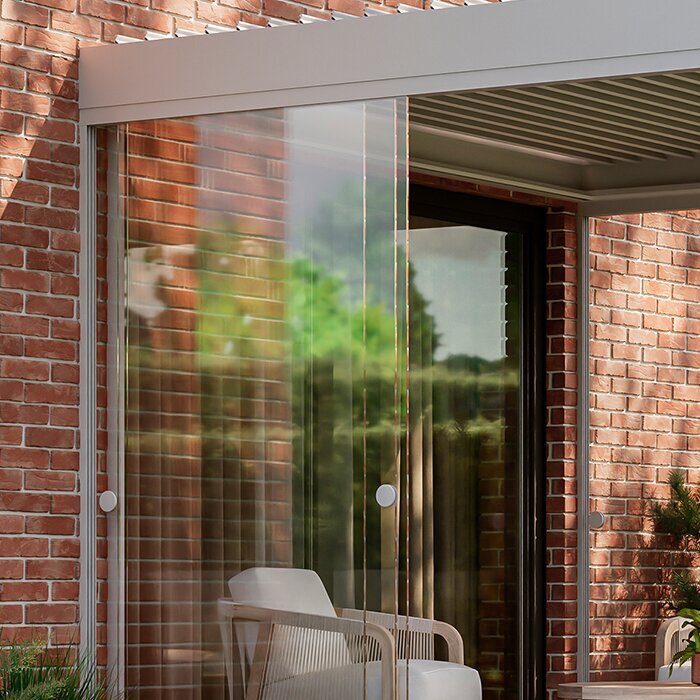
Brickwork varies in construction and condition, so suitability cannot be judged from appearance alone. Previous alterations and the position of openings can affect the proposed fixing line, while cavities, insulation systems or cladding may require an approach appropriate to the actual wall build-up.

Inspect the full proposed width rather than only the intended end points. Note mortar joints, air bricks, boiler outlets, cables, external lights, taps, soil pipes, downpipes, drain covers, door canopies and window sills. Anything that is currently usable should remain accessible once the pergola is installed.

An experienced installer or appropriate building professional should determine the fixing design after assessing the property. A solution used on one brick wall may not suit another, and the decorative outer surface should not automatically be assumed to provide suitable support. Existing defects should be addressed rather than hidden behind the structure.

Patio levels and rainwater routing

A patio that appears level may incorporate intentional falls, local settlement or depressions where water gathers. Observe the area during rainfall if possible, and check how the paving relates to door thresholds and nearby gullies. This can reveal issues that are not obvious during a dry site visit.

Plan an appropriate destination for water leaving the integrated drainage system. The arrangement should direct discharge away from the building and avoid splashback, erosion, slippery routes or persistent pooling. Existing drainage may be useful, but its location and suitability should be confirmed rather than assumed.

Where paving or landscaping will be altered, coordinate the work with the pergola plan so the finished levels support drainage and safe movement. Do not let new surfaces compromise damp-proofing, raise levels inappropriately at thresholds or block air bricks. Review site-specific building details before work begins.

Using the patio in changeable weather

Rain may still enter through the open sides and reach furniture or paving. Choose furnishings suitable for an exposed outdoor setting, keep items that need protection easy to move and adjust the arrangement to suit the conditions at the time.

Keep the route into the house clear of storage boxes, trailing cables and movable furniture. Choose outdoor furnishings appropriate for the setting, and position items so that wet surfaces and changing conditions do not make the main route awkward to use.

Comfort also depends on orientation and the shade created by nearby buildings or planting. Observe when the area receives direct sunlight and where shade falls during the day. This will help you choose a position suited to the times when you expect to use the patio, whether for breakfast, afternoon seating or evening dining.

Everyday comfort

Once the structural location is understood, refine the arrangement around the routines that happen most often. The best layout is not necessarily the one with the most furniture; it is the one that makes doors, seats and garden routes intuitive to use without continual rearrangement.

Kitchen access

A position outside the kitchen can make outdoor meals easier because crockery and food travel a shorter distance. Check the entire serving route, including the door opening, any step at the threshold and the approach to the table. A direct path reduces collisions with chair backs and people already seated.

If the same doorway is also the principal garden entrance, keep serving and through-traffic on a defined side of the dining group. Avoid placing the head of the table directly in that route. Consider where a person can pause safely while opening the door with both hands occupied.

Plan where serving dishes and drinks can be placed without occupying the main route or crowding the dining table. Any additional surface should remain clear of door swings, wall fittings and areas needed for drainage access.

Check furniture at its working size

Measure furniture in its working position, not simply by the manufacturer's closed dimensions. Pull chairs back as they would be when someone sits down or stands up, open extendable tables and include the depth of reclining seats. Marking the outline temporarily on the patio provides a useful full-scale check.

Maintain practical gaps between separate furniture groups. Combining a large table, deep sofa and several occasional pieces beneath one structure can restrict movement even when their total dimensions technically fit. Give the main activity priority and add secondary pieces only where circulation remains comfortable.

Think about storage as well as use. Cushions, covers and accessories need a practical destination when removed, but permanent boxes should not obstruct posts, drainage access or doors. If furniture is likely to change later, retain some neutral floor area rather than designing every clearance around one exact set.

Doors, steps and movement

Check every relevant door in its fully open position and note whether it swings inward, outward or slides. Include handles, door stays and the standing space needed to operate it. French doors may require a wider unobstructed zone than a single opening, while a raised threshold may influence the safest approach.

Where the patio includes steps, changes of level or narrow side passages, keep the edges visible and avoid placing seating in the approach. Posts and furniture should not obscure a step or create a tight turning point. Check how the route works after dark, when changes of level may be less obvious.

A clear route should feel obvious without relying on people to weave between chairs. Walking the proposed path while temporary markers represent posts and furniture can expose conflicts that are difficult to see on a plan, especially where the garden gate, bins or side access generate regular traffic.

Choosing a RAL colour

Frame colour changes how prominent the pergola looks. Darker tones can create a defined outline, while shades related to existing windows or doors may sit more quietly against the outside wall. The best choice depends on the house materials and the effect you want.

Compare the proposed finish with permanent elements rather than furniture that may later be replaced. Window frames, doors, roofline details, brick, render and paving provide more dependable reference points. Where the exterior includes several colours, decide which feature the pergola should complement most closely.

Review a physical colour reference outdoors at different times of day where possible. Bright sunlight, overcast conditions and reflections from glazing can change how the colour looks. Also consider how readily dust, pollen and rain marks may show, as this may influence your preferred cleaning routine.

Care and long-term flexibility

The fixing arrangement and water outlet remain in place even if your furniture and patio use change. Keep inspection points accessible, and avoid planting or fixed storage that would make routine cleaning and maintenance unnecessarily difficult as the setting develops.

Keeping drainage clear

Leaves, seeds and other airborne debris can restrict integrated drainage. Check accessible gutter and outlet areas when debris is visible and follow the product care information. Use suitable access equipment rather than standing on furniture or the pergola.

Slow discharge, overflow or staining can indicate a blockage or a problem farther along the outlet route. Investigate promptly to limit repeated wetting of the wall and prevent damp, slippery patches on the patio. Recheck the outlet if later landscaping or drainage work changes the surrounding area.

If an outlet connects with another drainage arrangement, keep the junction accessible for investigation. Concealing it permanently beneath paving or fixed cabinetry may make a simple cleaning task disruptive. Any alteration should retain a safe destination for water rather than diverting the problem to another part of the property.

Cleaning and visual checks

Remove loose dirt using methods suitable for the aluminium finish, then clean the surfaces in line with the supplied care guidance. Avoid harsh abrasives or unsuitable chemicals that could mark the coating. Test unfamiliar products on an inconspicuous area and rinse away residue rather than letting it dry on the frame.

While cleaning, inspect accessible connections, drainage openings and the areas nearest the wall. Unusual movement, damage, persistent leakage or deterioration around the attachment should be investigated rather than covered over or ignored. Keep the product, installation and warranty documents together for future reference.

Maintain enough working room around key areas. Large planters become difficult to move when filled, and climbing plants can conceal joints or hold debris against surfaces. Position planting so it contributes to the patio without preventing observation, cleaning or access to the building façade.

Allowing the setting to evolve

The way a household uses its patio may change over the life of the pergola. A dining space may later become a quieter seating area, or new furniture may have a different footprint. A simple primary layout with an open circulation edge is generally easier to adapt than several tightly fitted zones.

Consider where replacement furniture could enter the patio before creating narrow permanent gaps with raised beds, screens or outdoor cabinetry. Retaining a workable access route also helps with cleaning and property maintenance. Movable accessories can add seasonal flexibility without committing the whole setting to one arrangement.

Review nearby planting as it grows. Overhanging branches may increase the amount of debris reaching the pergola, while dense shrubs can restrict access around the wall. Regular garden maintenance helps retain the clean appearance and keeps inspection points within reach.

Before installation work starts

Coordinate the site check, access and patio preparation before work begins

Bring the survey findings into one agreed installation plan covering the wall position, patio levels, access and rainwater outlet. Before scheduling the work, confirm that the latest version reflects any recent alterations to the property or patio.

Before work begins, clear the patio and the agreed delivery route of loose furniture, fragile objects and other obstacles. Protect vulnerable surfaces where necessary, provide room for components and equipment to be handled, and keep children and pets away from the working area.

Agree who will complete any paving adjustments and the final rainwater connection, and coordinate the order in which those tasks will be carried out. Retain the supplied documentation and seek appropriate advice if site conditions differ from the agreed plan rather than altering components or fixings without approval.

Choosing the right pergola format

Wall-mounted, freestanding or bioclimatic: which pergola format suits the site?

Wall-mounted pergola

This Bloomcabin format attaches to a suitable building wall and is intended to make the patio feel directly connected to the home. It is the relevant choice when the preferred outdoor zone sits beside the façade and convenient access from an interior room is a priority.

Freestanding pergola

A freestanding pergola is independent of the house, so it can define a destination elsewhere in the garden or on a detached section of patio. That flexibility may be useful where the building wall is unsuitable or where the desired seating area is separated from the main elevation.

Bioclimatic pergola

A bioclimatic pergola is defined by an adjustable roof used to manage shade and ventilation. Check each model’s stated specification rather than assuming that every aluminium pergola is bioclimatic.

Frequently asked questions

Questions about the Bloomcabin Wall Pergola

How do I decide which part of the patio to cover?

Mark out the table or seating in its fully used position, then check the door swing, space around the furniture and the route to the garden. Choose the section that accommodates this layout without obstructing everyday movement.

What should be included in a wall survey?

The survey should cover the full proposed fixing line and record the wall construction and condition, doors, windows, eaves, rainwater goods, vents, exterior lights, pipework and other fittings. It should also identify anything that must remain accessible after installation.

How should I look after the aluminium frame?

Follow the supplied care guidance and use cleaning methods compatible with the finished surface. Remove accumulated dirt without harsh abrasives or unsuitable chemicals, and inspect accessible connections and drainage openings while cleaning.

How do I know whether my wall is suitable?

The exterior material alone is not enough to confirm suitability. The wall construction, condition and proposed fixing arrangement must be assessed for the individual property, particularly where there are cavities, insulation systems, cladding or previous alterations.

How should I choose a RAL colour?

Compare the proposed tone with permanent exterior elements such as window frames, doors, brickwork, render and paving. View the colour outdoors if possible, as bright sun, overcast light and reflections from glazing can change how it appears.

Where should rainwater from the pergola go?

It should discharge to a suitable point that works with the patio levels, thresholds and existing drainage. The route should avoid sending water back towards the house, across a regularly used path or into an area where it will collect.

Will the pergola keep the whole patio dry?

Not necessarily. The pergola covers the selected area, but rain can still enter through its open sides and reach furniture or paving. Position items that need to stay dry accordingly and keep the route back into the house easy to use in wet conditions.

What should I prepare before installation day?

Clear loose furniture and fragile items from the working area, confirm the access route for components and equipment, and make sure the agreed wall position and rainwater outlet are accessible. Keep the order and installation documents available for reference.

Bloomcabin Wall Pergola

Create a patio that feels naturally connected to your home

The Bloomcabin Wall Pergola is designed for outdoor living directly beside the house. Compare the available sizes and RAL colours, decide how you want to use the patio, and arrange a property-specific assessment of the wall and installation area before confirming your choice.

Bloomcabin UK

Information to have ready when requesting a quote

✓ A measured sketch showing the patio edges, intended furniture and the area you want the pergola to cover

✓ Clear photographs of the full wall, including doors, windows, pipes, vents and other fittings

✓ Notes showing door openings, thresholds, steps and the routes used between the house and garden

✓ The RAL finish you are considering and the permanent exterior elements you want it to complement

✓ Photographs or notes showing nearby gutters, downpipes, drains and the proposed rainwater outlet

✓ Details of site access and any paving or landscaping work planned before installation

Uždaryti x
10 metų garantija
Bloomcabin didžiuojasi savo aukščiausios kokybės produktais ir kasdien juos prižiūri, taikydama įvairius gamybos ir kontrolės procesus. Tai patvirtina 12 metų garantija mūsų šiltnamiams.
45 % pigiau apsiperkant internetu
Patogūs ir pelningi pirkimai internetu
Paklauskite mūsų
Susisiekite su mumis
Telefonas:
El. paštas:
Šis el.pašto adresas yra apsaugotas nuo šiukšlių. Jums reikia įgalinti JavaScript, kad peržiūrėti jį.
Registracijos numeris:
38944924
Adresas:
Thriges Plads 6, 5000 Odense C, Denmark
Socialiniai tinklai
Sekite mus Instagram, Facebook ir Twitter, kad gautumėte naujienas ir geriausius pasiūlymus iš Bloomcabin.
X
Turite klausimų ir norite, kad jums paskambintume?
+370
−
✖