



Bloomcabin Large Orangery
Large Orangery greenhouse – productive growing space with room to relax
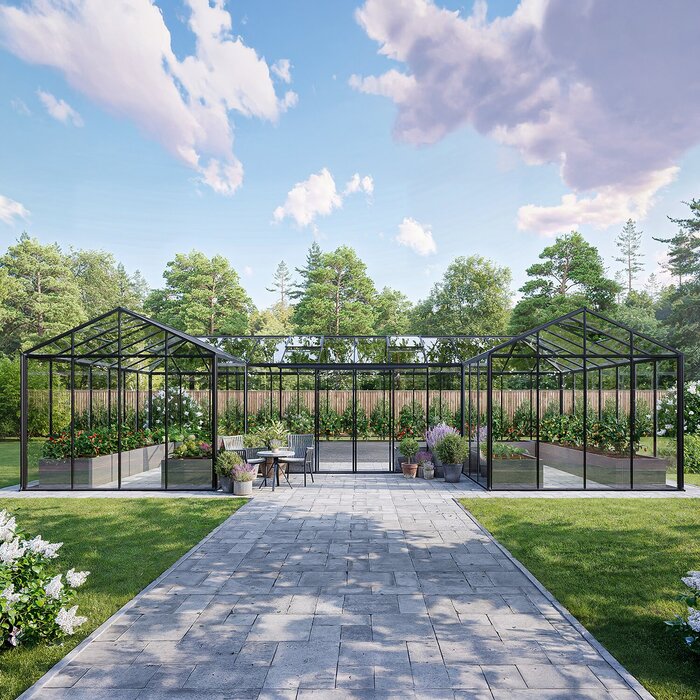
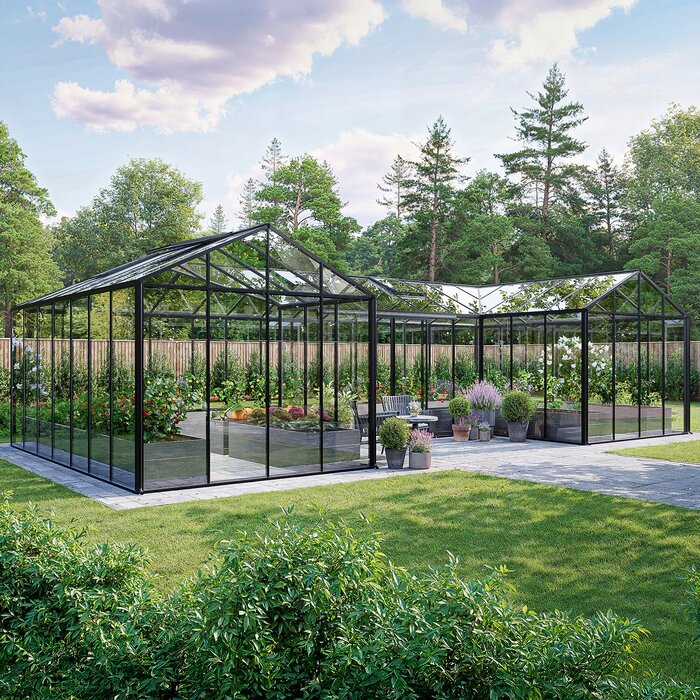
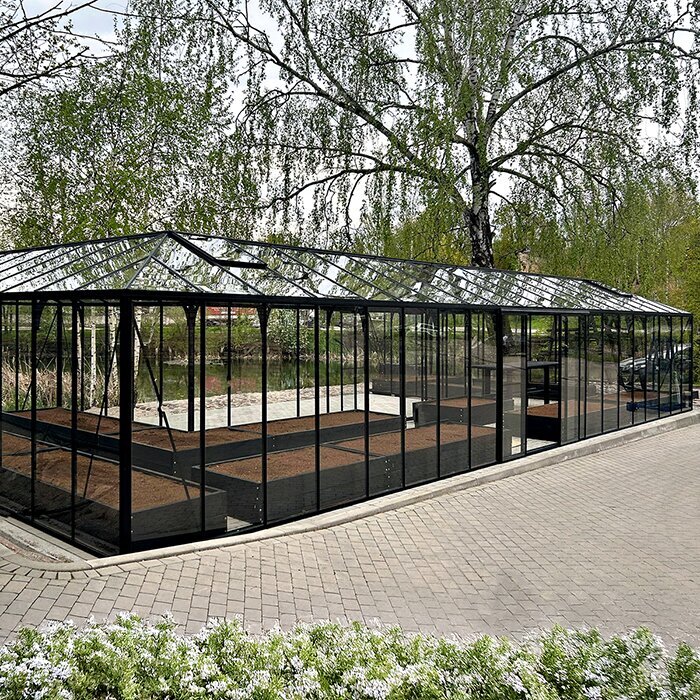
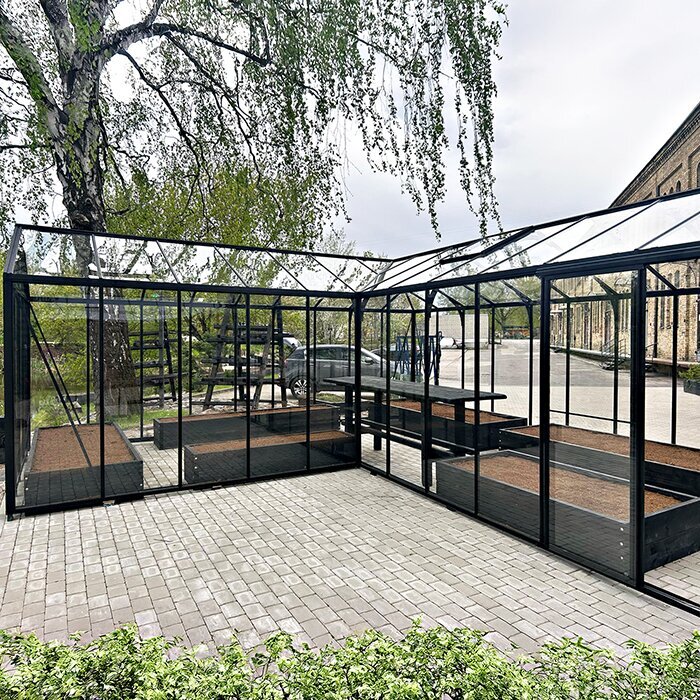
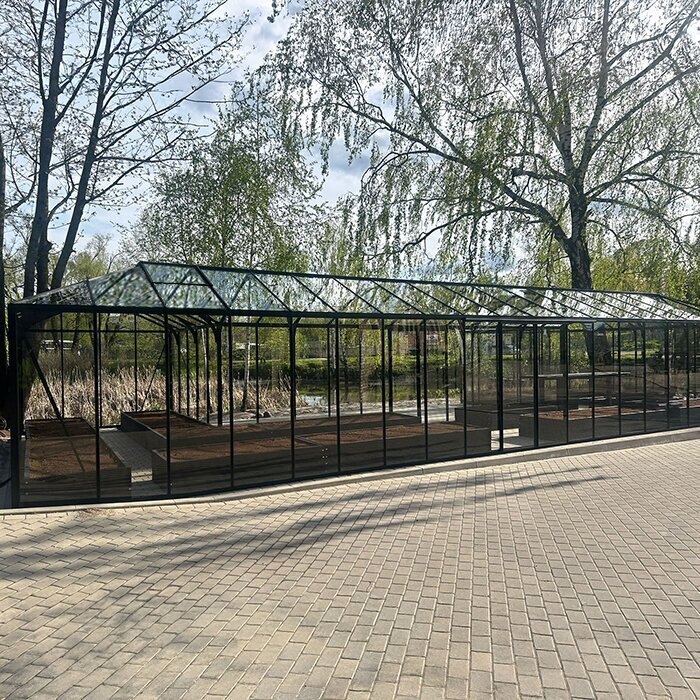
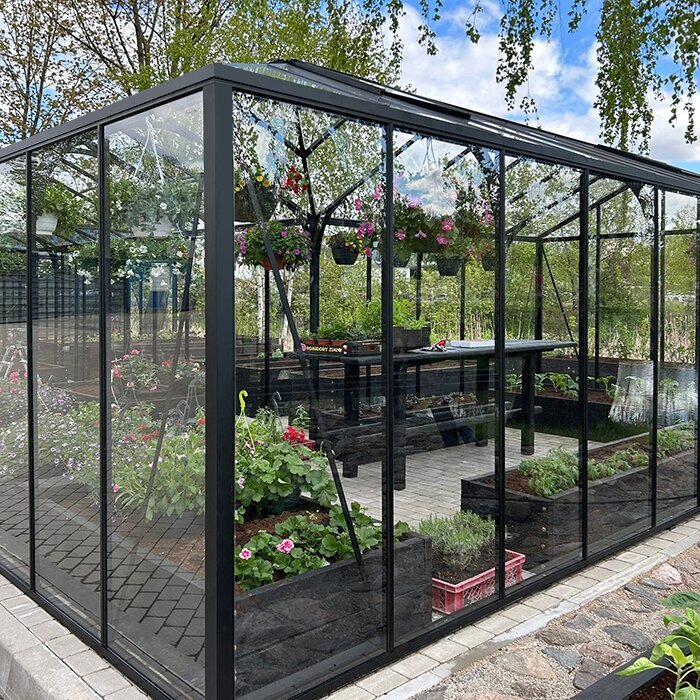
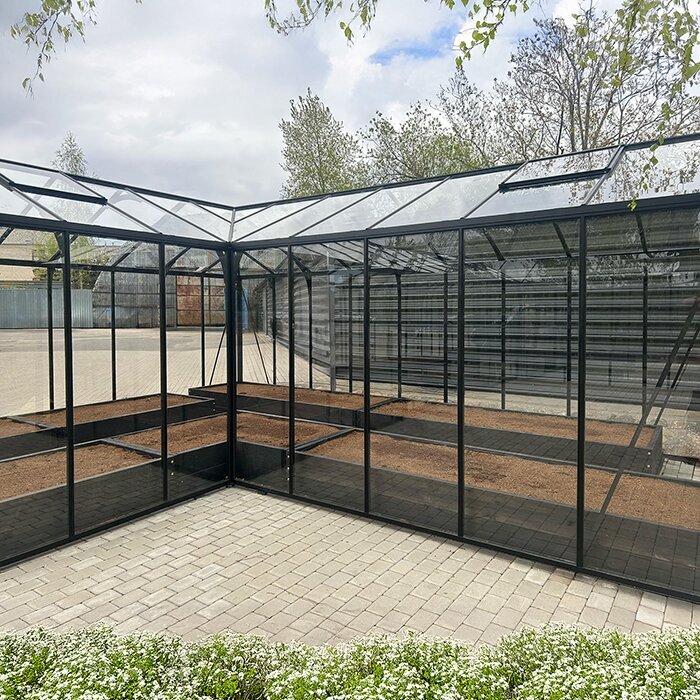
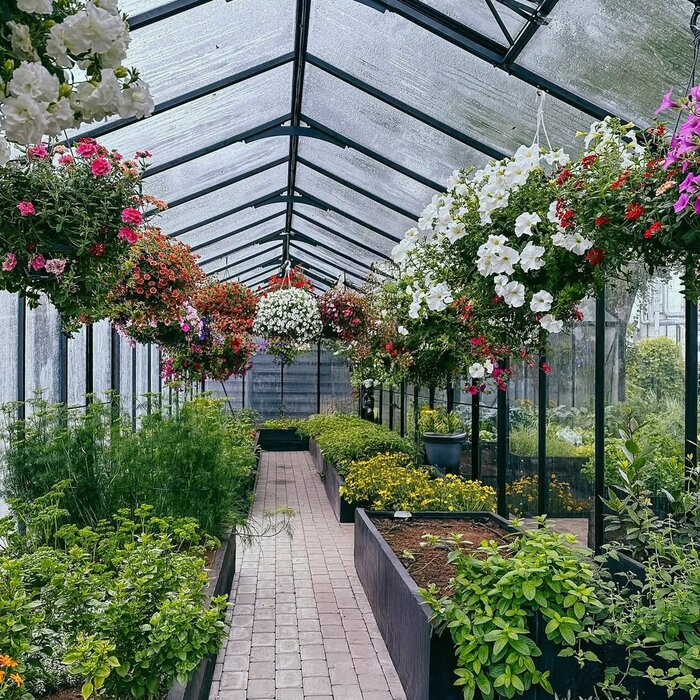
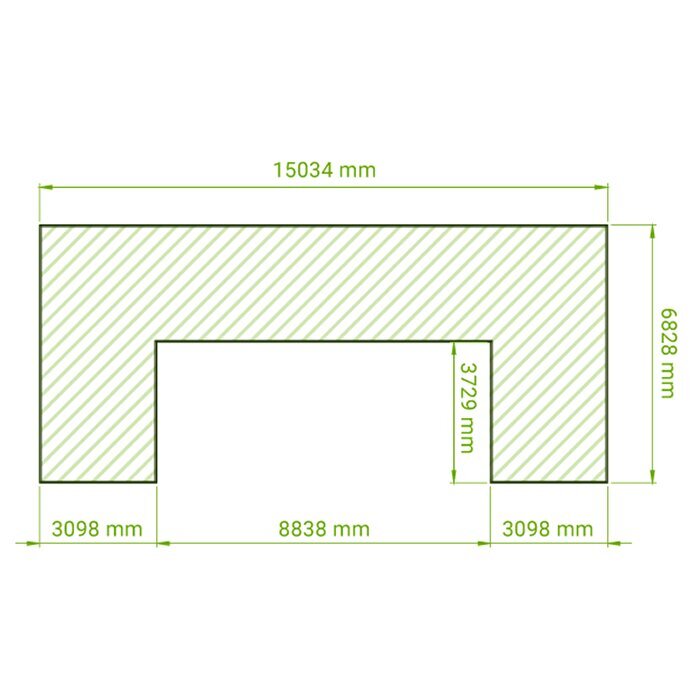
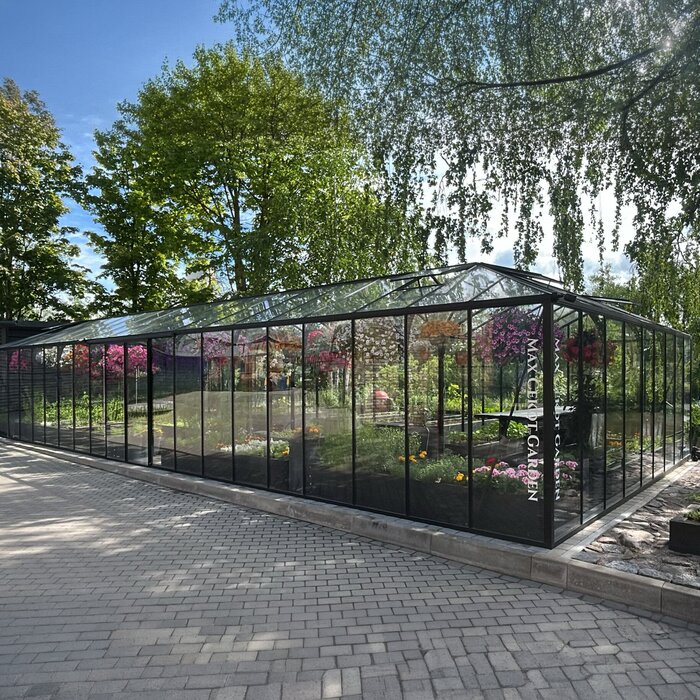
The Bloomcabin Large Orangery is a glasshouse designed for larger UK gardens. Offering approximately 47–70 m², it provides room for permanent crop zones, wide paths, specimen plants and a well-proportioned dining or seating area. It suits gardeners who want growing to remain the priority while creating a sheltered place to relax among the plants.
Plan the interior as a complete layout rather than one oversized greenhouse aisle. Mark out permanent beds, propagation benches, container displays, storage, main paths and seating before deciding where services and doors should go. This highlights practical conflicts early: climbing crops may shade the dining area, while a table too close to a workbench can make everyday plant care awkward.
Before finalising the configuration, assess how the Orangery will relate to the wider garden throughout the year. Consider whether rainwater will drain away from the foundation, how low winter sun and summer shade affect the position, and whether the approach remains convenient in wet weather. Boundary clearance, delivery access and the route from the house or patio are particularly important for a structure of this size. Explore the range at Bloomcabin UK.
Space for plants and people
Plan clearly defined zones and practical routes through the open interior
Wide paths can remain genuinely usable after crops, containers and furniture are installed. Plan the principal route around the widest item likely to pass through the building, such as a trolley, large planter or piece of furniture, rather than judging clearance in an empty structure. Secondary paths can serve individual beds, but the route between the entrance, work area and social zone should stay direct and unobstructed.
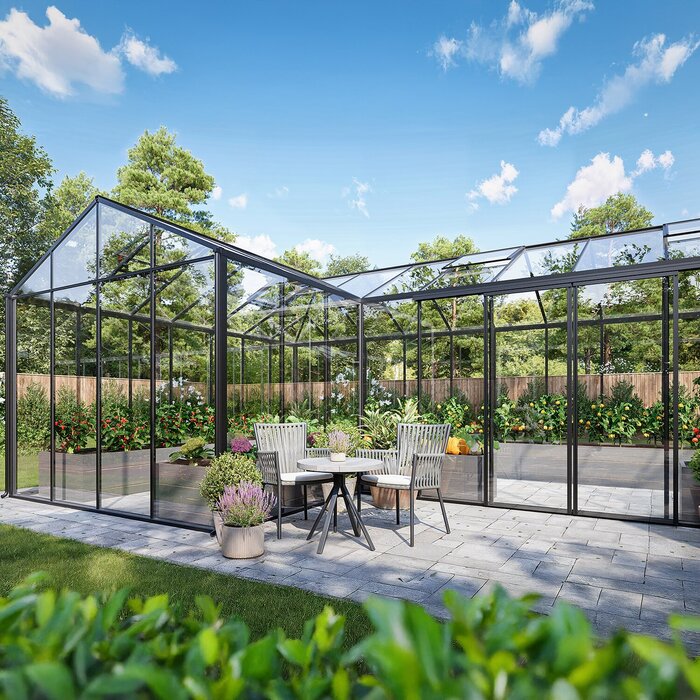
A dining area can sit comfortably within the Orangery without taking over the growing space. Keep it away from potting compost, hose connections and the busiest crop-care routes, and make sure diners can reach the doors without crossing the main work area. This allows watering and plant care to continue without furniture needing to be moved each time.
The balance of space can evolve with the growing calendar. Spring may call for extra propagation surfaces, whereas summer can place more emphasis on tall crops and social use. Later in the year, cleared areas may receive tender containers awaiting protection. Designing some zones around movable benches or furniture preserves this flexibility while leaving permanent beds, key routes and ventilation openings unchanged.
01
47–70 m²
Space to divide planting, work and seating areas
02
Flexible growing zones
Beds and benches for crops, propagation and plant collections
03
Space to relax
Dining or lounge area beside the plants
04
Configurable details
Door, ventilation and colour choices, plus an optional chimney outlet
Interior planning
Create generous growing space alongside a comfortable garden room
The best layouts give plants and people their own space while allowing for the work that happens between them. Harvesting, pruning, watering, potting and carrying supplies all need clear working positions beside the beds. Include somewhere to set tools down temporarily and keep the main route open when several jobs are under way.
Growing capacity
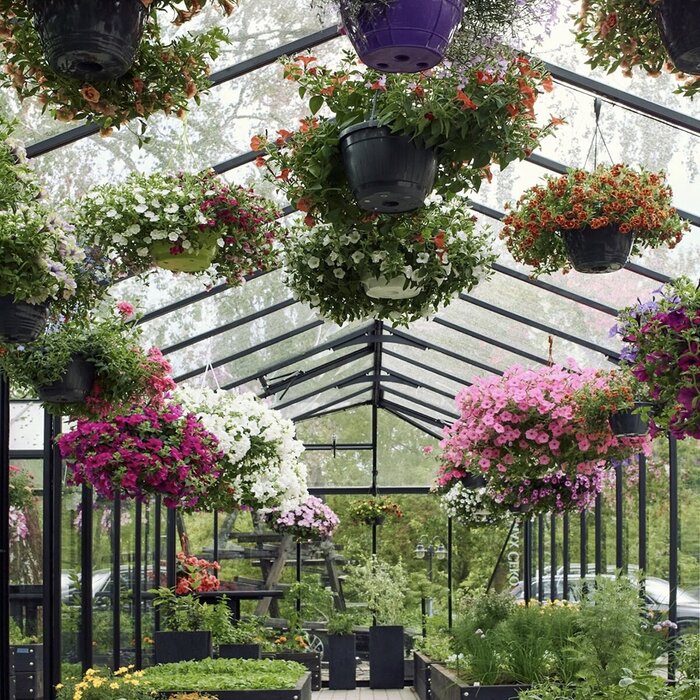
The available area can accommodate vegetables, propagation and a varied plant collection. Group plants by their light, watering and seasonal care needs rather than arranging everything solely by height or appearance. Long beds can support regular cropping, benches bring seedlings to a convenient working level, and large containers can be placed where mature plants will not restrict access.
✓ long beds
✓ climbing crops
✓ seed and propagation benches
✓ citrus and large containers
A room among the plants
The garden-room area should be comfortable for everyday use and easy to look after. Choose furniture that suits a bright growing environment and can be cleaned after nearby plant work. A dining table, lounge seating or compact creative workspace can all work well, but the intended use should guide its position in relation to direct sunlight, doors, roof vents and working routes.
✓ dining table
✓ lounge seating
✓ studio or hobby space
✓ small gatherings
Construction
High-strength aluminium, 4 mm toughened safety glass and practical built-in features
The Large Orangery pairs a high-strength aluminium frame with 4 mm toughened safety glass. The frame does not require the routine surface treatment needed by some other materials, while the clear glazing preserves views of the crops and garden. As part of routine maintenance, inspect the glass, seals, fixings and profiles for signs of damage or movement.
The ridge height is approximately 2.67 m, and the door height is around 1.85 m. This gives tall plants and climbing crops useful headroom, although mature growth must be kept clear of roof slopes, vents and access routes. Single or double sliding doors avoid a hinged leaf projecting into the path. Choose between them by considering both everyday entry and the occasional movement of bulky plants or equipment.
The built-in base frame, rain gutters and roof vents support installation, drainage and ventilation. An optional chimney outlet is available for a separately designed heating arrangement. The greenhouse is rated for wind speeds of 30 m/s and a snow load of 210 kg/m². Achieving the intended performance requires an accurately prepared foundation, correct assembly and proper consideration of the site's exposure.
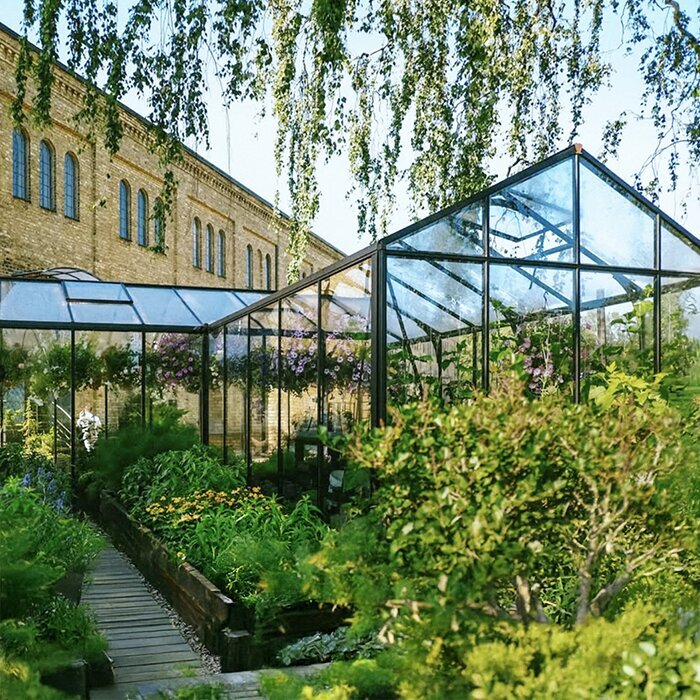
Product specifications
Large Orangery – main technical details
Interior area
Approximately 47–70 m²
Supports separate crop, work and seating zones
Height
Approx. 2.67 m ridge / 1.85 m door
Headroom for tall plants and a practical doorway
Frame
High-strength aluminium profiles
Does not need routine frame surface treatment
Glazing
4 mm toughened safety glass
Clear views across the planting and out to the garden
Doors
Single or double sliding doors
Access without a hinged door leaf projecting into the approach
Built-in features
Base, rain gutters, roof vents, optional chimney outlet
Supports installation, rainwater management and airflow
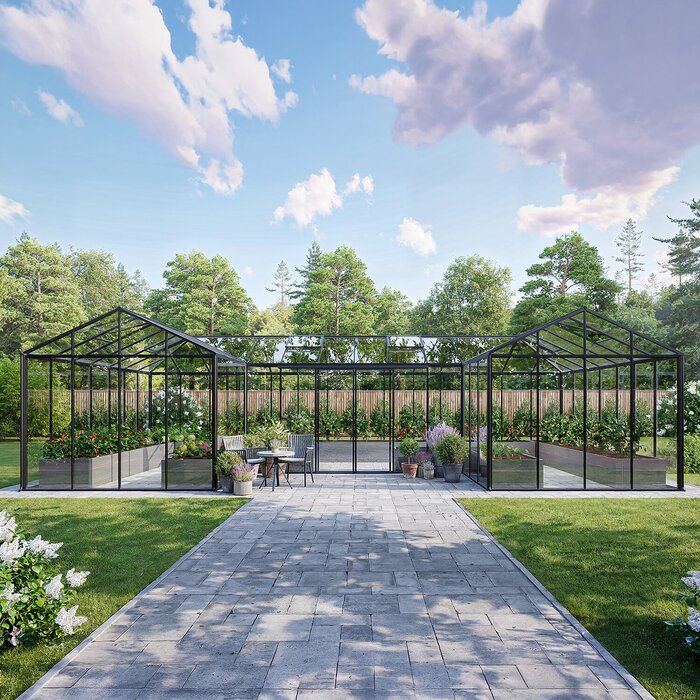
Climate and drainage
Drainage, ventilation and flooring should be planned together. Water from irrigation, wet footwear or condensation must be able to drain without collecting around furniture or the base. At the same time, air needs a clear route from the doors towards the roof vents. Resolving both before installation makes the growing and seating areas easier to manage.
Planning drainage on wet ground
Where the ground remains wet for long periods, foundation preparation must address both support and drainage. The completed base should meet the installation requirements and remain level, while the surrounding ground should direct water away from the structure. If the plot is prone to standing water, decide how surface water and water from the roof will leave the area before excavation or landscaping begins.
Rain from the glazed roof should discharge through the gutters into a planned outlet or storage arrangement. Downstream capacity matters: moving water only as far as the greenhouse corner may create a saturated patch beside the base. Connect collection points to suitable storage or drainage, provide a safe route for overflow, and keep discharge away from doors, main paths, neighbouring land and places where winter water could make access hazardous.
Avoid borders, gravel or paving details that conceal the base or block access to drainage outlets.
Humidity management
Dense foliage, damp compost and regular watering can raise indoor humidity quickly, even on a mild day outdoors. Persistent moisture may lead to condensation on cooler surfaces and make the occupied zone uncomfortable. Check conditions around the plants as well as near the roof: warm air above does not guarantee useful movement through closely spaced foliage. Watering earlier in the day gives wet surfaces more time to dry.
Use the roof vents to release rising warm, moist air, opening the doors as needed to provide a lower-level inlet. This airflow route will work better when it is not blocked by tall plants, screens or storage. Because conditions can change while the Orangery is unattended, adjust ventilation to suit the plants, expected sunshine and whether anyone will be available later in the day.
Position furniture and soft furnishings away from the dampest, most densely planted areas.
Flooring and wide paths
Flooring must cope with soil, water and frequent use while remaining suitable beneath dining or seating furniture. Decide where a washable hard surface is useful, where beds or exposed soil will remain, and how the surfaces will meet. Select materials that suit the foundation and drainage plan, avoiding finishes that are difficult to clean or form awkward edges for trolleys, chairs and watering equipment.
Plan where muddy footwear, spilled compost and irrigation water are most likely to occur, then place easy-clean surfaces in those working areas. Bench fronts need standing room for sowing and potting, while container displays need access for watering and turning pots. Keep hose routes from crossing chair legs or trolley turning points, and avoid narrow gaps that cannot be swept or inspected.
Use flush, stable transitions between floor finishes so chairs, trolleys and watering equipment can move smoothly.
Planting and furnishing the interior
Plan planting, seasonal temperature control and furniture on the same scaled drawing. Start with elements that are difficult to move, including beds, doors, vents and service entry points, then try different positions for benches and seating. Mark the mature spread of important plants rather than their size when purchased, so later growth does not remove the light, access or headroom another area needs.
Summer heat
Bright, still weather can cause the temperature inside the glazed structure to rise well above the outdoor reading. The effect may differ across the floor, especially where one area receives prolonged direct sun or airflow is interrupted by dense planting. Monitor the conditions that matter to the actual crops and occupied zone instead of relying solely on a reading elsewhere in the garden. Early intervention is generally easier than cooling an already overheated interior.
Open the roof vents and doors before excessive heat develops, while allowing for security and changing weather. Keep furniture and lightweight objects away from openings and operating routes. If the Orangery will be empty during the day, use the forecast to set an appropriate ventilation routine. Seedlings and recently moved plants may need closer attention than established crops.
Temporary shading can be particularly useful above dining or seating areas.
Using the Orangery in winter
An unheated Large Orangery should not be assumed to remain frost-free through winter. Glass admits valuable daylight but does not make the building equivalent to an insulated room. Match the winter plant collection to the conditions you are prepared to maintain, and identify which specimens need relocation or additional protection before cold weather arrives. This distinction also matters for furniture, stored materials and any activity expected to continue during the coldest periods.
For citrus and other tender plants, establish the conditions the collection needs before planning any heating. Consider which part of the Orangery requires protection, for how long and how the temperature will be controlled. Protecting a defined plant area may be more practical than heating the whole interior. Any heating equipment and installation should be suitable for a greenhouse environment and planned by an appropriate professional.
Group tender plants according to the conditions and level of monitoring they need rather than filling every available winter space.
Planning a dining area
When drawing a dining arrangement, include chairs in both their occupied and pulled-back positions. Add a route for serving, passing behind seated guests and reaching an exit without asking everyone to move. Also consider the changing angle of direct sunlight through the glazing, since a pleasant spring position may become intense in summer. Locating the table where temporary shading can be used without covering priority crops gives the area greater seasonal practicality.
Choose furniture proportions that leave the glazed walls accessible for cleaning and inspection.
Plan where dining items will be stored when seasonal growing takes priority.
Adapting the space through the seasons
Seasonal changeovers are easier when each movable item has a defined storage position and the sequence of work is planned in advance. Clear propagation equipment as spring batches finish, then prepare winter holding areas before tender plants arrive. Note successful layouts so they can be recreated without repeated measuring, while keeping doors and vents accessible throughout.
Entertaining among the plants
For entertaining, place seating where it feels connected to the planting without occupying the busiest work zone. Use views towards specimen plants or the garden to guide the furniture position. Avoid seating beneath places prone to drips from watering or condensation, and keep temporary lighting and cables away from wet work areas and vent mechanisms.
Use a dedicated, easy-clean surface for serving food and drinks, separate from potting and plant-care equipment.
Store occasional-use chairs compactly so they do not become permanent obstacles beside beds or doors.
Propagation and seasonal changeovers
Spring propagation benefits from an organised progression rather than simply adding as many trays as the floor can hold. Reserve accessible bench space for sowing, checking and turning plants, and separate healthy young stock from tools and used pots awaiting cleaning. Place trays where their light and temperature needs can be observed consistently. Maintaining clear labels and grouped batches also makes it easier to remove completed propagation equipment when the area changes to its summer role.
Keep clean pots, labels and spare trays together so each sowing session can be set up without spreading supplies across the paths.
During autumn changeover, inspect incoming container plants before placing them close together. Remove damaged material, check pots and allow enough access for continued watering and observation. Large specimens should be positioned with their eventual removal route in mind, particularly if doors or adjacent beds could later narrow the passage. This is also a useful point to clean vacated benches and reassess which annual crops or temporary supports should be removed.
Delivery and installation planning
A structure of this scale requires coordination between delivery, storage, groundwork and assembly. Confirm who is responsible for each stage, where components can be held securely, and which areas must remain free for installers. Protect normal household and garden access throughout the project. Rainwater outlets and any planned service routes should be settled before surrounding surfaces are completed, as later alterations can disturb finished landscaping or create awkward exposed connections.
Delivery access
Measure the entire delivery route rather than the garden gate alone. Turns, steps, overhanging branches, narrow side passages and changes of level can all affect whether long aluminium profiles and glass panels can be moved safely to the work area. Confirm where the delivery vehicle can stop without blocking traffic or neighbours' access, and separate the unloading route from children, pets and normal household movement. If access is shared, agree arrangements before delivery.
Provide a firm, secure staging area where components can be arranged in installation order. Handle and store the glass in accordance with the supplied instructions, protect it from impact and keep it away from general foot traffic. Keep profiles, fixings and packaged parts identifiable rather than distributing them around the garden. Orderly storage reduces unnecessary handling and makes it easier to check quantities and visible delivery damage before assembly.
Installation requires working room outside the final footprint as well as within it. Keep spoil, pallets, stored glass and landscaping materials away from the areas installers need for moving components and using access equipment. Check the clearance around every side, allowing for boundaries, walls, planting and changes of level. Adequate access will also make future cleaning and inspection easier.
Collecting rainwater
The glazed roof can be used to collect rainwater for the garden when the gutters are connected to suitable water butts or tanks. Position storage on suitable support where it can be reached for cleaning and maintenance without creating obstacles across paths. Covered storage helps exclude debris, while an accessible tap or draw-off point makes the collected water practical for routine watering.
Choose storage capacity by considering the roof area feeding the system, the available space and how quickly the water will be used; one container will not suit every Orangery installation. If there is more than one collection point, coordinate each with the selected gutter arrangement. Include a means of isolating and cleaning the system, and check connections periodically for blockages or leaks. The aim is controlled storage with a planned overflow route, not simply moving rainfall to another unmanaged part of the site.
Keep water butts or tanks clear of door approaches and the external working space needed for cleaning the greenhouse.
Part of the wider garden
Plan the approach, views and everyday route to the Orangery
Position the main entrance so trays, compost, tools and harvested produce can move easily between the Orangery and the parts of the garden used most often.
Keep enough clear space outside the sliding doors for trolleys and large containers, and choose a path surface that remains practical in wet weather.
Consider the views from both inside and outside, using the position of beds, seating and specimen plants to connect the interior with the surrounding garden.
Project planning
1
Define zones
Assign measured floor space to planting, work routes and seating.
2
Check site access
Confirm gate widths, side-passage clearance and space for unloading and installation.
3
Plan services
Plan water, power, lighting, drainage and any optional heating before groundwork and flooring make the routes difficult to alter. Decide where each service is needed, how it can be isolated and how equipment will remain clear of watering and circulation. Electrical work in a potentially damp greenhouse environment should be designed and installed by a suitably qualified professional rather than relying on trailing extension leads.
4
Plan furniture storage
Decide where movable pieces will go when seasonal planting needs more room.
Frequently asked questions
Large Orangery FAQs
How large is the Large Orangery?
The selected configuration provides approximately 47–70 m² of interior area. Compare options on a scaled plan that includes mature planting, furniture, storage and clear access routes, as these determine how much of the floor remains usable.
Can it be used as a garden room?
Yes. The scale allows a genuine dining, sitting, studio or workshop zone to be planned alongside substantial growing space. It remains a glazed horticultural structure, however, so expectations for winter warmth, condensation, direct summer sun and furniture suitability should differ from those for a fully insulated room in the house.
Which door configuration should I choose?
Choose a single sliding door when one clear everyday entrance is sufficient. Double sliding doors are more suitable if you regularly move wide furniture, trolleys or large container plants. Check the approach on both sides of the doorway and allow for the space those items need to turn.
How should I plan for large or climbing plants?
Mark each plant’s expected mature height and spread on the layout. Keep tall crops clear of roof vents and allow working access for tying in, pruning, watering and harvesting. Position large containers where they can later be moved to the doors without beds or furniture narrowing the route.
Are roof vents included?
Yes, roof vents are included. They provide high-level outlets for warm, humid air and should be used with suitable lower-level openings to create an airflow route. Their effectiveness depends on unobstructed positioning, appropriate operation and the amount of heat and moisture being produced by the planting.
Is there a heating option?
An optional chimney outlet is available for a separately designed heating solution, but it is not a complete heating system. First establish the winter needs of the intended plants, then obtain suitable advice on the equipment, controls, ventilation and installation required for the greenhouse environment.
How long is the warranty?
The Large Orangery warranty lasts 12 years. Keep the order documents, installation information and maintenance records in case support is required, and follow the applicable warranty terms and supplied care instructions.
What should I check before delivery?
Check the full route from the delivery vehicle to the installation area, including gates, turns, steps, side passages, overhanging branches and changes of level. Prepare a firm, secure staging area where glass, profiles and packaged components can be organised without blocking household access or the installers’ working space.
Bloomcabin Large Orangery
Choose the Large Orangery configuration that fits your site and planting plan
The 47–70 m² interior can combine productive beds, comfortable circulation and a genuine garden-room area when each use is drawn to scale. Before ordering, check the chosen configuration against the site, foundation, delivery route and long-term maintenance needs. The finished Orangery should remain straightforward to ventilate, clean, inspect and adapt as planting develops.
Before ordering
✓ choose the right configuration within 47–70 m²
✓ map growing, circulation and garden-room zones
✓ check gates and side access
✓ prepare an accurate, level foundation to the installation requirements and plan drainage around it
✓ choose the sliding-door layout, roof-vent arrangement and colour to suit the interior plan
✓ coordinate water, professionally planned power, lighting and any optional heating before installation
