
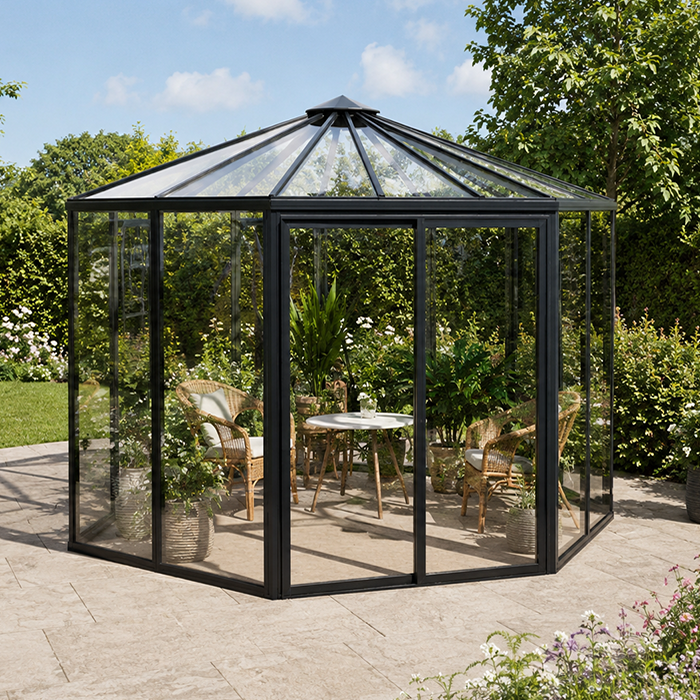
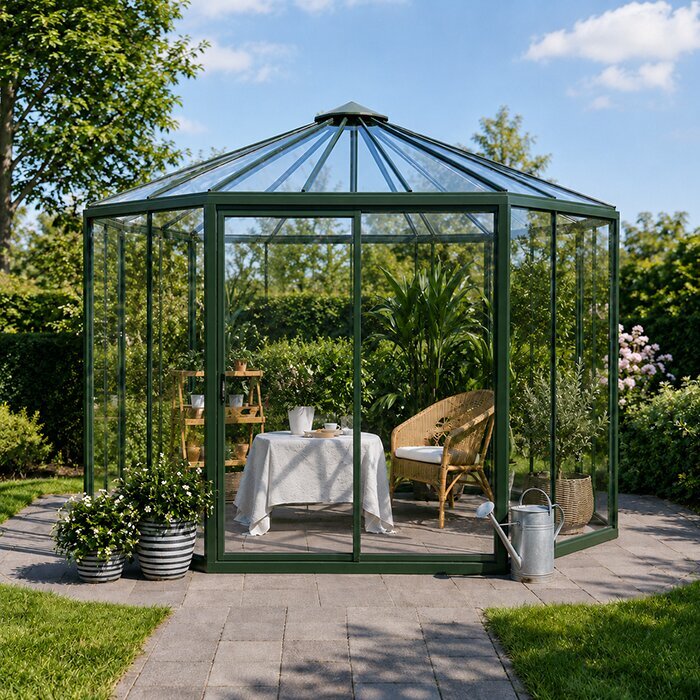
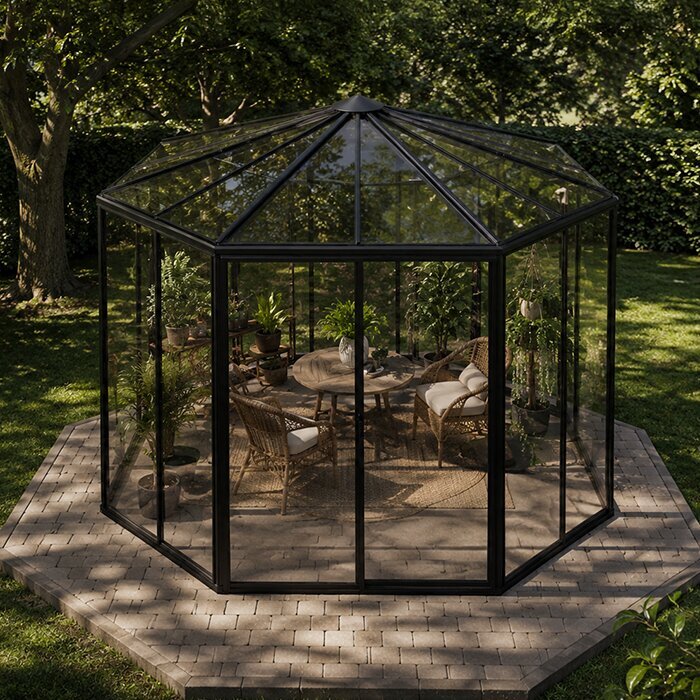
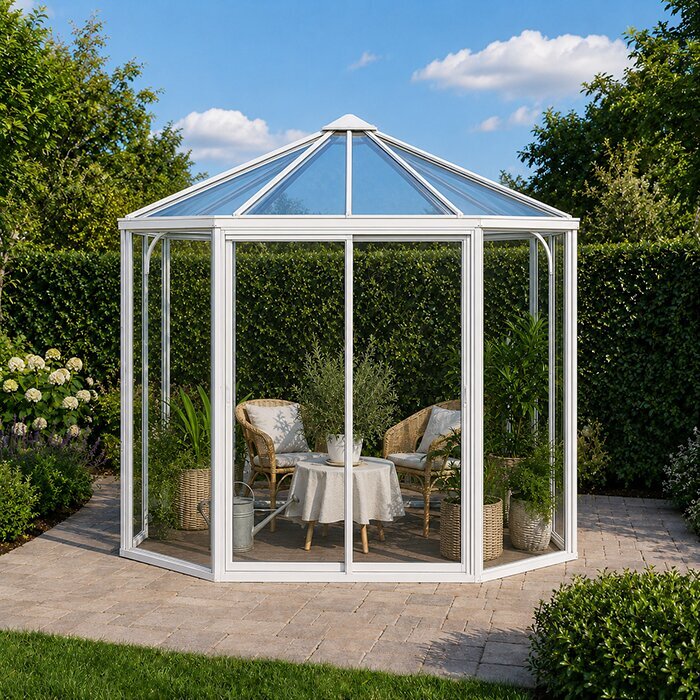



BloomCabin Hexagon Greenhouse
Hexagon Greenhouse – a six-sided growing space with the feel of a garden pavilion
The BloomCabin Hexagon Greenhouse offers a distinctive alternative to a long rectangular glasshouse. Its six glazed sides form a compact pavilion for raising plants, displaying specimen pots or combining productive growing space with a modest seating area.
The design combines a generous central ridgewith a tall doorway for easy everyday access. The specification includes premium aluminium, toughened safety glass, roof vents, integrated gutters and an aluminium base.
For current product information and the wider greenhouse collection, visit BloomCabin United Kingdom.
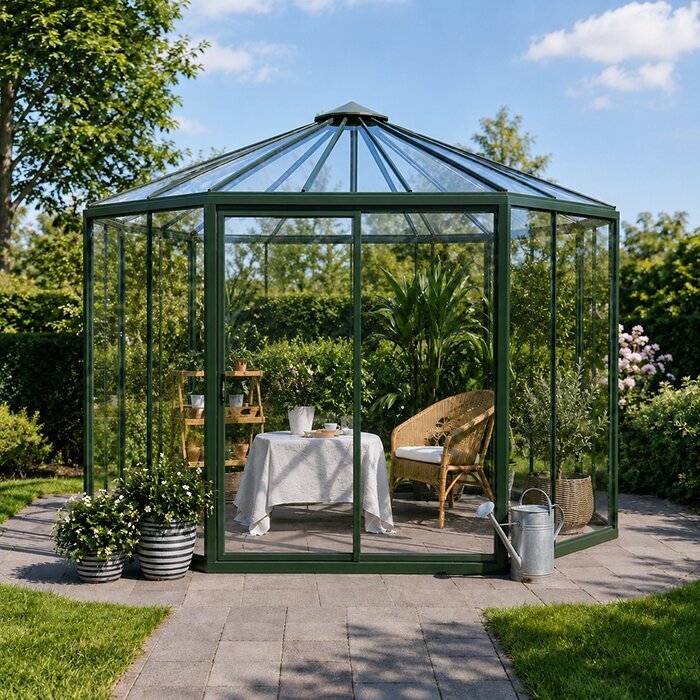
A greenhouse for prominent garden positions
A balanced six-sided form for open garden settings
The Hexagon works well near a terrace, at the end of a path or on an open lawn, where its glazed elevations can be appreciated from several directions. Before choosing a position, consider how it will look from the rooms and outdoor spaces you use most often.
Inside, the geometry encourages circulation around a central area rather than along one long aisle. Benches, containers and compact furniture therefore need to follow the angled perimeter instead of being planned as straight opposing rows.
Because each elevation contributes to the overall appearance, consider the greenhouse together with nearby paths, borders and seating rather than as an isolated structure. A simple setting allows the six-sided outline and planting inside to stand out.
Key features
Premium materials and a flexible layout for plants and occasional seating
The Hexagon suits gardeners who want a practical greenhouse that also looks at home in a prominent part of the garden. Decide from the outset how much room to give plants, movement and seating, as the angled floor plan benefits from a deliberate layout.
Six-sided layout
Angled sides create separate planting areas around an open central space
Clear toughened glazing
Clear panes keep plants and the surrounding garden visible from both sides
Aluminium frame
A low-maintenance structural frame that requires less routine surface treatment than unfinished timber
Flexible interior
Use the centre for plant care, a compact seat or both, while keeping the doorway clear
Light throughout the day
Glazing on all six sides brings in daylight as the sun moves
As daylight shifts around the structure, one side may receive direct sun while another is more subdued. This gives the interior varied light levels rather than a single uniform exposure.
The clear toughened safety glass maintains a strong visual connection between the plants and the garden. It also leaves the internal arrangement on view, so orderly staging, well-spaced pots and discreet storage will make the most of the design.
Roof vents allow rising warm air to escape from the tall central space, providing ventilation where heat accumulates. Their inclusion is particularly useful in a compact interior surrounded by clear glazing.
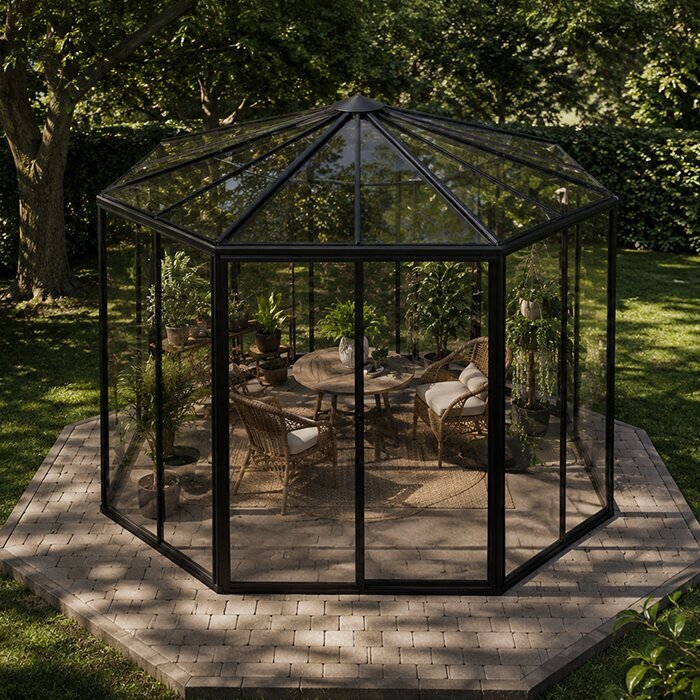
Product specifications
Dimensions, materials and included features
Footprint: approximately 2.73 m wide × 1.57 m long.
Ridge height: approximately 2.59 m.
Door height: approximately 1.94 m.
Frame: Premium-quality aluminium, engineered for a wind rating of 30 m/s and a snow load of 210 kg/m² when correctly assembled and anchored.
Glazing: 4 mm toughened safety glass.
Doors: single or double sliding doors depending on configuration.
Included features: roof vents, integrated rainwater gutters and an aluminium base.
Warranty: The greenhouse has a 12-year warranty, subject to the applicable warranty terms.
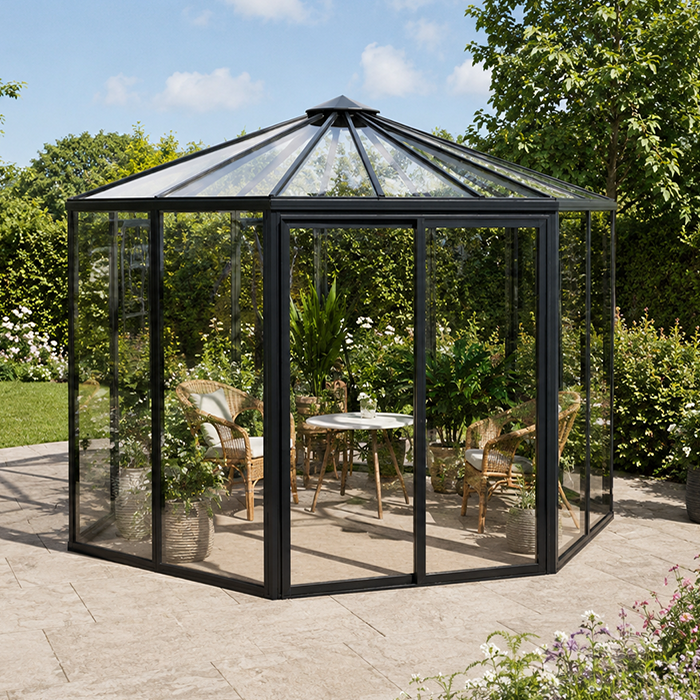
Plan the central floor area before choosing staging
The interior works best when the middle remains sufficiently open for turning, carrying trays and reaching the angled sides. Mark the footprint on the proposed base and test the circulation zone before buying benches or furniture.
Low staging or pots can follow selected perimeter faces while a compact stool or table occupies the core. Leave a direct route from the sliding doors and avoid placing fragile plants where they could be brushed whenever someone enters.
Standard rectangular greenhouse benches may waste space at the corners or project into the walking route. Measure each usable wall section individually, including frame members and door movement, rather than assuming one continuous run will fit.
Manage roof water during prolonged rain
Integrated gutters collect water from the glazed roof, but decide where it will go before installation. Depending on the site, the outlet might connect to suitable drainage, an appropriate soakaway or a securely connected water butt.
Do not allow repeated discharge beside the aluminium base. Saturated ground, splashing soil and standing water make access unpleasant and can undermine an otherwise well-prepared perimeter, particularly where surrounding surfaces fall towards the greenhouse.
Place any water butt where it can be reached easily with a watering can without narrowing the entrance route or maintenance path. A neat, secure connection keeps the greenhouse perimeter usable as well as making the collected water convenient for plants.
Control humidity without chilling vulnerable plants
Ventilation is useful on mild, damp days as well as hot afternoons. Moist compost, dense foliage and condensation can keep the internal air humid even when the outside temperature does not feel warm.
Water early enough for wet foliage and staging to dry before evening. Space pots to permit air movement, remove fallen leaves promptly and avoid leaving full watering trays standing beneath plants that do not need constant moisture.
On cooler days, ventilate for controlled periods rather than leaving the openings unchanged. Check conditions around vulnerable plants and close the vents when the internal temperature begins to fall.
Respond early when summer sunshine raises the temperature
A bright day can make a compact glazed pavilion much warmer than the outdoor air temperature suggests. Check conditions inside the greenhouse itself, especially around young plants and small pots, rather than judging them from the temperature outdoors.
Open the roof vents before heat has built to the point where foliage wilts. Ensure leaves, supports and stored equipment do not obstruct the openings, and keep the entrance route accessible so the doors can be operated whenever additional airflow is needed.
Temporary shading may improve comfort around a sitting area and protect sensitive plants during intense sunshine. Use it selectively and remove it when conditions ease, as unnecessary shading reduces useful light during duller periods.
Organise spring propagation by light and temperature needs
The Hexagon can accommodate seed trays and young plants while outdoor weather remains changeable. Group batches by their watering and temperature needs rather than treating every tray on the same bench alike.
Reserve the brightest practical positions for seedlings that need strong light and retain a clear working surface for sowing, potting on and inspecting growth. Labels are especially useful when several tray edges follow the angled interior.
An unheated greenhouse is not automatically frost-free. Monitor forecasts and internal conditions, then protect or relocate vulnerable plants when necessary rather than assuming the glass alone will maintain a safe overnight temperature.
Match the position to the light your plants need
Watch the proposed location from morning to afternoon before settling on the final position. The six glazed sides receive light from different directions, but fences, buildings and established planting can create local areas of shade.
Balance the available sunshine against the needs of the plants you expect to grow. A position that is ideal for spring propagation may need selective summer shading, while a heavily screened site may limit useful light during duller parts of the year.
Consider how light levels will change as surrounding trees and shrubs come into leaf or grow taller. Allow enough separation to prevent branches from resting against the glass and to avoid creating a permanently shaded maintenance gap.
Prepare an accurately level and stable foundation
The included aluminium base needs a stable supporting surface that is level across the whole footprint. Finish and check the site preparation before assembling the frame rather than trying to correct the support while the glazing is being fitted.
Because the frame meets at several angles, even a small error can affect multiple junctions and make panels or doors harder to align. Check diagonals, levels and the finished outline carefully, following the installation instructions at each stage rather than forcing components into place.
Check ground drainage and the location of buried services before work starts. The finished support must suit the site’s ground conditions and be compatible with the anchoring method specified in the installation instructions.
Add a sitting area without losing working space
A compact table with two suitably sized chairs can complement the central geometry. Test their actual dimensions within a marked floor plan, including the space needed to pull out a chair without touching the glass, staging or access route.
Sliding doors avoid the inward swing of a hinged door, but their approach and operating area must remain clear. Choose furniture that can be moved safely through the opening and avoid pieces too cumbersome to remove for cleaning.
Perimeter planting can create a sheltered, conservatory-like atmosphere while keeping the centre available for seating. Store watering cans, compost and tools neatly so they remain convenient for plant care without encroaching on the sitting area.
Arrange a plant display around the glazed sides
Citrus, pelargoniums, ferns and seasonal flowering containers can form a visible collection, provided each plant is suited to its particular position and the greenhouse conditions. Place taller specimens where they will not shade smaller pots unnecessarily.
Observe how direct light moves across the six faces before settling on a permanent arrangement. A plant that performs well on one side may need rotating, relocating or shading as the season and surrounding garden canopy change.
Because the collection is visible from outside, use differences in height and leaf shape to create interest while retaining practical gaps for watering and inspection. Keep every container accessible so that pests, damaged foliage and spilled water are easy to spot.
Care for the clear toughened safety glass
The clear glazing provides open views through the greenhouse and shows dirt readily. Wash it with suitable equipment and non-abrasive products, without leaning ladders or heavy tools against the panes or frame.
Clean both faces when required because algae, mineral deposits and general grime can reduce clarity. Work methodically around the six elevations so no panel is missed, and take particular care near edges, seals and moving components.
Inspect each pane during cleaning, paying attention to its edges and seals as well as the main surface. If a pane is chipped, cracked or loose, avoid disturbing it and obtain guidance on the correct replacement procedure.
Maintain the aluminium frame and moving parts
The aluminium frame requires less routine surface treatment than unfinished timber, making it a practical choice for a greenhouse exposed to regular wet weather.
Rinse away compost, plant residue and other dirt before it builds up on the frame. Use non-abrasive products suitable for aluminium and take care around seals, fixings and neighbouring panes.
Periodically clear the sliding-door tracks and test the vent mechanisms, then look over fasteners and visible joints. These routine checks are easiest while the interior and outside perimeter are already clear for cleaning.
Plan lighting and electrical work before finishing the interior
Subtle lighting can make the greenhouse inviting after dark and keep its six-sided form visible from the house. Position fittings to reduce glare through the clear panes and avoid shining light directly towards nearby seating or paths.
Any fixed electrical installation should be designed and completed by a qualified electrician using equipment suitable for the location. Do not run temporary extension leads through wet planting areas, across doorways or along walking routes.
Keep cables and fittings clear of roof vents, sliding doors, watering activity and growing plants. Decide whether electricity is genuinely required before foundation work, since later alterations can disrupt the finished base and carefully planned interior.
Hexagon or Classic: compare how you plan to use the space
A Classic greenhouse is generally easier to arrange with long parallel staging, repeated trays and straight rows. Its linear aisle suits a mainly productive layout based on standard rectangular benches.
The Hexagon places growing positions around angled sides and leaves a central area that can become part of the display. It suits mixed planting, specimen pots and a modest place to sit rather than maximising uninterrupted bench length.
Base the choice on how the interior will be used most weeks, not appearance alone. Draw the intended benches, pots and circulation at scale inside each footprint to see which geometry accommodates them with fewer compromises.
Hexagon or Pyramid: compare the effect each shape creates
A Pyramid model has a stronger vertical outline, while the Hexagon looks broader and more like a garden pavilion. Consider which shape sits more comfortably beside the house, surrounding planting and other garden structures.
Consider where the greenhouse will be seen from eye level, upper-storey windows and outdoor seating. A shape that suits one viewpoint may feel less balanced from another, particularly in a compact or formally arranged garden.
Plant requirements, usable floor space and installation conditions should still take priority over appearance. Compare the listed specifications for each configuration before deciding which shape best suits the site.
Keep the outside perimeter accessible as the garden grows
Retain a usable route to all six sides so that every pane, gutter section and frame joint can be reached. A narrow gap beside a fence or wall can trap leaves and make routine cleaning unnecessarily awkward.
Review nearby planting as it matures rather than allowing the original clearance to disappear. Prune back growth before it obstructs roof ventilation, gutter access or the route needed to carry cleaning equipment around the greenhouse.
When refreshing nearby borders, keep soil, mulch, gravel and cut material out of the door tracks and gutter outlets. Maintain a tidy edge beside the base so changes to the surrounding ground do not reduce access.
Delivery and assembly
Plan the access route and work area before installation
Before installation, confirm that packaged frame sections and glass can reach the site without being forced around tight turns or carried over unprotected finishes. Measure gates, side passages and steps, and make sure there is enough firm space beside the prepared site for installers to work.
Set aside a clear area for unpacking and checking components against the assembly instructions. Keep children and pets away from the work area, and use suitable lifting assistance and protective equipment when handling toughened glass and frame components.
Bring packages to the site in the order required by the assembly instructions without blocking the route installers still need. Protect nearby paving and planting, keep loose material out of the door track, and leave the perimeter clear until glazing and final checks are complete.
Practical answers
Frequently asked questions about the BloomCabin Hexagon Greenhouse
Should the sliding-door entrance face the main garden path?
Not necessarily. Choose the orientation that provides a clear, convenient approach and works with the planned interior layout. Check that people carrying trays can reach the entrance directly and that nearby planting will not narrow the route as it grows.
How can I use the central height without obstructing the roof vents?
Plan for each plant’s mature height, including any support it will need. Position tall growth so every roof vent can still open freely and remain accessible for inspection and adjustment.
Can I drill the frame or glass to add shelves and plant supports?
Do not drill or cut the toughened glass, and do not improvise holes in the aluminium frame. Fit shelves, supports and other accessories only with fixings intended for the structure and in accordance with the relevant instructions.
Can I leave the roof vents in one position for the whole season?
No. Adjust them as the weather and plants require. Open them early enough to release rising heat or humid air, keep the mechanisms unobstructed and close them when exposure or plant needs make that necessary.
What should I check if water spills from the integrated gutter?
First check the gutter and outlet for leaves or other debris. If they are clear, inspect the connection for a restriction or backed-up water, and make sure any water butt is not full and has a working overflow route.
What should I check if a sliding door becomes stiff?
First remove soil and debris from the track. If the door is still stiff, look for an obstruction or misalignment and check that the base and frame remain level. Do not force the door; identify the cause before operating it again.
Can I train climbing plants directly onto the greenhouse frame?
No. Train climbing plants on suitable supports instead, keeping stems and foliage clear of the roof vents, joints and glazing. Do not attach supports with improvised fixings.
Which documents should I keep after installation?
Keep the order information, installation records, assembly instructions and care documents together for future reference. They will be useful when checking the original configuration, arranging maintenance or identifying a component that needs attention.
BloomCabin Hexagon
Make the Hexagon Greenhouse a practical and attractive garden focal point
The Hexagon is best suited to a garden where its distinctive shape can be enjoyed and its angled interior used deliberately. Decide how the available space will be divided between growing, access and occasional seating, then use the checks below to prepare for ordering and installation.
Details to confirm before ordering
✓ Check the listed footprint and ridge height against your measured site
✓ Confirm the required sliding-door configuration and entrance position
✓ Note the usable length of each angled side before choosing staging
✓ Check that packaged components can pass through gates, side passages and turns
✓ Decide how the integrated gutter outlet will connect to drainage or water storage
✓ Leave enough space outside to clean the glazing and maintain the gutters and frame
