


Bloomcabin Oasis Pyramid Greenhouse | UK
Oasis Pyramid Greenhouse – a faceted roof with generous central height
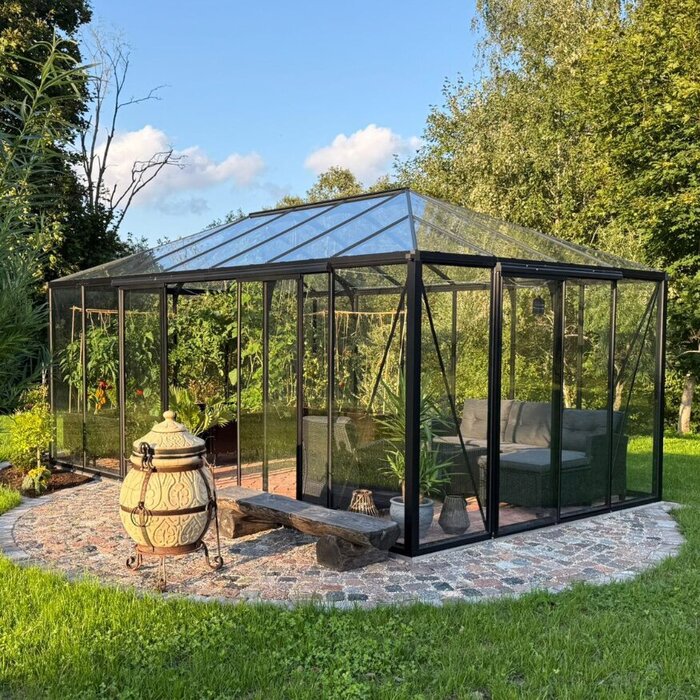
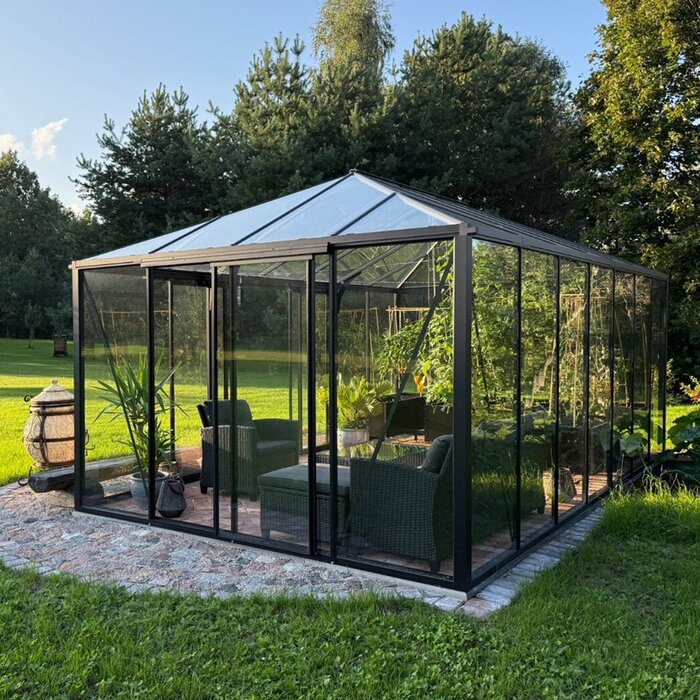
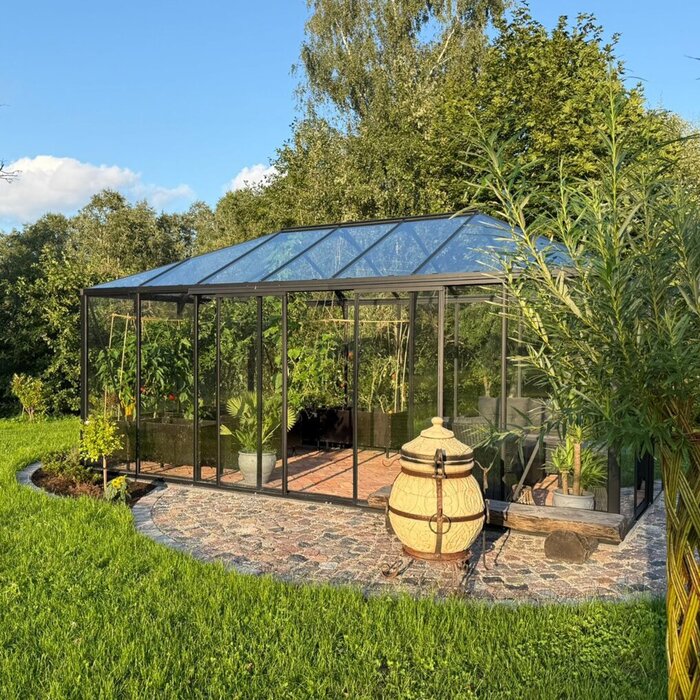
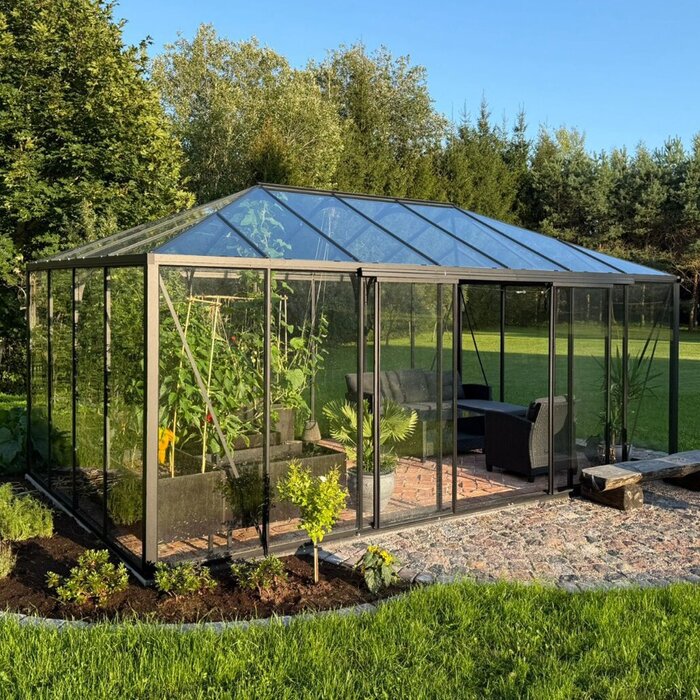
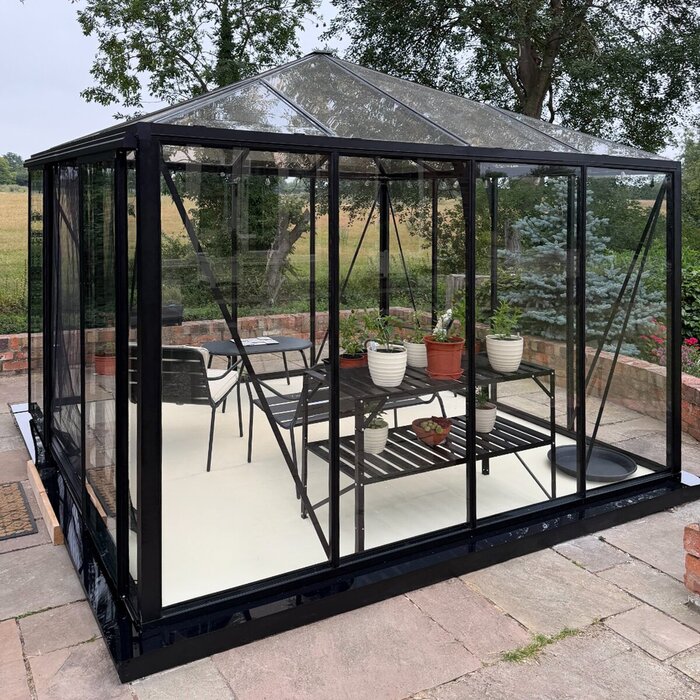
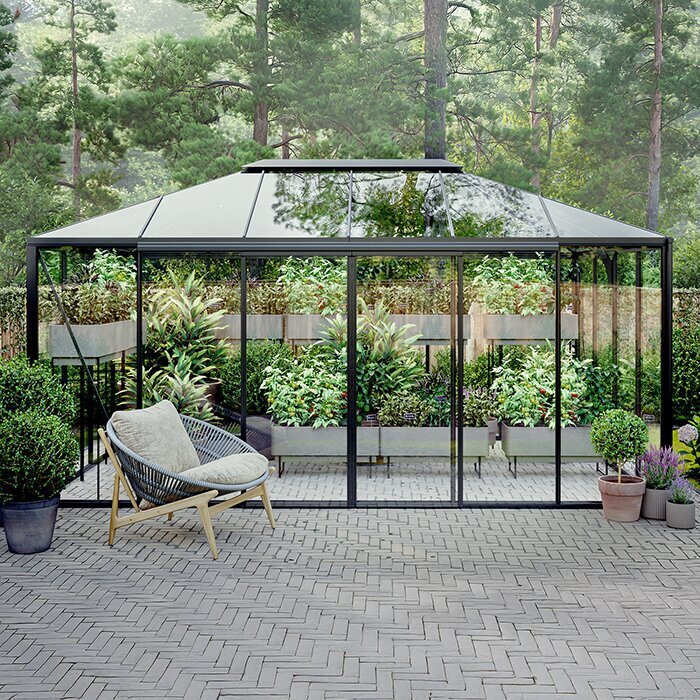
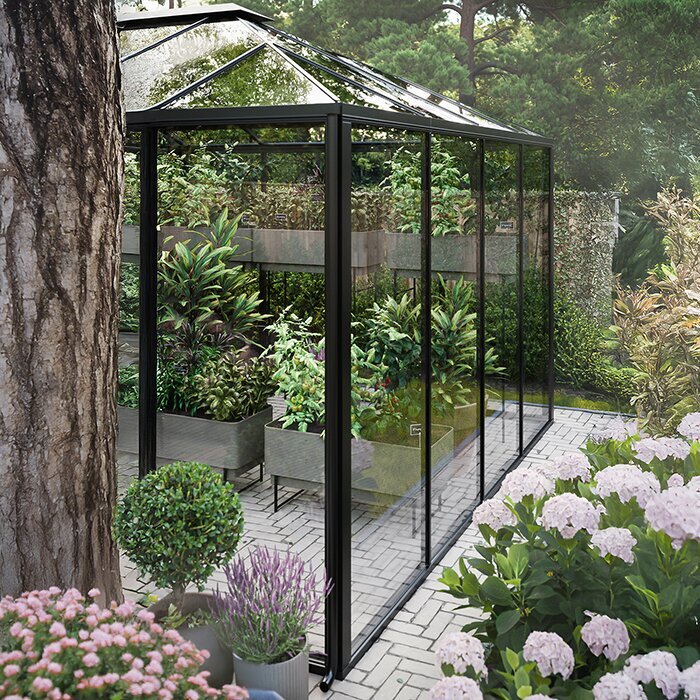
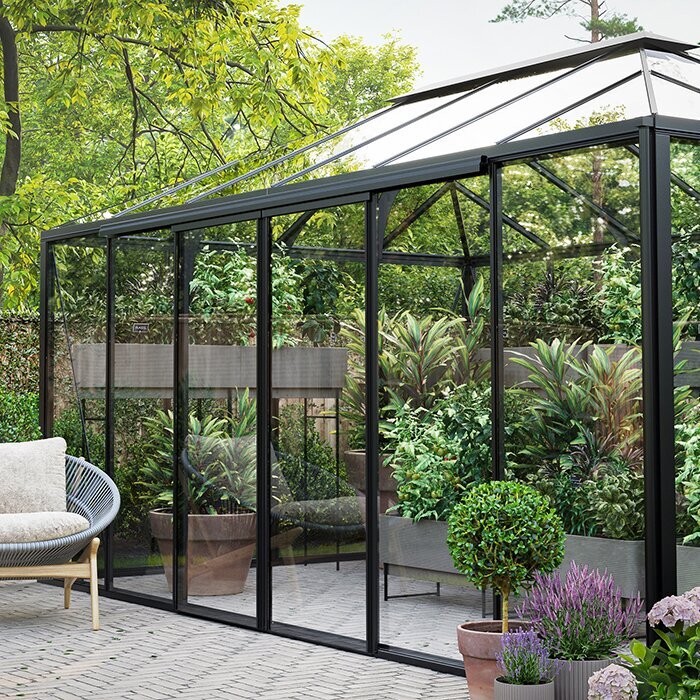
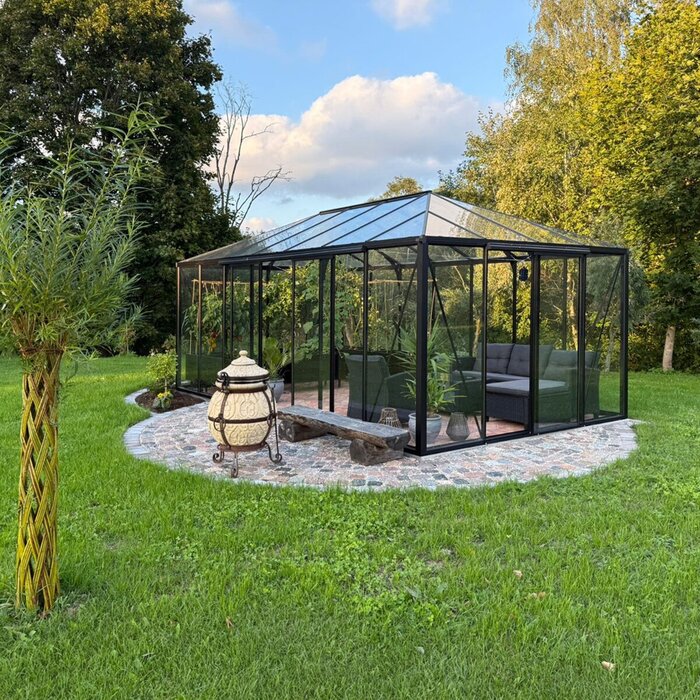
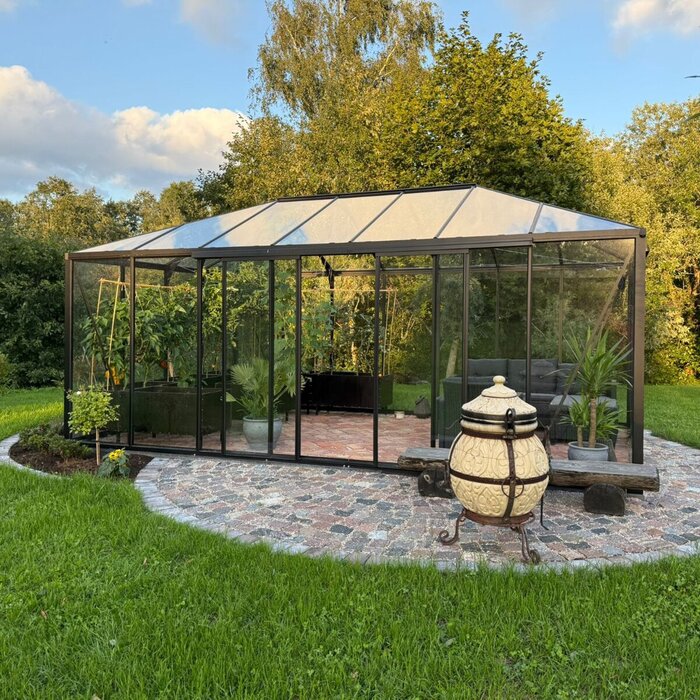
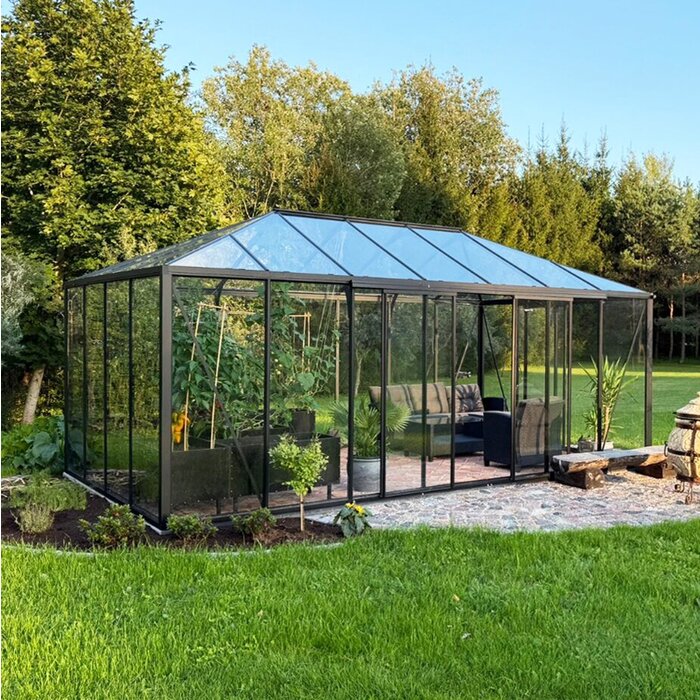
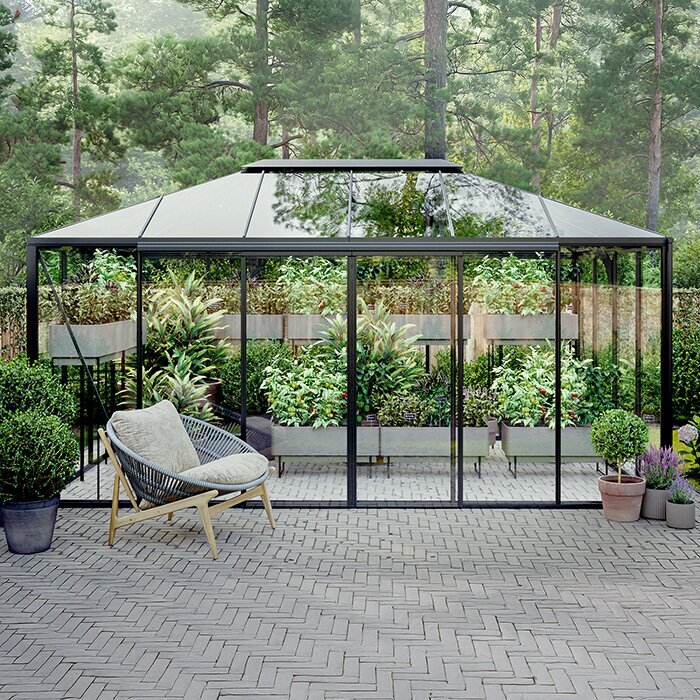
The Bloomcabin Oasis Pyramid Greenhouse is a distinctive alternative to a conventional ridge-roof glasshouse. Its faceted roof rises to a central point, creating a pavilion-like shape that can be enjoyed from several parts of the garden. The design also provides useful extra height in the middle. Depending on the chosen footprint, the greenhouse can be arranged for productive growing, plant displays or a mixed layout with a small place to sit.
The range offers a choice of square and extended footprints. Each model combines reinforced, powder-coated aluminium with sliding doors, integrated gutters and a built-in aluminium base. Glazing is available in polycarbonate or 4 mm toughened safety glass. This choice affects visibility and the quality of light inside, while the door arrangement determines how the greenhouse connects with nearby paths and beds. Check the complete specification for your chosen size before preparing the site.
A good position in a UK garden needs more than an open patch of ground. Watch where direct light falls during the day, particularly when nearby trees are in leaf, and note any prolonged shade from buildings, fences or boundary planting. The route from the house should remain practical when carrying trays, compost or watering equipment, with enough space around the greenhouse for cleaning and maintenance. Explore Bloomcabin greenhouses in the UK.
A focal point in the garden
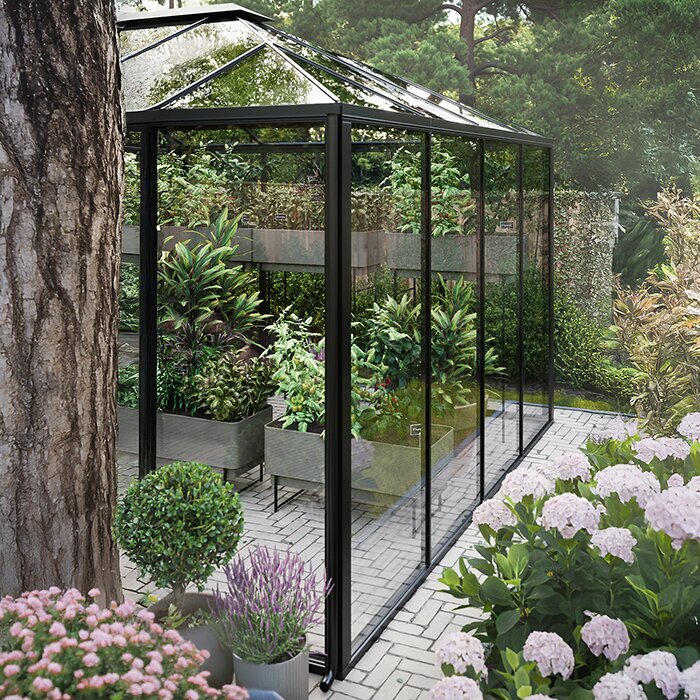
The high central roof gives the Oasis its pavilion-like character
Several roof planes meet at a central point instead of running along a single ridge. This creates the Oasis Pyramid’s distinctive outline and a greater sense of height in the middle, while the space closer to the walls feels more enclosed. Allow for this changing headroom when measuring staging, plant supports and mature plants.
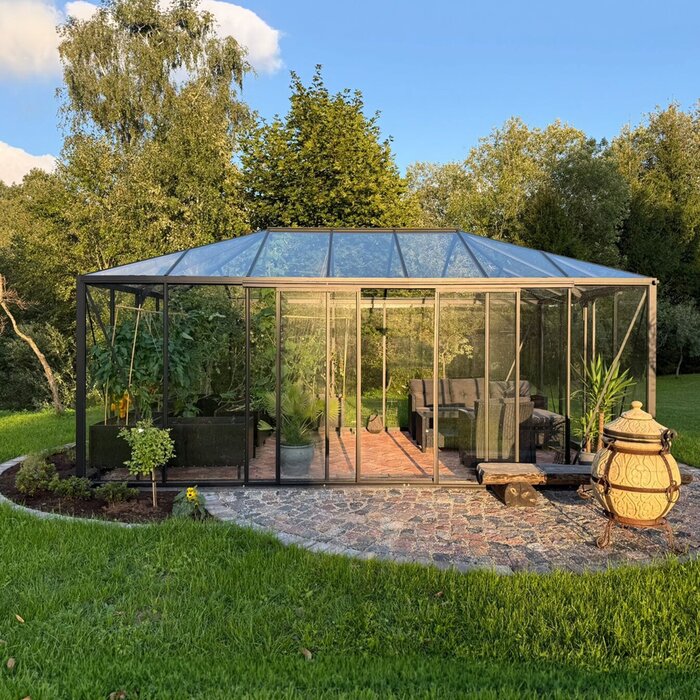
The pyramid roof has no single dominant viewing side, so it works particularly well where the structure can be seen from several parts of the garden. Align the entrance with the path and nearby bed lines where practical, but let sunlight, everyday access and maintenance clearance determine the final position.
Low staging around selected edges can hold propagation trays and smaller pots without crowding the interior. Keeping the central route open makes plants easier to inspect, leaves room for taller growth and prevents the greenhouse from feeling cramped at shoulder height.
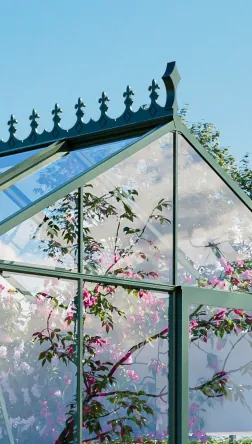
Pyramid roof
A faceted profile centred on the roof apex
Central headroom
The greatest headroom is in the middle
Glazing choice
Clear views or softer, diffused light
RAL frame colour
Frame colours to complement your home and garden
Light through the day
Plan planting around changing light across the roof facets
Morning and afternoon light reaches the separate roof facets at different angles, so brightness and reflections shift through the day. Use these variations when positioning plants with different light requirements. Plants that favour stronger light can occupy brighter areas, while more sensitive plants may need a less exposed position or suitable seasonal shading. Assess the actual site rather than assuming the whole footprint will receive the same light.
Toughened safety glass gives clear views through the greenhouse and allows plant displays to be seen easily from outside. Polycarbonate is less transparent and provides more diffused light. Consider whether your priority is a clear view of the interior, a more screened growing space or softer direct sunlight on the foliage. With clear glazing, storage and staging also become part of the view from the garden.
Choose the glazing alongside the planting plan rather than treating it as a final cosmetic decision. Consider the crops you want to grow, the privacy required from neighbouring viewpoints and how summer heat will be managed. Ventilation and shading still need separate planning: neither glazing option can make up for obstructed vents, overcrowded plants or an unsuitable position.
Planning the Oasis as a garden feature
Four decisions that improve both growing conditions and garden layout
Treat the Oasis as part of the wider garden plan rather than positioning it in isolation. Plot the structure on a measured drawing that includes the house, paths, boundaries, planting and changes in level. Then work through the four decisions below before setting out the foundation; this helps resolve conflicts between appearance, growing conditions and day-to-day access.
01
View from home
Look from the windows and outdoor seating areas used most often, then identify the clearest sightlines to the proposed site. The greenhouse need not sit at the centre of the view: aligning its apex or entrance with a path, bed edge or established planting can integrate it more naturally. Place temporary markers at the corners to judge its apparent scale before committing to the position.
02
Sunlight
Check the position at different times of day and, where possible, in different seasons. Low winter sun, summer foliage and shadows from fences or buildings can all alter exposure. Avoid unnecessary shade. If particular plants will need protection from intense sun, plan seasonal shading rather than choosing a permanently shaded site.
03
Entrance and path
Face the sliding-door entrance towards a firm, convenient route from the house, vegetable beds or potting area. Leave space to pause with a tray or large pot without blocking the opening. The path should meet the threshold neatly, drain well and avoid an abrupt change in level. If you use a wheelbarrow or other wheeled equipment, check the full route, including turns, gates and changes in level.
04
Rainwater route
Show the gutter outlets, pipe route and intended storage or discharge point on the site plan before installation. Keep connections clear of the entrance and exterior cleaning route, and avoid running them around finished paving or established planting where access would be difficult later.
Product specifications
Construction and dimensions
Current range
14 sizes
Approximately 5.6–14.2 m²
Compact square
Approx. 2.35 × 2.35 m
Peak 2.69 m; wall 1.93 m; door 1.85 m
Large square
Approx. 3.10 × 3.10 m
Peak 2.64 m; wall 1.93 m; door 1.85 m
Extended
Approx. 3.10 × 3.85 m
Longest option
Approx. 3.10 × 4.60 m
Construction
Reinforced powder-coated aluminium
The reinforced, powder-coated aluminium structure includes integrated gutters, a built-in aluminium base and sliding-door options. The greenhouse is rated for wind speeds up to 30 m/s and a snow load of 210 kg/m². Accurate assembly, secure fixing and routine maintenance remain essential. Follow the supplied instructions for the selected configuration, and keep doors and vents secured when conditions require it.
Making use of the roof shape
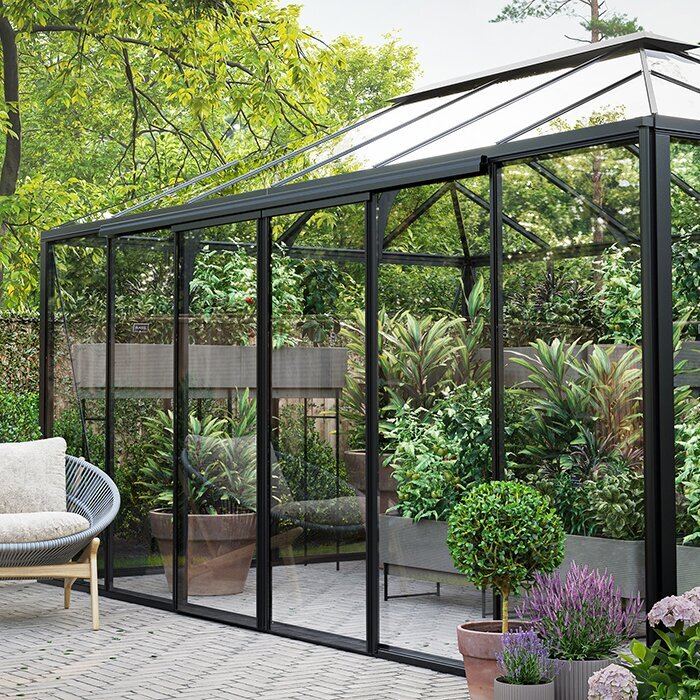
Allow for changing headroom across the floor
The walls provide useful standing height, while the roof rises further towards the centre; the exact peak varies by footprint.
When checking whether plants or equipment will fit, compare their full width with the sloping roof rather than considering height alone. Broad foliage can meet the glazing before the top of the plant reaches the highest point.
Sketch a simple cross-section for large pots, staging and supports, using the dimensions of the chosen model. Allow room to work around each item, and remember that moving a container closer to the wall reduces the available height above it.
Ways to use the Oasis
Four layouts for growing, displaying plants or taking a seat
01
Beside the kitchen garden
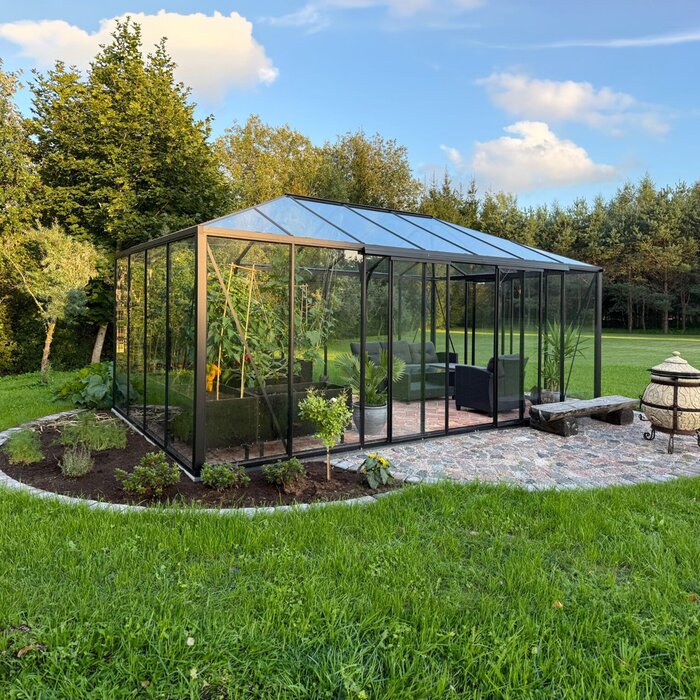
Place the greenhouse within easy reach of vegetables, herbs and outdoor growing beds. This shortens journeys when moving seedlings out for hardening off, collecting produce or transferring tools between covered and open growing areas. Leave enough separation from adjacent beds to stop soil and spreading foliage from narrowing the exterior route. The Pyramid roof can provide a clear visual focus without forcing the surrounding paths into an overly formal layout.
02
Mixed edible growing
Group edible crops by how often they need watering, feeding and harvesting rather than filling every available edge. Keep frequently picked plants close to the main route and place supported crops where they remain easy to tie in and prune. This makes routine care simpler and reduces the chance of vigorous growth taking over the working space.
03
Flower display
Clear glazing can turn a flower collection into a visible display from the garden. Arrange pots by mature height and flowering period so that shorter specimens remain visible and spent plants can be removed without dismantling the whole composition. Leave discrete working gaps for watering, deadheading and checking pests. If appearance from outside is important, decide where compost, spare pots and tools will be stored rather than allowing them to accumulate behind the most prominent glazed elevation.
04
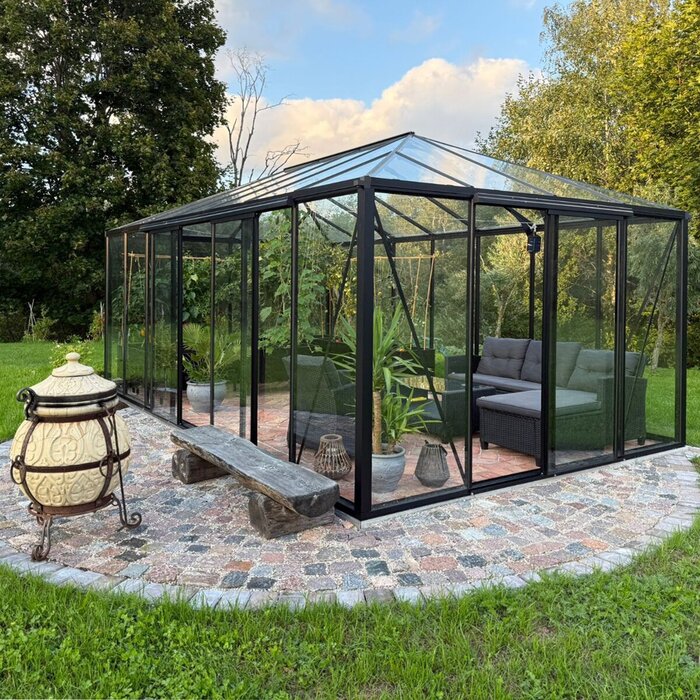
Greenhouse with a seating corner
In a suitable footprint, a small seat can sit alongside the planting without taking over the growing area. Choose materials that tolerate humid conditions, and keep furniture clear of the entrance, irrigation lines and routine horticultural work. Define the seating corner so furniture can be moved or removed easily when spring propagation or overwintering requires more space.
Siting and drainage
Consider ground conditions and intended use together. A bright position is unsuitable if the approach becomes waterlogged or the supporting surface cannot be prepared accurately. Map existing runoff before adding paving, because hard landscaping can divert water into a previously dry area. The finished scheme should carry water away without directing it towards buildings, paths or boundaries.
Site drainage
Account for water arriving from nearby slopes, roofs and hard surfaces, not only rain falling directly on the proposed site.
Observe the site after rain before deciding how the surrounding ground will be finished. Shape the area so natural runoff does not collect against the built-in base or pass through the main working area. Paving and other new surfaces should support the drainage plan rather than redirecting water towards the greenhouse.
Keep the entrance route well drained so water and mud do not collect at the threshold or sliding-door track.
Flexible interior layout
Divide the footprint into fixed growing zones and an adaptable area for equipment that changes with the season.
Arrange side staging and containers so that every plant can be reached without leaning across fragile growth. Keep sliding-door tracks and roof-vent operating areas clear, with a direct route to irrigation controls and fittings. Shelving can make good use of vertical space for small pots, but avoid creating deep shade beneath it unless those conditions suit the plants.
Movable staging, wheeled planters and modular shelving make it easier to respond to changing crop sizes. Check that wheels or feet suit the chosen floor and will not catch at joints or sink into loose material. Flexible equipment only helps if there is enough free space to move it when plants mature or maintenance access is needed.
Seasonal change
Spring often places the greatest demand on staging and bench space as seed trays, young plants and propagation equipment compete for room. Reserve a bright, accessible area where seedlings can be inspected and watered without reaching over larger containers. Keep labels and small tools organised, and avoid placing temporary trays in the doorway or central route. A planned overflow surface is safer and more efficient than repeatedly moving plants from one unsuitable position to another.
During summer, ventilation and harvesting access become the main priorities. Check roof vents regularly and prevent climbing growth from crossing their opening paths. Water in a way that suits the plants while limiting prolonged wetness on floors and foliage. Remove trimmings and fallen leaves before they restrict drainage or harbour problems. If temporary shading is used, fit and manage it without damaging the frame or preventing ventilation components from working.
In autumn, review which container plants genuinely need protected space and measure them at their widest points. Clean plants and pots before bringing them inside, inspect for pests, and avoid compressing everything into one dense group. Reposition movable staging to create stable locations for heavier containers. This is also a useful time to clear summer supports and prepare unobstructed access for winter cleaning and periodic checks.
Growing conditions and interior planning
Plan planting, airflow, supports and storage around the changing roof height and the routes used every day.
Ventilation and humidity
Use the roof vents to release warm, moisture-laden air, not only during the hottest weather. Condensation can increase when warm air inside meets cooler glazing, particularly when damp compost and dense foliage add moisture. Adjust ventilation to current conditions and plant needs, and make sure leaves, support strings and stored items cannot obstruct the vents.
Leave enough space between pots for air to move around foliage and for water to reach the compost without splashing neighbouring plants. Remove dead material promptly and avoid storing wet sacks or water-filled trays beneath staging. Overcrowding also makes early signs of pests or disease harder to spot and plants more difficult to reach.
Check beneath staging and behind dense foliage, where damp air may remain even when the central route feels clear.
Plant supports and access
Plan support positions before filling the greenhouse, using the highest part of the roof for plants that will need the most vertical room.
Keep canes, strings and other supports clear of vent mechanisms, door openings and glazing that needs cleaning. Supports should remain stable under the expected plant weight and allow individual stems to be tied in or removed without disturbing nearby containers.
Leave enough room to prune and harvest each plant from the path instead of reaching through neighbouring foliage.
Storage and working space
Set aside a defined place for hand tools, labels and small supplies so they do not gather on staging or beside the door.
Storage should remain easy to clean and must not block access to plants, ventilation controls or irrigation fittings. Keep compost and spare pots away from the sliding-door track, and avoid deep shelves that make items at the back difficult to reach.
Portable storage boxes and compact modular organisers can be repositioned as planting needs change through the year.
Access, services and equipment
Plan services and equipment before fixing the final position. Decide where water will enter, where irrigation controls can be reached and how tools or compost will be brought inside. If electricity or other services are being considered, obtain suitable professional advice rather than improvising connections. Keep service routes away from the sliding-door track and main walking line so they remain easy to inspect.
Delivery and assembly access
Check gates, passages, corners and changes in level to make sure the greenhouse components can reach the prepared site.
Plan where components can be placed during assembly without blocking household access or damaging established planting.
Protect finished surfaces and path edges along the route throughout installation, then remove tools and packaging promptly once assembly is complete.
Irrigation
A planned watering system can be particularly useful in larger layouts where hand watering every growing position becomes awkward.
A carefully routed drip system can water containers without leaving loose hoses across the floor. Divide the layout so plants with different watering needs are not forced into the same routine. Secure lines where they remain visible for inspection but cannot be snagged during harvesting or cleaning, and check outlets regularly for blockages.
Place filters, valves and isolation taps where they can be reached without moving heavy pots or reaching beneath staging. Label separate watering zones if the layout could otherwise become confusing. Connections should not drip beside the built-in base or onto a surface that may become slippery. When equipment is not needed during colder periods, isolate, drain or store it in line with its instructions.
Maintenance
Inspect the glazing, gutters, doors, vents and visible fixings regularly and after severe weather. Clear plant debris from tracks and water channels before it causes a blockage. Use cleaning methods and products suitable for each material, avoiding abrasive tools that could scratch the glazing or damage the powder-coated finish. Attend to loose parts or stiff mechanisms promptly rather than forcing anything that no longer moves freely.
Allow enough separation between the frame and permanent shrubs, climbers or hedges for mature growth and maintenance access. Branches rubbing against the glazing can leave debris and hinder inspection, while roots and dense planting may complicate drainage or work around the base. If soft landscaping is used to integrate the greenhouse, make sure it can be cut back without stepping into narrow, inaccessible gaps.
Allow working room at the corners, where gutter connections and frame junctions may need closer inspection.
Rainwater, flooring and size
Reserve space outside for rainwater storage and inside for the finished walking surface before deciding which footprint provides enough usable growing room.
Rainwater storage
Use the integrated gutters as the starting point for the rainwater system. Place the water butt on a sound support, with enough room to inspect connections and fill a watering can comfortably. Keep leaves and other debris out of the container and fittings so the system remains clear.
Provide a controlled overflow route so surplus water does not discharge beside the base or across the approach.
Choose storage capacity by considering the greenhouse roof area, the available position and realistic watering demand. A larger container is not automatically more useful if it cannot be positioned without restricting access or makes the stored water awkward to draw off.
Flooring
The internal floor should be durable, well drained, comfortable underfoot and easy to sweep or wash. The finish affects daily use: very loose material can impede small wheels, while poorly laid hard surfaces may hold puddles or leave furniture unstable. Decide whether beds will be formed in the ground or the greenhouse will use containers and staging, as this determines how much of the footprint requires a finished walking surface.
Choose paving, gravel or another suitable finish according to the ground conditions, drainage plan and intended use.
Set the completed floor level in relation to the threshold and sliding-door movement. The transition should not impede the door, trap debris in its track or create an abrupt step on the main approach. Check how internal cleaning water and incidental spills will drain without washing soil towards the base. Final levels must also remain compatible with the correctly prepared support required by the greenhouse installation.
Choosing size
Choose the footprint from the inside out. List the mature plants, staging, containers, irrigation equipment and furniture that will actually occupy it, then reserve an uninterrupted working route. Include the depth needed to stand in front of benches and tend plants rather than counting the bench top alone. If the greenhouse will serve several purposes, decide which uses must operate simultaneously and which can replace one another seasonally.
Draw the proposed interior to scale using the published greenhouse dimensions and the measured sizes of planned contents. Show door openings, vent operating areas, bench depth, large pots and the space required to turn or carry a tray. Test more than one arrangement before choosing a model. This simple exercise exposes pinch points that total floor area cannot reveal and helps distinguish genuinely useful extra space from an oversized but poorly organised layout.
Keep the drawing as a reference when choosing staging, large pots, irrigation equipment and furniture.
Foundation and drainage
A built-in aluminium base still needs an accurate supporting surface
The built-in aluminium base forms part of the greenhouse, but it does not replace proper site preparation. The supporting surface must be stable, level and suitable for the ground and drainage conditions. Confirm the required installation method from the supplied instructions before work begins. If the ground, foundation design or exposure creates uncertainty, seek competent advice rather than altering structural details without reliable guidance.
Accurate setting out is especially important because the roof is assembled from several converging planes. Establish the footprint from fixed reference points, check all relevant dimensions and compare the diagonals before continuing. Do not use the glazing or door components to pull an inaccurate frame into position. A correctly prepared base helps the sliding doors operate smoothly and keeps the roof sections properly aligned.
Before installation, check property boundaries, underground services, drainage routes and any planning restrictions that apply to the site. Requirements vary with individual properties, so confirm them rather than relying on general assumptions. Also make sure every component can reach the prepared position through the available gates, passages and turns.
Planning steps
1
Decide how you will use it
List the plants, their mature heights and any seating or storage you need.
2
Assess the site
Check sunlight, paths, boundaries, access and drainage.
3
Choose the configuration
Confirm the size, glazing, doors and frame colour.
4
Prepare the foundation
Create a stable, level support and finalise the rainwater route.
Frequently asked questions
Oasis Pyramid Greenhouse FAQs
How should I choose the right size?
Start with a scale plan showing mature plants, staging, large pots, the main working route and the space needed at the entrance. Compare this layout with the published dimensions for each model rather than relying on total floor area alone.
Can I place staging around the sides?
Yes. Low staging can use selected edge areas, provided it does not obstruct doors, vents or access to the plants. Check the exact footprint and changing roof clearance before assuming that a standard run of staging will fit.
Which glazing offers more privacy? Polycarbonate provides a more screened appearance, while 4 mm toughened safety glass maintains clear views through the greenhouse.
Are double sliding doors possible?
Double sliding doors are available on compatible walls from approximately 3.10 m wide. Confirm compatibility for the exact size and wall before finalising the approach. Wider access can help when moving bulky containers, staging or equipment, but preserve that width in both the exterior path and interior layout.
Are gutters integrated?
Yes. The built-in gutters can feed planned rainwater storage or drainage. Keep the outlets clear and route overflow away from the aluminium base and entrance.
Is the aluminium base built in?
Yes. The aluminium base is part of the greenhouse, but it still needs an accurately prepared supporting surface. Follow the supplied instructions and check the level, squareness and drainage before assembly begins.
What type of furniture works best inside?
Choose compact, lightweight furniture that tolerates moisture and is easy to move for cleaning or seasonal growing. Keep it clear of the entrance, plants, irrigation equipment and ventilation controls.
What warranty is included?
The Oasis Pyramid Greenhouse includes a 12-year warranty, subject to the applicable terms.
Bloomcabin Oasis
Choose an Oasis Pyramid Greenhouse that works as both a growing space and a garden feature
Before ordering, mark the chosen footprint on the ground, including the entrance approach and rainwater-storage position. View it from the house and walk around the outline to check for cramped corners, awkward routes or blocked sightlines that may be less obvious on a drawing.
Final checks before ordering
✓ compare the available sizes using a measured interior layout
✓ choose glazing by balancing outward views, privacy and light diffusion
✓ choose a frame colour that complements its permanent surroundings
✓ confirm door configuration, threshold treatment and the full access route
✓ plan where gutter water and overflow will go
✓ prepare a stable, level and accurately squared supporting surface