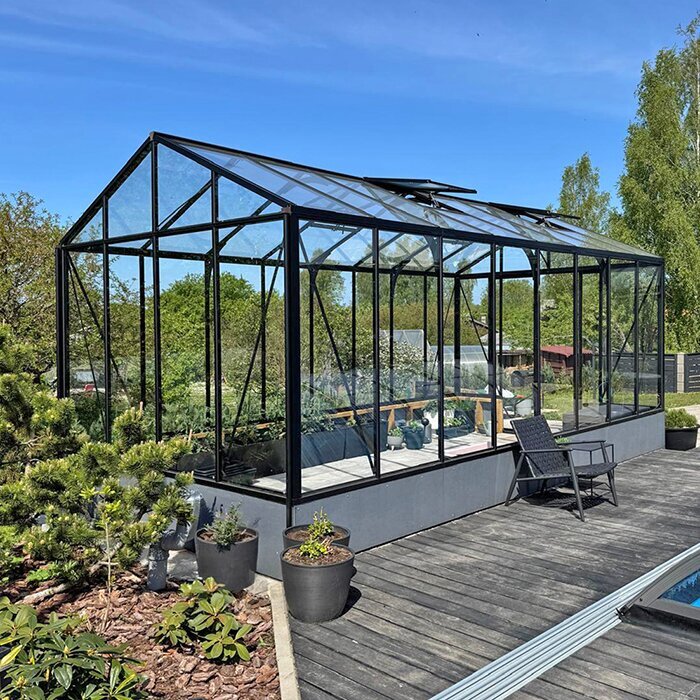
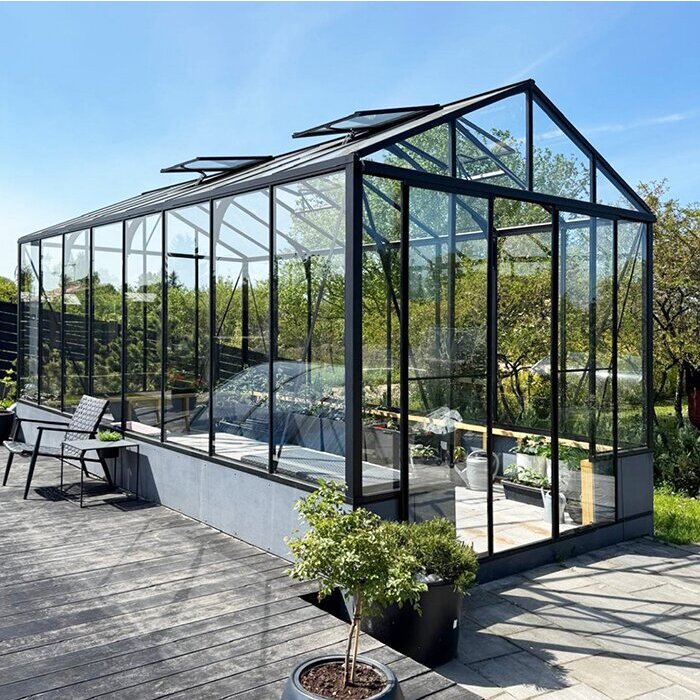
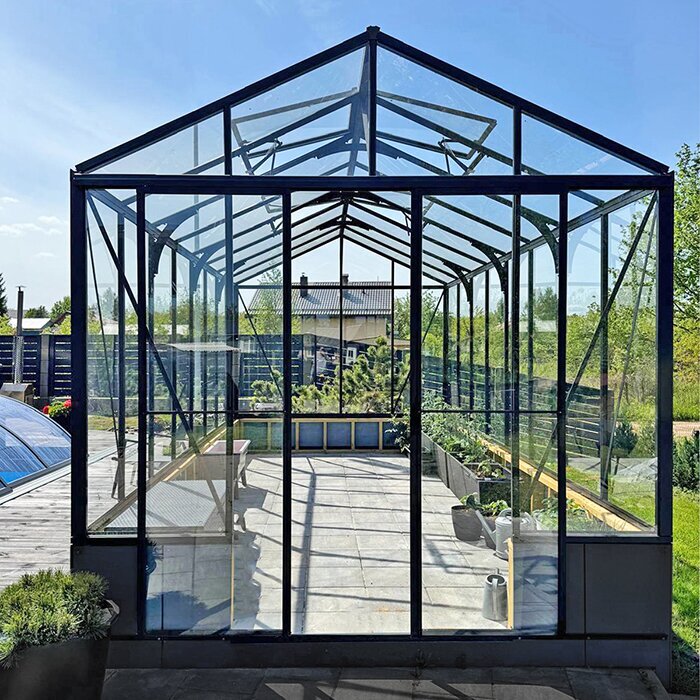








Classic Greenhouse on a Masonry Wall Base
A freestanding greenhouse for a brick, stone or rendered dwarf wall
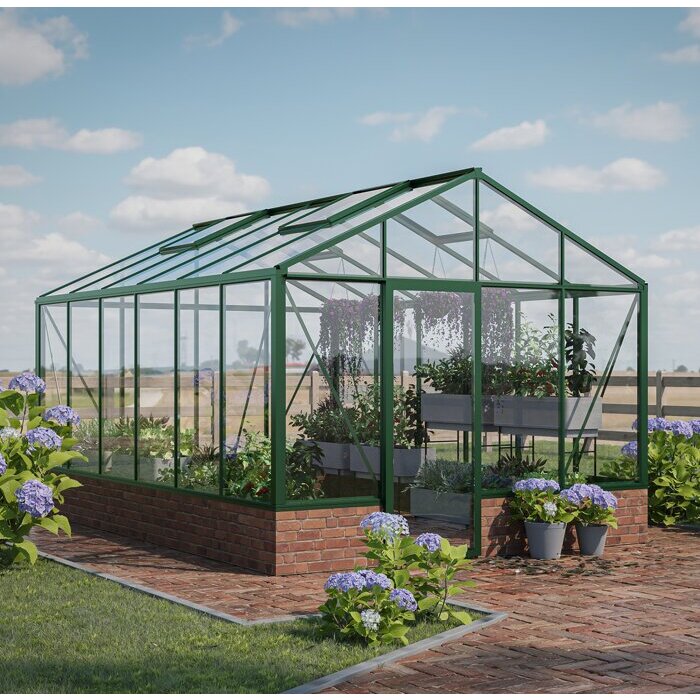
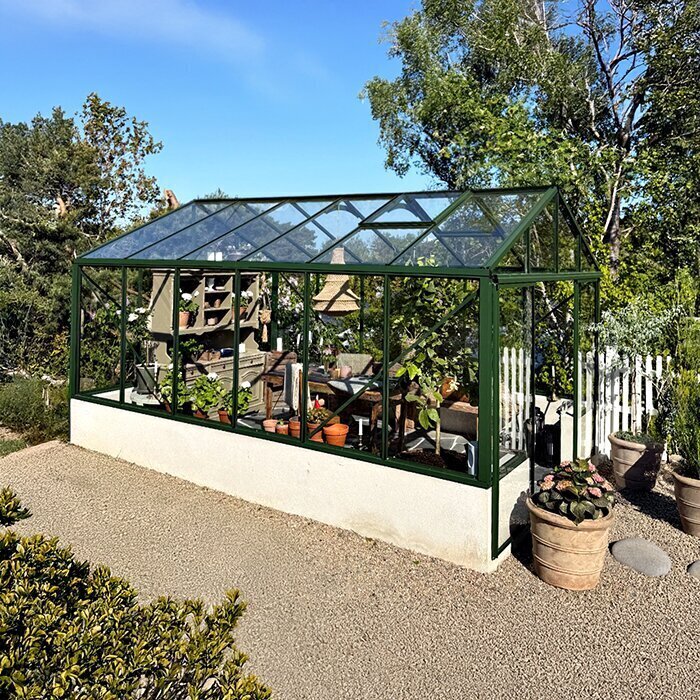
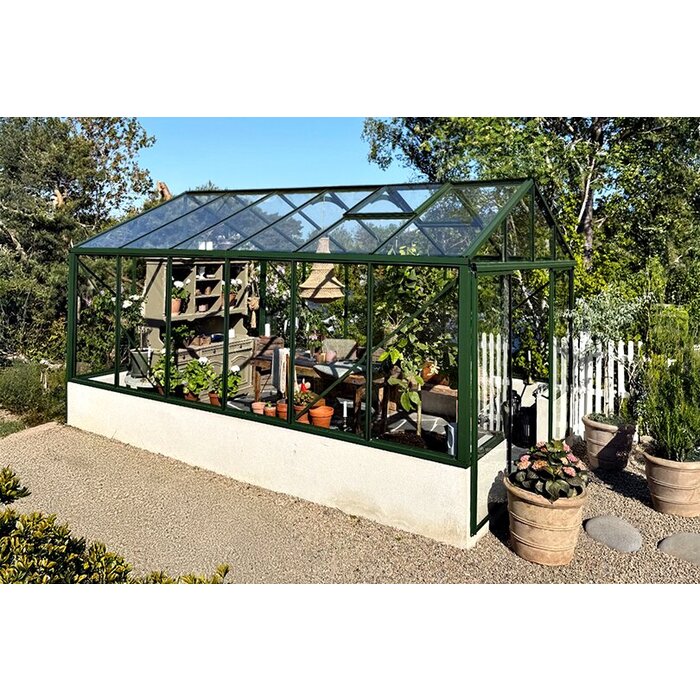
The Bloomcabin Classic Greenhouse on Masonry Wall Base is a complete freestanding greenhouse with a pitched roof, designed to sit on a purpose-built dwarf wall. A carefully chosen masonry finish can complement a UK home, terrace or walled garden.
Choose from a broad range of greenhouse sizes, available in several widthsand dwarf-wall heights . Glazing options vary by configuration, so check the choices available for your preferred size.
The wall finish is visible around the full structure, so its colour, jointing and workmanship contribute directly to the finished appearance. Explore Bloomcabin greenhouses in the United Kingdom.
Traditional freestanding design
The Classic greenhouse shape, finished with a solid dwarf wall
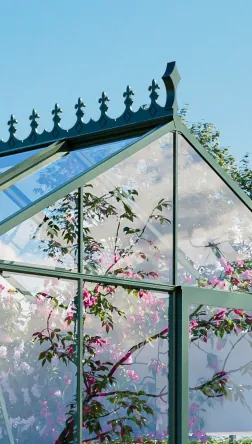
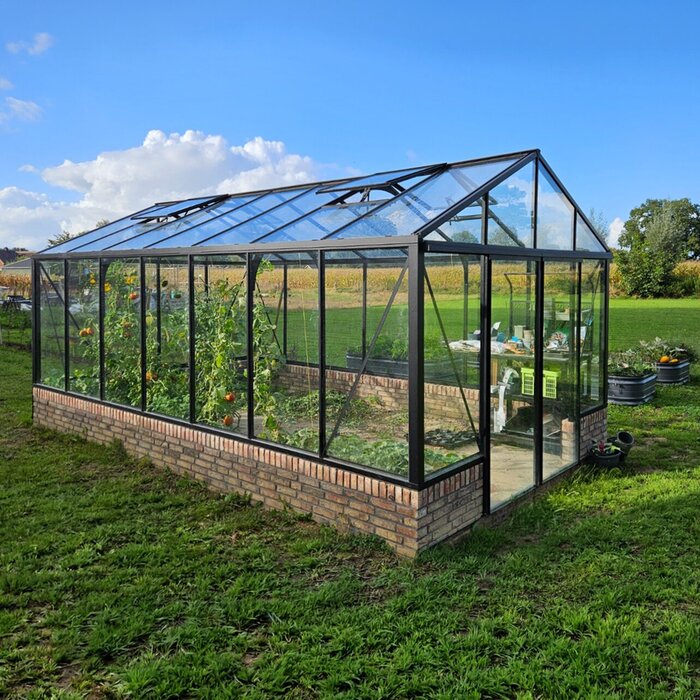
The pitched roof and full freestanding footprint retain the familiar Classic appearance, while masonry replaces the lowest section of glazing around the perimeter.
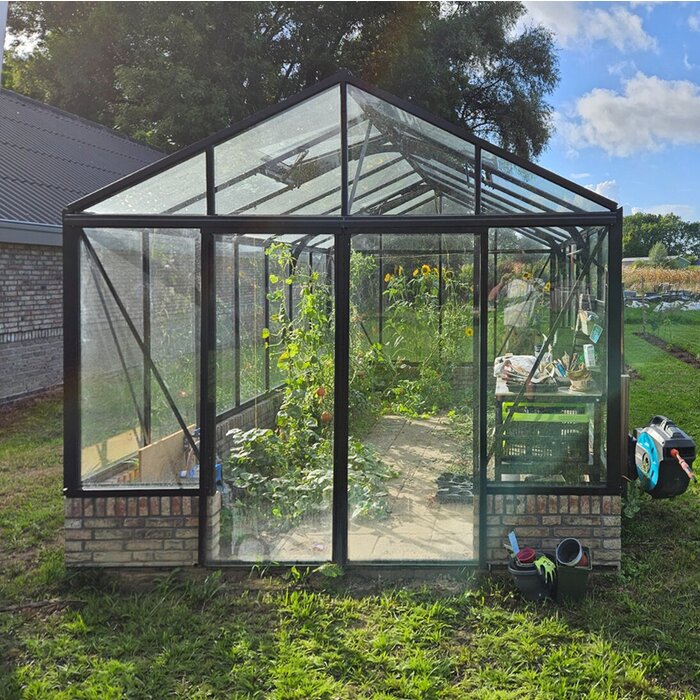
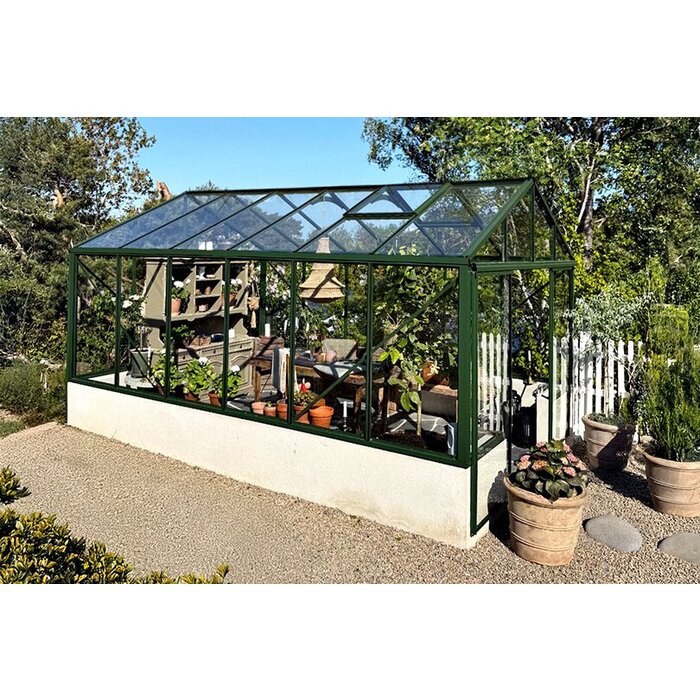
The masonry gives the project much of its individual character. Brick can echo the house, natural stone may continue an existing garden wall, and neatly rendered blockwork offers a clean, understated finish. Consider the wall alongside the frame colour, paving and nearby boundaries so that the materials work well together.
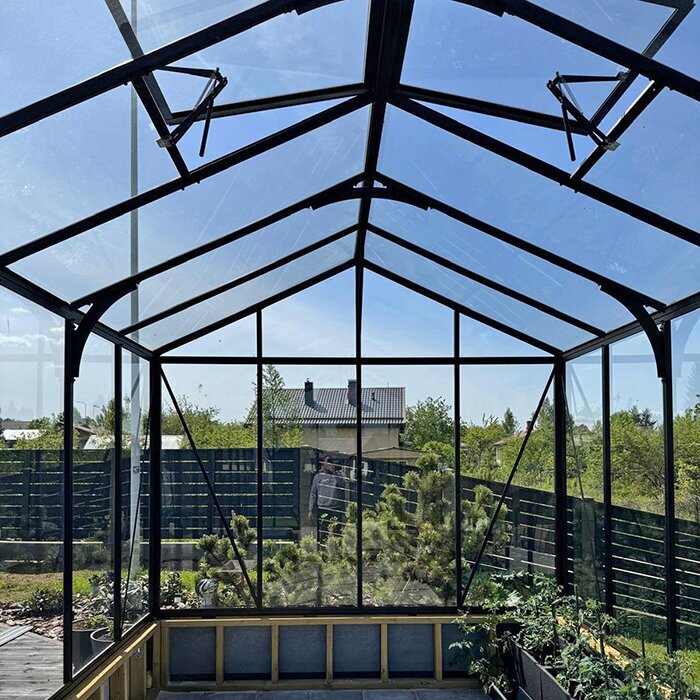
As the aluminium frame begins above the masonry, benches, shelves and containers can be arranged beside a solid lower boundary. The chosen wall height will affect views through the greenhouse, daylight near floor level and access to the glazing for cleaning.
Why choose a dwarf-wall greenhouse?
Practical benefits of a solid lower wall
This version works well where the greenhouse should sit comfortably beside a house, terrace or established garden wall. The masonry gives the structure a more settled appearance, screens some low-level storage and provides a solid edge beside paths, tools and growing areas.
A base that suits the setting
Coordinate the wall finish with the house, paving and frame colour
Practical space along the sides
Plan benches, shelves and containers against a solid lower wall
Protection at ground level
Helps protect the lower frame and glazing from soil splashes, tools and wheelbarrows
Complete freestanding form
Allows access around all sides for cleaning and maintenance
Choose the greenhouse before building the wall
Confirm the wall height, footprint and doorway before masonry work begins
Select the exact greenhouse configuration before the foundation or wall is built, then work from its confirmed base dimensions. The wall height, external footprint and doorway must all match the same setting-out drawing. Changing one detail independently may prevent the manufactured frame from fitting correctly.
Accuracy matters along the entire wall, not just at the corners. The finished top must form a continuous, stable and level surface for the frame. Check the external dimensions, corner angles, diagonals and wall width before mortar, coping or other finishes make adjustments more difficult.
Include the selected sliding-door opening in the setting-out plan from the outset. Confirm the finished internal and external levels as well as the clear route through the doorway, so trays, wheelbarrows and other garden equipment can pass without an awkward step or obstruction.
Classic construction
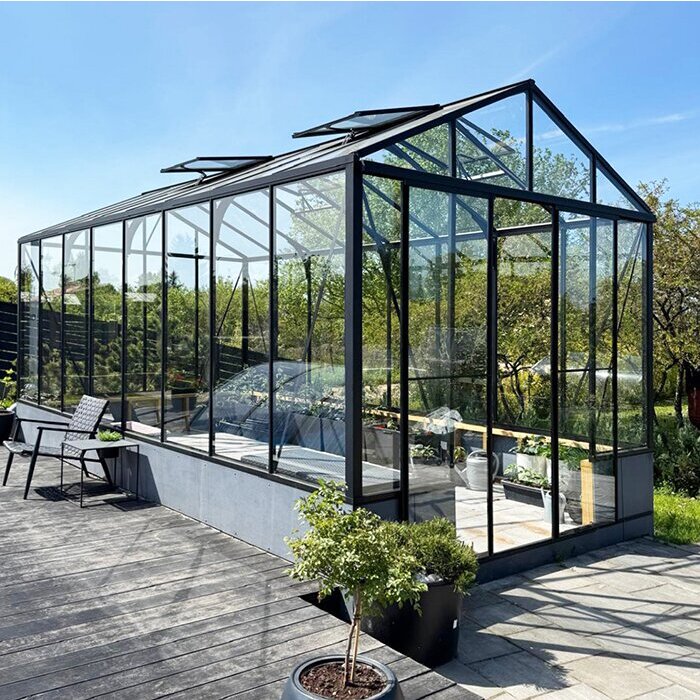
An aluminium-framed greenhouse made to fit a purpose-built wall base
Floor area: approximately 3.8–28.1 m².
Dwarf-wall height: approximately 10–50 cm, depending on configuration.
Available widths: approximately 2.35 m and 3.10 m.
Glazing: polycarbonate, 4 mm toughened safety glass and selected specialist options.
Ventilation: roof vents, with manual or automatic-opening options available for suitable configurations.
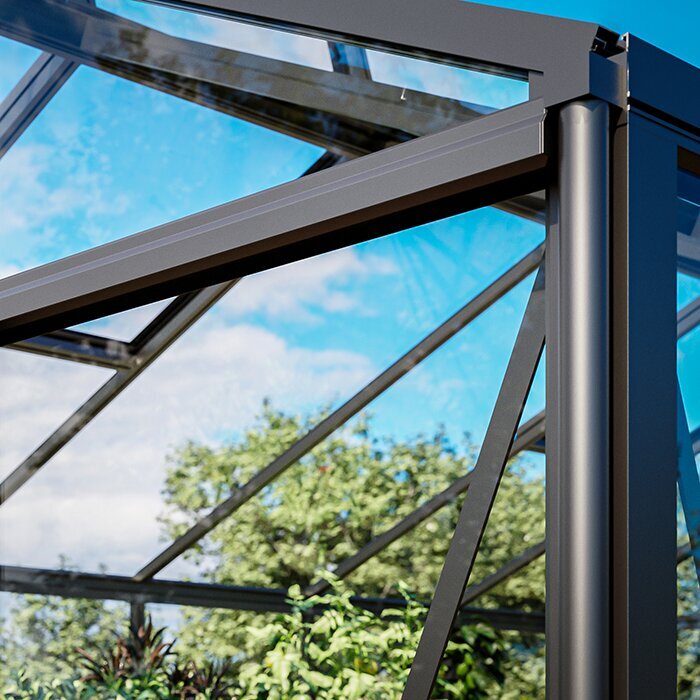
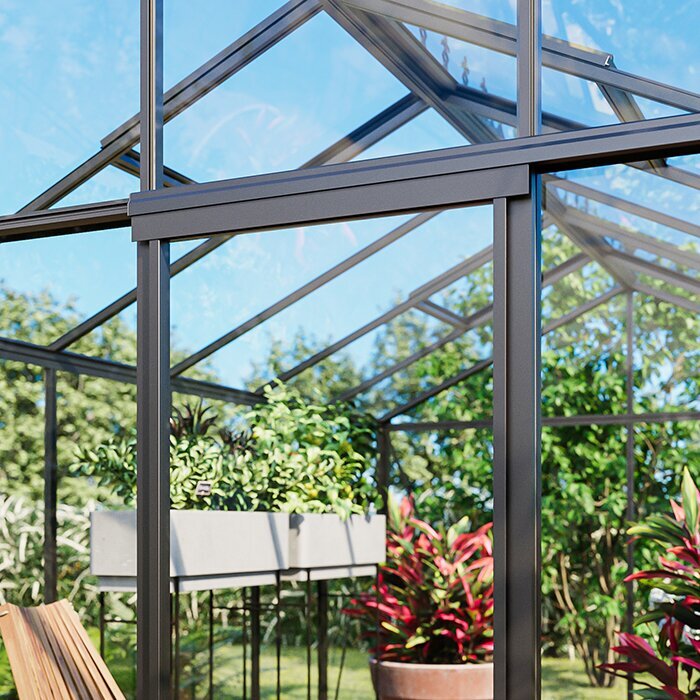
Frame: powder-coated aluminium profiles.
Drainage: integrated rainwater gutters.
Doors: sliding doors, as specified for the selected configuration.
Warranty: 12-year warranty, subject to the applicable terms and conditions.
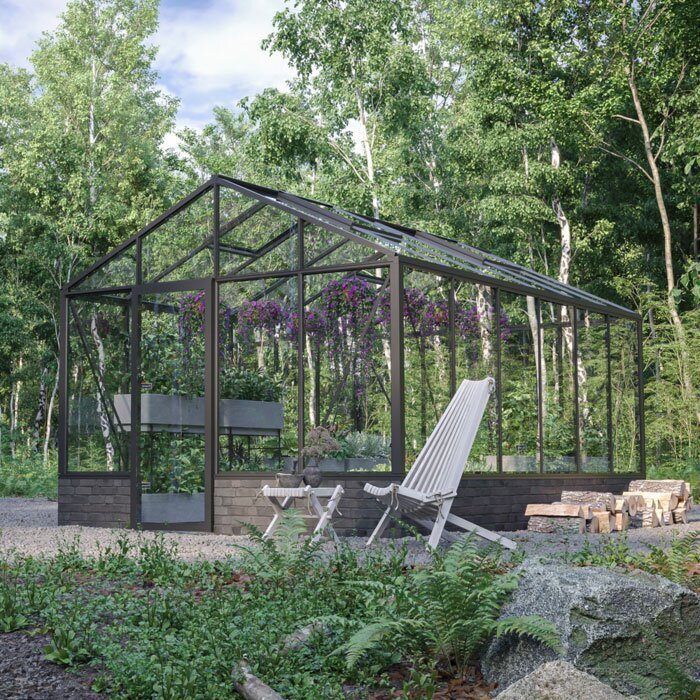
Choosing brickwork to suit a British home
Brick is a natural choice for a greenhouse near a traditionally built UK home, but it need not copy every detail of the main building. View sample bricks in their intended position and under different daylight, as colour, texture and weathering can look very different outdoors than they do in a small sample.
Mortar colour and joint profile can make the wall appear lighter, darker, more formal or more rustic. They also affect how clearly each course is seen beneath the fine aluminium frame. Agree these details with the person building the wall so that all visible faces, corners and the doorway receive a consistent finish.
Consider the powder-coated frame colour against the finished wall rather than the brick alone. Mortar, coping, paving and nearby painted woodwork all affect the overall appearance. A contrasting frame will stand out more clearly, while related tones generally give the greenhouse and base a quieter, more unified look.
Choosing the dwarf-wall height
A lower wall option keeps more of the greenhouse transparent and preserves views of plants, pots and paths near ground level. It can suit a setting where the structure should feel visually lighter. Choose a height offered for the ordered configuration rather than setting the wall by an arbitrary number of brick courses.
A taller wall option creates a more enclosed lower perimeter and gives the greenhouse a stronger presence. It can screen stored pots, compost bags and bench supports from outside, although it also reduces the amount of low-level glazing. Consider both seated and standing views into the garden before choosing.
The wall height also shapes the interior layout. It determines where the aluminium uprights begin, influences practical bench positions and must align with the manufactured doorway components. Assess these details from the intended finished floor level, not from unfinished ground.
Site drainage
Avoid placing the greenhouse in a hollow where rainwater will collect against the wall. Before construction, observe how water moves across the plot during prolonged rain and note any persistently wet areas. The foundation and doorway approach should remain firm and usable throughout the seasons.
Hard landscaping around the greenhouse should shed surface water away from the base. Avoid creating a raised paving edge that traps water against the masonry. Where paths meet planting beds, maintain a route for runoff that does not wash loose soil onto the wall or deposit silt in the doorway.
Decide where water from the gutters will go before laying nearby paths or planting beds. Use a suitable drainage point or rainwater storage arrangement for the site, and avoid discharging water beside the foundation, across the doorway or towards a neighbouring property.
Foundations
The foundation must support both the masonry and the greenhouse above it. The appropriate design depends on the ground, wall construction and selected greenhouse size. Made ground, tree roots, slopes or persistently wet soil may need particular attention, so seek suitable professional advice if the site conditions are uncertain.
Treat the dwarf wall as part of the greenhouse installation rather than as decorative garden edging. It must remain stable and support the frame around the complete perimeter. Settlement, twisting or variations in height can affect frame alignment, glazing fit and the smooth operation of doors and vents.
Set out from fixed reference lines and protect the work while it cures. Confirm that the top is clean and free from proud mortar, loose material or abrupt steps before greenhouse assembly. Do not use the aluminium frame as a guide for correcting inaccurate masonry; the supporting structure should already match the confirmed dimensions.
Planning the doorway
The approach to the sliding doors should provide clear, firm standing space for opening them and carrying plants or equipment. A direct connection to the main garden path is usually more practical than an entrance reached across cultivated soil.
Doorway problems often arise when paving, gravel or an internal floor is added above the level used during setting out. Establish all finished layers in advance, including bedding beneath paving, so the threshold can be formed accurately without restricting the sliding mechanism.
Before masonry begins, compare the door position with the intended interior layout. Placing a central aisle, potting area or large containers directly opposite the entrance can simplify movement. Also check that the approach will remain clear of gates, steps, overhanging planting and tight turns that make long trays or equipment difficult to carry.
Planning side benches
The aluminium frame begins above the dwarf wall, leaving useful space for perimeter furniture. The best arrangement depends on the selected wall height and greenhouse width, so sketch the benches and central aisle together. An over-wide bench is unhelpful if it narrows the aisle or leaves plants at the back out of reach.
Freestanding benches can be moved for cleaning or seasonal changes, while permanent fittings need more careful planning. Do not drill into or attach anything to greenhouse components unless the installation guidance specifically permits it. Heavy shelves and water-filled containers need support appropriate to their weight rather than relying on decorative wall finishes.
Leave a practical gap wherever access is needed to wash glazing, inspect seals or retrieve fallen leaves. Dense foliage pressed against the side can restrict air movement and hide pests. Arrange plants by mature size, allowing smaller pots to be moved without dismantling the whole bench layout or leaning across fragile growth.
Using the roof vents
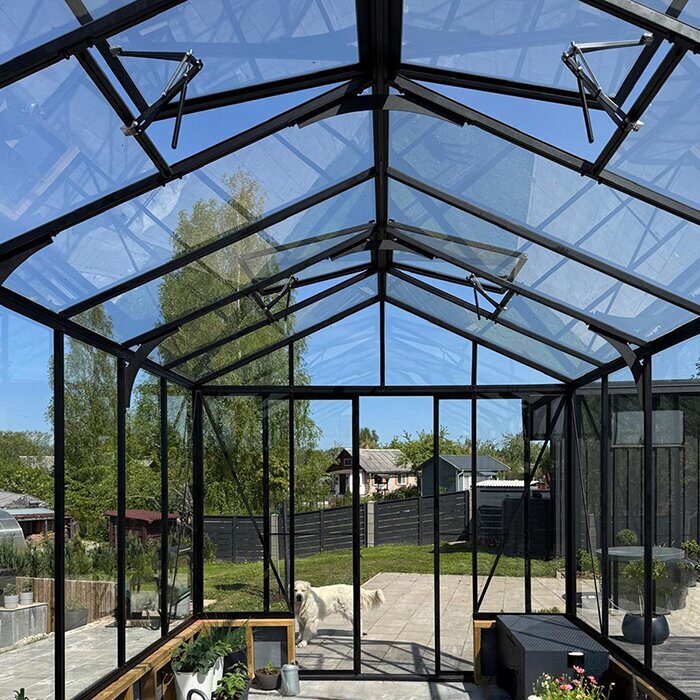
Ventilation matters throughout the growing season because heat and moisture can build up inside even when the weather feels mild. Roof vents release rising warm air, while a well-spaced planting layout allows air to circulate. Regular ventilation also helps surfaces dry after watering and limits persistent condensation.
Open the vents gradually rather than waiting until the greenhouse is already too warm. The right routine will vary with sunshine, wind, plant density and watering. In cooler weather, balance fresh air with the needs of the plants instead of leaving the greenhouse fully open in all conditions.
Automatic vent openers may be available for selected configurations and can operate when nobody is present. Inspect the mechanism regularly, keep the vent clear and adjust your routine with the seasons. An automatic opener helps manage ventilation but does not replace checking the plants and conditions.
Choosing glazing
The 4 mm toughened safety glass option gives clear views, a traditional glasshouse appearance and plenty of natural light. Its transparency also leaves stored items in view, which may affect how you arrange benches and screening. Clean the glass with suitable non-abrasive materials and replace damaged components in line with the product guidance.
Polycarbonate looks and handles differently from clear glass, so choose according to how you intend to use the greenhouse as well as its appearance. Consider outward views, privacy, cleaning and how the material will look alongside the garden and masonry base.
Specialist glazing may be available for selected configurations. Check which combinations are offered before planning the masonry or coordinating other materials around a particular finish, as not every glazing option is available with every greenhouse size.
Collecting rainwater
The integrated gutters can direct roof runoff into a water butt beside the greenhouse. Choose a stable position with easy access to the tap, lid and connections without narrowing the main path. The water butt should not obstruct frame maintenance or make the doorway awkward to use.
Provide a controlled overflow route for times when the water butt is full. Water should run away from the masonry and foundation rather than repeatedly soaking the same area. Check connections after heavy rain and clear leaves from the gutters to prevent water spilling down the greenhouse sides.
Collected rainwater can be convenient for hand watering during drier periods, but storage needs simple management. Keep the container covered, inspect it for debris and empty or maintain it as appropriate for seasonal conditions. Place watering cans nearby without creating clutter in the access route or resting them against glazing.
Choosing the floor finish
An internal surface can visually continue the wall or nearby terrace, but appearance is only one consideration. Choose a finish that provides secure footing when damp, tolerates soil and watering, and can be swept or washed without directing dirty water towards the frame. Loose surfaces should not interfere with the doors.
Establish the completed floor height before building the doorway. The surface should support benches and pots without rocking and allow spilled water to drain or dry. Avoid concealed low points beneath furniture where water and compost can collect unnoticed and make cleaning difficult.
Coordinate the threshold with both sides of the entrance. A manageable transition is especially valuable when moving a wheelbarrow, trolley or heavy container. Where levels cannot be made continuous, plan the change deliberately and keep it visible, stable and clear of the sliding-door travel rather than improvising after installation.
Planning water and electricity
If you may want water or electricity later, plan the routes before pouring foundations, laying the floor or completing the wall. Ducts and service entry points installed at the right stage are neater than drilling finished masonry. Position them away from greenhouse fixings, door movement, drainage routes and persistently wet areas.
A conveniently positioned tap can make watering easier, while an irrigation line may help with a regular growing routine. A professionally planned electrical supply can serve suitable equipment. Choose services for a clear practical need rather than adding outlets that will not be used.
Electrical work in or around a greenhouse is exposed to moisture, condensation and garden activity. It should therefore be specified and installed by a suitably qualified person using equipment and protection appropriate to the location. Keep cables away from paths, sharp frame edges, standing water and places where tools may damage them.
Classic or Lean-To?
A Lean-To uses an existing building wall as one side and has a roof designed around that connection. It may suit a site where placing the greenhouse directly against a house or another suitable wall is important. This is a different structure and layout from the Classic wall-base model.
The Classic wall-base greenhouse has its own complete perimeter and two roof slopes. Its masonry is a purpose-built dwarf wall beneath the frame rather than part of a house. It can therefore stand independently within the garden on a foundation prepared for its full footprint.
The choice affects views from each side, access around the greenhouse and rainwater drainage. A freestanding model needs enough surrounding space for cleaning and maintenance. Select the form that suits the intended position and use rather than treating the wall-base Classic as another way to attach a Lean-To.
Planning requirements and boundaries
Whether consent or another approval is required depends on the property, location and proposed work. Planning controls, listed status, protected settings, boundaries and the masonry construction may all be relevant. Requirements vary, so check current advice for the site with the appropriate local authority and qualified professionals.
Complete these checks before ordering materials or starting excavation. Moving the footprint on a drawing is straightforward; relocating foundations, drainage or finished brickwork is not. Record the agreed position and dimensions so the greenhouse supplier, builder, landscaper and service installers all use the same information.
Leave a practical strip around the greenhouse for cleaning the glazing, clearing gutters and inspecting the masonry. Avoid placing it so close to a fence, hedge or boundary that routine maintenance depends on access from neighbouring land. Allow for hedges and shrubs becoming broader as they mature.
Cleaning and routine care
Care requirements differ across masonry, powder-coated aluminium and glazing. Use methods suitable for each material, keep tools in a designated place and avoid stacking pots, canes or bags against the greenhouse.
Clean the glazing when dirt or algae begins to reduce clarity, using suitable non-abrasive materials. Remove leaves from the gutters and check that the outlets flow freely. At the same time, inspect the vents, door tracks, fixings and visible seals so obstructions or signs of wear can be dealt with promptly.
Nearby planting should complement the greenhouse without blocking access or holding damp foliage against the wall. Position climbers, shrubs and hedges according to their mature size, and prune them before they reach the gutters or glazing. Remove self-seeded plants from joints and clear accumulated soil from the base.
Designing for a lasting appearance
A well-proportioned masonry base can give the Classic greenhouse the settled appearance associated with traditional kitchen gardens and glasshouses. This comes from the relationship between the wall, frame and surrounding garden rather than added ornament. Straight setting-out, carefully finished corners and well-coordinated materials make the greatest difference.
Judge the proportions from the main viewpoints as well as from inside the greenhouse. Consider how much masonry and glazing will be visible from the house, garden entrance and nearby seating areas. Each available wall height creates a different effect and must match the exact greenhouse configuration.
Choose materials you can maintain realistically. Textured masonry and smooth render have different cleaning needs, while pale finishes tend to show splash marks more readily. Relating the finish to the existing property can help the greenhouse continue to look at home in the garden as it ages.
Building the base and installing the greenhouse
The masonry base is part of the structural installation, not just landscaping
The completed installation is rated for wind speeds up to 30 m/s and a snow load of 210 kg/m². Achieving the intended structural performance depends on constructing a suitable foundation and accurate masonry base, then assembling and securing the greenhouse correctly in accordance with the supplied instructions.
Before assembly begins, compare the completed base with the confirmed drawing. Check the footprint, diagonals, doorway and finished top, and remove loose material or excess mortar. Correct any discrepancy in the supporting work rather than trying to force the frame components into alignment.
Plan access for excavation, masonry deliveries, frame assembly and glazing. Keep the work area clear and follow the supplied handling guidance for glazing and long aluminium components. Arrange suitable assistance or professional installation where appropriate.
Common questions
Frequently asked questions about the Classic Greenhouse on a Masonry Wall Base
Can I build it on an existing garden wall?
Only if the existing wall and foundation are suitable and match the confirmed greenhouse dimensions, doorway and level requirements. Do not assume that an established wall will be accurate or strong enough; have it assessed before ordering or adapting the greenhouse layout.
When should I decide the wall height?
Choose an available wall height before any foundation or masonry work begins. It affects the position of the frame, the amount of low-level glazing, the interior layout and the entrance details, so it must form part of the confirmed greenhouse configuration.
Who builds the wall?
The customer is responsible for arranging the foundation and masonry wall to the confirmed dimensions. The completed base must be ready to receive the greenhouse frame. If the ground, structural design or setting-out is uncertain, consult an appropriately qualified local professional before work starts.
Can the wall include coping or a rendered finish?
Yes, provided the completed wall still has a stable, flat, level and dimensionally accurate top for the frame. Include all coping, render and decorative finishes when checking the final dimensions rather than adding them after the base has been set out.
Which glazing gives the clearest view?
Choose 4 mm toughened safety glass where clear views and a traditional glasshouse appearance are priorities. Polycarbonate and specialist options have a different look, and availability varies by configuration, so confirm which glazing options are offered before finalising the project.
Can the door position be changed after the wall is built?
Only if the revised position is confirmed as compatible with the selected greenhouse before the masonry is altered. The opening must match the manufactured sliding-door arrangement, together with the paving and finished floor levels.
Which documents should I keep?
Keep the order confirmation, approved dimensions, setting-out drawing, assembly instructions and applicable warranty terms. Retaining installation and maintenance records also makes it easier to identify the correct components and explain any issue that needs attention.
Can benches or shelves be fixed to the dwarf wall?
Only if the chosen fixings are suitable for the masonry and remain clear of the greenhouse frame, glazing and moving components. Heavy shelving or water-filled containers need support appropriate to their weight. Check the installation guidance before drilling near any greenhouse component.
Bloomcabin Classic
Create a traditional freestanding greenhouse with a permanent masonry base
Choose the exact greenhouse size, available wall height, glazing and other configuration details before commissioning the base. Give the confirmed dimensions to everyone responsible for the foundation, masonry, drainage, flooring and installation. Careful coordination ensures that the manufactured frame fits correctly and delivers a neat, practical greenhouse.
Before building the wall
✓ Confirm the greenhouse size and exact footprint
✓ Choose the wall material and height
✓ Coordinate the doorway and threshold
✓ Plan drainage, rainwater storage and utilities
✓ Prepare a sound, level foundation
✓ Check the applicable planning and building requirements