




Aluminium Greenhouse with Integrated Storage
Grow plants and organise garden equipment under one roof
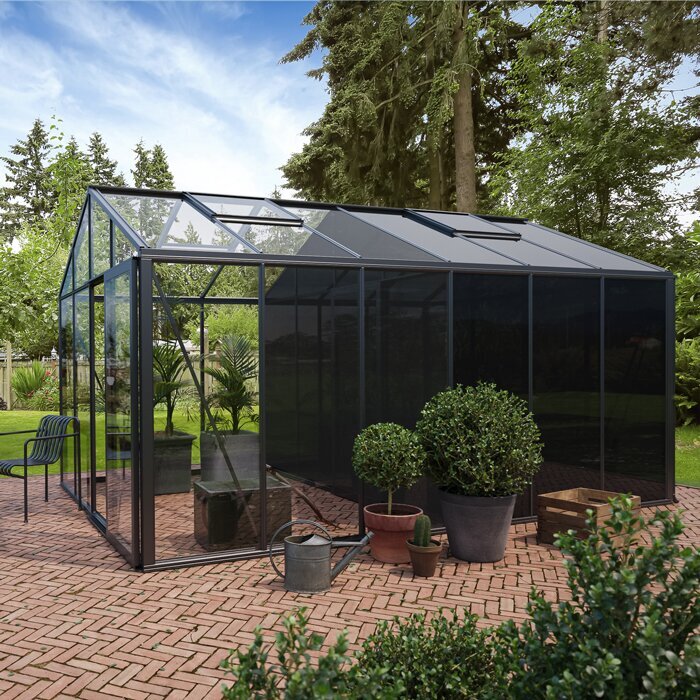
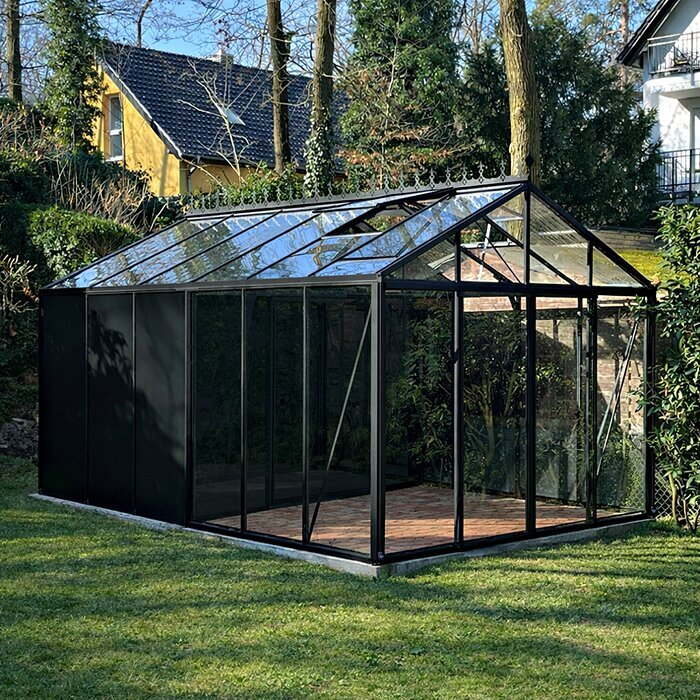
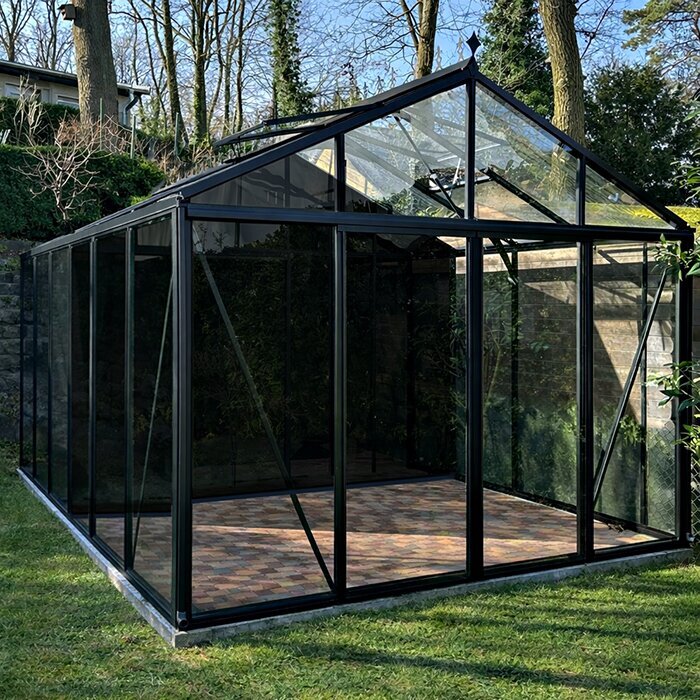
The Bloomcabin aluminium greenhouse with integrated storage combines a bright growing area with a separate built-in store. It is designed for gardeners who want plants and everyday equipment in the same structure without allowing tools, pots and supplies to take over the cultivation space. Whether installed in a compact garden, on a patio or at an allotment, the combined design may also remove the need to reserve another part of the plot for a freestanding shed.
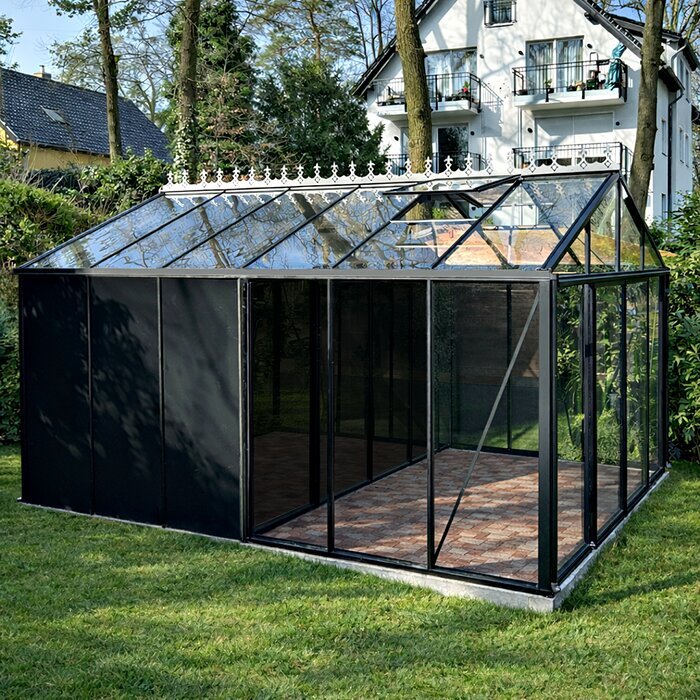
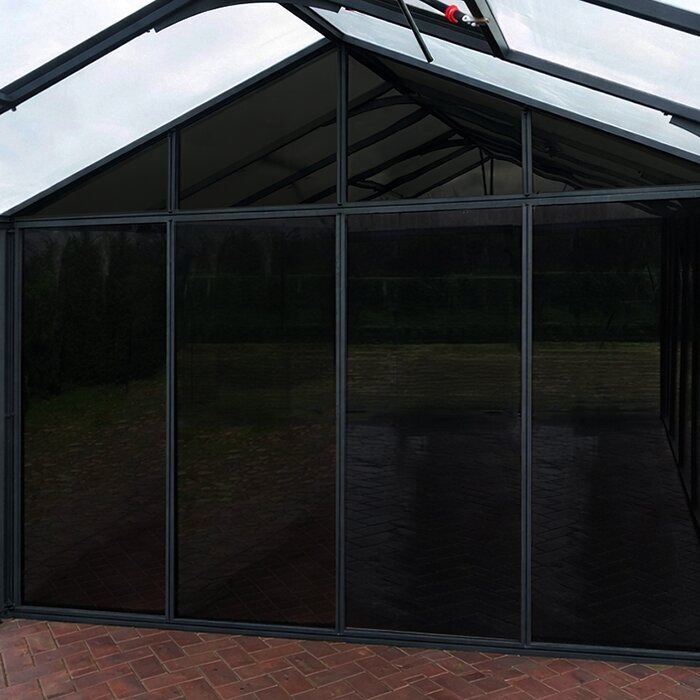
The current range includes 22 configurations from 3.77 to 28.08 m². The growing area is available with polycarbonate or 4 mm toughened safety glass, while roof vents, integrated gutters and an aluminium base are included. Tinted glazing marks out the storage compartment and makes its contents less noticeable when viewed from the house, patio or neighbouring plots.
Keeping tools, compost, pots and irrigation parts beside the plants means fewer trips around the garden. It also leaves benches and paths free for growing, tending plants and moving through the greenhouse. Visit Bloomcabin UK.
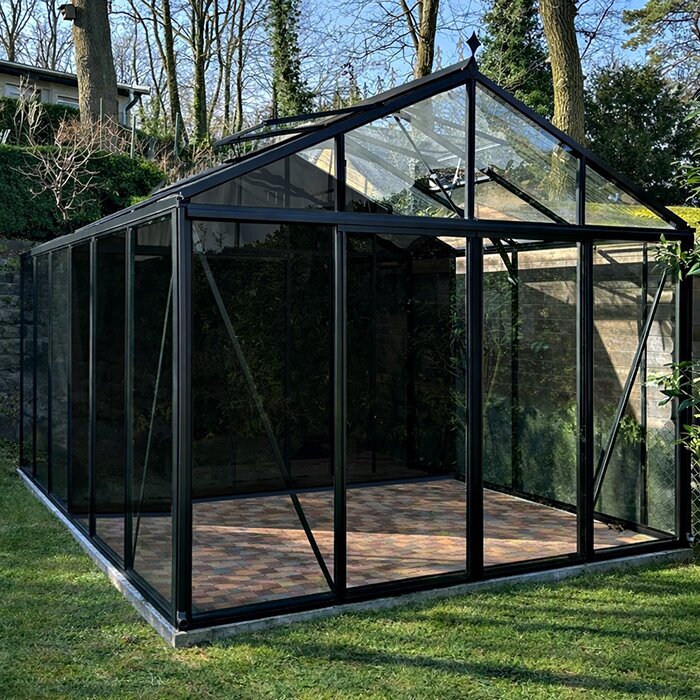
Two defined compartments
Give plants and gardening equipment their own working areas
The greenhouse remains available for seedlings, established plants and working surfaces instead of gradually becoming an overflow store. This is especially useful during busy periods, when trays, supports and watering equipment might otherwise compete for the same bench and floor space.
The adjoining compartment provides a dedicated place for pots, labels, watering equipment, hand tools and plant supports. Daily essentials can be kept near the entrance, with occasional or seasonal items farther inside.
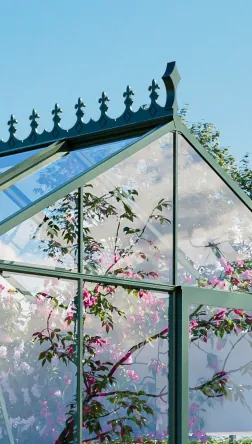
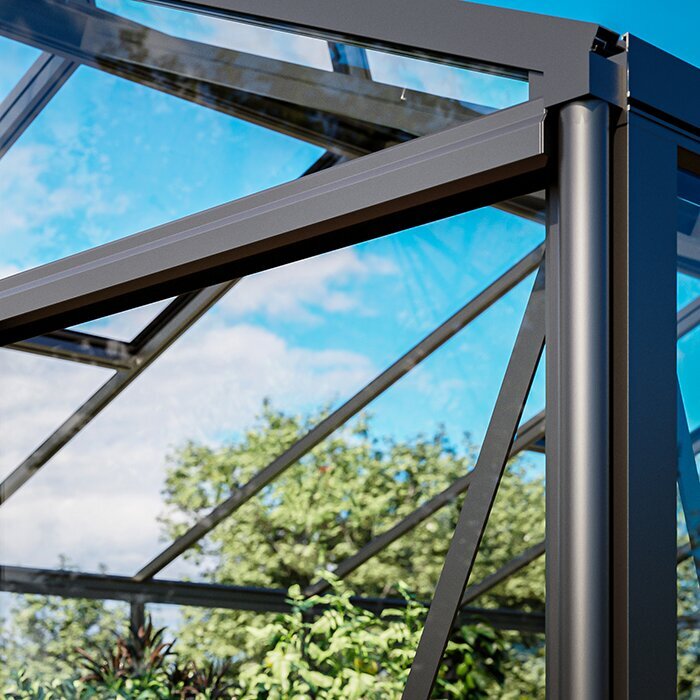
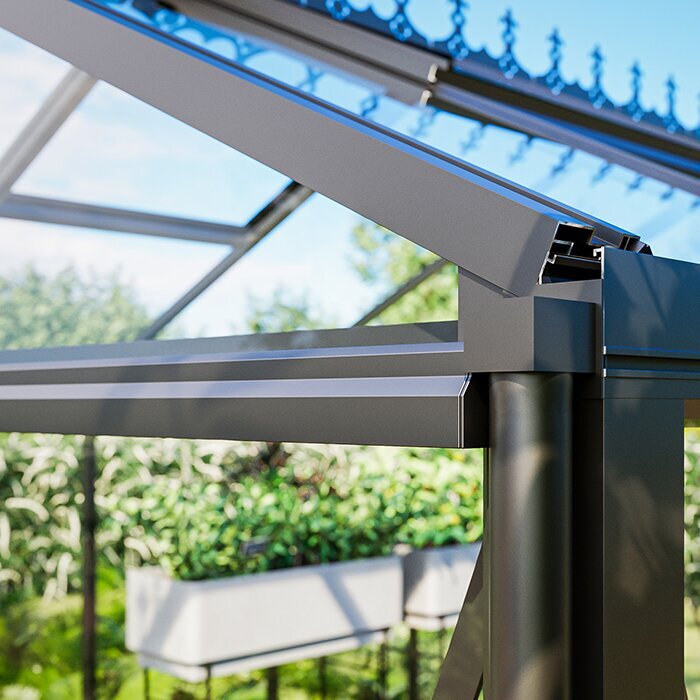
The shared aluminium frame gives both areas a consistent roofline and base, while the separation prevents shelving and stored supplies from extending into the cultivation space.
Product at a glance
Compare the range by size, storage, glazing and base
These core details provide a useful starting point when comparing configurations. Use them alongside the full dimensions, door arrangement and intended internal layout for the selected model.
22 current configurations
3.77–28.08 m²
Integrated storage
A dedicated compartment beside the growing area
Tinted glazing
Makes stored contents less noticeable from outside
Built-in aluminium base
Included as part of the greenhouse structure
A more discreet storage area
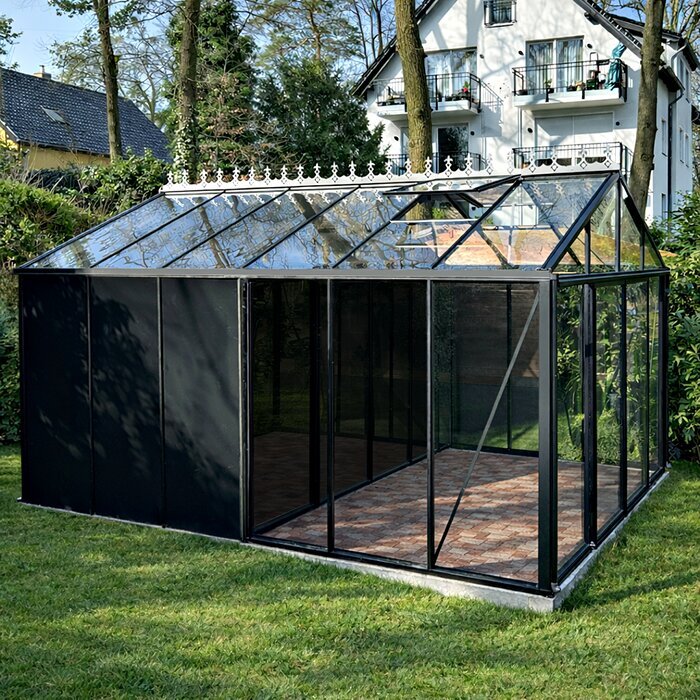
Tinted glazing keeps stored equipment discreet within a unified design
Watering cans, spare pots, trays and compost bags remain less visible through the storage walls. The tint does not replace sensible organisation, but it prevents the normal mixture of gardening supplies from dominating the outward appearance.
The store follows the same aluminium roofline as the greenhouse, so the two compartments look like one complete building rather than separate structures placed side by side. This can help a limited garden feel less crowded.
Tinted glazing reduces visibility rather than blocking it completely. Keep visually untidy supplies away from the panels where practical, and avoid placing tall stacks directly against the glazing.
Product specifications
Key specifications of the greenhouse with integrated storage
Current sizes: 22 configurations, 3.77–28.08 m².
2.35 m-wide models: ridge height approx. 2.32 m; door height approx. 1.65 m.
3.10 m-wide models: ridge height approx. 2.67 m; door height approx. 1.85 m.
Frame: high-quality aluminium profiles.
Greenhouse glazing: polycarbonate or 4 mm toughened safety glass.
Storage glazing: tinted glazing.
Doors: single sliding doors, with double sliding doors available on suitable 3.10 m-wide sections.
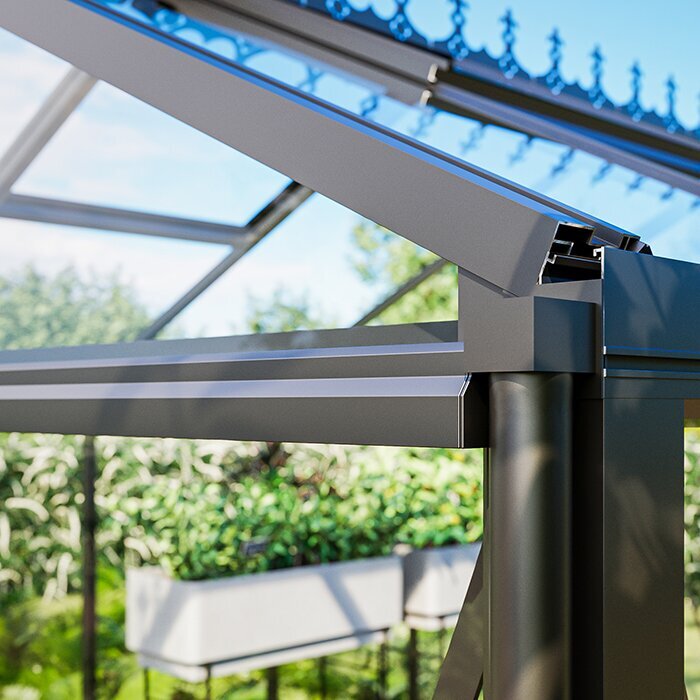
Features: roof vents, integrated gutter system and built-in aluminium base.
Practical workflow
Keep everyday gardening tasks moving smoothly between the two compartments
Before potting on, tying in or watering, take only the materials needed for that task from the adjoining store. Return unused supplies and finished tools before starting the next job so the working surface remains ready for plants and trays.
A clear greenhouse floor makes it easier to move watering cans and planted containers. It also reveals fallen leaves, spilled compost and algae that need attention, so routine cleaning does not begin with shifting equipment between temporary piles.
Arrange the store around how often each item is used. Keep current-season tools in the easiest-to-reach positions and move occasional equipment higher or farther back, while preserving a clear route through the compartment.
Space-saving design
Decide whether a combined greenhouse and store suits the available space
A separate tool shed needs its own footprint, together with enough clearance for access and maintenance. Combining storage and growing space may leave more of a small plot available for beds, seating, paths or open garden.
There is still a trade-off: part of the structure is used for storage rather than plants. Before choosing a configuration, compare that loss of growing area with the amount of equipment currently kept in the greenhouse, outdoors or elsewhere.
Consider the view as well as the footprint. One continuous roofline may look calmer than two buildings placed close together, but the orientation should first provide convenient door access, suitable growing conditions and a practical route from the house or plot entrance.
Pre-season stock check
Check growing supplies before sowing begins
Before the busy growing period, check labels, modules, clean pots and hand tools, then group them by task. This prevents small supplies from becoming mixed with empty containers and older seasonal equipment.
Place open compost and other frequently used materials where they can be reached without moving unrelated equipment. Secure opened packaging after use and reorganise any unstable stacks before they encroach on the entrance.
Use the stock check to remove unusable items and identify anything that needs replacing. Starting the season with clearly arranged supplies is easier than carrying out a major clear-out after the greenhouse has become busy.
Managing wet equipment
Deal with mud and moisture before equipment enters the store
The separate compartment keeps garden tools away from trays and plants, but wet equipment should not simply be shut inside. Brush off soil, empty standing water from containers and allow damp gloves, cloths and tools to dry before putting them away.
Keep washable or muddy items near the entrance so they can be removed without carrying them past clean supplies. Leave the doorway and central route clear rather than allowing this area to become a permanent pile.
Clean metal tools as appropriate and store them only when dry. Check handles and moving parts while putting equipment away so items needing attention are not returned unnoticed to the shelf.
Warm-weather care
Keep roof vents accessible throughout warm weather
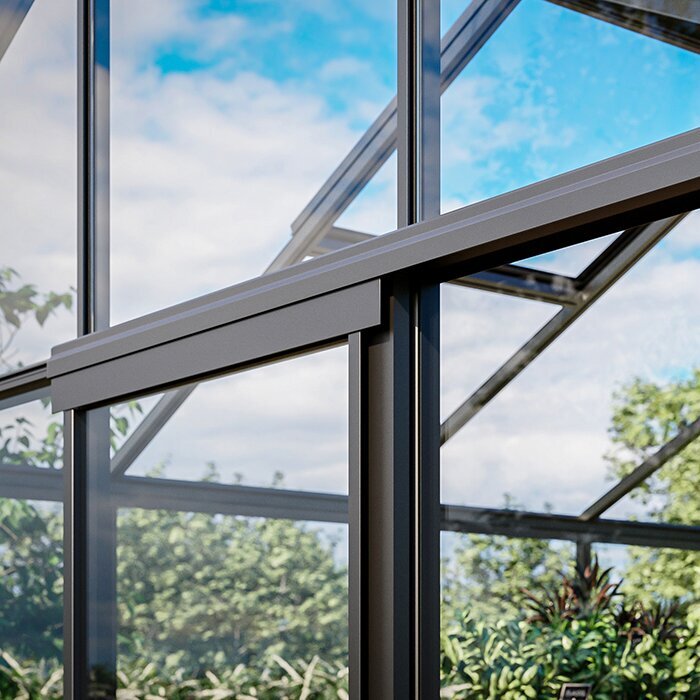
Greenhouse conditions can change quickly as sunlight strengthens, even after a cool or overcast start. Check the growing area during the daily watering routine and operate the roof vents according to the conditions around the plants.
Keep vent mechanisms within reach and clear of tall crops, canes, hanging items and temporary stacks. A route planned in winter may disappear as plants mature, so check access again before growth reaches roof level.
Shelving and stored equipment must not interfere with doors, ventilation controls or movement between the compartments. Rearrange seasonal items when needed rather than working around a blocked control or access route.
Glazing care
Use the correct cleaning method for each glazing material
The growing area may have polycarbonate or 4 mm toughened safety glass, while the store uses tinted glazing. Follow the relevant care instructions for each material rather than assuming that the same products and tools suit every panel.
Avoid abrasive tools that could mark the surface, and remove loose dirt before wiping the glazing. Cleaning is easier when pots, tools and other items have not been left against the inside or outside of the panels.
During cleaning, inspect the junctions between the glazing and aluminium profiles, together with the gutter channels, for trapped debris or visible damage. Follow the supplied maintenance guidance if any part needs attention.
Efficient organisation
Choose shelves and hooks to suit the equipment you actually use
Shallow shelves suit labels, small pots and compact supplies because the contents remain visible and easy to reach. Measure the intended items before fitting storage furniture, and retain enough doorway clearance for bulkier materials.
Hooks can hold suitable hand tools, hose fittings and lightweight accessories off the floor. Place projecting or sharp items where they will not catch on clothing, touch the glazing or obstruct handles and walkways.
Keep compost bags, filled containers and other heavy materials near floor level. Do not place more weight on a shelf than it is intended to hold, and avoid arrangements that require heavy items to be lifted down over other equipment.
Rainwater collection
Plan gutter outlets, collection and overflow before installation
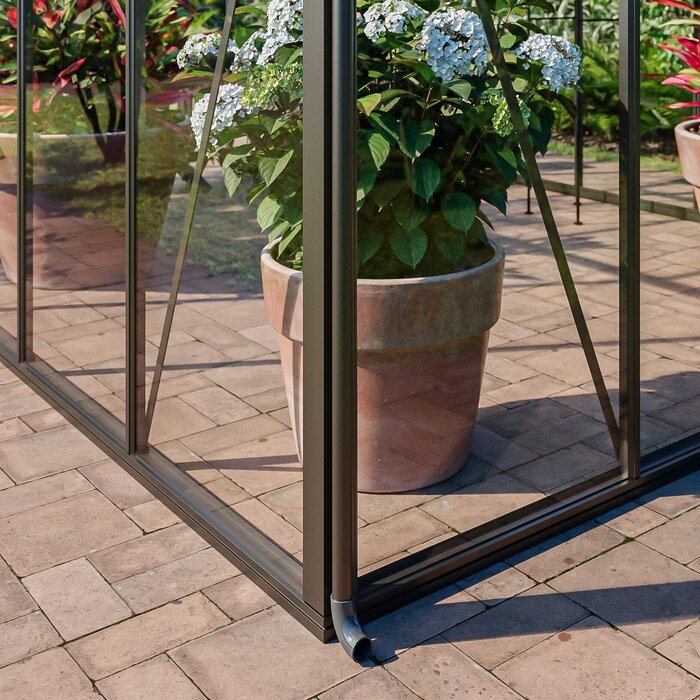
The integrated gutter system can form part of a rainwater collection arrangement. Decide where a suitable water butt would stand without narrowing the path, blocking a door or making routine exterior cleaning difficult.
Collected rainwater can be useful for garden watering, but the container and connections need regular checks. Keep the arrangement secure and clean it when required rather than allowing roof or gutter debris to build up unnoticed.
Direct overflow away from the foundation, entrance and main walking route. Uncontrolled discharge can leave the approach muddy, encourage standing water beside the base or create slippery conditions where tools and watering cans are carried.
Glazing choice
Compare toughened safety glass with polycarbonate for the growing zone
The 4 mm toughened safety glass option provides clear views into the greenhouse and a traditional glazed appearance. Its clarity can also make dirt and water marks more noticeable, so consider the level of routine cleaning you are prepared to undertake.
For polycarbonate, assess the appearance shown for the selected configuration and use the handling and cleaning methods specified for that material. Consider the glazing as part of the overall design because it covers much of the visible growing compartment.
Whichever option you select, follow the assembly instructions for that material and confirm the choice for the complete configuration before ordering. The storage compartment retains its tinted glazing with either growing-area option.
Planning for an allotment
Check allotment rules, plot boundaries and delivery access before ordering
Where allotment rules allow it, a combined greenhouse and store may simplify the plot by replacing two separate buildings. Obtain any required permission before ordering and check whether the site has conditions covering position, appearance or foundations.
Measure gates, shared paths and turns along the entire delivery and installation route. A structure that fits the final footprint may still be difficult to carry onto the plot or leave too little working room for installation.
Leave a practical approach to the door, with enough room to carry trays and supplies without stepping into neighbouring beds. Respect plot boundaries and direct drainage so it does not inconvenience a neighbouring plot holder or damage a shared path.
Existing garden storage
Factor the location and convenience of current storage into your choice
A nearby shed or garage may already provide dry, accessible space for tools and supplies. If everything needed for routine greenhouse work is within easy reach, dedicating the full structure to cultivation may be the better use of the footprint.
Storage becomes less convenient when it is distant, difficult to access or shared with unrelated household items. In that situation, an adjoining compartment can reduce interruptions and give greenhouse equipment a consistent home.
Consider the route you currently take for pots, compost, labels and watering equipment during a typical gardening session. The time and effort involved in that routine provide a more useful comparison than storage capacity alone.
End-of-season care
Use autumn maintenance to reset both compartments
As crops finish, remove plant supports, irrigation pieces and empty pots from the growing area. Clean and inspect reusable items before storing them so that damaged equipment is not carried unnoticed into the next season.
With movable objects returned to the store, glazing, frame surfaces, gutters and the greenhouse floor are easier to inspect and clean. Remove plant debris promptly rather than allowing it to remain behind benches or containers.
Review stored stock at the same time. Discard unusable labels and broken pots appropriately, consolidate partly used supplies, and note anything that needs replacing before spring demand makes the compartment busy again.
Optional utilities
Treat power and lighting as specialist outdoor installations
Lighting may make short winter visits more convenient, particularly when retrieving tools from the tinted compartment. Plan its position so fittings do not interfere with shelves, doors or the movement of long plant supports.
A power supply may also serve suitable irrigation controls or other gardening equipment. Decide what is genuinely required before installation so cables and fittings are not added piecemeal through working or storage areas.
Any electrical work must be suitable for a damp garden setting and completed in accordance with applicable requirements by a competent person. Do not run temporary domestic extension leads through doorways or across wet access paths.
Coordinating both interiors
Plan greenhouse benches and store fittings as one connected layout
Bench position in the growing area affects the route used to carry trays and supplies from the store. At the same time, shelving inside the store must leave enough room to remove bulky equipment without turning awkwardly at the doorway.
Draw both compartments together, including door openings and the space needed to handle the largest tray, watering can or stored item. This highlights conflicts that may not be apparent when each room is planned separately.
A coordinated plan helps ensure that one compartment does not work well at the expense of the other. Finalise the main circulation route before adding optional benches, shelves or hooks.
Compact plots
Assess the visual and practical impact on a compact plot
A single combined roofline can reduce competition between separate garden buildings, but the overall scale still matters. Mark the proposed footprint on the ground and view it from the house, seating area and main path before choosing a size.
In a narrow or enclosed garden, allow for more than the external dimensions. You will need a comfortable approach, room for installation and future access to clean glazing, inspect gutters and maintain the area around the base.
Look beyond the marked footprint for fences, overhanging growth and narrow gaps that could restrict installation or later maintenance. The best position should work at ground level, around the sides and above the roofline.
Stock control for small supplies
Keep labels, ties and irrigation parts visible without overstocking
Assign frequently used consumables a consistent location and check what remains before buying replacements. This makes shortages easier to spot while reducing unnecessary duplicate packs.
Label closed containers with their exact contents rather than using a general miscellaneous category. Group components by task and remove broken or obsolete pieces when they are found.
Before reordering, check open packs and containers in every assigned location. This prevents useful supplies from being overlooked and preserves spare capacity for pots and plant supports returning at the end of the season.
Selecting a model
Choose a configuration around plant space, storage, doors and site access
A larger configuration is worthwhile only when both compartments can be used comfortably. Check whether benches, trays and mature crops will leave a workable greenhouse path, then consider whether the store can accept the intended shelves without narrowing its entrance.
Walk the route from the house, patio or allotment gate while imagining a tray, compost bag or long plant support in hand. This exercise can reveal awkward corners, steps and door approaches that are not obvious on a footprint drawing.
Prepare a stable, level foundation in line with the installation requirements, and allow suitable access around the structure during assembly and future care. This greenhouse is rated for wind speeds up to 30 m/s and a snow load of 210 kg/m², but correct anchoring, assembly and ongoing maintenance remain essential.
Test the internal plan
Mock up the proposed layout before fitting benches and shelves
Use the dimensions for the chosen configuration to mark the planned benches, storage furniture and walking space at full scale. Include the area occupied by mature plants rather than basing the layout only on empty trays and pots.
Boxes or other temporary markers can represent shelves and bulky equipment while you test the route through each compartment. Check whether a loaded tray or long plant support can pass through the doorway without striking the glazing.
Make adjustments at the planning stage, before permanent fittings are installed. A simple mock-up can reveal where a narrower shelf, different bench position or clearer turning area would improve everyday use.
Clean propagation storage
Separate prepared sowing supplies from used garden equipment
Keep clean modules, labels, pens and small sowing tools together on assigned shelves or in labelled containers. This allows propagation work to begin without searching among muddy or unrelated equipment.
Store cleaned pots and modules separately from containers awaiting washing. Return each group to its assigned place so it remains clear which items are ready for immediate use.
After sowing, remove spilled material, close opened supplies and clean the working surface before watering or moving trays. This leaves the area ready for the next batch rather than carrying debris into later tasks.
Condensation checks
Track where moisture appears before rearranging vulnerable supplies
If condensation appears, note the panels, corners or surfaces affected and whether the issue is isolated or recurring. Check beyond the open floor, including enclosed containers and less visible shelf areas.
Move cardboard packaging, fabrics and other vulnerable items to a suitable dry location while the affected area dries. Avoid simply shifting them to another damp corner or pressing them against the glazing.
For recurring moisture, follow the applicable care and maintenance instructions and address the underlying condition before restocking the area. Packing items more tightly elsewhere may conceal the problem without resolving it.
Sliding-door clearance
Keep door openings and moving parts free from stored equipment
Check that each sliding door opens and closes fully after shelves, plant supports and seasonal supplies are in place. An opening that was clear after assembly can become restricted as equipment accumulates.
Keep loose items, compost and projecting tools away from the door path and moving parts. Nothing should need to be balanced against the glazing while another object is retrieved.
Recheck door operation whenever the storage layout changes. Remove loose debris in accordance with the care instructions and reposition anything that narrows the usable opening.
Protecting the greenhouse perimeter
Do not turn the outside of the structure into overflow storage
Avoid leaning pots, tools or plant supports against the glazing or aluminium frame. External clutter can obstruct inspection and make routine cleaning unnecessarily difficult.
Keep the areas around gutter outlets, doors and the base free from stacked equipment. If the store is full, review its contents rather than transferring surplus items to the exterior walls.
Reserve enough capacity inside the tinted compartment for equipment that is genuinely used with the greenhouse. A clear perimeter supports maintenance and presents the combined structure as one tidy garden building.
Dedicated space for bulky equipment
Plan how plant supports, hoses and awkward containers will be removed
Identify the longest and bulkiest stored items before fitting shelves. Choose their orientation and removal path first so surrounding storage does not have to be emptied whenever they are needed.
Keep hoses neatly coiled and secure groups of plant supports so individual pieces can be selected without the remainder falling into the walkway. Avoid positions where long items could strike the glazing as they are turned.
Test the complete removal route through the sliding door, not just the space occupied while an item is stored. Allow enough room to lift, turn and carry awkward equipment without disturbing nearby containers.
Frequently asked questions
FAQ – Aluminium Greenhouse with Integrated Storage
How much storage space should I allow?
Allow enough room for the tools, pots and supplies you use regularly, together with a clear route to retrieve them. Compare the internal split between growing and storage space rather than choosing by the overall footprint alone.
Who is an integrated-storage greenhouse best suited to?
It suits gardeners whose tools and supplies would otherwise occupy greenhouse benches and paths or require frequent trips to another building. It is less useful if suitable storage already exists and the priority is maximum growing space.
Does tinted glazing hide everything inside the store?
No. It makes tools, pots and other everyday supplies less noticeable from outside, but items placed directly beside the glazing may still be visible in outline. Orderly storage will therefore still improve the appearance.
How should I choose glazing for the growing area?
Choose 4 mm toughened safety glass if you prefer clear views and a traditional glazed appearance. Choose polycarbonate if you prefer its different finish and are prepared to follow its material-specific handling and care instructions.
What door arrangement is available?
Models use a single sliding door, with double sliding doors available on suitable 3.10 m-wide sections. Check the corresponding door height and the approach to the chosen configuration before ordering.
How should I plan access to the roof vents?
Roof vents are included. Keep their mechanisms within reach after benches, shelving, plant supports and mature crops are in position so they can be operated whenever conditions require ventilation.
Can the integrated gutters be used with a water butt?
Yes. The gutter system can form part of a rainwater collection arrangement. Plan the position of the water butt and overflow so they do not obstruct a door, narrow the path or discharge beside the foundation.
How long is the warranty?
The greenhouse has a 12-year warranty, subject to the applicable terms. Review those terms together with the installation and maintenance instructions before assembly.
Bloomcabin Storage Greenhouse
Select a configuration that works for both crops and equipment
Review the usable area in each compartment, the selected glazing, door access and the prepared site before ordering. The right Bloomcabin configuration should support the way you garden rather than merely occupying the largest available footprint.
Order details to record
✓ selected configuration and stated area
✓ growing-area glazing option and tinted storage glazing
✓ door arrangement and corresponding height
✓ delivery contact, access route and assembly area
✓ foundation and anchoring requirements from the instructions
✓ intended positions for benches, shelving and rainwater collection