
Choosing insect screens for windows and patio doors

Window and door planning
Choosing insect screens only after replacing windows or fitting a patio door often reveals a conflict: the frame can no longer be fitted easily, the sash catches the mesh, or outdoor access becomes awkward. The opening size is not the only factor; consider the complete movement sequence. How does the unit open, which side is the handle on, where does the sash swing, and what area must remain clear every day? A suitable system may be fixed, removable, hinged, sliding or roller-operated. The best result comes from planning windows, doors, hardware, sun protection and insect screens together. Where several openings are involved, one coordinated plan is usually better than separate retrofit solutions.
01 / Assess the opening
Start with the opening type, not the mesh pattern
The first question is whether the insect screen remains in place while the window opens, or whether it must itself open to allow access. A fixed-glazed window often only needs a permanently closed cover because there is no sash travel to allow for. With fixed-glazed windows you should still check that the mounting surface is accessible and flat on the intended side. Opening windows change the task completely: an outward-opening sash needs clear space outside, while an inward-opening sash needs it indoors. The insect screen must therefore sit on the opposite side or be designed to release the movement zone.
Record the unit type, opening direction and hinge side separately for every opening. “Bedroom window” is too vague; “single sash, inward opening, handle on the right, external shutter guide” is useful. The preferred ventilation method matters too. Is the window only tilted, or opened fully? Must the pane remain reachable from indoors? Add the maximum opening angle and a short operating test: open the window, turn the handle, move the curtain and reach the outer face. This reveals pinch points invisible in a closed photograph. Also note whether protection is needed daily, seasonally or only overnight. These checks prevent an otherwise suitable screen from obstructing cleaning, handle access or full opening. Only once the opening path is clear can you decide whether a fixed frame, roller screen or moving solution is appropriate.
Choose window solutions by use, not room name
A permanently fitted frame is a calm solution for openings that are not used as passageways and need long-term protection. A tension frame can suit a removable design, but whether it can be held without drilling depends on the existing frame shape and available contact surfaces. A hinged or roller system provides window access but needs space for guides, a cassette or swing clearance. With an inward-opening single-sash window the conflict is usually on the room side if an additional frame is planned there. An external solution can keep the inner sash path clear, but must be coordinated with the exterior sill and other accessories.
Kitchens, bathrooms and bedrooms often have different requirements, not because of their names but because of how they are used. A kitchen window handle may be needed frequently; a bathroom needs quick, wide ventilation; a bedroom may need continuous protection with the window open overnight. Also check whether curtains, internal blinds, plants or handles restrict the operating area. A technically installable solution is not automatically pleasant to use. When requesting a quote, ask which side the system is fitted on, how the handle remains accessible and what daily steps are needed to remove or open it. Set a priority for each opening: continuous protection, rapid pane access or especially easy seasonal removal. If all three cannot be achieved, this identifies the most important benefit.
02 / Check clearance
Outward-opening windows need clear external space
For outward-opening windows, the key collision zone is in front of the façade. The sash swings through an area where a fixed insect screen placed in front of it cannot stand. This also applies to top-hinged outward-opening awning windows: when opened, their lower edge moves outward while the upper section remains at the frame. A rigid frame immediately in front of the sash can therefore be unsuitable. The right arrangement may follow from the geometry, but should not be assumed generally. Photos of the open window from inside and outside often tell planners more than width and height alone.
Look for obstacles that only appear when the sash is fully open: downpipes, balcony rails, planter boxes, shutters, external shading parts or deep reveals. Clear space must allow not only for the sash, but also for the handle and operating hand. If you regularly need access to the outside face, include the cleaning routine in the plan. A screen removable only with tools may not suit a frequently cleaned window. Record whether the sash really needs to open wide or whether a limited ventilation position is enough; this use decision affects system choice more than room size. Check the situation with sun protection extended too, as its operating zone may differ greatly from its resting position.
Measure the frame, reveal and accessories precisely
Clear opening size and overall unit width alone are not enough for a reliable quote. Measure usable contact surfaces on the frame, reveal depth, projecting seals, weather bars, handles and distances to roller-shutter or external-blind guides. Measure in several places, since older openings may vary. A photo with a tape measure and an overall view help locate obstacles. With glazing bars or decorative bars, also establish whether they affect the plane intended for the frame. The aim is not an elaborate drawing, but a clear answer to where a system can sit flush without a collision.
Do not describe fixing merely as “no drilling” or “screwed on”. A removable, hooked, clamped or screwed solution has different requirements and consequences for operation and cleaning. Ask which parts remain on the existing frame, whether the screen can be removed seasonally, and whether later replacement of seals, hardware or sun protection remains possible. During renovation, coordinate the sequence: first confirm window and door dimensions, then relate external accessories and insect screens to them. This avoids a guide rail later taking the exact mounting surface intended for the screen. Mark photos clearly as taken from inside or outside; otherwise hinge and handle sides can easily be confused during handover.
03 / Compare systems
Plan patio doors around daily access
At a patio door, an insect screen is an additional door, not simply a mesh frame. Foot traffic, moving furniture, children, pets and how often people go outside therefore determine the choice. A hinged screen door needs clear swing space; a self-closing option can return after passage but also needs room. Side-running systems need a free parking zone beside the opening. Pleated screens can fold away compactly, but their guide and handle must still be accessible. Plan the route from the dining area, kitchen or garden, not merely the door opening on a drawing.
With a single inward-opening patio door the insect screen must respect the internal sash path. The external side is often the natural plane for a moving screen, but existing steps, drainage, railings or shading can determine the detail. The threshold is especially important in daily use: an unsuitable guide or poorly visible transition should not increase tripping risk. Ask not only about clear passage width, but also handle height, screen opening direction, closing behaviour and the area that remains clear when the system is open. Comfortable access comes from these details, not door size alone. Mentally test the movement sequence from both sides, because a handle easy to reach indoors may be awkward from the garden.
Sliding units need room for the parked screen
Sliding doors do not require door-sash swing space, but the sliding sash movement and space beside the opening must be considered. A suitable insect screen often follows the horizontal principle: it moves sideways and is gathered or guided in a parking position. For Patio Life lift-and-slide doors confirm before choosing which part moves, which side is operated, and whether the screen meets the door travel path, a fixed side panel or the frame profile. The door name alone does not replace a measure-up of visible frame and reveal surfaces.
The practical check works best against the real daily routine. Imagine trays, plants or a pram passing through the opening. Must the screen open completely, or is partial opening enough? With sliding doors it must also be clear whether the screen should run in front of a moving sash, a fixed panel or several panels. If the door is used many times in the evening, smooth operation and an easy-to-find handle zone may matter more than an almost invisible parked position. Curtains inside and awning or shading components outside belong on the sketch too. Ask for a view of the open and closed positions. It shows whether the system conceals an operating handle, fixed glazing or the desired clear side of the doorway. Also establish how much opening remains usable once parked; overall width and clear passage width are not the same.
04 / Confirm measurements
Treat folding doors and wide openings as a separate task
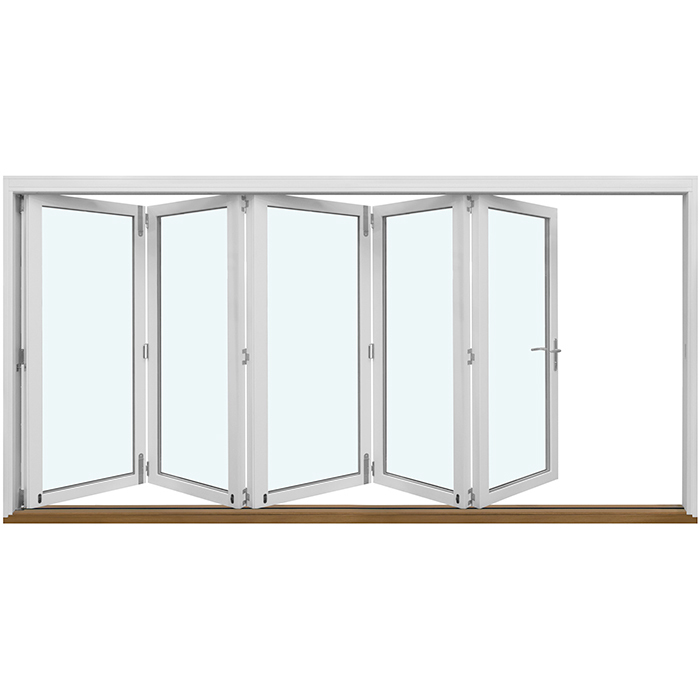
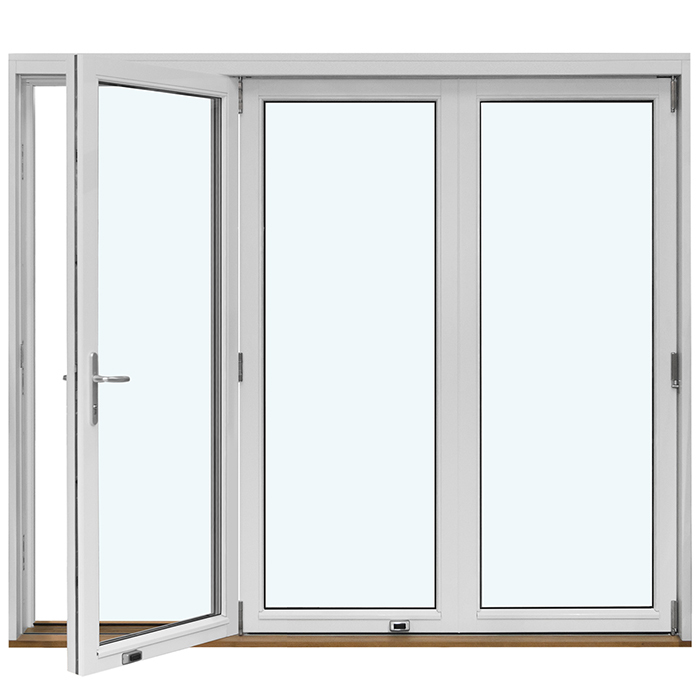
Folding doors change their geometry more dramatically when opening than hinged or sliding doors. Several sashes fold together into a stack, and its position can be critical for an additional screen. With outward-opening folding doors this movement happens outside. A fixed frame placed in front would therefore often conflict. A moving insect-screen solution must allow for both the full passage width and the parking side of the door sashes. Check whether the installation is usually opened fully or only partly. Someone opening the complete frontage on warm days needs a different operating concept from someone mainly using a narrow access route. Define the preferred everyday passage before deciding the screen’s parking direction.
Wide glazing can tempt you to focus only on the largest possible coverage. More important is whether the solution remains stable and easy to reach in everyday operation, and whether it can be handled sensibly in wind, frequent use or seasonal removal. Confirm where the folded door-sash stack, screen stack, handle and shading are located. A scaled plan view helps where a terrace, balcony furniture or planters sit near the façade. The second image shows one folding-door configuration; the third shows an alternative configuration. Both illustrate why sash positions, not just an opening’s total width, determine compatibility. Compare options fully open, partly open and closed so that no rarely shown position is missed.
Assess special shapes and hard-to-reach windows realistically
Not every glazed panel needs to be treated as a ventilation opening. Round, semicircular or angled fixed glazing mainly requires an accurate contour measure-up and a decision on whether a permanent screen panel is needed at all. With triangular and angled fixed-glazed windows a standard rectangular solution may not cover the shape meaningfully. First establish which area needs protection and whether the screen can connect to the frame or reveal. For individual contours, clear templates, elevations and installation-depth information are more useful than estimated diagonal measurements. Mark inside and outside, plus top and bottom, clearly on asymmetrical shapes. A rotated or mirrored contour may look similar on paper but not fit on site. If only an adjacent opening in a window group is ventilated, concentrating protection there may be more practical than including every fixed pane.
Roof windows, high stairwell windows and difficult-to-reach clerestories also need an operating strategy. A system that can technically open but is reachable only with improvised help will rarely be used or cleaned. With a pivoting roof window, for example, sash and handle movement differ from a vertical façade window; the solution must work with that movement. Consider in advance who will clean, remove seasonally and repair it if needed. Where an opening is rarely used, a permanent screen panel can be more practical than complex operation. The decision should follow access and use, not the wish to equip every window alike. For high-level units, also document the operating position from the floor so later handling, not only installation, can be assessed.
05 / Approve the order
Match mesh and visibility to the installation location
Mesh determines how open a protected window feels, but should be selected for its purpose. In living spaces, an unobtrusive outward view may matter; in harder-wearing areas, durability may take priority. Pets, playing children or frequent traffic through a patio door create different demands from a rarely opened upstairs window. Do not rely on product names alone. Ask specifically how the mesh can be cleaned, how it is tensioned, how damaged mesh can be dealt with, and how much frame remains visible inside and out. At doors, also check whether the mesh is easily seen when people step from a bright room onto a darker terrace, or the other way round.
Colour and frame appearance also deserve a deliberate choice. Darker or lighter mesh can look different depending on light direction and the view; samples at the actual installation site are more informative than a showroom viewing. Check the appearance in daylight, with indoor lights on and from normal seating distance. At doors, the frame should be easy to locate by touch as well as visually. If several windows and doors are being equipped, decide in advance which visible side should have a consistent appearance. Consistency can be useful, but should not lead to a door solution poorly suited to a frequently used passage. Record the chosen frame and mesh option for each opening so an order is not later based solely on similar colour names.
Read the quote as a compatibility check
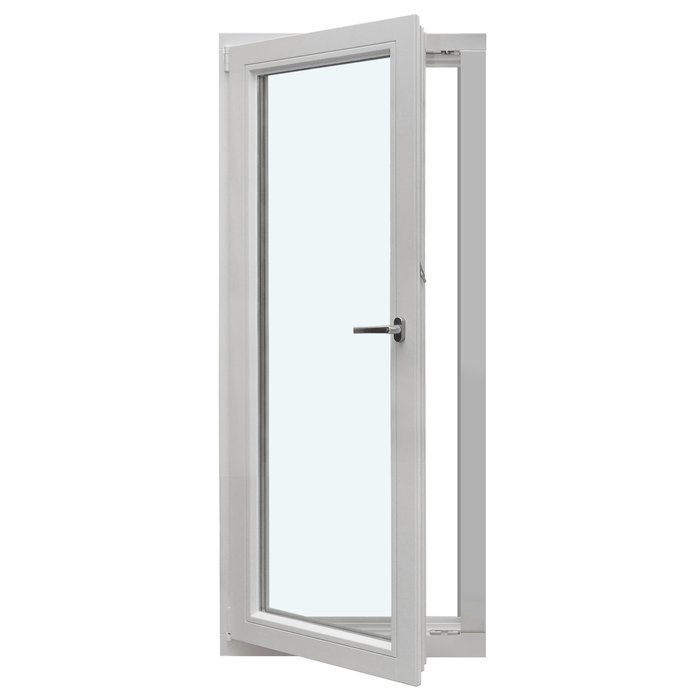
A good quote assigns a comprehensible solution to every opening. It should show which measurements are used, which side the screen is fitted on, how the screen opens or is removed, and which components remain on the frame. Compare quotes by the described scope, not merely the total price. If the hinge side is missing or it is unclear whether a door opens inward or outward, the basis is still too vague. The first image shows a single inward-opening patio door; for units like this, the position of the door sash and additional screen must be recorded clearly in the plan. Measure-up, installation, removal of existing components and later adjustment work should also be identified as included or excluded.
Ask four final questions before approval: Does every window open fully in its intended position? Does every required handle remain reachable? Can the usual patio route be used without detours? Does the solution avoid collision with shading, sills, railings and furniture? Clarify deviations from the measure-up in writing before manufacture. Bloomcabin offers a five-year commercial guarantee for its windows and doors, subject to the guarantee terms; it does not replace any applicable consumer remedies. Delivery takes four to six weeks after order confirmation. These details do not replace a coordinated measurement and compatibility check. The best time for final checking is before ordering, when opening direction and accessories can still be adjusted together. Give every opening a clear identifier matching the quote, sketch and photographs; this makes allocation easier where several units are similar in size.
Frequently asked questions
Can I retrofit an insect screen to every window?
Not automatically. Frame shape, available contact surface, opening direction, handle position and accessories such as shutter guides are decisive. A fixed screen panel may suit fixed glazing differently from an opening sash. Measure more than the opening: document depth, projections and the complete movement path too.
Which solution suits a frequently used patio door?
Choose according to access behaviour. A hinged or self-closing door needs swing space, while a side-guided system needs a parking area beside the opening. Check whether trays, garden furniture or a pram pass through daily. Ease of use, handle access and a clear route matter more than an unobtrusive closed appearance.
Will an insect screen obstruct window cleaning?
That depends on the system and access. A permanently fitted frame remains in place during cleaning, while a removable solution must be released safely and fitted again. Ask in advance which side of the glass remains accessible and how the screen opens or is removed. This process should be especially practical for high windows.
What should I specify for a lift-and-slide door?
Provide overall size, number and position of moving parts, opening side, visible frame surfaces and adjacent components. Photos from inside and outside, plus a view with the door open, are helpful. Also identify where a side-moving insect screen can sit when parked and which passage is used regularly.
Should windows and insect screens be ordered together?
Joint planning reduces coordination risks, especially with outward-opening sashes, patio doors, shutters and shading. Retrofitting may also be possible, but requires careful measurement of existing profiles. Confirm the solution before windows or doors are manufactured so mounting planes, handles and movement zones can be coordinated.
Next step
An insect screen works convincingly when it not only covers the opening but supports how it is used. Check opening direction, hinge side, handle, mounting plane, accessories and clearance individually for every window and patio door. Fixed solutions are best where no passage is needed; moving systems must follow the actual access route. Gather measurements, photographs and a simple sketch of the open position before comparing options. This turns the insect screen from a later obstacle into a coordinated part of the window, door and terrace.
