
How to determine window and door handing
Planning guide for windows and doors
When ordering windows and doors, “left” or “right” is not a complete specification. The same opening can be described in opposite ways depending on whether someone stands inside or outside it. On a project with several rooms, patio connections and exterior doors, these uncertainties quickly add up: a sash may collide with a radiator, obstruct the route to the patio, or open on the wrong side of furniture. A reliable specification therefore separates three questions: From which side is the view described, on which side are the hinges, and in which direction does the sash move? This guide offers a practical method for window and door schedules, explains special cases, and helps coordinate handing decisions room by room before order confirmation.
Handing consists of three separate details
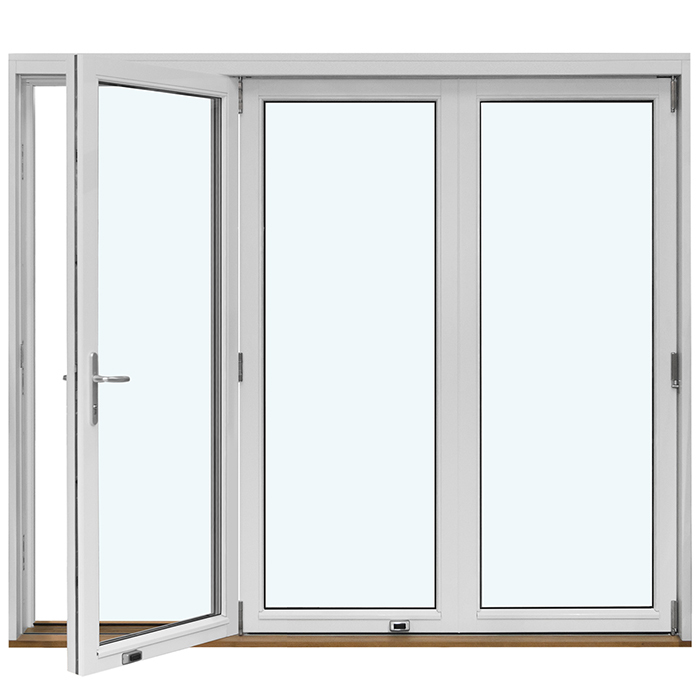
A clear order starts not with a side, but with the viewpoint. Write “viewed from inside” or “viewed from outside” on every sketch, for example. Only then state the hinge side: if the visible hinges are on the left in that view, the sash is left-hinged from that view; if they are on the right, it is right-hinged. Finally, add whether the sash opens inwards or outwards. These three details prevent two people from assessing the same component from different viewpoints yet intending different results.
The terms handing, hinge side and opening direction are often mixed up in everyday use. Separating them is worthwhile during planning: handing describes the side of the pivot axis, while opening direction describes the area into which the sash swings. An inward-opening window uses space in the room; an outward-opening element uses space in front of the façade. Do not rely on a rule of thumb without a reference side. Instead, always use the same wording in your schedule: “room, element number, view, hinge side, opening direction”. It remains clear even when measurement, installation and ordering are handled by different people. If the supplier’s drawing uses different symbols or terms, ask for the relationship to be explained before approval.
Use the hinge side, not instinct
Stand directly in front of the installed or planned element and take the view expressly stated in your documents. Find the hinges or pivot side of the moving sash. Hinges visible on the left mean left-hinged in that view; hinges on the right mean right-hinged. A sketch helps with concealed hardware: draw the frame as a rectangle, the sash within it, and mark the fixed pivot edge with two small circles. The swing arc then also shows where the sash travels. Label the handle edge as well, so that the pivot side and operating side are not confused.
For an inward-opening single-sash window the check is especially easy to visualise: first decide whether the drawing shows the interior view. Mark the pivot edge there and draw the sash in its open position. This reveals whether it would sit in front of shelving, a worktop or a radiator. The product name identifies inward opening, but not automatically the hinge side required for your project. That must be selected separately and checked in the order confirmation. A photo of the shell does not replace a sketch, but can supplement it when the camera position and viewing direction are clearly labelled. Where several openings look alike, also check that the photo and element number genuinely belong together.
Derive inside and outside from actual use
Opening direction fundamentally changes the space required. An inward-opening sash takes up room when opened, whereas an outward-opening element needs a carefully considered external area. Do not check only the fully open sash. The everyday ventilation position, handle access, curtains, blinds or other shading solutions also deserve space on the sketch. For windows, it should also be clear from which position in the room they will be operated. Think through the movement: someone approaches the element, reaches for the handle, perhaps steps back, and guides the sash past an obstacle. This sequence can make a solution that looks symmetrical on the elevation impractical in the room.
For a front door, an outward-opening exterior door can be a suitable alternative if the indoor area in front of the door needs to remain clear. The deciding factor is not the product name alone, but movement in the particular entrance area: where does someone stand while unlocking it, and where are the step, landing, letterbox or bicycle? Record whether the door has been described from outside or inside, and mark the opening area on the floor plan. Also check whether waiting people or stored items could stand in the swing area. Changing the opening direction later regularly changes several related details, such as hinge, lock and handle sides. Therefore, record such a change not only on one plan, but throughout the full element schedule.
Read the floor plan, elevation and swing arc together
The floor plan answers whether a sash can move without conflict inside the room or outside. Draw walls, openings, furniture and circulation routes to scale, or at least in proportion. A quarter-circle from the pivot point shows the swing area. This simple drawing reveals conflicts hidden in an elevation: a coat stand behind the front door, a bed at the window, or two sashes blocking one another in a corner. Write “inside” or “outside” on the arc so the movement direction is not reinterpreted later. For a door opening close to a room corner, it should also be clear whether the handle and hand remain sufficiently accessible beside the adjoining wall.
The elevation complements the floor plan because it shows the division and position of individual sashes. With two adjacent windows, a symmetrical appearance may be wanted, while operation within the room suggests opposing hinge sides. This also applies to panelled internal doors whose desired configuration must be checked against the actual circulation route; the product type alone does not determine project-specific handing. Keep the element number identical in all documents, such as GF-01 for the kitchen and FF-03 for the bedroom. Elevations should clearly show the wall side, viewing direction and opening arrow. Ask the supplier which view its drawing uses and how the hinge side is shown there. This unambiguous allocation is more reliable than an oral statement such as “the door opens to the left”.
Plan patio doors from the furniture layout and outdoor area
Patio doors join two areas of use, so their handing must be checked on both sides. Indoors, a dining table, sofa, curtain or radiator can restrict the swing area. Outdoors, seating, planters, a step or the route along the façade may be affected. Draw an opened sash on both sides and check on which side the handle is sensibly accessible when entering and leaving. Also consider whether a regularly used passage must remain completely clear or whether the sash is mainly opened for ventilation. Test two typical situations: quickly taking a tray outside, and opening the door when garden furniture is already in place. This assesses everyday practicality better than an empty floor-plan area.
An inward-opening single patio door needs a different room check from an outward-opening version. If the sash sits inside beside fixed furniture, the hinge side can determine whether the handle remains accessible. If a narrow area is planned outside, its use is still a separate planning consideration. Do not write only “left patio door” in an enquiry; write, for example, “interior view, hinges left, opens inwards”. Add a short functional note such as “main route to the garden remains clear on the handle side”. Also record whether furniture is fixed in the plan or only shown as an example. Otherwise, a later room change can quietly alter the basis for the handing decision. The functional note explains why the configuration is intended and makes checking easier after plan changes.
Two sashes need an additional functional decision
For double-sash windows and doors, asking left or right is not enough. First establish which sash will normally be opened first and which serves as the second sash. Then describe the hinge sides, handles and opening movement of both sashes from one consistent view. A drawing should include both swing arcs. Otherwise, it remains unclear whether the sashes open towards the centre or away from it, and whether one obstructs access to the other. The preferred clear passage side should also follow from the use scenario. Name the sashes clearly in the schedule, for example “Sash A, used first” and “Sash B, opened next”, rather than referring only to left and right halves.
For an inward-opening double-sash window do not simply assume in the drawing that both sides are operated equally. Ask specifically: which sash is used most often, how is the second sash unlatched, and what handle position is intended in the interior view? These questions matter particularly where the window is behind a table, at a kitchen run or beside a tall cabinet. Also check the situation with only one sash open: does operation remain easy, or must furniture first be moved? The answer may affect the choice of division or another opening type. Have sash sequence and handing confirmed together in writing, rather than discovering at installation that both sashes open but the frequently used one is on the inconvenient side.
Describe sliding and folding doors differently from hinged sashes
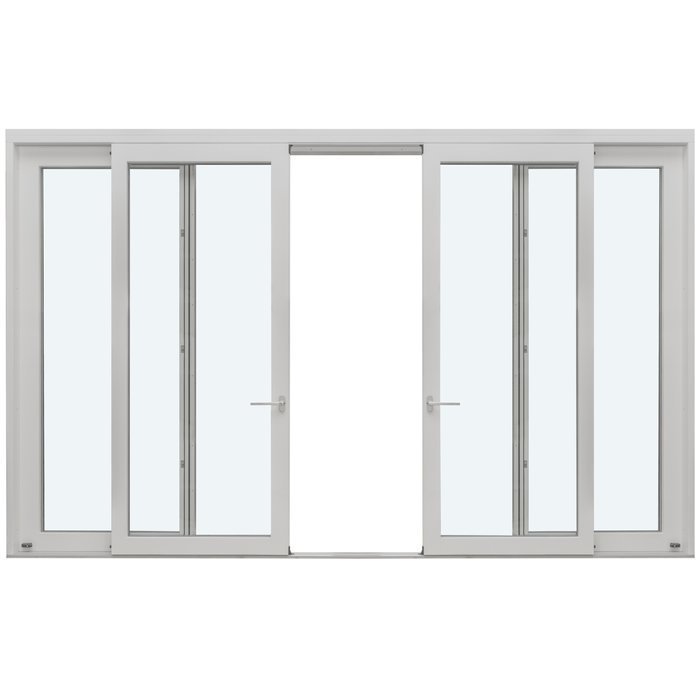
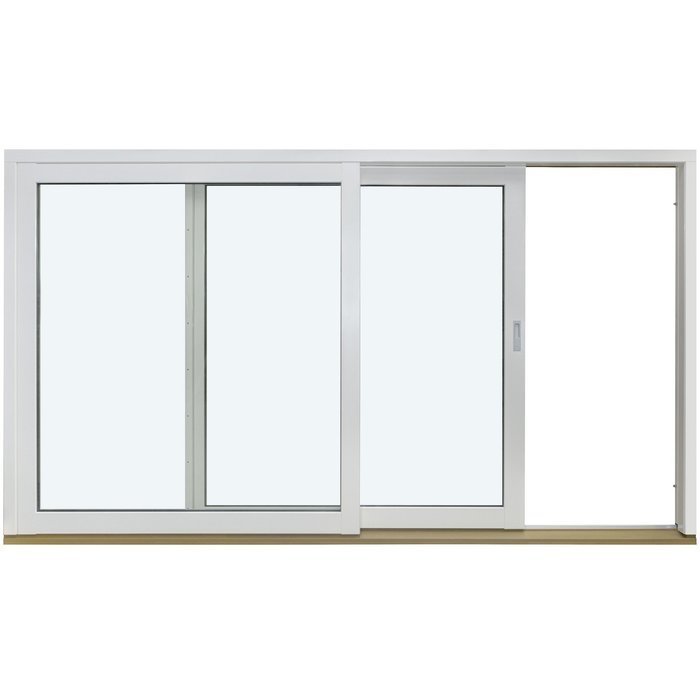
A sliding door has no conventional side handing for a pivoting sash. What matters is which element moves, which way it travels, and on which side it sits when open. Describe the view as clearly as for hinged sashes: “interior view, moving sash travels right” is clearer than “opens right”. Add which passage side is used most and whether moving parts should run in front of or behind fixed panels. Draw closed and open positions side by side. This shows which panel releases the opening and where the sash sits when open. For this construction, the product drawing remains the key comparison.
For Patio Life lift-and-slide doors the order should expressly state the travel direction and position of the moving element; the name alone does not establish a project-specific side configuration. Also check the position of handles, furniture and curtains along the full travel path, not only at the opening. Folding doors are instead described by the order and folding of their elements. Mark where the stack sits when open, the direction in which each sash moves, and which side becomes clear for passage first. A simplified plan view with several hinge points is more meaningful here than one left-right arrow. Anyone combining several opening types on one façade should prepare one shared exterior elevation. It reveals conflicting descriptions, awkwardly arranged handle sides or overlapping movement zones early.
Special forms: check top-hung, pivot and roof windows separately
A top-hung casement window has its pivot axis at the top; the usual left-right question is secondary to opening direction, operating side and projecting movement. State whether the sash opens outwards or inwards and where the handle or opener is located. For outward-opening top-hung casement windows, “hinges at top, opens outwards” is therefore the useful basic description. Also check whether an outward-opening sash projects into a used area or could meet another building element. The position from which the window is to be operated also belongs in the plan. Agree the exact construction and ease of operation against the product documents rather than transferring the approach used for a side-hinged window.
Pivot and reversible windows do not rotate on an ordinary side hinge axis. Instead, the location of the pivot axis and clearance on both sides matter. For a pivot roof window include the operating position, sash position when open and use of the area below in room planning. A handle drawn left or right is no substitute for stating the actual axis. In section, draw which part of the sash swings inwards and which swings outwards. Fixed glazing has no opening handing, but can still influence the intended composition beside moving elements in an elevation. Clearly distinguish fixed and moving panels, and do not accidentally include fixed panels with a handing specification in the schedule.
Build one handing schedule for the whole project
Create one handing schedule rather than scattered messages, photos and floor plans. Useful columns include element number, room or façade side, element type, interior or exterior view, opening direction, hinge or travel direction, sash sequence, special use notes and drawing revision. Add dimensions from the governing plan, but do not mix dimension checking with the handing decision. One line per element makes changes traceable. Use the same element number on the floor plan, elevation and order so that no door is confused with a similarly named window. Also add a status such as “to check”, “agreed” or “released for ordering”. This prevents an unresolved direction from being passed on as a final selection.
Coordinate the schedule with the full process: structural openings, floor build-up, electrical layout, heating surfaces, kitchen planning and furniture can all affect operation. Consider typical routes from the entrance to the coat area, from the kitchen to the patio, and from the bed to the window. In renovation projects, an on-site visit with a taped-out swing radius or a cardboard strip the width of the sash can help. It makes spatial conflicts tangible without assuming technical properties. After every relevant plan change, recheck only the affected lines, but mark the new revision of the complete schedule. If designers or installers use their own plans, provide your list as a decision basis and then compare it with their drawings. A qualified professional should assess the construction where suitability for the particular building is in question.
Compare drawings and order confirmation before approval
The most important check happens before placing a binding order. Check every position against the latest drawing: do the element number, view, opening direction, hinge side, number of sashes and movement direction match? Do not mentally turn the drawing around. Read the labelled view and check the hinges or travel route exactly there. Then compare the swing arc with your current furniture and outdoor-area plan. Especially after a design change, a hinge side that once made sense can suddenly block a route. For the final check, use a printout or an unalterable version with a clear date where possible. Mark each checked position individually rather than approving the schedule only as “seen”. Keep questions in writing and ask for a clear graphical answer.
Also check that everyone uses the same terminology. If a document contains a short label such as “left” or “right”, clarify before approval which reference side underlies the drawing. Do not adopt a label whose viewpoint you cannot verify from hinges, arrows or the movement path. Compare attachments and the main document too: a correct sketch is of little use if the order-confirmation line states a different direction. Windows and doors from Bloomcabin carry a 5-year warranty. Delivery takes 4–6 weeks, subject to order confirmation. These details do not replace checking the final configuration. A fully checked handing schedule before ordering is the most reliable way to avoid misunderstandings about the intended opening.
Frequently asked questions
Is left handing always left when viewed from inside?
No. “Left” is only unambiguous with a defined view. Documents can use different viewpoints. Always write down the side from which you are looking, and mark the pivot edge and hinges there. Compare this illustration with the symbols in the product drawing instead of deriving the viewpoint from a short label.
How do I determine handing for a new-build door without installed hinges?
Draw the door opening on the floor plan and decide where the sash should swing. Mark the pivot edge as the hinge side, then add the interior or exterior view and opening direction. Check the swing radius against furniture, circulation routes and the outdoor area. The clearly labelled sketch should form part of your order documents.
What else must I specify for a double patio door?
Along with the view and opening direction, record which sash opens first, which follows second, and on which side the main passage should be. Draw both swing arcs and label each sash separately. This keeps sash sequence, handle side and movement clear even for people who were not involved in the early planning.
Do sliding doors have left or right handing?
For a sliding door, travel direction is more informative than handing as used for a hinged sash. From a clearly named view, describe which sash moves, which direction it travels and which panel it covers. Always check the description against the product drawing and the intended passage side.
When should I finally confirm the hinge side?
Confirm it once the floor plan, furniture positions, floor build-up and key external areas are coordinated, but before binding order confirmation. Compare every element number with the drawing and order line. If anything is unclear, the supplier should explain the configuration in writing and graphically. Recheck affected elements after later plan changes.
Next step
Correct handing is not guesswork, but a traceable planning decision. For every hinged element, state the view first, then hinge side and opening direction. For sliding, folding and special windows, instead describe the axis, travel direction, moving panel or folding stack. A floor plan with swing arcs shows whether the choice works in everyday use, while the elevation secures the division and sash arrangement. Bring all details together in an element-based schedule and compare it with drawings and order lines before order confirmation. This creates a clear, consistent basis for ordering and installation across the project.
