
Garden Shed Delivery Day: How to Prepare Your Property
Garden shed delivery
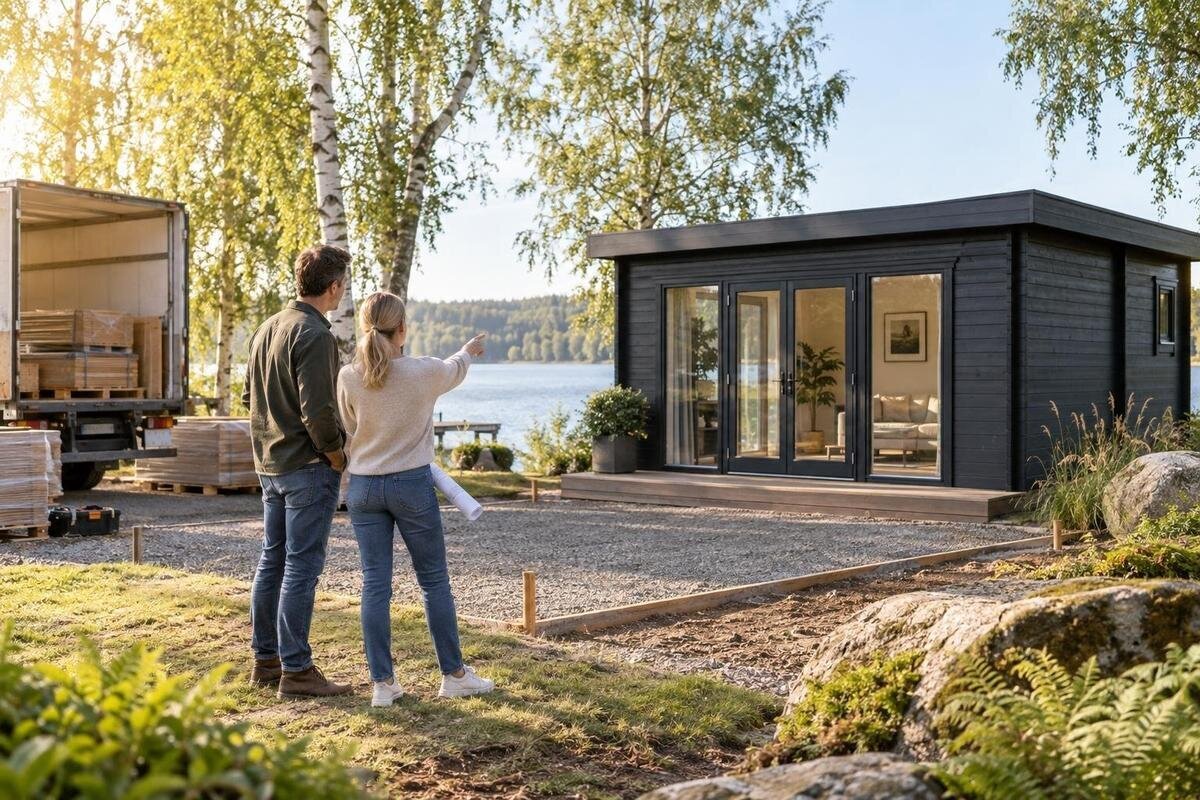
Garden shed delivery is easier to manage when the order, access route and final site have all been checked before the vehicle arrives. A booking does not, by itself, show whether a load can pass a narrow gate, turn in a driveway or be placed where you intend to build. Confirm the delivery method, measure the route from its stopping point to the chosen spot, clear obstructions and agree what to do if any part is unsuitable. This guide focuses on property preparation and handover, not shed assembly.
Confirm the order and delivery scope
Pull together the order confirmation, delivery booking and any messages about the selected garden shed. Check the model name, any recorded option or accessory, delivery address, contact number, agreed date and arrival window. Add directions to the correct entrance if the address alone could take the driver to another gate or side of the property. If you need to cross-check the name, compare the order with the Verdana 1 garden shed listing and treat the written order as the final reference. Tell the supplier early if the entrance, recipient or access route has changed since booking, and keep a copy where the person meeting the delivery can find it.
Ask exactly what the delivery service includes, and separate it from assembly or other site work. Confirm whether the shed is arriving as one assembled unit, packaged components or another agreed arrangement; whether unloading is included; and where the handover point will be. Check whether someone must be present, how the crew will contact them and what paperwork they need. Those answers determine whether you must clear a carrying route, prepare a temporary drop area or arrange separate installation help. Keep the agreement with the booking so the person meeting the driver and any installer work from the same plan.
Find out how the shed will arrive
Delivery can mean different things: a completed structure brought to the site, components left at an agreed point, or a booked drop-off followed by separate installation. Do not infer which applies from a product name, photograph or the word delivery. Ask how the load is packaged, where it will be unloaded and whether the crew will carry it beyond the vehicle. When enquiring about the item shown as the Verdana 2 garden shed listing, quote the exact model from your order so the reply applies to the correct shed. If a second contractor will assemble it, have both providers agree on the handover point.
Request the dimensions of the delivery vehicle and of the shed or packages that must pass through your property; ask whether those figures include packaging or parts that extend beyond it. Confirm whether the vehicle must enter the driveway or can stop at the road, and how far the load is expected to move. Ask what the crew requires at the unloading point and what happens if it is unavailable. If you are arranging a separate installer, make sure delivery timing and access are compatible before booking both services; do not assume either provider has coordinated with the other.
Measure the full route to the site
Walk the route the delivery will actually use, starting at the likely stopping point and ending at the chosen site. Measure narrow places such as a gate opening or gap between a fence and wall, plus the lowest overhead obstruction; record usable width and height rather than a nominal gate or carport size. Do not estimate from an image: the Durano garden shed page identifies a model, but the delivery provider needs dimensions for the load on your order. Ask whether figures supplied include packaging, handles or other projections, and write down where each measurement came from.
Add every turn, step, slope and surface change to a simple route sketch. A passage that is wide enough on a straight line may still be difficult for a long or bulky load to negotiate around a corner; a truck may also need room to turn or reverse. Mark raised edging, bollards, drains, low branches and sections where the crew would have to carry the item. Take photos from both ends of tight areas, label the measurements, then send the map to the supplier or carrier for confirmation against its proposed vehicle and unloading method. Keep its reply with your booking.
Check gates, corners and overhead clearance
Check gates with them fully open and measure the clear opening, including space taken by hinges, handles, posts and uneven ground beneath the gate. A gate’s stated width does not guarantee that a package can pass, and the turn just inside it may be the real pinch point. Put the full item name, such as the name on the Veltor 1 garden shed listing, on your route sketch so measurements and access questions are tied to the right order. If a gate needs to be unlatched, held or moved, agree who will do that beforehand and confirm permission where the access is shared.
Look up as well as across: tree branches, eaves, covered entries and overhead services can limit the vehicle or the load while it is being handled. Ask the carrier which overall vehicle clearance and approach it expects; the shed’s height alone is not enough to assess vehicle access. Do not touch, lift or move overhead wires. If a branch, service or fixed structure conflicts with the planned route, pause and speak with the appropriate service provider or a qualified person about a safe solution before delivery. Include the outcome in the access plan rather than leaving the crew to discover the issue on arrival.
Clear the route and flag vulnerable areas
Remove obstacles along the whole route, not just at its narrowest point. Move pots, bins, garden tools, hoses, outdoor furniture, toys and parked vehicles; check behind gates and around the house where stored items may constrict a turn. The crew needs room to walk and handle the load, so leave the agreed path unobstructed for the full delivery window. Trim or tie back only vegetation you can deal with safely and are entitled to alter. Do not expect the delivery team to shift a heavy planter, dismantle a fence or cut branches without prior agreement; ask before planning around that work.
Identify surfaces and fittings that may be vulnerable: delicate paving, steps, garden edging, drains, irrigation lines, garden lighting and a newly laid lawn. Tell the supplier or installer what lies under or beside the route, and ask what protection, if any, it will use and whether the proposed route is suitable. When discussing the order, use the exact reference, such as the Orello 1 garden shed listing, so the access plan relates to the correct item. Do not assume that loose boards, mats or sheets will make a surface safe for a vehicle or heavy load. Move fragile items out of the manoeuvring area and keep access to household doors and gates usable, so the delivery route does not create a new obstruction.
Prepare the agreed site
The destination should match the location agreed with the supplier or installer, not an improvised drop spot that later blocks assembly. Mark the planned position on a sketch and compare it with the confirmed footprint, entrance side and working clearance needed for installation. Write the exact item name, for example the Modano 1 garden shed listing, beside the plan, then ask the supplier or installer to confirm that the measurements and orientation apply to your order. A model name or product image is not a reliable substitute for those details; use current instructions for the item you are actually receiving.
Clear the agreed work area of vegetation, loose stones, garden waste, stored items and anything that needs moving before installers arrive. Make sure the planned base or support is prepared to the manufacturer’s or installer’s requirements, and ask whether it needs to be complete before delivery or only before assembly. This guide covers access and arrival, not base design: get advice from the supplier, installer or another qualified professional if you are unsure about suitability or preparation. Also leave the working space specified for assembly; a clear place to drop packages is not necessarily a workable building area.
Plan vehicle access and unloading
Choose a realistic stopping and unloading position. Consider whether the vehicle can enter, turn, wait and leave without blocking the only driveway, access to a garage or a shared route. Tell the carrier about narrow access, a steep approach, parked cars, a shared drive or other constraints; ask which entrance to use and who should meet the driver. Use the full item name, for example the timber garden shed M listing, when confirming the vehicle’s stopping point and the planned movement from there. A spot that is convenient for parking may not provide enough room to unload.
If the delivery vehicle cannot reach the final site, agree in advance how far the provider will move the load and whether a separate transfer or installer is needed. Keep the transfer route clear and choose a temporary drop point that does not block a gate, walkway or the next stage of work. Do not assume the crew will use a forklift, crane, trolley or manual carrying; ask what is included and which ground or clearance conditions are required. Confirm any revised unloading arrangement before the vehicle arrives, so you are not trying to negotiate a new route while people or cars wait.
Check weather and ground conditions
Check the forecast and the ground close to the delivery date, especially if access crosses grass, unsealed ground or a narrow garden path. Rain can leave a route softer or more slippery than it was when measured; tell the provider about puddles, soft patches, steep sections or recent surface work rather than assuming the vehicle can still use it. Ask the carrier whether its proposed vehicle and unloading method remain suitable. If the route may be unsafe or damage the property, discuss another entrance, an alternative unload point or changing the booking instead of asking the driver to decide at the gate.
Plan for a delay as well as an on-time arrival. Ask where the shed or packages could be placed if the final site is temporarily unavailable, who is responsible for protecting them and whether a sheltered holding area is needed. Do not assume the packaging is weatherproof or that the load can be left unattended. Keep any agreed temporary space clear and make sure it will not block a doorway, driveway or the route needed by the delivery crew. If the only possible holding place is exposed or inaccessible, tell the supplier before delivery day and agree what to do instead.

Coordinate people and property access
Choose one person to meet the crew, answer questions and know the agreed drop point. Give them the order number, supplier contact, delivery window, route sketch and notes about gates, surfaces or overhead concerns. Add a clear item reference, using the wooden garden shed S page if that is the model on your order, so a call can be matched to the right purchase. If you will be away, ask whether another named person can receive the delivery and what they need to check under the provider’s process. Keep a charged phone available for unexpected access questions.
Let household members and anyone sharing the driveway know when access needs to stay clear. Arrange in advance for cars to be moved, gates to be unlocked as agreed, and pets and children to be kept well away from the manoeuvring and unloading area. Keep normal entry to the house usable where possible; do not let visitors or other contractors overlap with the delivery space. If the route uses a neighbour’s land or a shared area, agree the timing and access beforehand rather than trying to arrange it while the vehicle is waiting.
Repeat the checks on delivery day
Before the vehicle arrives, repeat the route check in that day’s conditions. Open gates to their planned position, move vehicles and loose items, check the work area is still clear and tell the delivery contact about any new obstruction, parked car or ground change. Keep the order confirmation and written access plan on hand, then direct the driver from the agreed entrance. Do not send a vehicle across a path or surface whose suitability has not been confirmed. If the route no longer matches what the provider approved, pause and call rather than improvising.
At handover, follow the provider’s process for checking the item and any packages against the delivery note. Record visible damage, missing packages or a different drop point using its procedure, and keep a copy of any report. Ask for help if you cannot check something at the time. If access proves unsuitable, do not try to lift or move the shed yourself or ask the crew to improvise a transfer. Contact the supplier or carrier while the delivery is there, if possible, and agree a safe alternative before proceeding.
Frequently asked questions
Will the delivery team take the shed to its final position?
Not necessarily. Delivery terms may cover a particular drop point, while unloading, carrying through the property and assembly may be separate. Before delivery day, ask where the vehicle will stop, what the crew will move, how far they can carry the load and whether the final site is included. Record the agreed arrangement so your access plan matches it.
How much clearance does the delivery route need?
There is no single clearance figure for every load and vehicle. Ask the supplier or carrier for the maximum load dimensions, vehicle height and width, and any turning or unloading space required. Measure the narrowest opening and overhead restriction along the full route, then send the figures or a sketch for confirmation. Ask whether the measurements need to include packaging or projecting parts.
Should the shed base be ready before delivery?
Ask whether the delivery is a complete structure or packaged components, and whether installation is part of the same booking. Check the manufacturer’s or installer’s instructions for when the base or support must be ready and what access assembly needs. If requirements are unclear, seek advice from a qualified professional; a clear drop-off point is not necessarily a prepared installation site.
What if the vehicle cannot reach the chosen site?
Contact the provider before the booked day and describe the obstruction. Ask whether a different stopping point or route is acceptable, who will move the load from there and whether your installer can work with that arrangement. Do not assume the crew will carry packages over steps or across grass. Confirm a safe alternative before the vehicle arrives.
Can delivery go ahead after rain?
That depends on the access, ground conditions and the provider’s vehicle and unloading method. Tell the carrier if the route has softened, become slippery or collected water, and ask whether the planned approach remains suitable. Agree a different entrance, drop point or timing if the plan is no longer safe. Do not direct the driver onto ground whose suitability has not been confirmed.
Delivery preparation connects three things: the exact shed on the order, the route the load and vehicle will use, and a destination ready for the agreed handover. Confirming measurements and unloading arrangements early leaves time to clear access or agree another plan. On the day, follow the plan and contact the provider if the route, weather or site has changed; a delivery is not worth an improvised or unsafe move.
