
Can You Put a Garden Shed on Existing Paving?
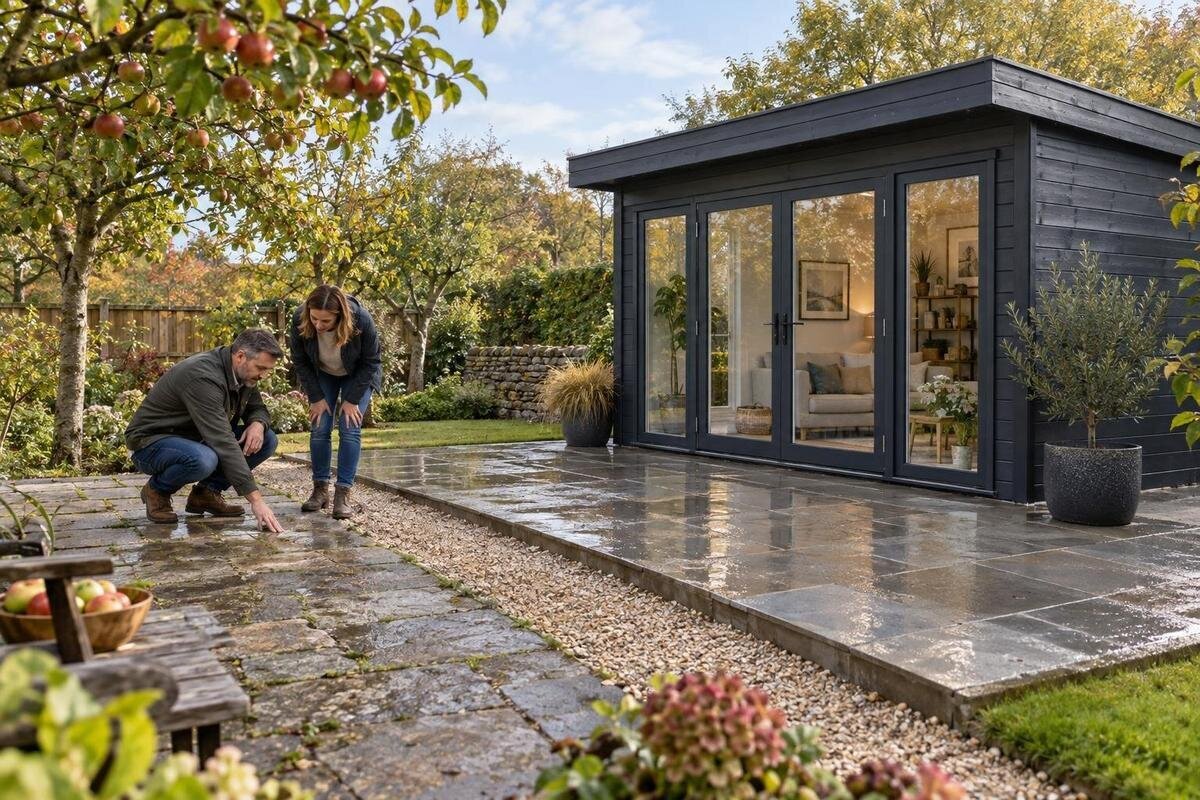
Garden shed planning
Existing paving may be a suitable place for a garden shed, but its presence alone does not make it a ready-made base. Check whether the full shed footprint is evenly supported, the pavers stay stable, rainwater drains away from the base and an approved anchoring method suits the surface. The answer depends on both the condition of the paving and the requirements of the exact shed, so inspect them together before arranging installation.
01
When existing paving can support a garden shed
A garden shed can sit on existing paving when the surface provides firm, suitably even support at the points or lines specified for its base. The paved area must cover the required footprint, remain stable under the shed and avoid persistent water at its base. A patio that looks tidy can still have a dip, loose slab or unsuitable fixing surface; older paving is not automatically unsuitable either. The decision comes from inspecting the whole site and comparing it with the exact installation instructions, not from age or appearance alone. Some designs call for particular support positions or a separately prepared base, so experience with a different shed will not settle this one.
Think of existing paving as a possible base, not proof that preparation is unnecessary. Individual pavers, large slabs and a continuous hard surface can behave differently, and the visible finish does not reveal how firmly the layers below are supported. This does not mean every patio needs rebuilding; it means you need to check what is there before the shed covers it. Repairs beneath an assembled shed are harder to reach, so resolve loose, uneven or wet areas early. If the product guidance is unclear, ask the seller, manufacturer or installer what base is acceptable and whether your paving meets it. Ask about the exact model, since an answer for a different shed may not apply.
Check level across the full footprint
Clear the area and mark the intended shed footprint from the model’s documentation; do not estimate it from a product photograph. Check the paving in several directions, across the centre and along each edge, as well as along the positions where the base is meant to bear. A long level or straightedge can reveal a rise or hollow that is hard to judge from standing height. Compare what you find with the tolerance stated for that exact shed, and record any uncertain spots. There is no single acceptable variation for every model. If you are weighing up the Verdana 1 garden shed listing, get its base requirements before deciding the existing surface is level enough.
Uneven support may make it difficult to assemble the floor and frame as intended, and a door may not sit or operate as designed. Pay attention to a corner that sits higher, a noticeable fall across the patio or a hollow beneath a support line; checking only the entrance can miss a problem elsewhere. Do not assume the shed will correct the surface, and do not use loose scraps or improvised shims unless the instructions expressly allow them. If the paving falls outside the model’s stated tolerance, or no tolerance is supplied, ask an installer how to assess it. An approved adjustment to the base is better than forcing the structure into alignment during assembly.
02
Look for moving pavers and signs of settlement
Inspect all the paving within the marked outline and a little beyond it. Look for slabs that rock or shift under ordinary foot pressure, edges at different heights, cracked or crumbling pavers, widening joints, dips and evidence of repeated patching. Check neighbouring rows too: one chipped corner may call for a local repair, while several moved slabs or a gradual sag can point to a wider problem. Sweep away leaves and loose dirt so cracks and gaps are visible, and check around drains and at the patio edge. Note whether the ground just beyond the paving sits lower, or whether water collects in the same spots. Neat-looking joints do not prove that a paver is firmly supported.
The layers beneath paving are hidden, so a surface check has limits. An intact paver may still move, while a small cosmetic mark does not by itself prove the whole area is unsuitable. Focus on whether paving shifts, settles or shows a pattern of ongoing cracks, and have a paving professional inspect anything that moves or sinks before placing a shed over it. A few photos can help show how widespread a problem is. Avoid masking a loose area with joint filler or positioning the base across a suspect patch. When reviewing the Verdana 2 garden shed page, assess any repaired area against the instructions for that exact model, not a generic idea of a sturdy patio.
Match the shed base to the paving layout
Confirm the base footprint from the shed drawings, rather than relying only on the overall wall or roof dimensions. The building’s outer size does not necessarily show exactly where its base is intended to bear, so identify any specified support edges, runners or points and check that these land on sound paving. The paved surface should not end beneath a required support or leave part of the base on soil unless the instructions explicitly allow that arrangement. A photo can make a shed look as if it fits even when its support lines cross joints or a narrow edge. Use the dimensions supplied for the Durano garden shed listing as a starting point, then confirm the required support positions for that model.
Lay out the footprint against the individual slabs and joints. If a support position is close to a paver edge, crosses an unstable unit or falls outside the paved rectangle, ask whether the layout can be revised or the base professionally altered. Check required clearances too, including space for access and any gap specified around the structure. Include any threshold or projecting base component shown on the plan. Orient the entrance towards a usable path, not just the most convenient-looking section of patio. Do not cut or move paving on the day of assembly without checking what that change does to stability and the planned fixing points. A shed that fits visually may still have an unsuitable support arrangement.
03
Check where rainwater will go
Consider where rainwater will travel before choosing the exact position. If possible, observe the paved area during rain and after it stops: note whether water runs in from a higher part of the patio, collects in a low spot or drains through joints towards the intended footprint. Include runoff from nearby roofs, paths and downpipes, not just water falling directly onto the paving. Look beyond the marked area too, since water may flow in from outside the shed’s footprint. One dry-weather inspection cannot show whether puddles form in wetter conditions. For the Veltor 1 garden shed listing, check the exact base and moisture guidance and compare it with what you observe on site.
Paving with open joints and a continuous surface can direct water in different ways; neither appearance confirms that the finished shed base will stay suitably dry. If you find pooling or water running beneath the planned footprint, resolve the drainage issue before assembly. Do not simply seal joints or raise one corner without understanding the route, as either change could redirect water elsewhere. A paving or drainage professional can assess persistent problems and help avoid sending runoff towards another building or neighbouring property. Keep drains and access covers clear rather than placing the shed over them, and check that any drainage work does not undermine the support area.
Plan the anchoring before choosing the site
Resting on pavers and being anchorable to them are separate questions. A fixing has to suit both the shed’s designated fixing points and the material below the surface. Individual or interlocking pavers can move, while the depth and condition of any supporting layer are not visible from above; a fixing into the top surface is not automatically secure. Read the instructions for the exact product and establish whether the specified anchoring method accepts the existing substrate. Before selecting the Orello 1 listing, ask for its anchoring requirements and whether the paving at your site can meet them. A general answer about sheds is not enough if it does not specify the permitted surface and fixing approach.
Do not omit required anchors or substitute a convenient fixing because the patio is difficult to drill. Work on pavers may crack or loosen them, and drilling can encounter material or services below; check what lies under each planned fixing location before work starts. If the approved method requires a different substrate, ask a qualified installer to specify the preparation rather than adapting a detail by guesswork. The right fixing can depend on both the model and site conditions, including exposure, so a universal anchor choice is not appropriate here. Make sure the written installation guidance and the site assessment agree before treating the base as ready.
04
Allow for doors, access and future maintenance
The footprint is only one part of the siting decision. Check a dimensioned plan for the entrance location and any opening clearance, then make sure there is room to reach and use the shed without blocking a path. Allow working space for assembly and future access to the sides; a narrow gap against a fence can make inspection or routine maintenance awkward. If the Modano 1 product page is on your shortlist, request the plan and measurements needed to place it rather than inferring access from a photograph. Also consider how you will carry bulky items between the garden and the doorway.
Look beyond the paved rectangle. Keep drains, service covers, gates and established access routes usable, and consider whether the shed would obstruct a tap, window or routine maintenance of nearby features. It may sit neatly in the middle of the available paving yet leave too little room at the entrance or make a path impractical. Check ownership or property conditions and any site-specific consent questions separately with the relevant authority or professional; a sound paved base does not answer them. This siting check complements the base assessment, but does not replace it.
Confirm base requirements for the exact shed
Before ordering, get the exact installation information or a clear written answer on acceptable base type, level tolerance, footprint, support positions, anchoring method, ground clearance and any moisture guidance. These are questions to resolve, not details to assume every garden shed shares. Confirm whether a base frame or fixing kit is included and whether it is suitable for your paving; do not infer the contents from a photograph or a general product description. For Timber Garden Shed M, request the requirements for that exact model and compare them with your site notes. If instructions say only that the base should be level, ask what that means for the maker’s installation standard.
Give the seller or installer useful site information: a sketch of the paved dimensions, photos from several angles, notes on level changes and moving slabs, and a description of where water collects. Ask who decides whether existing paving is acceptable and what base preparation is expected from you. If installation is arranged separately, confirm whether the installer has reviewed the paving before a date is set, rather than assuming the product order includes a site assessment. Clarify who supplies any required fixings and who is responsible for preparing the base. Include likely preparation work in your project plan and budget, and keep the answers with the manual so you can compare sheds on actual base requirements as well as appearance and space.
05
Choose whether to keep, repair or replace the paving
If the paving passes every check, retain it only after confirming that it meets the exact shed’s requirements and that an appropriate anchoring plan is available. If a limited section is uneven but surrounding paving is stable, a paving professional may be able to repair or relay it; if movement is widespread or the supporting layer is doubtful, more extensive work or another prepared base may be needed. Compare the repair area with the shed’s full footprint rather than focusing only on the most visible defect. Extra slabs, loose packing or a thin surface patch should not be treated as universal fixes. The Wooden Garden Shed S listing still needs the same independent base assessment as any other model.
Compare the options before you commit. Keeping a sound patio may avoid unnecessary work, whereas lifting and relaying or replacing part of it can add time and cost; a new base may also change where the shed can sit. Do not select a shed on the assumption that the paving can later be altered to match its support plan. If a specialist recommends a different base, ask what needs to be designed for the selected shed and site, and who will prepare it. Avoid adapting a foundation detail from another model or a generic online drawing, because support and anchoring requirements vary. Agree on the plan with whoever is responsible for the paving and the shed installation.
Prepare the site before installation
Make the final site check part of installation planning, not an afterthought. Once the footprint and orientation are agreed, remove movable furniture and debris, leave the required access clear and complete any paving repairs before assembly. Recheck the surface after the work, since a repair may alter its level, drainage or the position of joints. Keep the model instructions, written confirmation about the base and the anchoring plan available to the person assembling the shed. Make sure the route to the site is clear for carrying components. If the supplied model differs from the one assessed, pause and compare its requirements rather than assuming its footprint or fixings are the same.
Take a dated photo of cracks, joints and areas where water collects before the base is covered. Once the shed is installed, inspecting paving underneath becomes harder, and a repair may involve moving the structure. Keep drains, service access and the surrounding paved area usable, and note any maintenance access agreed with the installer. These details matter even when the paving passes the main checks: a suitable site needs to remain manageable after assembly, not simply look level on the day. Store the product documentation and any decisions about paving or anchoring with the shed records so future checks refer to the same model and base arrangement.
Frequently asked questions
Can a garden shed sit directly on paving slabs?
Sometimes, but the slabs must be stable, meet the chosen shed’s level requirements, cover its required support footprint and suit the specified anchoring method. Check for movement and pooling water as well. If the instructions require another type of base, or do not say whether paving is acceptable, ask for clarification before treating the patio as ready.
Do I need to remove existing paving before installing a shed?
Not if the paving meets the exact model’s requirements for support, level, drainage and anchoring. Loose or uneven slabs, an undersized paved area or an unsuitable fixing surface may need repair or replacement. The work depends on the condition and layout of the paving; a shed appearing to fit on top is not enough to confirm that it will.
How level does paving need to be for a garden shed?
There is no single tolerance for every garden shed. Check across the whole footprint, especially along the intended support lines, and compare the result with the chosen model’s installation instructions. If no tolerance is given or the paving has a noticeable fall, ask the seller or installer how to assess it. Avoid guessing or using unapproved packing to correct unevenness.
Can I anchor a garden shed to paving?
Possibly, but the paving and the material beneath it must suit the fixing method specified for the shed. Do not assume an anchor into a paver is secure, or drill before checking what lies below. Ask the manufacturer or installer for an approved approach for the exact model and site; do not leave out required fixings or substitute a convenient one.
What should I do if water pools on the paving?
Address the drainage issue before assembly. Note where the water comes from and whether it collects within the shed’s footprint or runs beneath it, then ask a paving or drainage professional about a suitable remedy. Simply sealing a joint or diverting water elsewhere may not solve the problem. Recheck the area after any work.
Putting a garden shed on existing paving is possible, but the answer depends on a particular base and a particular model, not simply on having a patio already in place. Confirm the full footprint, level, stable support, drainage and compatible anchoring, then compare these with the exact installation guidance. If any part is uncertain, resolve it before the shed covers the surface or installation is arranged. You can then make a clear choice between retaining the paving, repairing it or preparing another base.
