
Grey mould rarely starts with the whole greenhouse.
Plant health / New Zealand
Grey mould rarely starts with the whole greenhouse.
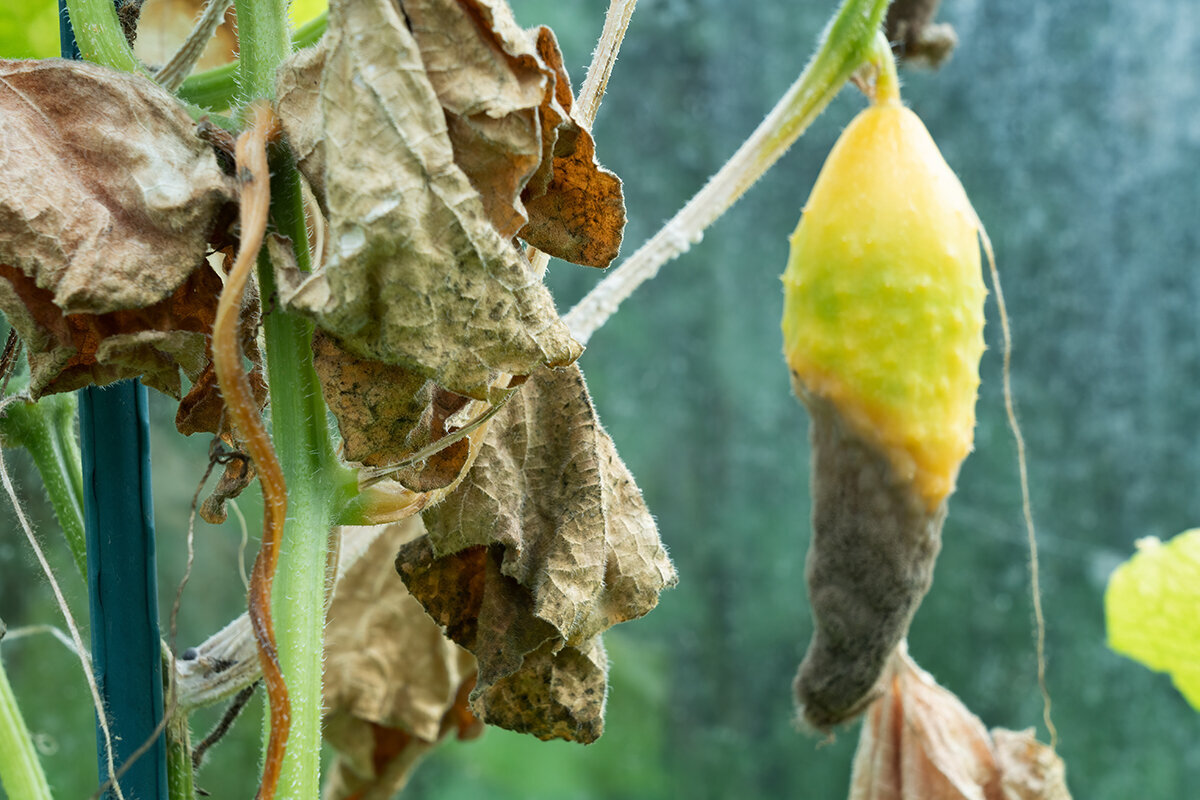
Botrytis often finds what was missed first: a spent flower in a leaf axil, a damaged stem, wet leaf contact or rotting young fruit. After cool, damp nights, such small weak points can become the starting point.
Botrytis cinerea is widespread. When spores meet susceptible tissue and prolonged surface moisture, the familiar grey spore growth can appear quickly. The sensible response is not rushed spraying, but a calm sequence: check the symptom, contain the outbreak, remove material, dry the crop, then improve prevention.
Principle for tonight: Leave no dead, damaged or wet material between plants while the greenhouse cools down.
First response / act before the diagnosis becomes a debate
Move calmly. Remove precisely.
A fluffy coating does not automatically prove Botrytis. Tissue with typical grey spore growth, soft collapse or a progressing lesion should still be handled carefully. An open basket, vigorous shaking or washing down can spread spores and affected particles further through the greenhouse.
- 01
Pause routine care.
Do not keep pruning, harvesting or brushing through neighbouring plants before dealing with the suspect area. - 02
Bag it at the plant.
Place a bag or sealable container beside the plant before cutting. Transport affected material enclosed, not exposed. - 03
Remove visibly affected tissue completely.
Use clean, sharp tools and carefully cut away the flower, fruit or leaf, including softly collapsed sections. - 04
Read the surroundings, not just the lesion.
Look for condensation, wet foliage, still air, close leaf contact and plant debris on benches and the floor.
Good access to ventilation and clear working routes are strengths of the Classic Aluminium Greenhouse. Daily crop care remains decisive: you should be able to inspect plants closely, clean surfaces easily and respond to weather changes without moving every plant.
Identification / do not call every coating Botrytis
Read the pattern first, then respond.
Grey mould often appears as a dusty, fluffy grey to grey-brown coating on affected flowers, leaves, stems or fruit. At a distance, normal ageing, other moulds, cold damage and root-related wilt can look similarly alarming. Assess the tissue, its position and recent climate conditions together.
More typical of grey mould
Fine grey, lightly dusty spore growth on soft or dead tissue; browning flowers; lesions starting from an old flower, wound or damaged fruit; or a stem area where a leaf, support clip or petal remained wet for a long time.
Grey spores are a strong indication, especially where infection begins on ageing tissue and moisture has persisted. They do not replace a careful assessment of the whole picture.
Collapse without visible fuzz
Watery, brown or pale-brown tissue can occur before Botrytis visibly sporulates. It may also indicate another rot, mechanical injury, cold damage, a root problem or bacterial disease. Check whether the crown, roots, leaf margins or only one wound are affected.
If valuable plants, young plants or food crops are affected, isolate the suspect plant and seek professional advice or a plant diagnosis for unclear or recurring symptoms.
Normal senescence
A dry, faded flower or an evenly yellowing lower leaf is not automatically infected. It becomes an opportunity for Botrytis when it remains in a damp, shaded crop or sticks to fruit and leaves.
The practical distinction: remove healthily ageing material during routine care. Carefully contain, bag and hygienically dispose of soft, spotted or fluffy suspect material.
Map of weak points – markers show risks, not proven infections.
1 / Spent flowers Ageing petals hold moisture against young fruit, leaves or stems.
2 / Leaf contact Closely touching leaves stay shaded and dry more slowly after watering or condensation.
3 / Pruning wounds Fresh cuts need clean work and quick drying rather than persistent moisture.
4 / Fruit damage Cracks, feeding damage and bruises create vulnerable areas, particularly in damp weather.
5 / Plant debris Leaves, flowers and fallen fruit on benches or the floor can continue producing spores near the crop.
6 / Stem lesions Brown to pale-brown areas around wounds, clips or dying leaves should be checked promptly.
Where the fungus enters
Botrytis favours the places good greenhouse care already watches closely.
Botrytis colonises old, damaged and dying plant tissue especially easily. That does not make it harmless. Once established on a dead flower, wounded stem or soft fruit, spores can be carried onward by airflow, splashing water, hands, clothing and tools.
In a home greenhouse, risks are often visible before disease appears. Tomato flower remains collect in leaf axils, while broad cucumber leaves overlap. Pelargoniums, fuchsias and begonias retain wilted flowers, while strawberry petals and ripening fruit can sit in the same damp pocket. These are opportunities for Botrytis, not inevitable infections.
- Check after cool, overcast days. At midday the house may appear unremarkable, although leaves and flowers were wet from evening well into the morning.
- Work with healthy, dry plants first. Care for suspect areas last; then clean hands and tools before touching healthy plants again.
- Keep floors and bench surfaces visible. Petals, leaves and spoiled fruit stand out immediately on open, clean surfaces.
Critical interval / from evening to dry leaves
Humidity matters. Surface wetness tells more.
Relative humidity is a useful signal, but not a complete diagnosis. Risk rises when leaves, flowers and stems reach dew point as temperatures fall and remain wet for a long time. Condensation on glazing is therefore not merely visual or a housekeeping issue. It indicates moisture conditions in the greenhouse that should also be checked and corrected on cool plant surfaces.
Late afternoon
Sunset
Night
Early morning
After sunrise
Water with time to dry
Water early enough for splashes and damp surfaces to dry before evening cooling. Water belongs in the root zone, not over leaves and flowers.
Temperature falls
Glazing, metal and plant surfaces cool quickly. Dense crops and still corners often lose warmth and air exchange first.
Condensation risk increases
Moist air meets cold surfaces. Leaves can become wet even without obvious droplets or extreme daytime hygrometer readings.
Break the wet period
Depending on weather and equipment, use a coordinated combination of gentle heat, controlled ventilation and light air circulation to dry plant surfaces.
Check and adjust
Inspect inside the crop, not only the glazing. If it stays wet, adjust watering time, plant spacing, airflow or climate management.
There is no universal number of wet hours that reliably predicts infection for every crop, variety and temperature. Use the interval as a practical observation routine: avoid a long, cool wet period on vulnerable tissue. Cornell guidance likewise stresses preventing condensation on plant surfaces for Botrytis control.
A greenhouse with easily operated roof ventilation provides a sound basis for daily climate control. The Classic Aluminium Greenhouse has roof vents; automatic window openers can support more reliable everyday responses. Even then, observing the weather and checking the crop remain essential.
Spacing
Create air routes, not merely decorative gaps.
Arrange pots and grow bags so leaves do not remain pressed together. Tie up tomatoes and cucumbers early, remove low or diseased leaves, and make room before flowering crops become a solid wall. A small circulation fan can reduce still, damp pockets, but it should move air gently through the crop rather than blow hard on one plant continuously.
Watering
Water the root zone and keep evenings drier.
Drip irrigation, a carefully directed watering can at the pot edge or other low-level methods keep foliage drier. Early watering gives unavoidable splashes time to dry; late watering can create a wet night. Adjust the amount to weather and plant demand. A damp, dull week needs a different rhythm from a bright, warm summer period.
Pruning
Do clean work on dry plants.
Prune, pinch out and harvest where possible with dry foliage and clean, sharp tools. Avoid unnecessarily large wounds. Remove wilted flowers and yellow leaves before more extensive pruning. With several plant groups, begin in the healthiest area and finish where suspect symptoms occur.
Season
Expect problems when light and drying power decline.
In New Zealand, watch particularly through cool, cloudy spells in spring and autumn, and during wet summer weather in milder regions. The greenhouse can seem calm while the crop cools rapidly after sunset and stays damp for a long time. In bright summer weather, ventilation and, where appropriate, shading take priority; in cool periods, use controlled air exchange, circulation and, depending on equipment, moderate heat without chilling the crop.
For forward-looking climate management, consider the Classic Aluminium Greenhouse, especially for its accessible roof vents and the scope to make door opening and gentle air circulation part of the daily routine.
Hygiene / the transport route matters
Do not carry the problem through the crop.
Removal works best when suspect material is contained from the moment it is found. Think of a short, direct route from plant to sealed waste container – not a walk through the whole greenhouse with an open harvest basket.
Dead flowers, diseased leaves and rotting fruit belong neither under the bench nor directly outside the greenhouse door, nor in an open compost bin beside plants. They can remain a source of spores.
At the plant→
Cut→
Contain→
Remove→
Reset
At the plant
Bring a bag or sealable container directly to the affected plant before cutting.
This moves the material less and prevents it brushing against healthy leaves.
The cut
Remove diseased, soft or visibly sporulating tissue with a clean, sharp tool.
A clean cut is easier to monitor and avoids an unnecessarily large tearing wound.
Containment
Put the material straight into the bag and seal it before leaving the area.
Do not shake it, place it on a bench or carry it through the crop in an open harvest basket.
Disposal
Remove waste promptly and use a sealed disposal route accepted by your local council or waste service.
Do not store a rotting pile immediately beside doors, windows or other ventilation openings.
Restart
First remove plant residues mechanically from secateurs and work surfaces. Then clean tools with a suitable product according to its instructions; clean hands or gloves too before touching healthy plants again.
Physical cleaning comes first. Adhering plant pieces can stop a cleaning or disinfecting product from reliably reaching the surface.
Make this sequence a weekly routine rather than saving it for acute outbreaks. Clear work surfaces, accessible paths and durable components make a greenhouse easier to maintain as a productive workspace. Explore the Classic Aluminium Greenhouse and plan its layout around how you actually grow, inspect, ventilate and clean.
Treatment / prevention after immediate action
Products can help. They do not replace a clean, dry house.
When Botrytis is active, first remove affected plant parts and correct the favourable conditions. Fungicides or biological plant-protection products may be considered only as part of an integrated approach to protect still-healthy tissue. Already rotting or destroyed material will not become healthy again through an application.
Task A
Use cultural measures as the first treatment.
- Remove spent flowers, affected fruit, dead leaves and other plant debris immediately.
- Reduce surface wetness through earlier watering, controlled ventilation, suitable heat and gentle air circulation.
- Increase plant spacing and consistently open wet, compressed areas within the foliage.
- Check neighbouring plants and the bench and floor below the affected area carefully.
Task B
Choose plant-protection products for the exact crop and approved use.
- Check the product’s current New Zealand approval status and EPA controls for the exact product, crop, target organism, greenhouse use and user category.
- Follow the full label, including directions for use, dose, protective clothing, ventilation, withholding periods and application limits.
- For repeated applications, consider resistance management and avoid repeatedly relying on the same mode of action.
- Do not use a product merely because it is approved for another ornamental, vegetable crop or outdoor use.
Biological options: preventive, specific and approval-dependent.
Biological plant-protection products or antagonists can be one component in certain crops and production systems. Their value depends on the product, formulation, crop, timing, temperature, disease pressure and correct application. They are usually most useful before disease becomes firmly established and alongside hygiene and moisture control. “Biological” does not automatically mean a product suits every vegetable, ornamental or greenhouse crop, or home use.
Conventional fungicides: an informed decision, not a default reaction.
If an approved fungicide is professionally justified by crop value and persistent disease pressure, selection must also consider possible resistance. Botrytis is known for resistance problems. Avoid improvised mixes, altered doses and routine calendar treatments without a specific risk. For severe stem infection, several hotspots or recurring outbreaks, seek crop-specific professional advice.
Approval rule in New Zealand: Check the product’s current New Zealand approval status and EPA controls, then read the full label. The product, crop, target organism, greenhouse setting and user category must all match the intended use. Follow every label direction, including dose, protective measures, withholding periods and application limits; old recommendation lists are not a substitute.
When planning a new growing space, view window access, glazing, working routes and room for air circulation as one connected system. The Classic Aluminium Greenhouse combines roof ventilation with a clearly structured design, supporting an accessible, clean and considered greenhouse routine.
Recovery / check rather than hope
The crop recovers when new vulnerable tissue remains clean, plants dry reliably after watering, and work surfaces stay free of fallen flowers, leaves and fruit.
Over the next 72 hours
Inspect the original affected point and neighbouring plants daily. Remove newly appearing suspect material immediately. Look beneath leaves and into dense crowns, not only at plant parts facing the path.
Over the next week
Note when condensation appears and disappears. If it regularly remains until morning, deliberately change one practical variable: watering time, spacing, airflow or the coordinated combination of heat and ventilation.
For the next growing cycle
Choose crops and varieties suited to the available space, schedule a weekly care round, and link every harvest or pruning job with cleaning the floor, bench and work surface.
For an orderly, accessible growing space, consider the Classic Aluminium Greenhouse. A consistent, simple routine is generally more valuable than a complex system that is not reliably followed.
FAQ
Common questions when grey mould appears in the greenhouse.
Can I save a plant affected by Botrytis?
Often yes, if the outbreak is small, clearly limited and dealt with early. Carefully remove affected parts with a margin beyond visibly damaged tissue, clean the surroundings, improve drying and monitor the plant closely. With severe stem infection, several hotspots or widespread sporulation, isolation or disposal may be wiser. Affected tissue itself does not recover.
Is lower humidity enough for prevention?
No. Lower humidity can help, but surface wetness, condensation, still air, wilted flowers, wounds, dense foliage and plant debris work together. The central aim is to avoid long periods when vulnerable plant surfaces remain cool and wet.
Should I spray grey mould off the plant with water?
No. Washing can spread spores and prolong leaf wetness. Instead, carefully remove and bag affected material, then correct watering and climate management. Use a plant-protection product only when its current approval, controls and label cover the specific crop, target organism, greenhouse setting and user group.
Can affected plant material go on the home compost?
For visibly mouldy or sporulating material, sealed disposal through a route accepted by your local council or waste service is the cautious option. Home compost heaps do not always reach pathogen-killing temperatures evenly. Do not carry affected material uncovered through the crop or leave it in or immediately beside the greenhouse.
Why does grey mould appear after a cold night without prior watering?
As temperatures fall, plant surfaces and glazing can cool to dew point. Moisture from greenhouse air then condenses on leaves, flowers and stems even though no watering took place. Check inside dense crops in the morning and adjust watering time, ventilation, air circulation and, where appropriate, moderate heat together.
Sources and further information
Reliable guidance for diagnosis and crop-specific decisions.
Botrytis management varies with plant type, growing method, weather and a product’s current approval. In New Zealand, check current EPA controls and the full product label; the university sources below provide further detail on symptoms, condensation, hygiene and integrated crop management.
More from Bloomcabin: Custom greenhouses · Smart greenhouse solutions · Premium aluminium greenhouses and conservatories
- EPA – gardening-product labels and controls
- EPA – using gardening products safely
- EPA – label precautions and disposal guidance
- Cornell University Greenhouse Horticulture – Botrytis Blight
- UMass Amherst – Botrytis on greenhouse crops
- UConn Integrated Pest Management – Botrytis in greenhouses
- Penn State Extension – grey mould on young and bedding plants
Before nightfall
Remove vulnerable tissue before dusk.
A strong greenhouse routine is also simple: leave the crop as dry and well ventilated as possible, removing ageing material that could become the starting point for tomorrow’s grey mould overnight.
Classic Aluminium Greenhouse- 01
Collect spent flowers.
Remove petals and wilted flowers before they remain in leaf axils or on fruit. - 02
Check damp inner areas.
Look into dense crowns, beneath leaves and along cool glazing – not only from the central path. - 03
Restore air routes.
Separate touching pots, tie up shoots and keep routes open for airflow and inspection. - 04
Take waste out enclosed.
Bag suspect material immediately where found and leave no open piles in or beside the greenhouse.
