
How to Store a Garden Shed Kit Before Assembly
Garden shed planning
Before assembly, a garden shed kit may need to wait in storage while you organise the site or settle on a build date. Good storage is less about special equipment and more about keeping the packs dry, supported and identifiable. Choose a suitable place first, leave the packaging and labels intact where possible, and check the kit’s own instructions for any material-specific requirements. A few straightforward checks help protect the parts without turning storage into premature unpacking.

Choose a dry, sheltered storage space
Choose a dry, sheltered place before deciding where the kit will wait. A garage, dry outbuilding or covered storage area can work if the floor is level, rain is kept out and there is enough air movement to avoid a stale, damp corner. Look for leaks, condensation, wet patches and water that could run in from outside. Check behind stored items and along outside walls too; a slow leak is easy to miss when a stack hides the floor. A spot that seems dry on a fine day may not stay that way through wet weather, so check it after rain.
Leave enough clearance around packages to read their labels, inspect their condition and move them without dragging them across the floor or shifting a stack. Keep them out of doorways and away from places where people routinely bring in wet gear. If the storage place is not the assembly site, consider the route between the two: repeated shuffling can tear packaging or separate labels from their bundles. For a particular option, the listing for Garden Shed Verdana 1 identifies the model; ask the retailer for its packed dimensions and storage notes before reserving space. Don’t estimate the space needed from the finished shed’s appearance.
Keep the packages clear of damp floors
Ground moisture can reach cardboard and other packaging even inside a covered building. If the floor is prone to dampness, use stable, level supports to keep the packs clear of it. The supports should not rock, bow or leave long packages hanging unsupported; they should suit the shape of the packs rather than concentrate pressure at one point. Avoid loose offcuts, uneven boxes or furniture that could shift, and don’t build an improvised platform from stacked cartons. A clean, dry floor may be better than an unstable raised surface. If you cannot tell whether the storage surface is suitable, choose another place or seek advice instead of guessing.
Keep packages in the orientation shown on their labels or in the instructions, and don’t stack them higher than the guidance allows. Leave household items off the kit; weight on top can crush packaging or put uneven pressure on the contents. Keep any stack stable and accessible enough that you can inspect the kit without first removing items from above. Before choosing a shelf or corner for Garden Shed Verdana 2, ask for the pack sizes and weights if you need them to plan storage. Don’t infer what a shelf can hold from a product name or image.
Protect the kit from rain and trapped moisture
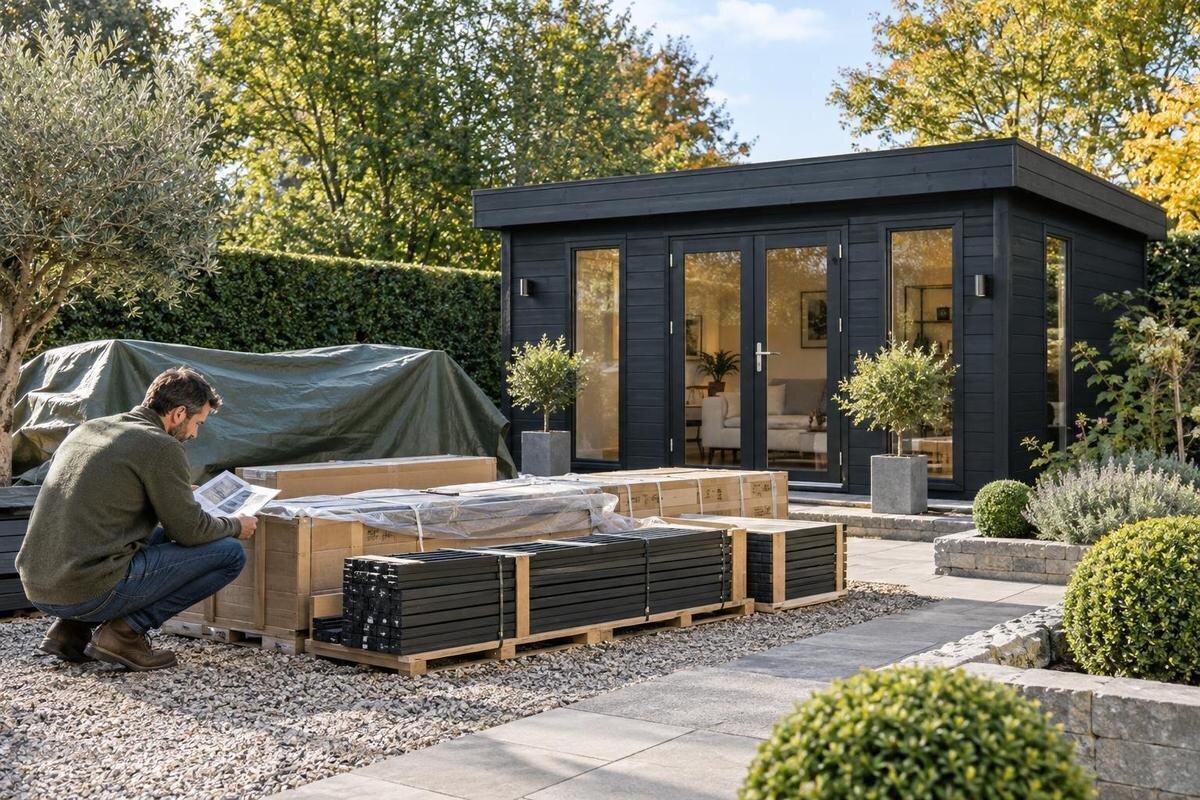
Rain protection needs both a cover and a way for damp air to escape. If the kit is held outdoors or in a partly sheltered spot, keep it under a sound roof or use a suitable waterproof outer cover, while leaving air space around the packages. Don’t wrap the cover tightly around everything unless the supplied instructions say to; trapped moisture can form condensation and leave packaging damp. Make sure rainwater cannot collect against, run under or splash directly onto the packs. If the inside of a cover is damp, improve the shelter or airflow rather than adding another sealed layer.
Position a cover so it sheds water away without resting on or compressing the packages. Secure it so it cannot flap against the kit, pull on a bundle or obscure every label. Check it after wind and rain, as it can shift or tear and leave one side exposed while the rest stays dry. If you are considering the Durano garden shed, ask the seller whether there are specific storage conditions for that packaged kit, particularly if it must stay outdoors. A product image or model name does not explain how its kit should be covered.
Keep the original packaging and labels
Keep the kit in its supplied packaging whenever the instructions allow. Outer cartons and protective layers can keep parts grouped, reduce knocks and preserve labels that identify bundles. Removing them too early makes it harder to match parts with the packing list, and packaging may also separate surfaces from one another. Avoid cutting, loosening or removing straps just to see what is inside; some packaging may be supporting a bundle. If the instructions call for an early inspection, follow them and keep each separator and label with its original pack.
If a box becomes damaged or damp in storage, photograph the outside and its label before changing anything. Note whether the outer cover, carton or bundle itself appears affected. Don’t seal wet packaging inside another layer or tape directly over a product surface. If you are unsure whether to open a damaged pack, contact the supplier first and include the model and package details. For questions about Veltor 1, use the exact product name and package label so the retailer can identify the right kit; appearance alone may not be enough.

Support long components as the instructions direct
Pay attention to how long or broad components are supported, but follow the package’s orientation instructions first. Where the guide allows horizontal storage, keep long pieces level and supported well enough that they do not sag, twist or press against an edge. Avoid leaving bundles leaning at an angle for a long time or standing where they could slide. Keep pieces in their original groups rather than separating them for convenience, as an individual item may move differently from the rest. If the instructions specify upright storage or a particular stacking order, use that instead; component shape and material can affect what is appropriate.
Keep other items off panels and long bundles so their weight does not create a bend or mark. Leave the original separators in place, and don’t wedge parts under shelves, doors or other stored objects. If the Orello garden shed is on your shortlist, ask how its packaged parts should be positioned and whether any bundle needs particular support. The catalogue title does not say whether pieces should lie flat or stand, so use the instructions for that kit rather than treating general advice about long components as a universal rule.
Keep the paperwork and pack record together
Keep the instruction booklet, packing list, order details and any care notes together in a dry folder, but separate from the packages so they are accessible without opening them. A digital photo or scan of the paperwork and package labels is a useful backup if you need to identify a bundle later. Make a simple record of how many labelled packs you have and where each is stored. Include details you can read from the outside, but don’t guess at a part count by opening every bag or bundle. A clear record saves time if more than one package looks similar.
Face labels towards the access path where possible, or note each package’s location on your list. Avoid writing on components or covering any manufacturer markings. If a label is hard to read, photograph it while the pack is intact. For an order such as Modano garden shed, keep the model wording shown on the order with your pack record. That helps keep the paperwork and labelled packages associated, especially if another kit is stored nearby or the packages are moved.
Store fixings with the right kit
Treat fixing bags and small components as part of the kit, not as loose odds and ends. Leave sealed bags in their original labelled packaging and store them with the matching instructions, in a dry, closed box or tray. If the manual tells you to inspect small parts, keep each group in a separate sealed container with its label. Don’t combine similar-looking screws, brackets or fittings: once they are mixed, it can be difficult to match them confidently later. If you open a bag, close and label it before returning it to the main kit.
Put the container somewhere easy for the person assembling the shed to find, but away from children, pets, dirt and water. Don’t stash it in a household tool drawer where it can be emptied or confused with other fittings. Add the kit’s model and package reference to a separate label; for example, record Timber Garden Shed M as it appears on the order rather than identifying the kit by colour or shape. Keep the small-parts box with the main kit and check it is still there before opening the larger bundles.
Leave safe access around stored packages
Plan how you will reach and remove the stored packs. Keep a clear path to the kit and enough room to move each package without pulling it past sharp edges, knocking a stack or shifting heavy items first. Don’t put the kit behind something that could fall on it, beside a door that can strike it or where regular household traffic will keep bumping it. Avoid leaning unrelated items against the bundles just to use every spare corner. A clear storage area is easier to inspect and helps labels and protective corners stay intact.
Keep the area separate from wet garden equipment, soil and products that could leak, stain or leave a residue. Store the kit where you can notice spills quickly and where damp items will not be left against it. Consider whether access will remain clear when other things in the space are moved or used; a sheltered corner can still become awkward if the route is blocked. When planning space for Wooden Garden Shed S, ask how many packs to allow for if that information is not in the supplied details. Reserve room for every package, not just the largest one.

Check the kit while it is in storage
Check the kit now and then, especially after heavy rain or a change in storage conditions. Look at the floor, outer cover, carton condition, supports and visible labels. Watch for water marks, softened or torn packaging, a shifted stack, condensation or a cover that has sagged onto the kit. A quick visual check is often enough; repeatedly opening every bundle can disturb the packing and make it harder to keep components grouped. If you have moved the kit or changed its cover, check that the new position is still level, dry and accessible.
If you see dampness, damage or a label has come away, take photos and record the date and package details before altering anything. Check the kit’s instructions and contact the supplier or manufacturer for advice on whether to open, dry or replace the protection. Don’t hide damp packaging beneath another sealed layer or apply an unapproved treatment; the right response depends on the material and finish. If the storage spot is letting water in, move the kit only to a dry, stable place and address the source of exposure. Keep any advice with your paperwork so it can be found later.
Prepare for unpacking without losing the order
Before unpacking, read the assembly and storage guidance and identify a clean, dry place to sort the parts. Check package labels against your record, gather the instructions and keep fixings together. Plan the order in which packs will be opened so that parts can stay grouped and the work area does not become cluttered. Open bundles only as the instructions indicate, rather than all at once simply because the kit is ready to build. During sorting, protect parts from rain, mud and damp ground, and put each labelled group aside in a clear order. Keep the outer packaging available until you have checked the contents against the supplied list, unless the instructions say otherwise.
If assembly is postponed after you have opened a pack, preserve the grouping and relabel it before putting it away. Use clean, dry coverings and follow the maker’s directions; don’t return damp items to a closed package or change their orientation without checking. Update your notes if a pack or small-parts container moves. If an unexpected delay means the kit will remain stored longer than the instructions allow, ask the supplier what to do rather than relying on a fixed storage period. That handover is easier when you know what has been opened, what remains protected and where each part belongs.
Frequently asked questions
Can I store a garden shed kit outside before assembly?
Only if the kit’s instructions allow it and you can protect it from rain and ground moisture while still allowing air to circulate. A cover may not prevent wind-driven rain or condensation, so check the packages after wet weather. Follow any storage directions supplied for the particular kit.
Should I unpack the kit as soon as it arrives?
Keep it in its labelled packaging unless the instructions ask you to inspect it or do something different. If you need to open a pack, keep its separators and labels with it, and keep parts grouped. That makes it easier to match them with the packing list later.
How long can a shed kit stay in storage?
There is no single storage period that suits every kit. It depends on the components, packaging and storage conditions, so check the manufacturer’s guidance. If the build is delayed beyond the period stated in the instructions, or conditions change, ask the supplier what to do.
Should the parts be stored flat or upright?
Follow the orientation shown on the packaging or in the instructions; different bundles may need different support. If there is no guidance, avoid leaving long items leaning unsupported or putting pressure on panels. Ask the supplier rather than guessing if you are unsure.
What should I do if the packaging gets wet?
Stop further water from reaching the kit, photograph the package and its label, and check the instructions or ask the supplier how to inspect or dry it. Don’t seal wet packaging inside another layer or use an unapproved treatment. Get specific advice if the components themselves are damp.
Good storage keeps a garden shed kit protected and its parts in order until you are ready to build. Choose a dry, stable place, preserve the supplied packaging and keep the paperwork and fixings with the right bundles. Let the kit’s own instructions guide any decisions about orientation, stacking or opening. When it is time to unpack, you will have a clearer view of what is there and where each part belongs.
