
Buying a Pergola Online: Pre-Order Measurement Checklist
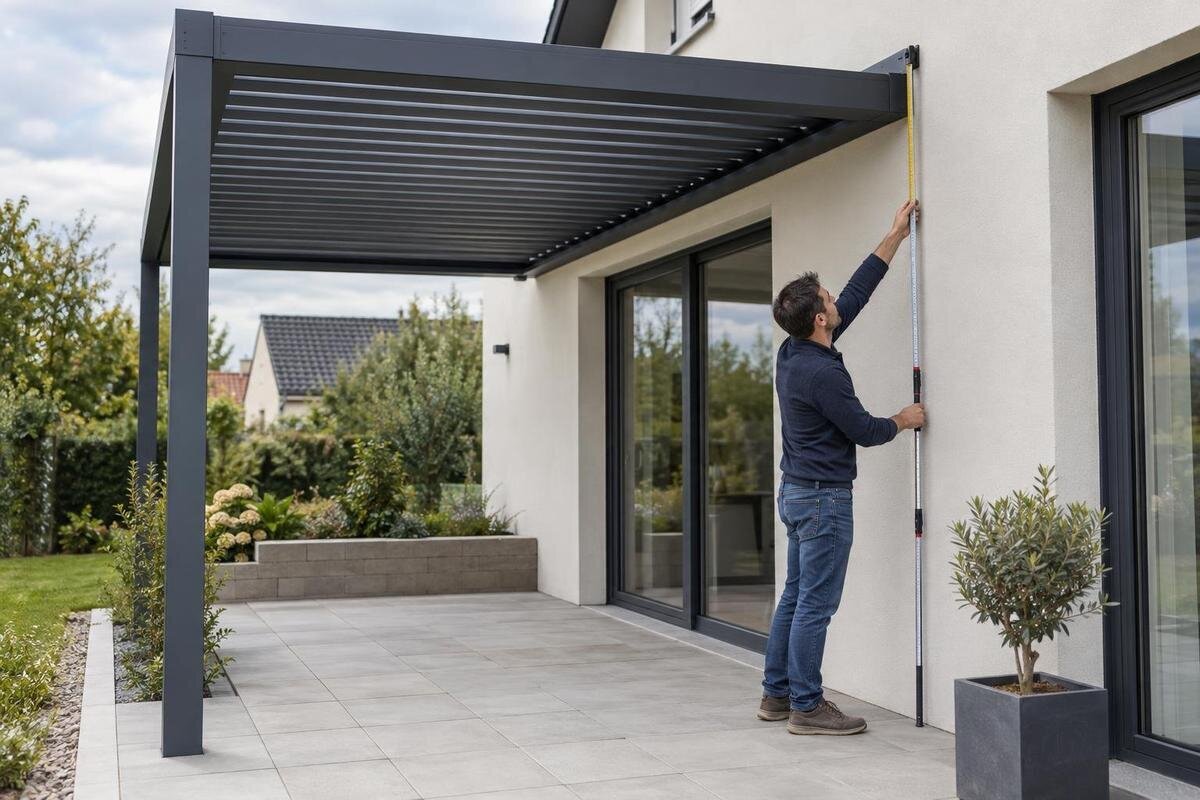
Pergola buying guide
Buying a pergola online means judging a full-size outdoor structure from drawings and written dimensions. A tape measure and a marked outline can show whether a proposed size crowds a doorway, furniture, or a route through the yard—but only if the listing and site measurements use comparable reference points. This pre-order checklist moves from the product’s stated footprint to height, nearby clearances, surface conditions, and delivery access. By the end, you should have a simple site sketch and a short list of facts to confirm, rather than a size choice based on a photograph.

Understand what the listed dimensions measure
Before comparing sizes, read a dimensioned drawing or written description. Width and depth can be measured between outside edges, support-post centers, the edge of an upper frame, or another stated reference; those numbers do not describe the same footprint. Note exactly where each arrow begins and ends, and which side the drawing identifies as width. If several views are shown, check that their orientation is consistent. A photograph cannot settle the question: camera angle and perspective can make a pergola look wider or narrower than it is. Ask the seller to clarify any measurement the page does not define.
Keep the overall footprint and the clear area beneath the structure as separate figures. A measurement called “width” does not automatically tell you how much room is available for seating or passage; the drawing or description needs to define what it covers. Don’t subtract guessed post sizes or add margins that are not in the documentation. Record each number with its label, reference points, and units, then use those same reference points on your site sketch. This avoids comparing an outside measurement from the listing with an inside clearance measured in your yard.
Mark the full footprint on the ground
Choose the exact location and direction the structure would face before taking measurements. Measure the proposed width and depth across the ground, using the listing’s stated width and depth only after confirming what each refers to. Note fixed reference points, such as a house corner, patio edge, or the inside face of a fence, so you can place the outline again later. Record feet and inches consistently, and avoid writing only “near the deck” as a location. When reviewing a pergola product page, copy the dimension labels as shown and compare like with like, not just the largest number.
Represent the proposed outer boundary with painter’s tape, string, or another temporary marker on the ground. Walk around all four sides and look at the area from the height at which you would use it; the outline makes an encroaching planter, step, or path easier to notice than a number on a screen. If the site has an irregular edge, mark the usable boundary rather than treating it as a perfect rectangle. Measure again from your fixed reference points and note any offsets. Make sure the marked perimeter corresponds to the dimensions’ stated reference points. This is a planning aid, not permission to ignore placement requirements.
Test the layout with your furniture and daily use
A footprint can fit in an empty patio yet feel cramped once furniture and movement are included. Measure the table, chairs, lounge pieces, planters, or other items you expect to keep there, including how far doors or chairs extend when used. Mark their outlines inside the pergola outline with tape or cardboard, then arrange them as you actually sit, serve food, or move through the area. If a chair needs space to slide back or someone must pass behind it, include that space in the test rather than counting only the furniture’s closed position. Use your own measurements; a generic seating diagram may not match your setup.
Compare the usable area you need with the listing’s stated measurements, not with a photograph of a staged setup. If a drawing identifies clear space between supports, it can help you judge whether the layout fits; if it gives only an overall footprint, don’t treat the whole rectangle as unobstructed. A side table, grill, storage box, or future planter can also affect the route through the area. Save two arrangements if your space has more than one plausible orientation, then test each on the ground. Check the listing for this pergola for the dimension reference before choosing between those layouts.
Measure door swings, paths, and nearby openings
Trace every route people use to reach the proposed area: from a back door, across a deck, through a side gate, or along a path to the yard. Measure the clear opening at gates and doors, not just the overall frame, and mark the space a hinged door or window sash occupies when open. For a sliding opening, note the track and any part that projects into the planned footprint. Measure the nearest points of fixed steps, handrails, and furniture as well. These observations show whether the outline would leave the area usable, rather than merely whether its corners fit.
Test the route with doors and gates fully open, then walk it while carrying something you normally move through the space. Check access to windows, exterior fixtures, and equipment you still need to reach; don’t let a post position or nearby edge make routine opening awkward. Keep a separate measurement for the clear path around the planned footprint, since that is not part of the listed width or depth. When checking the page for the model you’re considering, compare its stated dimensions with both the marked footprint and these access notes.

Check overhead clearance and overall height
Height deserves its own measurement because a ground outline will not reveal conflicts above it. From the proposed ground surface, note the lowest nearby obstruction over the footprint and surrounding path: an eave, gutter, soffit, balcony, light fixture, or low branch. Check more than one point where the ground slopes or an obstruction changes height, and note how far a gutter or other projection extends. Measure only from a safe position; don’t climb or reach toward electrical equipment. If an overhead utility line is near the planned location, don’t rely on a visual estimate; seek guidance from the utility or a qualified professional.
Compare the available vertical space with the product’s documented overall height and any clearly identified high points or projections. Don’t infer height from a lifestyle photo or assume a model name tells you how tall it is. Consider how nearby doors, windows, and equipment operate, but don’t invent a universal clearance figure: the relevant requirements depend on the product and site. Check the stated dimensions on the pergola’s product page and ask the seller to clarify the reference point or any missing height detail before ordering.
Record ground levels, surface changes, and obstacles
Look closely at what is under every part of the marked footprint. A patio may meet a lawn, a deck may have a step or edge, or a paved surface may have a drain cover, access panel, or fixed post in the way. Note visible slopes and changes in level at each corner and along the sides; a measurement at the center can miss them. Mark obstacles that must remain reachable, including drainage points and utility access. The purpose is to describe the actual site accurately, not to calculate a foundation or decide from appearance that the surface will support a structure.
Installation requirements can vary by product and by site, so check the written instructions for the candidate you plan to buy. Confirm what the seller says about the required surface, anchoring, and site preparation; don’t assume pavers, a deck, or compacted ground is acceptable simply because it looks level. If those details are not supplied or your surface is uneven, have a qualified installer or other relevant professional assess the plan. Use the linked product listing to identify the exact product documentation, but don’t treat a photo or dimension drawing as a substitute for installation guidance.
Measure wall-side space without assuming attachment
If the proposed footprint runs beside a house, fence, or another structure, measure from the finished face that actually projects furthest—not from an unseen foundation line. Note trim, siding, posts, ledges, vents, windows, downspouts, and wall-mounted equipment along the run. Measure the available uninterrupted length and the distance from the wall to the planned outer edge. This makes it easier to spot a short projection or an opening hidden in a broad patio measurement. Keep a wall-side route for the access and maintenance you need, rather than assuming an edge can sit tight to every surface.
Being near a wall does not establish that a pergola can be attached to it, and a freestanding layout still needs its own clearance. If attachment is part of your intended arrangement, confirm that the specific product documentation expressly covers it and describes the relevant placement; have connection and building conditions assessed by a qualified professional. If the structure remains separate, measure the gap you need for walking, opening windows, and reaching drains or equipment. Check the page for that product for stated configuration requirements, and ask about anything unclear instead of guessing from the product name or photograph.
Check the delivery and assembly route
Measure the full route from the delivery drop-off point to the proposed assembly area. Record the narrowest clear width at gates, doors, corridors, and turns; include the space taken by hinges, handles, railings, steps, and low overhead obstructions. A footprint that fits the patio may still be hard to reach if the route has a tight turn or a change in level. Walk the route and sketch those pinch points. On the listing for another pergola option, look for any package or handling dimensions the seller actually provides; don’t assume the shipping pieces are the same size as the finished structure.
Ask the retailer or delivery provider which package dimensions and handling details are available, then compare them with the route you measured. Also identify where a shipment could be placed temporarily without blocking a door, driveway, shared passage, drain, or work area. If assembly is planned on site, don’t confuse the space needed for that work with the final footprint; obtain the seller’s or installer’s requirements rather than inventing a buffer. Write down any access restriction, such as stairs, a narrow gate, or limited vehicle access, and confirm how it will be handled before placing the order.

Separate the ground footprint from the shade you want
The ground footprint is not a guarantee that the same area will be shaded. Shade depends on the product’s actual design and the sun’s position, so don’t infer coverage from listed width and depth alone or from an image. First outline the area where people will sit or work, then note when you expect to use it and where the sun falls at those times. This helps distinguish a size problem from a placement or orientation question. If your goal is to cover a particular table or seating group, measure that group and compare it with any coverage information the seller explicitly supplies.
Check whether the product information states a coverage area or otherwise defines the shaded zone; if not, ask rather than treating the footprint as an exact shade boundary. Compare the answer with the marked furniture layout, paths, and any window or planting areas you want to leave open. Consider future use too: a larger table, new planter, or relocated seating could change which space matters. The information on one more pergola product page can be reviewed on the same terms, but its image is not a dimensioned plan. Keep product measurements and expected shade as separate questions.
Complete a written pre-order measurement sheet
Bring the measurements together on one page before you check out. Include the intended orientation, product width and depth with their stated reference points, marked outer footprint, clear interior area if documented, distances to walls and fences, overhead obstructions, door and gate swings, surface changes, furniture layout, and access route. Write units beside every number and label observations separately from estimates. Add a quick sketch with fixed reference points so another person can understand where the measurements were taken. A clear record also makes it easier to compare another size without repeating the site visit.
Use that sheet to review the current product information item by item: exact dimensions, what each dimension describes, total height, documented placement and installation requirements, and any available package or delivery-access details. Mark each point as confirmed, unanswered, or not relevant; don’t fill gaps with a guess. Ask the seller for written clarification where a missing dimension could change the fit, and bring site-specific structural or attachment questions to a qualified professional. The goal is not to measure every inch of the yard, but to know which dimensions control the purchase and which still need confirmation.
Frequently asked questions
How do I measure the space for a pergola?
First check how the product listing defines its width and depth. Measure those same dimensions on the ground, mark the proposed outer footprint with tape or string, and record its position from fixed points such as a patio edge or house corner. Then note nearby doors, paths, furniture, obstacles, and the height of anything overhead.
Are the listed dimensions the same as the usable space underneath?
Not necessarily. A listing may give overall dimensions, while the clear area between supports is smaller or measured differently. Check the dimensioned drawing and note what each measurement refers to. Don’t estimate the interior space by subtracting imagined margins or measuring from a product photo.
How much clearance should I leave around a pergola?
There isn’t one clearance figure that suits every product and site. Measure the actual space needed for doors and gates to open, people to pass, windows and equipment to remain accessible, and nearby features to avoid. Follow the product’s written placement requirements; ask a qualified professional about site-specific structural or attachment questions.
What if the footprint fits but the ground is uneven?
A footprint that fits does not establish that the surface is suitable. Note slopes, steps, changes in level, drains, and transitions between materials, then check the product’s written installation and surface requirements. If those details are unclear or the ground is uneven, have a qualified installer or other relevant professional assess the site.
What should I confirm before ordering a pergola online?
Confirm the stated width, depth, height, and the reference points for each dimension. Also check documented placement and installation requirements, the package dimensions or handling details available, and whether the delivery route has enough clear space. Ask for written clarification if a missing detail could change the fit.
A useful pergola measurement is more than a width and depth copied from a product page. It connects those stated dimensions to a marked outline, the way the space will be used, the clearances around it, and the route needed to reach it. When the site sketch and product information agree—and any important unknowns have been answered—you can judge the size on its actual fit instead of its appearance in a photo.
