
Buying a Pergola Before the Patio Is Built: Key Decisions
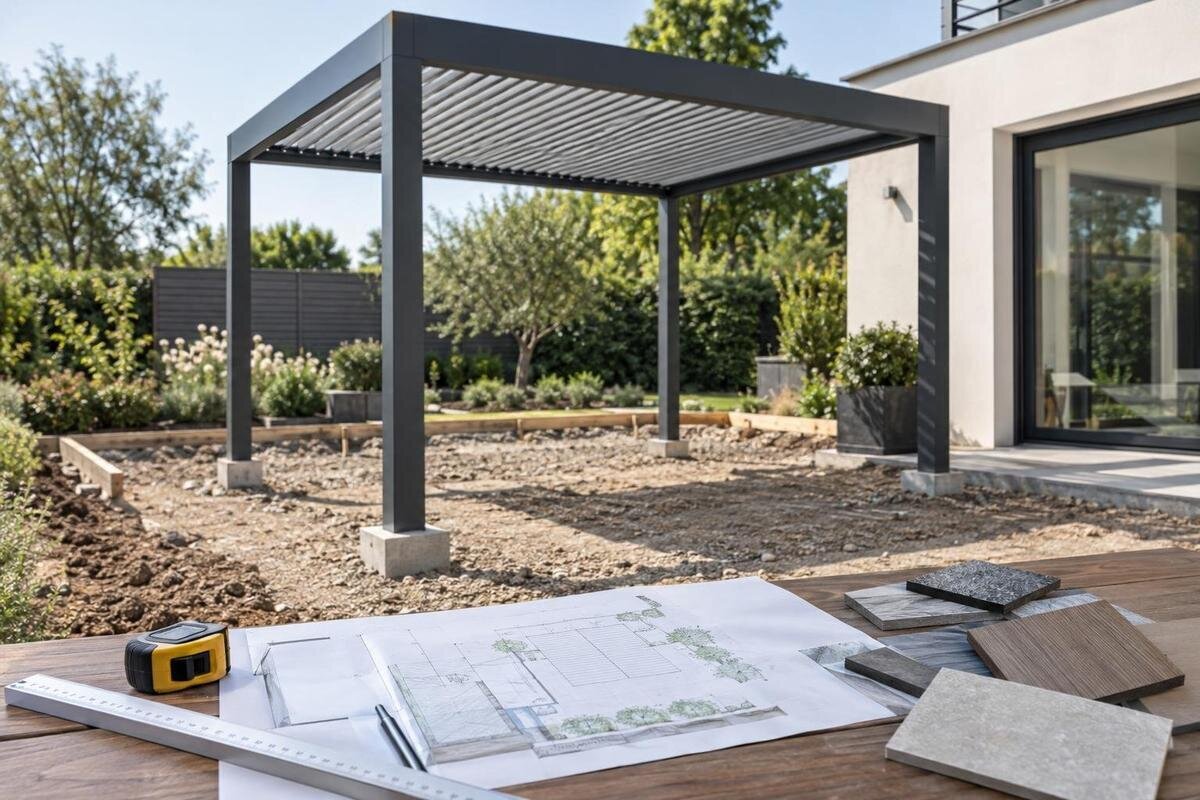
Pergola planning
When a patio is still on the drawing board, a pergola is not just a later accessory: its supports, attachment points, drainage, and service routes can affect work that will soon be hidden under concrete, pavers, or finished landscaping. Buying early does not mean guessing at a final model. It means agreeing on the space, support strategy, and contractor handoffs while changes are still easier to coordinate. This guide explains what to settle, what can remain provisional, and which questions to put in writing before the patio crew closes up the site.

Why the pergola belongs in patio planning
Pergola planning matters before the patio because a finished surface can hide decisions about structure and services. A post location may overlap a paving joint, a proposed support may conflict with a drain or utility, and a wall connection may affect siding or trim. Those conflicts are easier to spot on a plan than after the hardscape is installed. Even if the patio can technically be cut later, a retrofit may add demolition, patching, redesign, and schedule coordination. Treat the pergola as part of the outdoor project layout, not as a purchase that begins only after the patio looks complete.
You do not need to lock every color, accessory, or decorative choice at the first meeting. Separate decisions that affect buried or concealed work—footprint, support points, attachment, finished height, drainage, and service routes—from choices that can wait. Agree on a date before excavation or concrete when the relevant drawings must be reviewed by both trades. If the pergola configuration is not final, label provisional dimensions clearly rather than presenting them as installation coordinates. The goal is a clean handoff: the patio crew knows what to build around, and the pergola supplier or installer understands the surface and support conditions the site is expected to provide.
Set the footprint from real dimensions
Begin with use and geometry rather than an attractive rendering. Mark the area you want shaded, the table or seating footprint, circulation to the yard, and the path from the house. Measure the proposed structure from fixed reference points, such as a building corner, and record the patio boundary separately. A roof outline, outside-frame dimension, support center, and clear space under a structure may not be the same measurement; ask which dimensioned view defines each one. When considering the Bloomcabin Pergola, request a drawing for the exact size and configuration you want quoted. Compare its dimensions with your furniture layout and walking routes. Advertised coverage area alone cannot tell you where the posts will sit or how much usable space remains between them.
Draw the house, proposed patio edge, steps, thresholds, and fixed obstructions to scale if possible. Add the pergola’s outside limits and each support or attachment point from the current project drawing, and label every measurement with its reference point. Compare the diagram with the site: a small discrepancy can decide whether a post lands in a walking route, close to a stair, or across a planned border. Note which dimensions are confirmed, field-measured, or still preliminary. A dated plan keeps one contractor from working from a sketch while another assumes a different footprint. If the drawing changes, circulate the revision before the patio layout is treated as final.
Choose a freestanding or wall-mounted layout
Choose the basic support arrangement early. A freestanding concept and a wall-mounted concept create different site-planning needs: one locates supports within the patio or adjacent ground, while the other also depends on a defined relationship to the building. If you are considering the Bloomcabin Lean-To Pergola, include photos of the proposed wall and measurements of nearby openings in your inquiry. Ask for the configuration drawings and have the relevant building professional assess the actual structure before planning finished cladding around an attachment point. Establish whether the proposed connection can be accommodated before shaping the patio around it. If that question remains open, keep the alternative layout visible on the plan so the project does not depend on an unconfirmed wall connection.
Put responsibility for the wall interface in writing. Confirm who verifies the attachment location, who specifies the connection and any building-side preparation, and who is responsible for sealing and finishing penetrations. Ask how the proposed height relates to windows, doors, gutters, soffits, siding transitions, and existing services. A wall that looks sound from the yard is not proof of its capacity or compatibility with a selected product. If the support strategy is not confirmed, show a keep-clear zone on the patio plan instead of assuming a connection will be approved. The same principle applies to freestanding supports: their locations should come from the selected configuration, not a visual guess.
Coordinate pergola supports with patio groundworks
Coordinate support details with the patio base before anyone orders or places the finished surface. Pavers, decking, a slab, and separate supports are not interchangeable design assumptions; the surface material alone does not show whether or how a pergola may be anchored. For a quote on a regular Bloomcabin Pergola, describe the planned surface and ask what support information the supplier needs from your site team. Obtain the selected configuration’s support and anchoring requirements, then have the patio or foundation professional determine how those requirements fit the property. Clarify whether support preparation is included in either contractor’s scope. Otherwise, both crews may arrive expecting the other to have completed work beneath the finished patio.
Give the contractor a plan that locates every support point in relation to fixed references, with the intended finished surface and patio limits shown. Include nearby steps, retaining edges, drains, and utility corridors so a support is not placed where another part of the work needs to go. Have the responsible professional determine the support design and anchoring method; a general guide cannot provide dimensions or engineering calculations for a particular property. Agree on the sequence: who marks the locations, who prepares the supports, who verifies their positions, and what information goes to the patio crew before the area is covered. If locations shift in the field, update and circulate the drawing before finishing over the revised work.

Agree on patio elevations and drainage
Set a shared elevation reference before concrete or paving begins. The patio’s finished height affects thresholds, steps, transitions to the lawn, and the vertical relationship between the surface and the pergola. Measurements taken from rough grade can be misleading once base materials and finishes are added. Ask the patio contractor to state the planned finished elevation on the drawing, and ask the pergola supplier or installer which reference surface its clearances and support details use. Resolve height changes with the responsible professionals rather than making adjustments by eye. This matters especially where the patio meets a door, sloped yard, retaining feature, or existing hardscape.
Plan surface drainage as part of the landscape. Mark the intended flow direction, drains, downspouts, and places that need to remain accessible for cleaning. Make sure support locations do not obstruct drainage routes and that the finished surface will not direct water toward a threshold or create an unintended low spot. If you are evaluating the Bloomcabin Bioclimatic Aluminum Pergola, ask the supplier how the selected roof configuration handles water and whether there are outlet locations to coordinate. Have the relevant professional review any proposed connection to site drainage. Show confirmed discharge points on the patio plan, including their relationship to walking routes and planting areas, rather than leaving the patio crew to infer them.
Plan electrical and other concealed services
Decide early whether the project may include lighting, powered components, receptacles, or other equipment that needs a route through the patio area. Confirm what is part of the pergola configuration and what would be a separate accessory; a product title does not answer that question. Mark known utilities and proposed connection points on the site plan, and arrange for the appropriate utility-location process before ground is disturbed. Give a qualified electrician the pergola and patio drawings so the electrician can define any wiring route, connection point, and applicable local requirements. Keep electrical decisions within that professional’s scope instead of improvising a buried route from a sketch.
If a service route crosses under a slab or paved area, the trades need to agree on its location, termination, protection, and who installs or verifies it before the surface is closed. Do not ask a patio crew to guess at a future cable path, and do not bury an unconfirmed sleeve simply because it might be useful. When requesting a quote through the bioclimatic aluminum pergola product page, list any powered accessories you are considering and ask for their current connection requirements. The electrician can then coordinate the service design with the patio contractor. Record the agreed route and photograph concealed work before it is covered. Keep that information with the project documents so later installation does not depend on someone remembering where a route was placed.
Protect door, wall, and maintenance clearances
Check how the proposed frame relates to the way the house and patio are used. Show the opening paths of hinged doors, screen doors, gates, and windows, along with steps, walkways, and routes to the yard. A post can appear clear on a rough plan yet interfere with a door handle, stair landing, or chairs pulled out from a table. For a proposed Lean-To Pergola layout, compare the configuration drawing with the positions and heights of existing openings. Include projecting trim and other building features in that comparison. Check both the overhead frame and the supports: adequate clearance at ground level does not establish that a window or door can open fully beneath the proposed structure.
Also mark items that must remain reachable after construction: gutters and downspouts, hose connections, outdoor outlets, vents, meters, air-conditioning equipment, and access panels. Ask the relevant trades what working space each needs, and preserve that zone in both the pergola layout and patio border. Think through the expected furniture arrangement without treating a rendering as a clearance plan: chairs need room to move, people need to pass, and maintenance still needs access. Put any future screen, lighting, or other planned addition on the drawing as a separate item, so a later change does not require removing a finished edge or relocating a service.
Define the quote and contractor scope
A useful pergola quote request includes more than a patio photo and a target size. Send a measured site plan, photos from several angles, wall and door details, the planned finished patio elevation, and known drain or utility locations. If you are requesting a quote for the Bloomcabin Pergola, identify the option you are considering and distinguish the existing site from the work still to be built. Ask which drawing, configuration, and assumptions the quote uses, then compare those with the patio plan. Make sure dimensions refer to the same points in both documents. If a detail is unknown, label it as open instead of letting each contractor fill in a different assumption. Keep revision dates together so a late change does not leave the patio team working from an outdated plan.
Write a scope split for every interface: who supplies and installs supports, who prepares the wall if needed, who coordinates sleeves, who handles electrical work, who finishes around supports, and who repairs a disturbed surface. Clarify whether site measuring, drawings, unloading, assembly, cleanup, and adjustments are included or excluded in each agreement; a phrase such as installation included is not a complete task list. Name the person who approves the support layout before it is covered and the process for recording changes. List allowances and owner-supplied items separately. With responsibilities assigned, each technical question has an owner instead of being passed between the patio crew, supplier, and installer.

Sequence ordering, approvals, and deliveries
Work backward from the patio’s excavation and finish dates, but do not guess at production or delivery timing. For an order involving the Bioclimatic Aluminum Pergola, ask the seller which configuration details must be settled before ordering and which documents will be provided for site coordination. Ask the patio contractor when support locations, elevations, and service routes must be final. Build the schedule around those dependencies, leaving time to resolve drawing questions and circulate revisions. Confirm the seller’s current milestones rather than treating a preferred arrival date as a commitment. An order confirmation is not the same as an agreed installation layout; the product details and site requirements still need to match before concealed work proceeds.
Before ordering or starting work, check applicable local building, zoning, neighborhood-association, or property requirements with the relevant authority or association, and verify insurance questions directly with the insurer. Requirements vary by site, so do not rely on a neighbor’s project or a broad online statement. Coordinate delivery access, an unloading and storage area, protection for new paving, and the installer’s visit relative to other trades. Ask the supplier and installer what the site must be ready to receive, then tell the patio contractor when those conditions are expected to be met. If dates shift, circulate a revised schedule and drawing rather than relying on a verbal handoff.
Review the layout before pouring or paving
Before the patio crew pours concrete, installs pavers, or closes a concealed route, pause for a joint check against the latest agreed drawing. Verify the pergola footprint, support and attachment points, finished elevation, thresholds, drainage path, utility routes, and access clearances. Confirm that the person responsible for each task accepts the layout. This is not an engineering review by the homeowner; it is a coordination hold point that sends unresolved structural, electrical, drainage, or approval questions back to the qualified professional who owns them. Do not let a sketch marked roughly here become the only record of a decision that will soon be hidden.
After supports or service routes are installed, record their actual locations before the patio finish covers them. Photograph the work from identifiable reference points, keep revised drawings with the project documents, and note differences between planned and as-built positions. At the end, compare the completed patio with the agreed layout and make sure drainage access, door operation, and maintenance routes remain as intended. Give the pergola installer the final surface information before assembly. If site conditions changed, ask the responsible parties to review the current instructions and arrangement. A clear record preserves continuity between groundworks and later installation.
Frequently asked questions
How early should I buy a pergola if the patio is not built yet?
Begin the configuration and site review before excavation or hardscape work fixes support locations, elevations, or service routes. You may not need to place an order at the first design meeting, but you do need enough product-specific information to coordinate those interfaces. Use the supplier’s current drawings and schedule, and keep unresolved dimensions clearly marked as provisional.
Can I anchor a pergola directly to patio pavers?
Do not assume that pavers—or any finished patio surface—can serve as the required support. The answer depends on the selected product’s installation requirements and the base beneath it. Ask the supplier or installer for written support details, and have a qualified patio or foundation professional confirm the site-specific approach before the surface is installed.
Do I need the exact pergola model before patio construction?
You need a confirmed support concept and enough configuration-specific dimensions to set the footprint and interfaces. If the product choice is still open, the patio plan can show reserved zones and provisional measurements. However, footings, wall connections, clearances, and electrical routes should not be based on an assumed model. Circulate an updated drawing before those details are covered.
Should I plan electrical routes while building the patio?
If lighting or other powered equipment is under consideration, coordinate a route before paving or concrete closes access. First verify what is available for the selected configuration; do not assume it is included. A qualified electrician should identify the connection needs and applicable local requirements, then coordinate the route with the patio contractor.
What should I request with a pergola quote?
Ask for the named configuration, current drawings and dimensions, stated assumptions, and a written split of supply, support preparation, installation, electrical work, surface finishing, and cleanup. The exact categories depend on the project, but every interface should have an owner. Compare quotes only after confirming that each contractor is pricing the same footprint, site conditions, and scope.
A patio build creates a short window to coordinate details that become harder to reach later. You do not need to settle every finish at once, but you do need a documented reference for where the pergola will sit, what supports it, how drainage and services are handled, and who completes each connection. When the contractor drawings agree on those points, the patio can be finished with a clear handoff for the later pergola installation.
