
Pergola Gutters Overflowing: A Step-by-Step Diagnosis
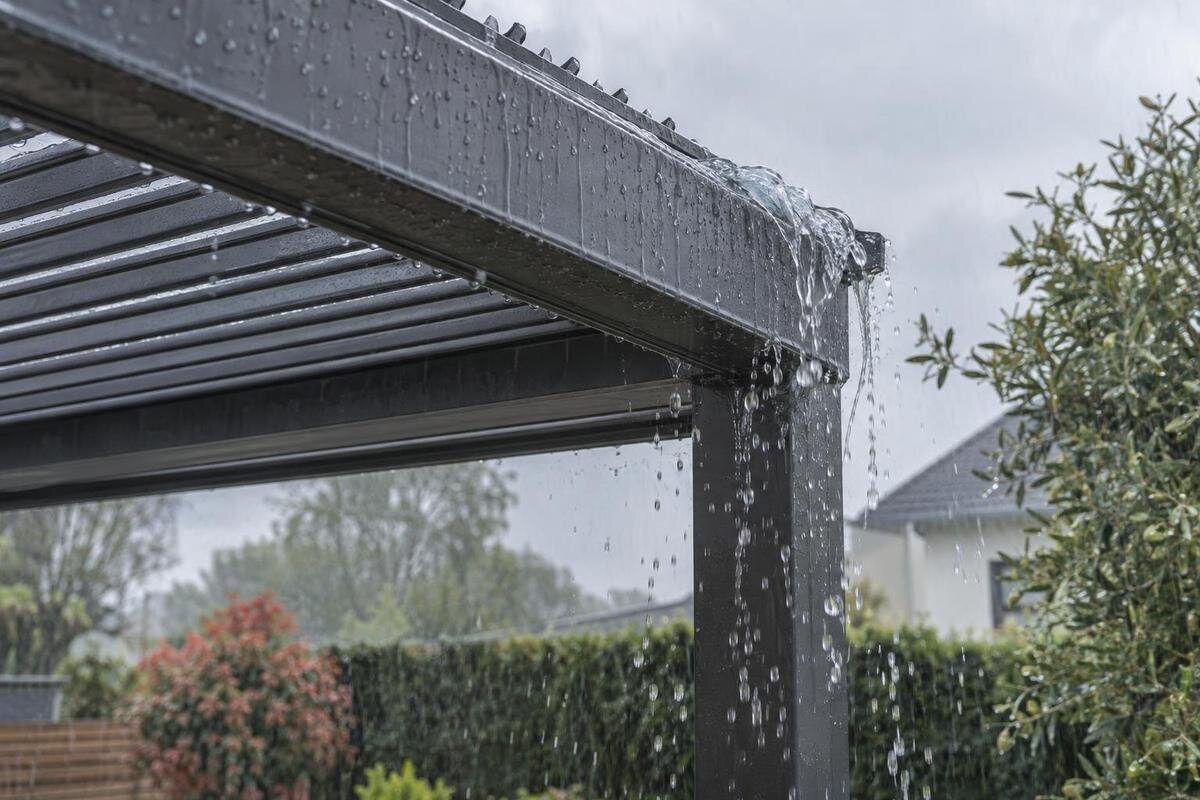
Pergola drainage troubleshooting
Water spilling over a pergola gutter can result from debris, a restricted outlet or downspout, a connection problem, extra runoff, or flow beyond the system’s documented limits. The visible spill is the endpoint, not necessarily the source: water may back up at an outlet, escape at a joint, or arrive from a separate roof. A useful diagnosis follows the water path in order and records the conditions that trigger the problem. This guide focuses on tracing a particular overflow event, rather than treating every spill as a routine cleaning task. Make observations from a safe position and use the instructions for the exact model before changing any roof or drainage components.

1. Make a safe record of the overflow event
Do not climb onto a pergola or approach a wet roof, ladder, gutter, or downspout during rain. Wet surfaces, gusts, moving roof components, and sudden discharge make close inspection unsafe. Observe from a dry, stable place outside the splash zone, and keep clear of powered controls or exposed electrical equipment. If a channel, support, or connection looks loose or displaced, do not touch or load it; arrange a qualified assessment. Avoid standing beneath a spill, particularly if any drainage part appears damaged.
Write down what was happening when the water first escaped: whether rain was light, steady, or heavy; the wind direction if you could tell; the roof position; and how long the rain had been falling. Note where the spill began, whether it continued, and whether water stopped after the rain eased. These details help distinguish a problem that appears in ordinary rain from one tied to a brief, unusual event. A short video taken from a safe position can preserve the sequence, but do not move closer to improve the view.
2. Find the first place water leaves its route
Work backward from where water lands instead of labeling every wet edge an overflow. True overflow crosses the upper edge of a gutter or drainage channel. A joint leak often appears below a connection; wind-driven rain may reach the area without backing up in the channel. Water can also travel along a beam or post before dripping, so a patio puddle may be some distance from the escape point. From a safe position, look for the first place water leaves its intended route and note whether it is spilling over the top, emerging from a seam, or arriving from outside the channel.
Sketch the roof edge, visible channel runs, corners, outlets, and downspouts. Mark the first escape point, not just the spot where water eventually collects. If there are several sides, note which ones stay dry and whether the overflow starts near a particular outlet. Give each location a simple label so that photos taken on different days can be compared without confusing one corner with another. Include the direction from which you viewed the structure; a close-up alone can make a service technician’s job harder. If you are reviewing the Bloomcabin Pergola product listing, ask for a drainage diagram for the configuration you are considering and compare its access points with your existing setup. Knowing where channels can be inspected and where outlets discharge is useful when evaluating a replacement, but the listing’s model name does not establish those details.
3. Match the roof position to its drainage diagram
Do not assume every pergola sends water along the same path. Some roof systems move or adjust, and their intended drainage route may depend on the position specified in their instructions. Record the roof position during the overflow and whether it changed before or after the spill began. Do not operate a roof during a storm just to see if a different position helps. For a fixed roof, use its specific instructions rather than applying guidance written for an adjustable design.
Look for the manual or installation drawing that matches the installed model and configuration. Trace the illustrated path from the roof surface to each channel, outlet, and downspout, then compare it with what you observed. Account for changes made after installation, since a generic diagram may not represent the current setup. If you are considering Bloomcabin Bioclimatic Aluminum Pergola, request the operating instructions alongside the drainage diagram. The questions to resolve are which roof positions are approved for rain, where water should enter the channels, and whether movement after rainfall changes the discharge pattern. Do not infer those answers from the word “bioclimatic.” For an existing installation, keep observations made while the roof was stationary separate from those made after it moved. Water released during movement is a different observation from a channel that fills and spills while the roof remains in its prescribed rain position.
4. Look for a local obstruction in the channel
Once the route is clear, look for visible debris where the water first backed up. Leaves, needles, seed pods, and other roof debris can collect in a channel, at a corner, or near an outlet and restrict flow. A blockage near one outlet may make water build up along the section feeding it, while other sections continue to drain. This targeted check is different from assuming that a seasonal clean will solve every overflow: the useful clue is whether the obstruction is located along the path that failed during this particular event.
Inspect only from the ground or another safe position, and wait for dry conditions before dealing with accessible debris. Follow the instructions for the exact model; do not reach overhead, climb onto a wet structure, pry out a screen, or push sharp tools into a channel. Record the debris location before clearing anything you can safely reach, then note whether the nearby outlet was also affected. A photograph can help distinguish a small deposit away from the flow path from material covering an opening. When evaluating the Bloomcabin Lean-To Pergola, ask how the wall-side channel and any concealed openings can be inspected and serviced. Access matters when diagnosing an overflow, but it cannot be established from the product name. If water later backs up at the same location despite accessible debris being removed, the next check is the outlet and downstream route, not simply another general cleaning.

5. Check the outlet separately from the channel
A channel can look clear while its outlet is restricted. If the design has a visible outlet, check from a safe position for obvious blockage at the opening, screen, or connection to the downspout. Note whether water appears to collect just upstream of one outlet while other visible sections drain. These are clues rather than proof: concealed outlet paths may not be visible, and an opening that looks clear from below can still lead to a restriction farther along.
During ordinary rain, observe whether water enters the visible downspout and whether the pattern differs between outlets. Interpret that comparison using the drainage diagram: separate outlets may serve different roof areas, so unequal discharge does not necessarily mean one is blocked. Record whether the affected channel begins filling before discharge appears below, whether the downspout flow continues during the spill, and whether water remains visible after rain eases. Each observation helps an installer narrow down where flow may be restricted; none establishes a hidden component’s condition by itself. If you are comparing drainage information for the Bloomcabin Pergola, request details about outlet locations, inspection access, and approved service procedures. Those are more useful for this problem than the catalog name alone. Leave concealed fittings in place and have an installer assess any route that cannot be checked safely without disassembly.
6. Trace the downspout to its discharge
If water reaches an outlet but the system still backs up, follow the downspout as far as it is safely visible. Water emerging from a connection partway down, while little or none appears at the visible exit during rain, can point to a restriction or a disconnected section. If the downspout feeds a buried drain, the problem may lie beyond the part you can see. Note where water appears along the route and whether it happens at the same time as the gutter overflow.
From the ground, check the visible discharge end for an obvious obstruction or a disconnected extension. Note whether it ends in open air, enters another pipe, or connects to a buried drain. Also record whether standing water surrounds the exit during the overflow; that gives a drainage professional useful information about conditions beyond the pergola. Do not dismantle the downspout or try to clear a buried line yourself. If you are considering the Bioclimatic Aluminum Pergola product listing, ask where the proposed configuration discharges water and how that discharge would connect to your existing drainage. Have the installer distinguish the pergola’s supplied drainage components from any site connections or extensions. This helps identify who should investigate each part of the route. A downstream restriction can make a clear channel appear undersized, so changing the pergola before checking the receiving drain may leave the original problem unresolved.
7. Check for alignment and connection clues
If the channel and visible outlet appear clear, look for a pattern that suggests a connection or alignment issue. Water escaping from a particular seam may indicate a joint problem. Water repeatedly pooling in one section or spilling from the same point may warrant an installer’s assessment of the channel’s position or condition. A visibly displaced part, gap, or change from the original installation is worth recording. If you have earlier photographs, compare the same connection or roof edge rather than relying on memory. These observations are clues, not a way to calculate or reset the correct slope: drainage arrangements vary by model and installation.
Pay attention to where the water emerges. A leak beneath a joint is different from water crossing the top edge after backing up, even if both wet the same area below. Photograph the location from a safe position and avoid adding sealant, bending a channel, or tightening a connection as a trial fix. For a wall-side problem, include a wider view showing the connection’s relationship to the wall and roof edge. Water traveling along that junction can obscure its origin, so identify what you actually saw rather than naming a failed seal. If Bloomcabin’s Lean-To Pergola is on your shortlist, request the connection details for the proposed installation and ask how joints remain accessible for assessment. A product page cannot establish the condition of an existing wall connection. The installer needs the relevant drawings and site observations to distinguish a drainage backup from water entering at the junction.
8. Look for additional water entering the system
Check whether water is arriving from somewhere other than the pergola roof. An upper roof, awning, or gutter that discharges onto or into the pergola can add runoff the system was not intended to receive. A recent change to a nearby downspout or roof edge may also alter where water lands. From a safe position, look at the point where that water enters and note whether it coincides with the first overflow. If the pergola channel stays relatively clear while water crosses the roof edge from outside, the issue may be incoming water rather than a blocked gutter.
Wind can also carry rain past a channel instead of into it. Record whether the problem happens only on one exposed side during gusts, or whether the channel visibly fills and overflows even in calmer conditions. Neither pattern proves a cause by itself, but comparing events can help separate wind-driven water from a restriction in the drainage path. Do not add nearby roof runoff to the system as a test or redirect it without checking the relevant instructions. The aim here is to identify all the water reaching the pergola, not to assume the pergola’s own gutter is responsible for every wet area.

9. Compare the evidence with documented system limits
Consider a possible capacity or operating-limit issue only after checking the channel, outlet, downspout, connections, and sources of extra runoff. If those paths appear clear but water still spills during heavy or sustained rain, the event may exceed what the particular drainage arrangement is designed to handle. A dramatic spill alone does not establish that the gutter is too small, and there is no single storm threshold that applies to every pergola. The roof configuration, installation, and weather conditions all matter.
Gather the exact model, installation information, roof position, event notes, and location of each observed spill. Ask the manufacturer or a qualified installer to compare them with the model-specific drainage diagram and weather-performance documents. For weather-performance questions about the Bloomcabin Bioclimatic Aluminum Pergola, request documentation for the configuration being considered rather than assuming another size or arrangement has identical limits. Ask what conditions any stated performance covers, which operating position applies, and whether connected runoff from other surfaces is included. A weather description such as “heavy rain” is useful context, but it cannot establish that a published numerical limit was exceeded. If an installer needs local rainfall records, ask which event data would help the assessment. Where documentation does not establish a capacity, leave that question open rather than treating a clear-looking gutter as proof that the system can handle every storm.
10. Match the response to the cause and verify the result
Choose a response based on the evidence. Follow the model’s instructions for safely accessible debris; ask a qualified person to assess a hidden outlet, blocked buried line, damaged joint, or displaced channel. Keep a record of the finding and the approved work so the next observation has a clear starting point. If replacement is being considered, use the Bloomcabin Pergola listing to begin a configuration-specific discussion, not as evidence that a new structure will solve the overflow. Ask how the proposed water route addresses the cause already identified: an inaccessible outlet, an unsuitable site connection, extra incoming runoff, or a documented performance limit. Changing the roof while retaining a blocked receiving drain would not address that restriction. Likewise, adding an enclosure does not by itself establish greater drainage capacity. Avoid drilling, adding a downspout, altering a channel, or applying sealant unless the responsible professional confirms an approved correction.
After an approved correction, observe the next ordinary rain from a safe place and record the same details as before. Check whether water now travels through the channel, outlet, downspout, and discharge point without escaping earlier in the route. Do not deliberately flood the roof to force a comparison. If the same first spill point returns, or a different point becomes the first one, update the sketch and event notes; the cause may not have been fully addressed. A repeatable record is more useful for further assessment than changing several components at once.
Frequently asked questions
Does an overflowing pergola gutter always mean it is clogged?
No. A blocked outlet or downspout is one possibility, but water can also escape at a joint, arrive from another roof, or exceed the drainage system’s documented limits. Trace where the water first leaves its route before deciding.
Can I use a garden hose to test the drainage?
Do not blast water into the roof or fill a channel to see what happens. Follow the model’s instructions; if they allow a controlled test, keep it safe and low-flow. Ask a qualified installer to test concealed routes or components.
Does an overflow prove the pergola roof is leaking?
No. Water crossing a channel’s edge points to a drainage-path issue or flow limit, but it does not by itself establish whether the roof is leaking. Check where the water first escapes and compare the conditions with the model-specific documentation.
Why does water spill from just one corner?
A local obstruction, restricted outlet, leaking joint, alignment issue, or downstream blockage could affect one corner. Wind or water arriving from another surface may also concentrate there. Note whether water backs up before it spills and where the first wet spot appears.
What information should I give an installer?
Provide the exact model and roof configuration if known, a sketch of the first overflow point and drainage route, and notes on the rain, wind, and roof position. Mention what you inspected or safely cleared, and share any photos or video taken from a safe place.
Treat an overflow as a water-path problem first: locate the earliest escape, then trace what happened upstream and downstream of that point. A note showing where the channel filled, whether water reached the downspout, and what the weather was doing can help distinguish an obstruction from a connection issue, extra runoff, or a possible design limit. If the route is hidden, a component appears displaced, or a clear system still overflows, use the exact model documents and a qualified assessment to decide what needs attention.
