
Electric Infrared Heaters Under a Pergola: What to Check
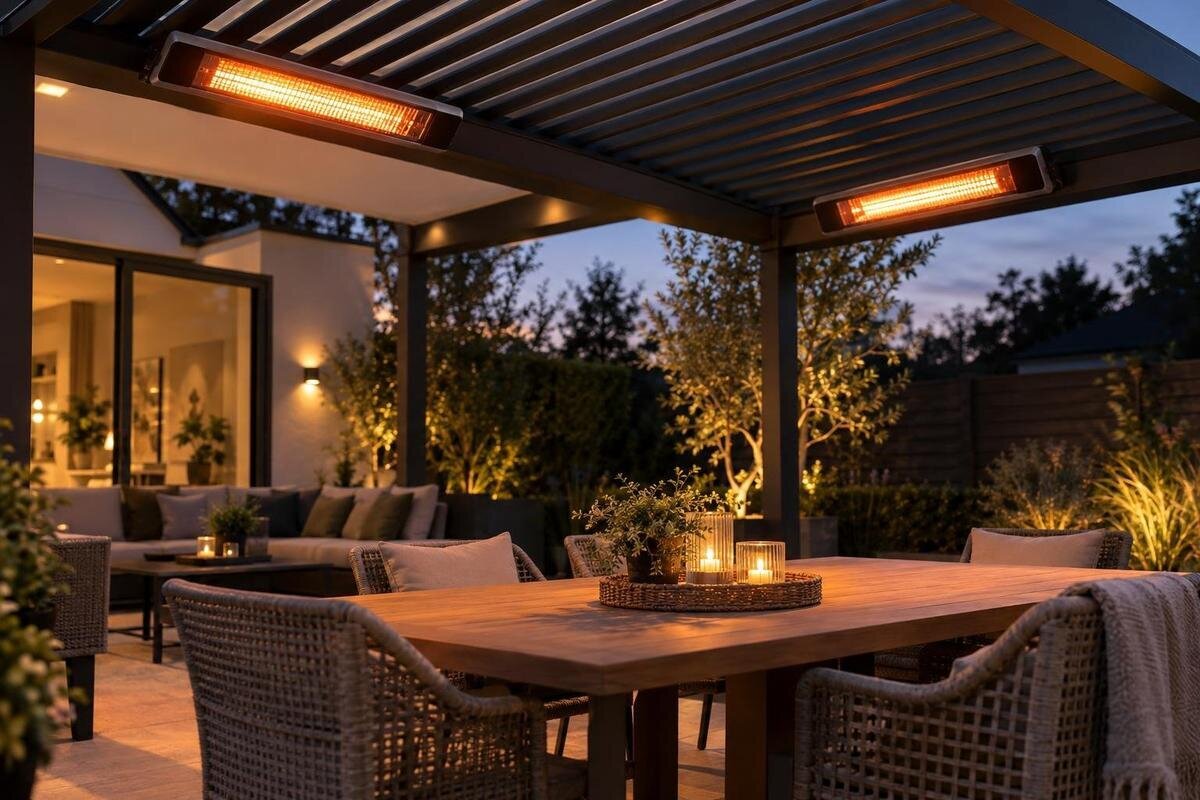
Pergola heating and electrical planning
An infrared heater can add warmth to a pergola seating area, but an overhead installation is suitable only when the exact heater and pergola instructions allow it. Before buying, confirm an approved mounting point, every required clearance, the weather exposure, and electrical requirements. A roof that provides shade does not by itself prove structural or electrical compatibility; treat the heater, frame, and installation as one coordinated project.

Identify the exact pergola and heater models
Start with model numbers, not appearance. Record the pergola's exact product name or model, version, roof type, installation configuration, and any screens or accessories added since purchase; then identify the heater and its specified bracket. Note changes made after installation, such as replacement roof parts, separately from the original setup. A photograph can help identify a frame, but it cannot confirm its capacity or an approved mounting point. If yours is wall-mounted, the Bloomcabin Lean-To Pergola listing can help identify the product family. Keep invoices, serial numbers or configuration details, and manuals together so a manufacturer or installer reviews the products you intend to use, rather than similar-looking models.
Request the complete installation and operating instructions for both products, not only short product summaries. Save diagrams that cover mounting, accessory use, clearances, weather exposure, and electrical connection, and check that each document applies to your selected size or version. If the pergola is already installed, confirm that the paperwork matches its original configuration and approved changes. If it was inherited or assembled by someone else, do not assume a product photo identifies it. A manual for a similar heater, an online answer for another frame, or a retailer's image is not a substitute. Note the revision date where available, list unanswered questions, and resolve them before ordering a bracket or planning electrical work.
Confirm that the frame permits the mounting point
The proposed mounting arrangement must be permitted by both products' instructions. Weight alone does not establish that a point can support a heater or its bracket; approval may be limited to a particular zone, mounting method, or accessory. Use a location and attachment method permitted by the pergola instructions, together with the bracket and orientation allowed by the heater instructions. Permission to attach something to one frame member does not mean every similar member qualifies. Do not treat decorative trim, a roof panel, gutter, slat, or arbitrary cross-member as approved support. When requesting mounting documentation for the Bloomcabin Pergola, identify the selected configuration and ask whether the documents address heater accessories.
Ask the pergola manufacturer or installer to identify the specific approved mounting zone, hardware, and restrictions, rather than saying only that the frame is strong enough. A qualified professional can assess the documented arrangement against the actual structure and site; product compatibility still needs confirmation from the relevant manufacturer. If the manuals show no approved heater location, do not create one by drilling, clamping, or attaching to a moving component. A separately supported heater may be an alternative, but it still needs its own manual, clearances, and outdoor-use review. An installation seen in a photo is not evidence that the same attachment is approved for your model. Resolve this before buying hardware, not as a late workaround.
Read the heater's clearance diagram closely
Clearance rules belong to the exact heater model. Locate every minimum distance the manufacturer gives, including distances above, below, beside, behind, or in front of the unit, and any separation from combustible materials or nearby surfaces specified in the manual. Check mounting height, allowed angle, and bracket orientation too; a diagram may measure from a particular part of the heater rather than from the beam. Keep access or operating-space requirements separate from heat clearances if the manufacturer lists both. If the manual gives different measurements for ceiling and wall mounting, use only those for the chosen orientation. Do not copy a number from another model, retailer chart, or online discussion.
Have the proposed mounting point shown on a measured sketch of the pergola, with beams, roof edges, walls, nearby equipment, and the furniture people actually use. Include the heater body and bracket in the drawing, not just the attachment point, so the installer can check each distance against the manual. The Lean-To Pergola product page lists a 97–258 sq ft range, but floor area does not show whether the required clearances fit beneath a particular beam. The review needs to account for the bracket's offset and any manufacturer-permitted adjustment in orientation. Measurements must use the reference points specified in the instructions. If the position cannot preserve required distances while leaving the roof and seating usable, revise the plan.
Account for roof movement and drainage
Some pergolas have components that open, tilt, slide, fold, or otherwise change position; others do not. For the exact structure, identify every roof or screen position allowed while the heater operates, then check whether the heater manual limits use beneath moving or overhead components. A Bloomcabin Bioclimatic Aluminum Pergola listing identifies a product family, but its name alone does not establish which roof positions, if any, are compatible with a specific heater. Consider the complete movement path, including the space occupied by the heater and bracket. If multiple positions are permitted, check each one rather than assuming only fully open or fully closed matters. Do not assume one product's control will stop another or prevent a collision.
Look beyond the heater body to roof runoff and drainage. Opening or closing a roof may change where water falls; gutter outlets, drips from panel edges, and wind-blown moisture can affect the actual mounting area. Compare those conditions with the heater's stated limits and the electrical connection requirements, including the position of any connection point. A heater under a roof is not automatically protected from water, and a pergola's drainage design does not establish an acceptable wet location for electrical equipment. Ask the pergola supplier to clarify relevant drainage paths and the heater maker to address exposure if the exact arrangement is not described. Check whether a moving screen or shade could enter the same area.

Match the outdoor rating to real exposure
An open-sided pergola is still outdoors. Wind-driven rain, splashing, dust, and moisture can reach an overhead heater even with the roof closed; the actual exposure depends on the site. Confirm that the exact heater is intended for the conditions where it will operate. If an outdoor or ingress-protection rating is shown, read it with the manufacturer's explanation of limits, mounting position, connections, and exposure. A rating is not a blanket approval for every weather condition. When planning a setup around the Bloomcabin Pergola product page, include the proposed location and surrounding conditions in your inquiry, rather than asking only whether a heater is suitable for that product name. Reassess exposure if screens or panels later change how enclosed the area is.
Describe the site in practical terms when asking: whether the sides are open or screened, how much wind-driven rain reaches the area, where splashing may come from, and whether water can collect or run from the roof. Also separate operation from storage. A manual may distinguish whether the heater can run in particular weather from whether it may remain outdoors between uses or needs a specified cover or storage location. Do not assume an ordinary furniture cover is suitable for warm equipment, or that switching the heater off removes its weather limits. Do not add an enclosure, fabric panel, or improvised shield unless the relevant manufacturers approve it; added surfaces can change required clearances.
Plan the electrical supply with a qualified electrician
Electrical planning starts with the exact heater nameplate and installation instructions. Record the stated voltage, power, connection method, circuit requirements, and any control or disconnect provisions, but leave conductor sizing, circuit design, and connection work to a qualified electrician. Do not assume a nearby receptacle is suitable because the plug fits, or that an existing lighting circuit can accept another appliance. The electrician can assess the selected heater alongside other loads and determine an appropriate supply for the site. Share which other equipment may run at the same time so the review reflects normal use. If the manual requires a particular connection or does not permit the supply you have, settle that before ordering rather than adapting the unit or relying on an unapproved extension.
Give the electrician the heater manual, pergola documents, planned location, and details of existing equipment before a quote is finalized. Ask the professional to confirm whether the proposed supply, outdoor connection, required protection, controls, and cable route suit that exact product and installation. The answer may depend on details that are not visible in a catalog page, so do not plan from a generic wattage chart alone. Avoid opening a junction box, changing a plug, extending a circuit, or concealing a cord yourself. If a heater is plug-in, still verify the manufacturer's approved outdoor connection method and any limits on where the receptacle may be located. Ask whether the quote includes the required connection work and approved control equipment.
Coordinate controls and cable routes
Controls and other powered equipment need coordination too. If the pergola includes a motor, lighting, sensors, or other accessories, list the exact products and how they are intended to operate together. Do not assume a heater can share a controller, timer, smart-home switch, or circuit with a roof motor or lights just because all are electric. The heater manufacturer must allow the control method, and an electrician should review simultaneous use and the supply. Decide who needs to operate each control and whether it can be reached without leaning into the heater's required clearance or crossing a wet or busy route. Confirm what happens if someone operates the roof while the heater is running; do not presume an interlock is included.
Have the installer review the wiring route as carefully as the connection. Wiring and controls must not interfere with roof movement, water drainage, removable panels, or access needed for inspection. The route should follow both manuals without undocumented frame modifications. If a powered roof system is part of your project, give its exact instructions to the electrician alongside the heater's. When considering the Bioclimatic Aluminum Pergola product page, request a configuration-specific list of included and optional powered accessories so the electrical review covers what you will actually order. Confirm cable routes before scheduling work, including any points where movement or heat could affect them and how service access will be maintained.
Separate heater coverage from pergola floor area
Assess the heater's stated coverage separately from the pergola's floor area. Use the heater maker's information for the precise model, including its specified mounting configuration and the conditions behind any coverage claim. Do not assume a general patio description means the result will feel uniform at every seat. For a project involving the wall-mounted pergola listing, describe the seating area's relationship to the house wall and open sides when asking the heater supplier about expected performance. Include typical wind exposure, distances, and occupant positions. Ask for model-specific guidance that matches how the space is used, especially if the published coverage information assumes more shelter than your pergola provides.
Think through normal use without overriding clearance rules: where people sit for most of the evening, whether chairs move, and whether a dining table, grill, or pass-through will occupy the same area. Compare that pattern with the heater maker's published coverage and permitted orientation. Do not compensate for a chilly seat by lowering or tilting the unit beyond its instructions, adding reflective surfaces, or installing another heater without reassessing clearances and circuit capacity. If the manual does not explain whether the proposed arrangement meets expectations, ask the supplier for a model-specific answer. Missing heater data cannot be filled in by a pergola area figure, and a coverage claim is not a promise of uniform air temperature.

Request model-specific answers before you buy
Before approving a purchase, request a written compatibility response tied to exact model numbers and the proposed mounting point. It should identify the heater bracket and orientation, pergola attachment location, applicable clearance diagram, outdoor-use conditions, and any restrictions on roof position. Ask which manuals or accessory instructions support each answer, and whether the response applies to every size and configuration being considered. If you are comparing the Bloomcabin Pergola listing with another structure, request separate answers for each option so you can see whether their documented mounting arrangements differ. Save the responses with the quotes and manuals, and make sure any restrictions are reflected in the proposed equipment and installation scope.
Check the quote for what is actually included. The heater, approved bracket, controls, electrical work, and any structural review should be named clearly rather than blurred into a vague allowance. Ask the heater maker to answer equipment-use questions, the pergola maker or installer to address the frame and mounting point, and a qualified electrician to assess the supply and connection. If information is missing, identify who will obtain it before purchase; a sales estimate is not technical approval. This makes alternatives easier to compare because each proposal names the equipment and assumptions instead of relying on phrases such as outdoor ready or fits most pergolas. Confirm whether the quoted plan will be checked against the structure on site.
Keep the approved plan for installation and later changes
Before installation begins, have the installer work from one confirmed plan that identifies the exact equipment, approved support point, heater orientation, clearance measurements, roof positions, exposure, and electrical approach. The plan should match the pergola on site, not a brochure image or an older drawing; note the specific accessories and mounting hardware as well. If a beam, roof component, furniture arrangement, or cable route changes, have the relevant professional revisit the affected approval instead of assuming earlier measurements still apply. Keep the final plan and written manufacturer answers with the product manuals, and date the documents so everyone is checking the same agreed configuration.
At handoff, make sure the people using the space know the heater's controls, operating limits, and care instructions from its manual. Keep required clearances free of movable items, and check that ordinary roof movement or drainage does not put the equipment outside its documented conditions. After storms, repairs, or changes to screens, furniture, or wiring, compare the setup with the approved plan. If the mount loosens, a component is damaged, water reaches an area the manual excludes, or the intended configuration changes, stop relying on the previous approval and arrange a review before further use. Keep manuals accessible, and record any service or maintenance change that affects the mounting or wiring.
Frequently asked questions
Does a pergola roof make any outdoor heater suitable?
No. A roof may reduce direct exposure, but open sides, wind-driven rain, roof runoff, and splashing can still matter. Use the exact heater's outdoor-use instructions and rating for the actual location; do not infer suitability from the pergola alone.
Can I attach a heater to any pergola beam?
No. The pergola instructions must permit the specific mounting point and method, and the heater instructions must allow its bracket and orientation. If either manual is unclear, get manufacturer guidance and a qualified professional's review before proceeding.
How do I know what clearances to leave?
Use the clearance diagram and measurements in the exact heater manual, for the permitted mounting orientation. Check every specified direction and nearby surface. There is no universal clearance number that applies to every heater.
Can the heater share a circuit or control with pergola lights or a motor?
Do not assume so. Give a qualified electrician the manuals and details for all equipment that may run at the same time. The heater maker must allow the control method, and the electrician should assess the supply for the actual setup.
Is an outdoor-rated label enough to settle the question?
No. Check what exposure the exact rating and manual allow, including the specified mounting position and electrical connection. If the instructions do not address the conditions at your pergola, ask the manufacturer for guidance tied to that model.
A suitable heater setup depends on more than fitting beneath the pergola roof. The documents need to support the precise heater model, mounting point, clearances across permitted roof positions, and actual weather exposure, with the electrical supply reviewed for the selected equipment. If any of those checks remains unresolved, pause the purchase or installation. Choose an arrangement that preserves the pergola's normal use without relying on an improvised attachment or an assumed weather rating.
