
Installing a Pergola on Composite or Wood Decking
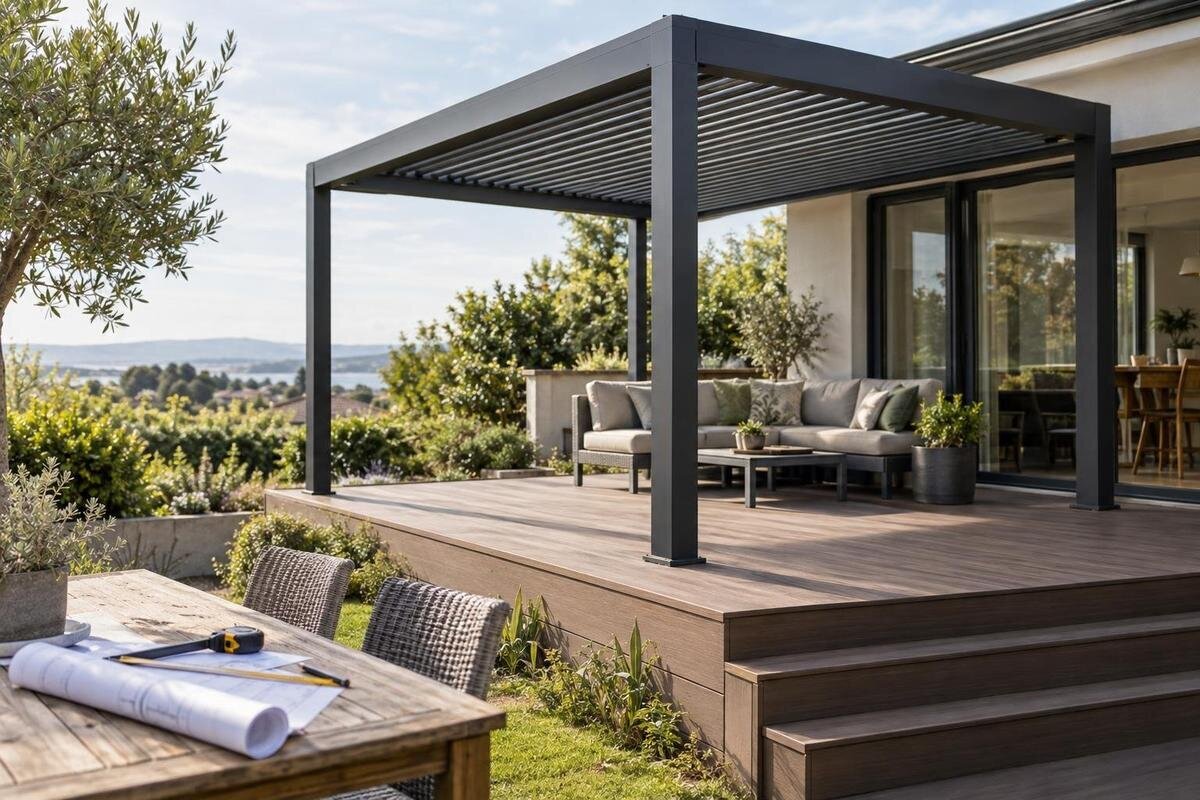
Pergola installation
Composite or wood decking can look like a ready-made base for a pergola, but the walking surface is only one layer of the structure. A pergola’s posts need to transfer forces through approved connections into framing, supports, foundations, or another verified substrate—not merely into finish boards. The practical work is to locate that load-bearing structure, align it with the chosen model’s approved attachment points, and arrange access without weakening the deck.

Why decking boards cannot be assumed to support a pergola
Composite boards and timber planks are finish surfaces, not automatic post anchors. They may feel solid underfoot while joists, beams, posts, and connections beneath them do the structural work. Deck screws or hidden clips normally secure the walking surface to its substructure; they do not, by themselves, prove that a post base can be attached there. Clamping a post to a composite board may conflict with how that board is supported or allowed to move. Timber can split, loosen, or deteriorate around a fastener. Treat the board as a surface to pass through or finish around unless the selected pergola’s approved detail explicitly gives it a structural role. Surface appearance, board thickness, or the fact that a deck carries people does not certify this different connection.
A pergola transfers forces through its posts, including sideways forces and uplift as well as downward load. The complete route from post to ground or other support must suit the model and the site. A longer screw, larger washer, or fastener driven through several boards does not automatically establish that route. Nor does a deck that feels stiff underfoot prove that its framing was planned for this attachment. The first question is what lies beneath each proposed post location and how those members connect to the rest of the deck or building.
Trace the load path from each post to its support
Sketch the assembly from top to bottom: pergola post, base or connector, approved fasteners, deck framing, supporting beam or deck posts, and the foundation or other structure carrying those supports. Decks are built in different ways. Joists may stop at a beam, run to a house-side ledger, or include cantilevered sections. A raised deck may pass loads to the house or tall deck posts, while a ground-level deck may use another support arrangement. A post over a board could sit between joists, near an edge, or over a member that does not continue to a support. The sketch helps identify questions; it is not a substitute for a structural assessment or anchoring design.
Keep separate support systems distinct. A wall-mounted unit may have a building connection as well as deck-side posts; the wall and deck each need the connection specified for that model. A freestanding unit relies on its planned post locations and supports. Do not assume that an existing ledger, rim joist, railing, or fascia can accept a new pergola connection just because it is convenient to reach. For Bloomcabin Lean-To Pergola, use the listed model name when requesting installation and anchoring drawings, then have the proposed deck connection compared with the actual site. A product label alone does not confirm deck compatibility.
Locate the framing beneath the deck surface
Look for the deck’s original plans, invoices, inspection records, or photographs taken during construction. A view from below may show joist direction, beams, posts, ledgers, blocking, and repairs that the top surface conceals. Record what can be identified, but do not infer member size, condition, or capacity from appearance alone. If the underside is boxed in, note the access panels, deck height, and locations where a qualified installer could inspect it. A builder or structural professional can help interpret incomplete records and determine whether the frame matches the site today.
Mark the proposed post centers from the pergola layout, then transfer them to the underside plan. Board seams, screw lines, and clip patterns can hint at joist spacing, but they are not reliable proof of a suitable support. Check whether a beam, post, ledger, edge, or opening changes the framing near each point. Avoid exploratory drilling or cutting until the board-fastening method and location of concealed services are known. Photograph the full deck and close views, noting which direction each photo faces. When assessing Bloomcabin Pergola, request a dimensioned layout for the selected configuration so the reviewer can compare its post positions with the framing you have documented.
Composite decking needs a separate substructure check
Composite describes the visible decking material, not the full deck structure. Boards may sit on different types of substructure and use different clips, screws, gaps, and edge details. Consult the decking manufacturer’s instructions to understand where boards can be removed, what clearances need to remain, and how cut edges or replacement sections should be treated. The surface material does not tell you whether a post can be attached to it. Even when a board can be drilled, the approved pergola connection may need to bypass it and engage framing below. Composite products and fixing systems are not interchangeable, so identify the one actually installed.
Check whether a proposed detail would pin a board designed to move, compress an unsupported area, or obstruct access to its fasteners. Do not assume a heavier-looking board is structural or that a hidden clip is suitable for a post connection. Have the installer coordinate the pergola anchor detail with the exact decking system and its support layout. If you are considering Bloomcabin Bioclimatic Aluminum Pergola, provide the reviewer with both its installation documents and the decking instructions. Ask how the proposed base will meet the finished surface without restricting required board movement, and whether any surrounding boards would need to remain removable.

Inspect a wood deck and its supporting frame
With wood decking, inspect both the surface and the structure below it. Look for soft or discolored areas, splits, loose boards, water staining, corroded or missing connectors, visible movement, and previous patches around likely post locations. These are reasons to investigate, not a way to measure capacity; a clean-looking joist can still be unsuitable for a new connection. Check whether deck posts and beams bear where records indicate and whether the frame has been altered. Look around stair openings, cutouts, and places where water may collect. Deterioration near the deck perimeter also matters if the proposed layout places posts close to an edge.
Do not treat the deck’s original purpose as proof that it can accept a different concentrated load. Its framing and connections were selected for a particular assembly, and a pergola adds another system with its own anchoring requirements. A walk-around cannot verify the complete load path, fastener embedment, or hidden deterioration. Have a qualified deck contractor or structural professional inspect the frame where needed and compare it with model-specific anchoring requirements. For the Bloomcabin Pergola model, provide the installation documentation alongside records of deck repairs. Ask whether repaired or replaced members near the proposed posts need closer inspection before the attachment design is finalized.
Match pergola post locations to approved attachment points
Ask for the chosen pergola’s approved layout and anchoring detail before cutting boards or ordering brackets. Confirm the post centerlines, base or plate footprint, permitted anchor type and location, and any required connection to supports using the manufacturer’s documents, not a similar-looking product photo. Put those locations on a measured deck plan that also shows joists, beams, posts, edges, stairs, and openings. Check whether installers will have room to reach fasteners in the specified order. A layout that fits on paper may still be difficult to install if a tool cannot reach the connection. A marked-up plan helps identify conflicts but does not authorize a change to the design.
If a base falls between suitable framing members or too close to an edge, do not move the post, angle a fastener, bridge across boards, or substitute a bracket on your own. Changes can alter the intended connection and leave the load path unresolved. Ask the manufacturer or a qualified design professional whether a documented alternate arrangement is allowed, or whether the framing needs a designed modification. For the Bloomcabin lean-to model, request drawings tied to that exact model before mapping openings or fixing points; a general layout may not show the approved deck-side attachment.
Plan deck-board removal and future access
Plan how installers will see and reach each approved fixing point. Depending on the deck, that may mean access from below, lifting a removable board, or making a planned opening. A board that appears easy to lift may be clipped, screwed, or trapped by trim, so do not guess at its fixing method. Identify lighting, wiring, drainage parts, irrigation, and other concealed services before drilling or cutting; use an appropriate qualified trade if their location or safe handling is uncertain. Agree on who is responsible for locating services and restoring the opening. Coordinate the sequence with the deck installer if removal could affect neighboring boards or trim.
Access matters after installation, too. Leave a practical way to inspect bases and connections if the approved design requires it, and avoid hiding fasteners behind permanent trim without an agreed maintenance plan. Refit or replace decking in line with its manufacturer’s instructions for support, spacing, drainage, and movement. An opening around a post should not trap water or leave an unsupported board edge. When reviewing the Bloomcabin bioclimatic aluminum model, ask which connections need to remain accessible under its installation and maintenance instructions. Record how the surrounding boards or trim can be removed later, including any concealed fasteners that would otherwise be difficult to locate.
Compare deck attachment, reinforcement, and independent support
A site assessment may identify more than one route, but each must be allowed by the chosen pergola design and suit the deck’s construction. One possibility is an approved connection into existing framing. Another is designed reinforcement beneath the deck, with added members transferring loads to suitable supports. Neither option is simply a matter of adding screws or placing a board between joists. A qualified professional must determine the connection and assess how the supporting members and their connections carry the resulting forces. Ask for the design to show the whole route, not just the post base or the new piece of framing.
A separate foundation may be considered where the pergola model and site permit posts to bear independently of the deck. It is not a universal shortcut: post positions, ground conditions, concealed utilities, deck height, surface drainage, and the approved pergola arrangement all matter. Passing a post through a deck or placing support beside it can affect boards, framing, water flow, and access, so those details need coordination. If considering a Bloomcabin Pergola for this project, ask whether its model documents allow the proposed support arrangement. Have the site reviewer also address the junction between the independently supported post and the deck surface. Do not select footing dimensions from a rule of thumb or a drawing for another property.

Check site constraints around the deck
Check the whole work area, not only the proposed base locations. Deck edges, cantilevers, stairs, railings, built-in benches, planters, drainage paths, door swings, and nearby walls can limit where posts or supports fit. Underside clearance affects whether a connection can be installed and inspected. Existing slopes or changes in deck level can also make a standard layout unsuitable without a model-approved arrangement. Note these constraints on the site plan and photograph them before requesting a proposal. Include roof overhangs and nearby openings if they could affect placement or access, so the installer is not assuming space that is unavailable.
Local wind, snow, exposure, and other site conditions can influence the anchoring design, but no universal deck-fastening detail answers those questions. Consider the pergola’s model documents together with a site-specific review. If the deck is attached to a house, the condition and support of the building-side connection may also matter; do not count a wall or ledger as an anchor without confirmation. Ask which professional is responsible for evaluating the structure, and check with the relevant local authority or property association about any approvals that may apply to your project.
Prepare a useful site assessment before installation
Make a compact assessment packet: the pergola model and available installation drawings; a top-down deck sketch with proposed post centers; photos from above and below; records of deck construction or repairs; the decking brand and board system, if known; and notes about concealed services, drainage, access, and visible damage. Label photos so the reviewer can match each view to the plan. If plans are missing, say so rather than guessing at joist locations. Clear information helps an installer or structural professional identify what must be opened or measured before making a final anchoring decision.
Ask for specific written answers: which approved connection is intended; what supports each post; whether reinforcement or independent support is required; who verifies hidden framing; how boards will be removed and restored; and how the finished installation will preserve movement, drainage, and inspection access. Clarify what must be confirmed before work begins and who is responsible for reviewing design changes. For a proposal involving the Bloomcabin wall-mounted pergola, make sure the documents cover both the building connection and the deck-side supports. Keep the reviewed drawing version, assessment, and any revised layout together so the installation crew can identify the agreed design rather than work from an earlier plan.
Frequently asked questions
Can I bolt pergola posts straight through composite deck boards?
Only if the approved anchoring detail treats the boards as a pass-through surface and specifies a structural connection below. A fastener through composite decking is not verified just because it reaches an unidentified member. Confirm how the board is supported and how the anchor reaches suitable framing or another approved support.
Does a thicker wood deck board make the installation safer?
Not by itself. Board thickness describes the walking surface, not the capacity of the joists, beams, posts, connectors, or foundation. Even sound timber may not be an approved anchor point. The review needs to trace each pergola post’s load through the frame to verified supports.
What if a proposed post falls between joists?
Pause rather than shifting the post or adding an improvised crosspiece. The model’s approved layout and anchoring details determine whether a post can be repositioned, the framing can be redesigned, or another support is needed. Have a qualified professional document and assess the proposed solution.
Can the installer remove deck boards after the pergola is assembled?
Possibly, but access is easier to plan before installation. Boards may be clipped, screwed, or trapped by trim, and the pergola can limit access to fasteners. Agree on the work sequence, service checks, and how boards will be restored before the crew begins.
Are separate footings required for every pergola on a deck?
There is no universal answer. Some model-approved designs may connect to verified deck framing; other sites may need independent support. The pergola documentation and site assessment determine the suitable approach. Do not choose footing dimensions from a rule of thumb or a plan for another property.
Composite and wood boards tell you what the walking surface is made of; they do not tell you where a pergola can be anchored. A reliable plan begins with the chosen model’s approved connection details, traces each post’s load into verified framing or another suitable support, and accounts for access and deck movement. If those parts cannot be seen or confirmed, pause the layout until a qualified installer or structural professional assesses them. The result may be a connection to existing framing, designed reinforcement, independent support, or a different placement—the right choice depends on both the pergola and the deck as built.
