
Keeping a Pergola Breezy While Adding Privacy
Pergola planning guide
Adding privacy to a pergola does not require screening every side. The useful starting point is the sightline you want to interrupt and the way air currently moves through the space. Place screening where it blocks a real view, leave other edges open where they can preserve a breeze, and check the arrangement at the seats—not just on a plan. The result depends on surrounding buildings, wind, and the exact accessory approved for the pergola model.

Privacy and airflow are separate design questions
Privacy and airflow are related design goals, but they answer different questions. A screen changes what can be seen through or around a pergola; airflow depends on wind direction, the size and location of openings, and obstacles beyond the frame. A solid panel can interrupt a neighbor’s view from one side and also slow air arriving from that direction. Closing several sides may reduce exposure to view while limiting the routes air can take. An open roof does not automatically keep the occupied zone breezy: air moving above the roof and air passing through the seating area are separate conditions. Likewise, open sides on a drawing do not guarantee a noticeable breeze at every seat, especially when a nearby wall or fence shields the space.
Write down the two outcomes separately before choosing a screen. For privacy, note who can see into the pergola, from where, and whether the view reaches a seat, dining table, or circulation area. For airflow, note the direction air usually approaches during the hours you use the space and which edge it could leave from. This turns a broad privacy request into a smaller question: which line of sight actually needs to be interrupted? It also prevents a common overcorrection—adding a barrier to every side when one carefully placed screen, or a small seating adjustment, may address the real exposure. Treat the result as site-specific because weather and nearby structures can change how the space feels.
Map views from seats and nearby windows
Start at the places where someone might look in, not at the pergola posts. Check views from a neighboring patio, a sidewalk or path, and nearby windows from a place where you can observe without entering someone else’s property. Then sit in each regular seat and stand where people will gather around a table. A screen that hides someone seated can leave a standing person visible, while a view from a higher window may pass above it. Include the approach to the space, not just the center: guests may pause at a gate, door, or walkway. Record only viewpoints that matter for actual use; trying to block every imaginable angle can close more sides than privacy requires.
On a simple top-down sketch, mark seats, the pergola edge, the observer’s position, and a line between each relevant viewpoint and the area you want hidden. Show the proposed screen as a band, then check whether that line passes through it or goes around an end. The listed floor area can help you compare overall scale, but it cannot resolve these sightlines: the Bloomcabin Pergola is listed at 97–258 sq ft, and that range alone does not show where a neighbor’s view crosses your seats. Keep the drawing proportional enough to compare positions; exact drafting tools are unnecessary. For an overlooking window, add a side-view sketch showing the window, screen, and seated person. Together, the drawings make the intended coverage easier to explain to a supplier or installer.
Observe air at seating height
Observe air where people will sit, not only at a distant weather station or at the roofline. Spend time in the space on more than one occasion when you would normally use it, and note which way leaves or light objects move along each edge. A light ribbon held briefly at seat height can show direction at that moment; it is not a wind-speed reading or a promise about future conditions. Record whether air crosses the proposed seating zone, runs parallel to it, or is already blocked by a wall or fence. Repeat the observation rather than treating one calm or gusty moment as the site’s usual pattern. A visibly open side can still sit outside the useful path.
Use those observations to identify an approach side and a possible exit side for the breeze. Draw arrows across the seating area and mark where a proposed screen would cross them. If the privacy problem is on the approach side, compare screening only the exposed seats with screening the entire opening. If air runs along an edge, check whether the chairs sit in that path or farther inside a sheltered pocket. When considering the Bloomcabin Bioclimatic Aluminum Pergola, use the same site sketch to explain which side needs privacy and which openings you want to preserve. Record changing directions separately rather than combining them into one supposedly reliable route; an arrangement that works in one wind direction may feel different in another.
Choosing a screen position for the key sightline
Once you know the view, begin with the smallest part of the perimeter that can interrupt it. A single screen positioned between the viewer and the seats may preserve more open edge than panels around several sides. In a plan, compare positions along the boundary and slightly offset from it; the useful location is the one that blocks the important line without cutting off the air route. A screen that starts too late or stops too early may leave a diagonal view around a corner. Check the endpoints from both the observer’s and occupant’s positions, rather than assuming a panel that looks well placed from inside is private from outside. More coverage is not automatically a better solution.
Existing walls count as boundaries when you map airflow. In a wall-mounted arrangement, the house wall can affect air approaching from that edge, so do not treat every remaining side as equally open. The Bloomcabin Lean-To Pergola is identified as a wall-mounted model; for any such layout, assess the actual house wall and openings before deciding where a separate screen belongs. Keeping another side open may preserve a possible route, but the building, a fence, or local wind patterns can still alter it. If more than one viewpoint truly needs screening, compare an offset or narrower screen with a second barrier instead of assuming full enclosure is the only answer. Let observed use, not symmetry alone, decide which sides stay open.

Screen height, coverage, and openness
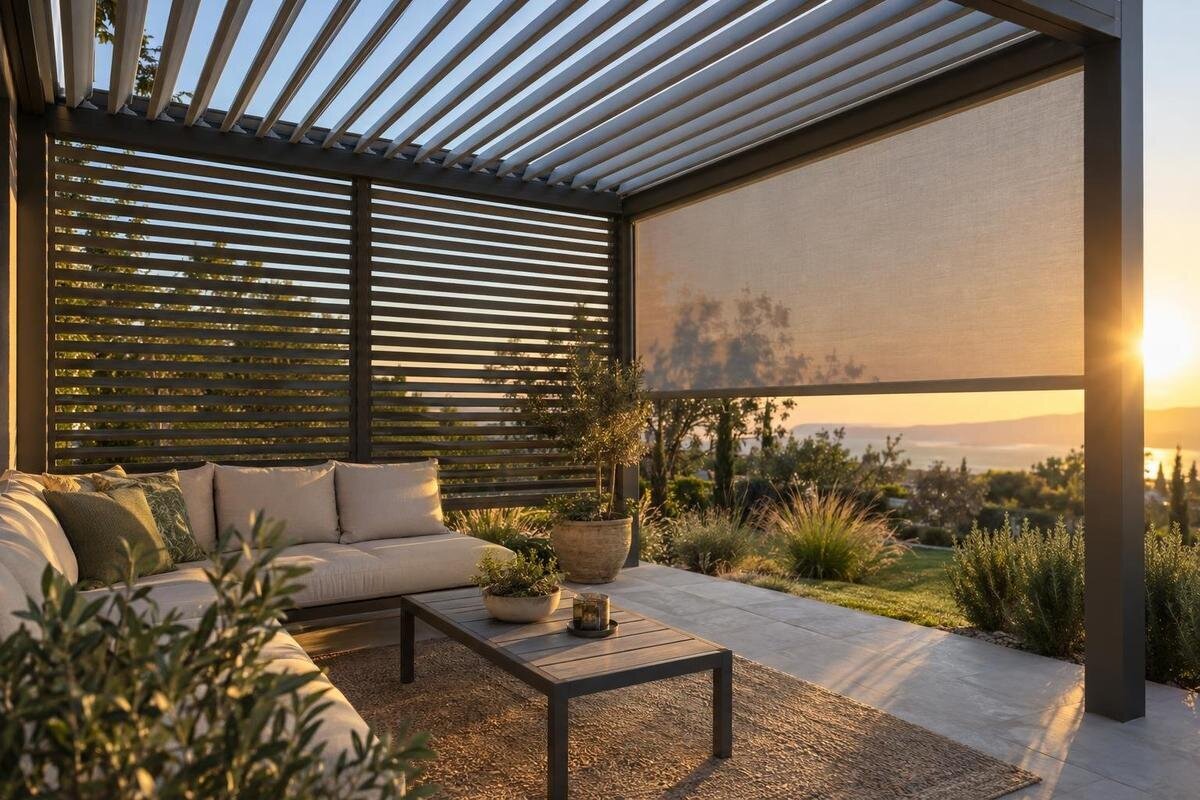
Screen height and openness affect what kind of view is interrupted and how much air a panel can pass. A low screen may hide a seated person from a nearby eye-level view but fail when someone stands or looks down from an upper window. A taller, less permeable surface may block more of the view while presenting a larger obstruction to moving air. An open-weave or perforated surface can allow some air through, but it may also leave outlines or movement visible; the result varies with viewing angle, distance, and the specific material. Do not assume a shade screen provides the visual privacy you want. If considering a sample, view it from approximately the same distance and angle as the person whose view you hope to block, not only from close range.
Judge width as well as height. The goal is to cover the line between a specific observer and the occupied area, not automatically to cover the full span or every upper and lower gap. If privacy is needed while entering or serving, the relevant zone may extend beyond one chair. For any proposed screen, request its actual dimensions and information about its openness rather than relying on a description such as “privacy fabric.” When discussing the bioclimatic aluminum pergola model, describe whether you need to conceal seated occupants, standing activity, or both. A material sample helps assess visibility through the surface, while the site sketch shows views around its edges. Neither test substitutes for the other.
A clear air route through the seating area
An air path needs more than an open-looking edge: think about where air enters, what it crosses, and where it can continue. For a breeze that usually crosses the pergola, keep the approach and exit sides from being sealed at the same time. Where air tends to follow one side rather than cross it, an opening opposite may not change the feel much. Place the intended route through the seated zone, not behind a storage bench or across an empty corner. This is a layout principle, not a guarantee; wind can shift, and nearby structures can create sheltered or irregular areas. If there is no consistent breeze to trace, openness preserves options but cannot promise comfort.
Draw arrows through the footprint and add the real furniture before settling on screen length. A large table, deep bench, cart, or planter can occupy space where you expected air to pass; a narrow gap between a seat and screen may also make the remaining opening awkward to use. Preserve a clear way to enter and move around the table, and avoid turning the route that should carry air into an enclosed pocket. If several people use the pergola, assess the layout with all seats occupied, because bodies and furniture change the usable space even though the outside perimeter stays the same. Check that open lane in normal daily use, not only in an empty structure.
Furniture placement can reduce the need for screening
Furniture can solve part of a privacy problem without adding more enclosure. Move regular chairs farther from the exposed edge, or place the table within the area already screened by a wall or approved panel. Chair orientation can change how exposed a person feels, but turning a seat does not by itself hide someone from an outside viewpoint. Check the table and the route to it, not just the most sheltered chair. A screen that hides one seat but leaves the main gathering area visible has not addressed the use you planned for. Try likely seating positions before deciding how much additional coverage is needed, and include the places people stand while talking or serving.
Keep seating clear of the opening you want to use as an air route. Allow for chairs pulled out from the table, not just tucked underneath it, and check where a serving cart or extra seat goes when guests arrive. For a wall-mounted Bloomcabin model, put the house wall, door access, table, and open edges on one plan. Try the table in more than one position and compare both the exposed seats and the space left beside the proposed screen. A layout that works for two people may become cramped when every chair is in use. Choose a position that remains practical during ordinary meals, rather than one that preserves an opening only when the pergola is empty.
Nearby walls, fences, and planting affect views and air
Air and views are affected by more than the pergola itself. A nearby building wall, solid fence, hedge, or outbuilding can affect or redirect air before it reaches the seating area; a screen added on the sheltered side may then do little for privacy but further reduce an already limited route. Plants can soften a view, but their density changes as they grow and with the seasons, so do not assume a newly planted boundary will provide immediate or year-round screening. Consider current conditions and the likely mature outline, and keep maintenance and access in mind. No single landscaping choice guarantees either privacy or a breeze.
Add these surroundings to the same sketch as the sightlines: the side of the house, fences, trees, doors, paths, and the places people approach from. Distinguish permanent barriers from seasonal planting and movable objects. When evaluating the regular Bloomcabin pergola model, include the space around the proposed footprint instead of drawing only the structure itself. A narrow passage between a fence and the pergola deserves its own airflow observation; do not assume it carries a breeze just because it is open. Also note where hedges need trimming or planters need watering so a privacy panel does not obstruct routine access. Revisit the observations when surrounding planting changes substantially, especially if a previously open edge becomes densely screened.
Check side-accessory compatibility for the exact model
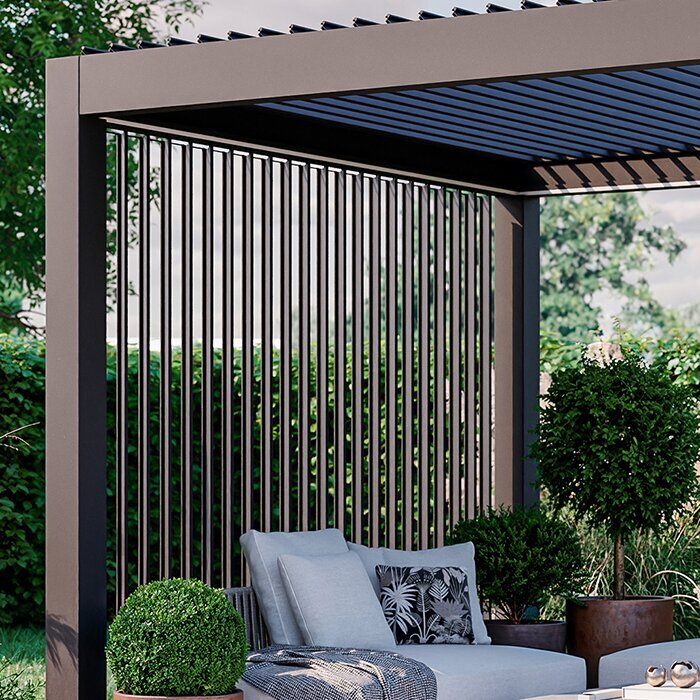
Before choosing a screen system, verify the exact pergola model and the positions where an accessory is approved. Ask whether the item is included or sold separately, which sides it can be fitted to, and whether its operating space and attachment requirements leave your intended air path and access usable. Do not assume a third-party shade or privacy product is compatible just because its size looks close or it can be fixed to a post. Use model-specific documentation or ask a qualified installer for the compatibility answer; do not drill, fasten, or modify a frame on the basis of appearance alone. Compatibility can depend on the exact model and configuration.
The available details for Bloomcabin's bioclimatic aluminum option identify the model but do not establish that a privacy screen is included or approved for it. Request confirmation that names the pergola and accessory together and shows the intended mounting position. If the accessory moves, ask where it rests when open and whether that position occupies another opening you intended to keep clear. Also clarify whether the proposed coverage is one panel or several components, since gaps between them may matter to your sightline plan. Keep the confirmed configuration with your sketch so the quotation and layout describe the same arrangement. An unresolved compatibility question should be settled before ordering a separate panel.
Test the sightline and airflow plan on site
Check the whole plan at the site before finalizing it. Mark the proposed screen’s endpoints on the ground, then sit in each intended seat and stand where people will gather. Ask another person to observe from an accessible, relevant outside viewpoint. Use the proposed height as well as the marked width when checking whether the sightline would pass through the screen or around it. For an upper-window view, refer to the side-view sketch rather than assuming ground-level coverage is enough. Then compare the proposed panel position with the airflow observations you recorded. This checks the geometry and likely obstruction; it does not reproduce how a finished screen will affect the breeze. Repeat the layout check with chairs pulled out and doors in normal use.
Record what the on-site check reveals: which seats would be hidden, which views remain, and which observed air routes the proposed panels would cross. If privacy and airflow conflict, change one variable at a time—a panel’s width, its position, or the table location—so you can tell which adjustment helps. Keep a second layout if your use changes between quiet meals and larger gatherings. When comparing Bloomcabin's lean-to option, bring the preferred sketch to the model inquiry and ask whether that side arrangement can be accommodated. After installation, observe the space under conditions similar to your original notes. That comparison can guide furniture adjustments without assuming that more screening is the answer to every remaining view.
Frequently asked questions
Can a pergola feel private without screening every side?
Often, yes. Identify the specific view you want to block, then position a screen between that viewpoint and the seating area. Keeping other edges open may preserve a path for air, but the result depends on wind direction and nearby buildings or fences.
Which side of a pergola should I screen?
Start with the view: note where the observer stands and which seats are visible. Then check which way air moves through the space at seating height. A screen can block a direct sightline, but placing it across the usual breeze may reduce the airflow you want to keep.
Will an open-weave screen keep a pergola breezy?
It may allow some air through, but the effect depends on the material and site conditions. Open-weave screening can also leave outlines or movement visible, so it may not provide the privacy you expect. Check a sample from the likely viewing distance and confirm the product’s compatibility.
Does an open roof guarantee airflow at the seats?
No. Air moving above a roof is different from a breeze passing through the occupied area. Side openings, wind direction, furniture, and nearby structures all affect the route. Observe air at seating height and plan the screens around what you find.
Are privacy screens included with, or compatible with, every pergola model?
The supplied model details do not establish that a screen is included or approved for a particular pergola. Check the exact model and proposed accessory with the manufacturer or a qualified installer. Do not assume a third-party screen fits just because it appears to match a post.
The best balance comes from screening a specific view while leaving a useful air route through the places people actually sit. A panel’s position and endpoints can matter as much as its overall size, and a small furniture adjustment may reduce the coverage needed. Use sightline sketches and observations at seating height to compare those choices. Aim for a pergola that feels private during your usual activities without enclosing sides that do not need protection.
