
A Minimalist Garden with a Pergola: Keeping the Design Coherent
Garden design
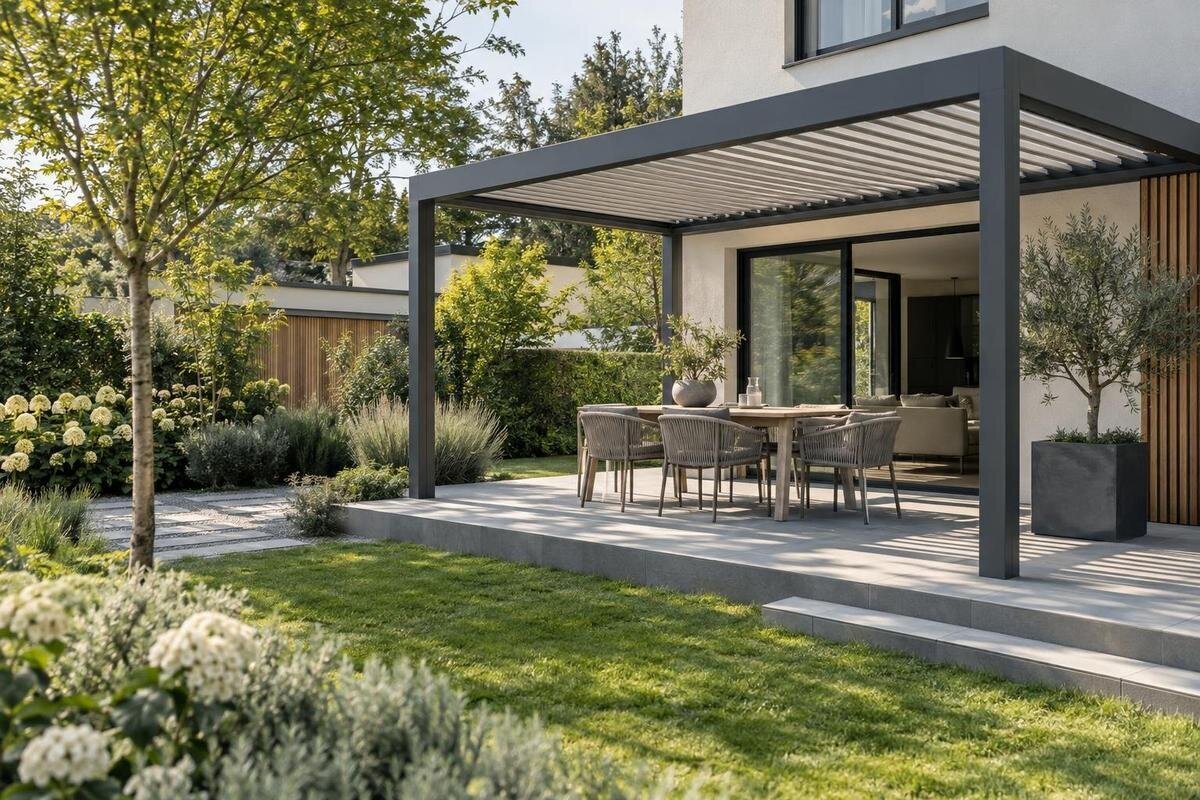
Minimalist garden design is not about removing every object; it is about making the relationships among the remaining elements easy to read. A pergola can give an outdoor room a clear center, but its paved area, planting, paths, and edges need to work with it. When those parts compete in direction, proportion, or material, even a simple structure can feel like an afterthought. This guide develops one coherent arrangement: a rectangular paved sitting area beside the house, a pergola positioned in relation to that building, a clear path into the open garden, and a restrained planted edge. Treat it as a way to test your own site, not as a fixed template. The useful decisions are the ones you can draw, measure, and verify before choosing products or setting out construction.
Before choosing a pergola 1
Define the garden’s main geometry before choosing the pergola
Begin with the activity the pergola is meant to frame: dining, seating, or another defined use. A garden can hold more than one activity, but the plan should make one of them the visual anchor. Record the furniture, likely number of users, how people enter, and what must remain accessible. This prevents a familiar mismatch: choosing an attractive footprint first, then squeezing chairs, a path, and planting around it. Write a one-sentence brief and mark fixed features—doors, steps, trees, or service covers—before placing the structure. Rank secondary uses so they do not block the main route.
For a working example, picture a rectangular paved area beside the house, with the pergola over its main seating zone. A clear route continues toward a lawn or another open part of the garden, while one planted edge frames the route without interrupting it. The rectangle is not a rule; the useful hierarchy is one principal shape, one legible route, and a quieter outer edge. Place a candidate such as the Bloomcabin Pergola within that composition, using its documented footprint. Leave the route outside the seating zone so people passing through do not have to weave between occupied chairs. This establishes the relationship between the outdoor room and the rest of the garden.
Place the pergola in relation to the house and garden route
Choose the main reference lines. On a patio beside the house, the wall, a door threshold, or an existing paved edge may set the direction; in a freestanding garden arrangement, a path or boundary may matter more. Select one dominant alignment and let secondary lines support it. A centered pergola can still look misplaced if its position ignores the route from the house. Draw fixed edges accurately, then compare the structure with the approach, doorway, and principal view instead of relying on a perspective image. If the house openings are offset, prioritize the route people use over assumed symmetry, and show both references so the decision is clear.
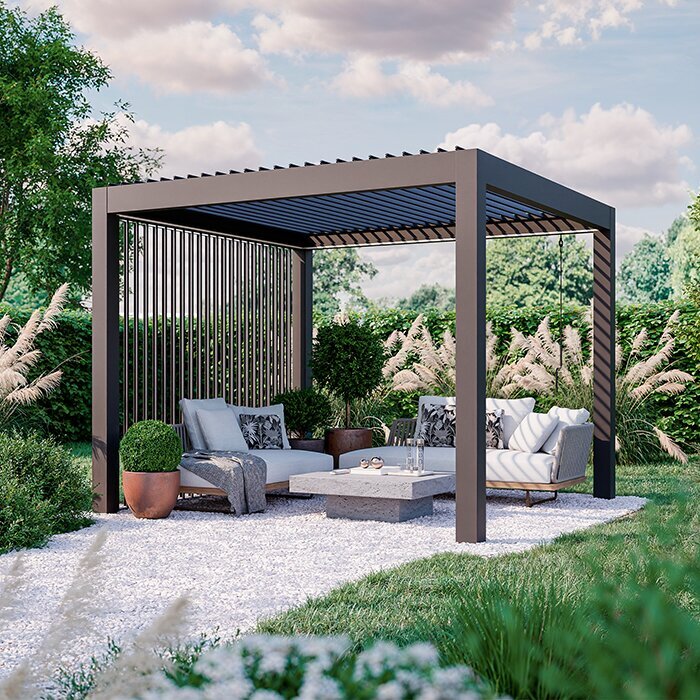
How the pergola meets the house changes the composition. A wall-mounted layout can read as an extension of the building, while a freestanding arrangement can sit in the garden as a separate room; neither is automatically more coherent. When considering the Lean-To Pergola from Bloomcabin, show the house elevation alongside the garden plan. Compare the proposed position with door and window openings, not just the wall’s overall width. An offset arrangement may preserve the main doorway as the focal point, while a centered arrangement may suit a more symmetrical facade. Check both from inside and along the outdoor approach. The technical requirements of the building connection need a separate review.
Before choosing a pergola 2
Fit the pergola footprint to furniture and circulation
Start with the usable area, not the product outline. Mark the space needed for the chosen furniture, including room to pull out a chair and walk around it, then compare that space with the pergola’s exact outside dimensions. Include the approach to the seating area and the swing or slide of nearby doors. A plan that measures only the table or the supports underestimates the space people occupy. Also draw the route behind chairs when they are in use and note equipment or storage that must remain reachable. If product dimensions are not confirmed, leave the model as a placeholder rather than tracing a precise edge from a photograph.
When reviewing a Bloomcabin Bioclimatic Aluminum Pergola, put confirmed product dimensions on the same scaled plan as furniture, clearances, and routes; do not infer fit from the model name or image. Test the arrangement on paper, then walk a temporary outline on site where practical. Look from the house and the garden entrance: the frame should define the use area without narrowing the route or taking too much of the open garden. Check its corners against the main paver lines, too. If the outline leaves an awkward strip or makes the structure feel detached, reconsider its position before adding extra edging or changing every surrounding element.
Use the paver layout to reinforce the pergola’s geometry
The paver layout should express the same geometry as the pergola rather than introduce an unrelated grid. Decide whether the joints or a border will align with the structure’s main edges, then show that choice on the plan. Perfect alignment is not required; clarity is. A centered paved area may help the structure feel settled, while a deliberate offset may preserve an existing route or planting strip. What weakens the composition is often an unexplained near-alignment that leaves narrow cuts or slivers around the perimeter. Carry the chosen direction into the path, or mark a clear break where the path turns, so small areas do not create competing patterns.
Before selecting a finished surface, draw the pergola footprint, confirmed support positions if available, and paver joints together. When comparing the Bloomcabin Pergola option with this layout, examine where each support would fall within the paving pattern. A support close to a joint or border may change how the surrounding cuts look, even when the overall rectangle seems well aligned. Show which paver edge is the fixed reference and where cut pieces will fall, especially at a doorway or planting bed. Ask a landscape or installation professional to resolve conflicts between the product requirements, paving layout, and site conditions. Avoid adding a decorative border solely to conceal an unresolved fit.

Before choosing a pergola 3
Make the paved-to-planting edge deliberate
The edge between the paved area and planting is one of the most visible details in a restrained garden. Decide whether the patio meets a continuous bed, a narrow margin, or a clear strip of lawn, and keep that choice consistent along the main sightline. A bed that stops and restarts without purpose can fragment a simple plan. A softer planting outline can still work within a crisp overall boundary when the transition is intentional. Treat the opening to the path as part of the edge design, rather than letting the bed narrow it by accident. If the property already has a strong boundary line, use it as a reference instead of adding another.
Show where the pavers finish, where soil begins, and how the route stays clear. A dimensioned plan helps avoid thin leftover pockets that are difficult to maintain or too small for the selected plants. In the house-side composition, plot the Bloomcabin Lean-To Pergola with the paved area and planting border to see whether the bed forms one continuous edge or breaks into isolated pockets around supports. Give any necessary break a clear purpose, such as access, rather than disguising it with an extra planter. Coordinate surface levels and water movement too; the paving-to-bed edge does not resolve drainage by itself. Have a qualified landscape or construction professional review site-specific levels and detailing.
Choose a small, coordinated material palette
Restraint comes from assigning each material a role, not from making everything identical. The pergola frame, paved surface, house, and boundary already create a small palette. Choose one as the dominant visual field, let another provide measured contrast, and use planting to soften meeting points. A close but unsuccessful color match can look accidental; a clear contrast can look deliberate when it is repeated elsewhere. Texture matters alongside color: a rough surface, smooth pavers, and a dark frame can compete even when their hues are similar. Compare actual samples beside the house and in garden light, because isolated swatches do not show how materials relate.
If the Bioclimatic Aluminum Pergola from Bloomcabin is on your shortlist, request information about available finishes and compare appropriate samples with materials already fixed on site. Do not make the frame an accent by default: decide whether it should blend with the house or provide a deliberate contrast. Keep recurring details consistent by repeating an edge treatment or color at meaningful thresholds instead of introducing new trim for every surface change. There is no fixed count of finishes, but each should meet a practical or visual need. View the frame sample, wall material, paving, and edging together, then remove choices that add another competing texture without improving the composition.
Before choosing a pergola 4
Resolve the junctions between the pergola, house, and hardscape
Draw the places where components meet at a useful scale. The pergola meets the paved area at its supports; the paved area meets the wall at a threshold; and the route meets the garden edge. These points may look minor on an early concept sketch, yet they determine whether lines finish cleanly or collide. Mark door openings, thresholds, confirmed support positions, edging, and access needs before finalizing the paver layout. Show where each material stops, which edge continues past another, and which joint remains visible. Avoid copying a generic detail from a photo: the actual junction depends on the selected product, the building, the ground, and the paving system.
For a scheme considering the wall-mounted Bloomcabin pergola option, treat the wall connection as both a visual line and a technical interface. Product documentation and a qualified installer must establish building compatibility and the required connection details and clearances. In the design drawing, distinguish the proposed alignment from the attachment detail awaiting professional review. Show nearby wall trim, thresholds, and changes in paving level so those relationships can be coordinated rather than addressed separately during installation. Also identify where drainage and weatherproofing details need review by the responsible professionals. A clean junction should look intentional, but its appearance is not evidence that the structural connection or water management has been resolved.
Use planting to frame the pergola without cluttering the plan
Planting in a minimalist composition works best when its outline is clear and its internal rhythm is deliberate. Reserve the bed area on the plan, then select plants according to documented mature dimensions and site requirements, including light, soil, and water needs. Repeating a smaller number of suitable forms can make a border read as one band, but repetition does not replace checking each plant’s requirements. Avoid placing unrelated specimens in every remaining gap; this can obscure the intended bed outline and compete with the pergola’s simple geometry. Decide which view the planting should frame and where it must stay low enough to preserve a clear view of the doorway or route. A considered mix of heights can add structure without interrupting movement.
In the example layout, keep the bed beside the route rather than wrapping planting around every support. For a scheme featuring the Bloomcabin bioclimatic pergola model, reserve any access space required by its documentation before allocating the remaining area to plants. Draw mature plant spreads, not just small circles representing nursery pots, to see where foliage will eventually meet the paving. Distinguish lower planting near the threshold from taller planting toward the garden boundary, and include pruning access so maintenance does not depend on stepping through a tightly planted strip. A planting schedule with positions, mature spread, and maintenance notes helps preserve the intended outline as the garden develops.

Before choosing a pergola 5
Keep furniture and lighting subordinate to the layout
Lighting and furniture can reinforce the plan or dilute it. Choose furniture that fits the measured use area, and keep its orientation consistent with the pergola or main paver lines unless a clear reason calls for a different angle. A dining set needs room around chairs and an unobstructed route; benches, planters, and side tables should not be added merely to fill corners. Open space is part of the composition. Assess the view from inside as well as from the garden so the pergola does not block an important window or doorway. Give storage and serving surfaces a defined role; loose objects accumulate visually when the layout has no place for them.
Plan visible lighting as a small, coordinated layer rather than a collection of unrelated fixtures. Mark likely locations and the task each one should support—an entrance, a route, or the seating area—then consider glare and visual clutter. Have a qualified professional determine electrical design and installation; a product image does not establish appropriate wiring or placement. A restrained number of fixture types, repeated where the same task recurs, is easier to integrate than a different style at every point. Keep accessories within the same material palette, and leave seasonal items out of the permanent composition unless they need a dedicated place.
Review the full garden plan at scale
Review the complete plan at scale before treating it as resolved. It should show the house, pergola dimensions confirmed from product information, paver limits and joints, doors, furniture, paths, bed outlines, and known site constraints. Add plant names, documented mature sizes, and requirements instead of a general label such as screening. Dimensioned landscape drawings make it easier to catch a narrowing path, an awkward paver remnant, or a bed that cannot accommodate the selected plants. Include relevant thresholds and existing edges, and note the source of each key dimension so assumptions are visible. Where heights or sightlines matter, add a simple section or viewpoint sketch alongside the plan. If product dimensions or site measurements are missing, mark them outstanding rather than estimating.
Then test the drawing against the experience of moving through the garden. Trace the route from the door to the seating and on to the open garden; check important views from indoors and compare the plan with conditions on site. A marked outline can reveal where a route feels cramped before the surface is installed, but it cannot replace a measured, coordinated plan. A few deliberate revisions—moving the path, changing a bed edge, or shifting the pergola after constraints are confirmed—are better than adding screens and objects to disguise a mismatch. Have the relevant design and installation professionals review the details they are responsible for. Coherence comes when each element appears to belong where it is, and the plan explains why.
Frequently asked questions
What makes a minimalist garden with a pergola feel coherent?
A clear hierarchy helps: one main outdoor room, a small material palette, and paths and planted edges that relate to the pergola. Minimalism does not require an empty garden. It means each element has a purpose and the layout avoids unnecessary visual breaks.
Should a pergola line up with the house?
Not always. Use the line that best organizes movement and views, whether that is a wall, doorway, existing paved edge, path, or boundary. Draw the openings and route before centering the structure. For a wall-mounted model, have its documented requirements and compatibility with the building confirmed.
How many materials should a minimalist patio use?
There is no fixed number. Give the frame, paved area, house, and boundary distinct roles, then add a material only when it serves a visual or practical purpose. Compare samples together in the garden; a small sample viewed alone will not show how colors and textures relate.
How do I keep planting from looking busy around a pergola?
Draw the bed outline first, then choose plants using their documented mature sizes and site requirements. Repeating suitable forms can give a border a steady rhythm. Keep routes and doorways clear as plants grow, and include pruning access in the plan.
Should I choose a freestanding or wall-mounted pergola?
Base the choice on the layout, the building, and the specific model’s documented requirements—not on appearance alone. A freestanding arrangement can sit within the garden, while a wall-mounted one relates directly to the house. Have a qualified professional confirm the building interface and required clearances.
The garden feels coherent when the pergola, paved area, route, and planting edges follow a clear order and the places they meet have been drawn deliberately. Restraint is not an empty plan; it is a plan in which materials and objects each have a reason to be there. Confirm dimensions, site constraints, and planting requirements before decisions become fixed, so the finished outdoor room reads as part of the garden rather than a separate purchase.
