
Using a Pergola as a Focal Point in a Long Garden
Garden design
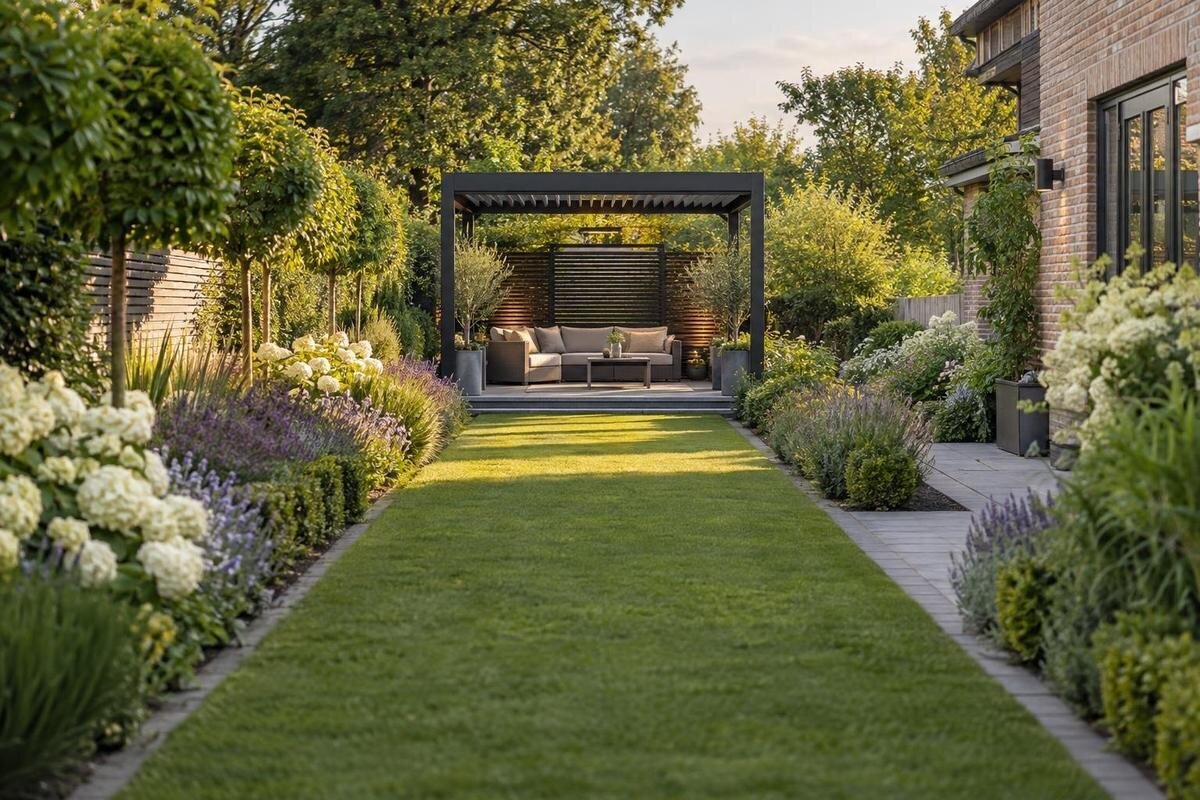
A long garden often draws the eye straight toward its far boundary. A pergola can give that view a clear destination when its position works with the approach path, sightlines, and planting depth—without making the garden feel like a corridor that simply stops at a frame.

Before you choose 1
Views from the house and garden entrances
Begin at the places where you see the garden most often: the kitchen sink, living-room window, back door, and any gate or path used on arrival. Draw a simple plan and mark where each view begins and ends. Long plots often read as a single corridor from the house, yet a slight turn in a fence, a mature tree, a neighboring wall, or a change in ground level can shift the real sightline. Mark those fixed features before placing a pergola symbol. The goal is not to force every view onto one centerline, but to learn which direction the eye naturally follows and where a visual pause would be useful. Note which view matters most; not every angle needs equal emphasis.
Then make a quick eye-level sketch or take photographs from two or three positions, rather than judging the layout only from above. A pergola can look well placed on a plan and still disappear behind a tree from the room where you want to enjoy the view. Note whether the frame should read as a clear outline, whether a glimpse through it matters, and what currently fills the far end. Record standing and seated viewpoints if both are part of everyday use. This gives you a visual brief before comparing products or moving plants: the landmark needs to work in a real view, not just in a top-down drawing.
Choose a position along the garden’s length
A pergola at the far end can act like a destination, but it is not the only way to create depth. Setting it a little forward of the boundary may leave a layer of planting or an open view behind it; placing it nearer the middle can divide one uninterrupted corridor into two readable scenes. Neither position is automatically better. Judge what you want the eye to meet first, whether the garden beyond remains visible, and whether the structure would hide a feature that currently gives the plot character. Even a modest shift along the garden’s length can change the composition and the way the route arrives.
Test at least three positions on paper: near the end, near the point where the view changes, and closer to the house. Use a scale drawing or a cutout based on the actual dimensions of the option you are considering, such as the Bloomcabin Pergola. Include the surrounding paths and beds rather than comparing isolated rectangles. For each position, note how much garden remains in front of and behind the structure. A central position may create two useful areas, but it can also interrupt an otherwise continuous lawn. Favor the arrangement that gives each remaining area a purpose and provides a clear arrival point.
Before you choose 2
Size the pergola against the available width
Measure the usable garden width where the pergola might sit, including any taper caused by the boundaries, planting beds, steps, or a path that must stay open. Mark the structure’s actual outside dimensions and post locations; do not size it by the roof outline alone. In a narrow plot, a frame that nearly spans the full width can read as a crossbar and make the view stop abruptly. A smaller footprint may preserve movement around it, while a broader one can create a stronger visual marker. The balance depends on the space left at the sides and on the view that continues beyond. Where the boundaries taper, use the tightest width rather than an average.
Height affects the composition as well as width. In an eye-level sketch, show where the upper frame would sit against the fence, trees, and sky using documented dimensions for the exact model. If you are comparing the Bloomcabin Bioclimatic Aluminum Pergola, obtain its dimensioned drawing rather than estimating proportions from a product photograph. A low-looking outline may merge with a fence, while a taller outline may become prominent against the skyline; neither effect is automatically desirable. Compare the structure with nearby features that will remain in place. Keep roof overhangs and post positions distinct on the plan so the visible outline and the space available for passage are both clear.
Plan a clear approach to the pergola
A clear destination still needs a route that makes sense from the house or garden entrance. Draw the everyday route first, then mark any separate approach that gives a better view of the pergola. A straight path creates a direct axis; a gentle change of direction can reveal the structure gradually, provided it does not feel like an unnecessary detour. Walk the proposed line on site with a hose, rope, or temporary markers. Check the view while approaching, not just from the starting point, and make sure the route does not end at a post or send visitors through a planted bed.
At the arrival point, allow people to pause or turn without blocking the path behind them. If the pergola is intended for sitting or dining, draw the approach and the occupied area as separate shapes; furniture and pulled-out chairs affect how the route works. Keep a continuous way around the structure if the garden needs circulation beyond it, and check access to everyday features such as a tap, gate, or storage area. Show where someone might wait without interrupting movement. There is no universal path width for every property, so record a clear width that suits how your household uses the space.

Before you choose 3
Check what appears behind and beside the frame
A pergola reads most clearly when its outline can be distinguished from what sits behind it. Look along the view from the house and note whether the frame overlaps branches, a fence top, or the eaves of a neighboring building. A busy background can blur the shape, while a simpler planting mass or open area can make it easier to recognize. The structure does not need a blank backdrop; the useful check is how its lines relate to the vertical forms around it and the direction in which the garden draws the eye. Compare the view from both ends: a landmark that reads clearly from the house may feel like an obstruction from the back.
Decide whether the view should end at the pergola, pass through it toward a tree, or use the frame to surround a smaller feature. Mark that view line and check where each post falls before settling on a position. If you are considering a wall-attached form, Lean-To Pergola product details can serve as a product reference, but cannot show what the frame will overlap from your own window. Include existing branches, furniture, and likely plant growth in the sketch. A strong landmark should be easy to see from the house without becoming a visual barrier when approached from the garden.
Use planting to create depth without hiding the destination
A layered planting plan gives a long garden more than one point of interest and helps the pergola sit within the landscape. Low plants or groundcover can soften the foreground; mid-height perennials and shrubs can create a transition; taller plants and trees can define the outer edges or background. Keep the key sightline open at the height from which it will be viewed, especially if the structure should remain visible from indoors. Draw planting groups at their expected mature width rather than as small nursery pots, so their eventual spread does not cover the feature or narrow the approach.
Repeating a few plant forms along the route can connect distant beds, while changes in height and texture keep the view from becoming a flat row. Avoid placing every tall plant at the far boundary: overlapping layers nearer the viewer can add depth, while gaps preserve glimpses beyond. Consider seasonal appearance too, including whether dormant plants will leave an important foreground bare or expose an unwanted background. Select plants for the site’s light, soil, water, and maintenance conditions. When comparing the pergola shown on the Bloomcabin product page, sketch the proposed planting alongside the frame so you can judge the balance between foliage and structure throughout the year.
Before you choose 4
Keep circulation and maintenance in the plan
Before filling the plan with planting, trace the routes used for mowing, pruning, watering, and getting through any side gate. A focal point should not turn a convenient shortcut into a squeeze or require people to cross a delicate bed. Draw bed edges and pergola posts together, then measure the clear route at its tightest point. Allow for plant growth as well as the space needed to reach plants for routine care. This matters especially where the garden tapers: a route that seems generous near the house may pinch toward the back. Include gate swings and the path of any equipment used for regular garden work.
Note known site constraints on the same plan, including drains and utility access, rather than leaving them until the layout is fixed. Check whether a person tending a bed would block the only route through the garden, and whether tools or a wheelbarrow could reach the far side without crossing the seating area. When reviewing the Bioclimatic Aluminum Pergola product information, identify any documented access requirements that need space in the layout. Leave those areas accessible instead of filling them with permanent planting. Beds beside a boundary also need a practical way to reach their back edge; a narrow gap that nobody can comfortably use is not useful maintenance space.
Connect the pergola to the rest of the garden
A focal point can feel integrated when one or two details echo elsewhere in the garden: a paving color repeated on a path, a low border that continues beyond the structure, or a plant form used in more than one bed. The aim is continuity, not matching every surface. A change in paving or planting can mark arrival, but an isolated change with no relationship to its surroundings may make the pergola look disconnected. For a layout that includes an existing garden wall or the house, compare the Bloomcabin Lean-To Pergola with that setting in a measured drawing. Consider how the wall’s lines, adjacent openings, and approach path would relate visually to the proposed frame.
Look at what will be visible beyond the pergola as well as at it. A low view corridor, a separate tree, or an open lawn can create another layer and prevent the long plot from seeming to end abruptly at the frame. Avoid adding another strong structure immediately behind it if that would compete with the intended landmark. An open strip or broad lawn can provide a quiet interval between features. If the garden serves several purposes, show those areas on the plan without filling every gap with small ornaments; clear intervals let the pergola hold attention while the garden still reads as a connected whole.

Before you choose 5
Check how the view changes along the path
The view from the house establishes the destination, but walking toward it reveals whether the composition holds together. Stop where the path turns, where a planting group ends, and where you first enter the pergola area. At each point, notice what becomes visible and what disappears. A partly screened frame can invite exploration, but a route that hides the destination until the last moment may need a clearer entrance or a more open planting gap. Check the return journey as well: the house or another familiar feature can help orient the view back. Photograph these stages in order to see whether the approach has a gradual reveal or an abrupt visual change.
Use temporary markers to test the proposed corners, path edges, and bed boundaries together. Label the markers so you can distinguish a post position from a planting edge when reviewing photographs. Check this layout against the exact dimensions in the Bloomcabin Pergola model details, then try one adjustment at a time. Moving both the structure and the path at once makes it harder to identify which change improved the approach. Record the preferred version on the plan before removing the markers. A ground outline cannot represent the roof or full height, so use it to test movement and arrival space, alongside the eye-level drawings used to assess the view.
Turn the layout into a dimensioned landscape plan
Once the position works visually, turn the sketch into a dimensioned landscape plan. Include the pergola’s actual outside footprint and post locations, paths and turning spaces, house openings, existing trees, planting beds at mature size, and the intended view corridors. Add grade changes or surface transitions that may affect movement, along with known site constraints such as drains or utility access. Distinguish existing features from proposed changes so everyone can read the plan the same way. Measured information is more useful than a perspective rendering alone when discussing clearances and the sequence of work with installation and planting professionals.
Keep planting requirements documented alongside the layout: mature dimensions, spacing, water needs, and maintenance expectations should come from reliable information for the chosen plants. Verify the exact pergola dimensions and installation requirements in product documentation. Have site-dependent questions about support, anchoring, drainage, or grade assessed by the appropriate qualified professional. For a house-attached option, the Lean-To Pergola specifications and product details are a starting point for that discussion, not confirmation that an existing wall is suitable. Record any resulting layout changes before finalizing paths and beds. The completed plan should show both the visual destination and the practical space needed to reach, use, and maintain it without sacrificing the garden’s longer views.
Frequently asked questions
Should a pergola go at the far end of a long garden?
Not necessarily. A position at the boundary can create a clear endpoint, while setting the pergola forward may leave room for a view or planting beyond it. Compare both options from the house and along the approach path.
How can I keep a long, narrow garden from feeling like a corridor?
Use the pergola and layered planting to create a visual pause, but preserve a clear route and some open views through or around the structure. A path can approach directly or shift slightly, as long as the route feels natural rather than forced.
How do I judge the pergola’s size for the space?
Use the actual outside dimensions and post positions for the model you are considering. Mark that footprint on a plan and, if possible, on the ground. Check the tightest garden width, side routes, and the view beyond the frame.
What planting works around a pergola focal point?
Plan layers of different heights, keeping the important sightline open. Choose plants for the site’s light, soil, water, and maintenance conditions, and use documented mature sizes so beds do not eventually hide the structure or crowd the path.
What should a landscape plan show before I choose a pergola?
Include the structure’s actual footprint and posts, the main views and approach routes, existing features, and planting at mature size. Note known site constraints, such as grade changes or utility access, and ask a qualified professional about site-dependent installation questions.
A pergola works as a focal point when its position is judged from the places you actually look from and the paths you actually use. In a long garden, the best location might be at the far end or partway down; what matters is how its outline frames the view, how planting builds depth around it, and whether movement remains easy. Mark the footprint and plant layers at mature size before making the choice. That simple test can turn an elongated yard into a sequence with a clear destination rather than a view that runs straight to the fence.
