
Pergola Footings Beneath Porcelain Pavers: What to Plan
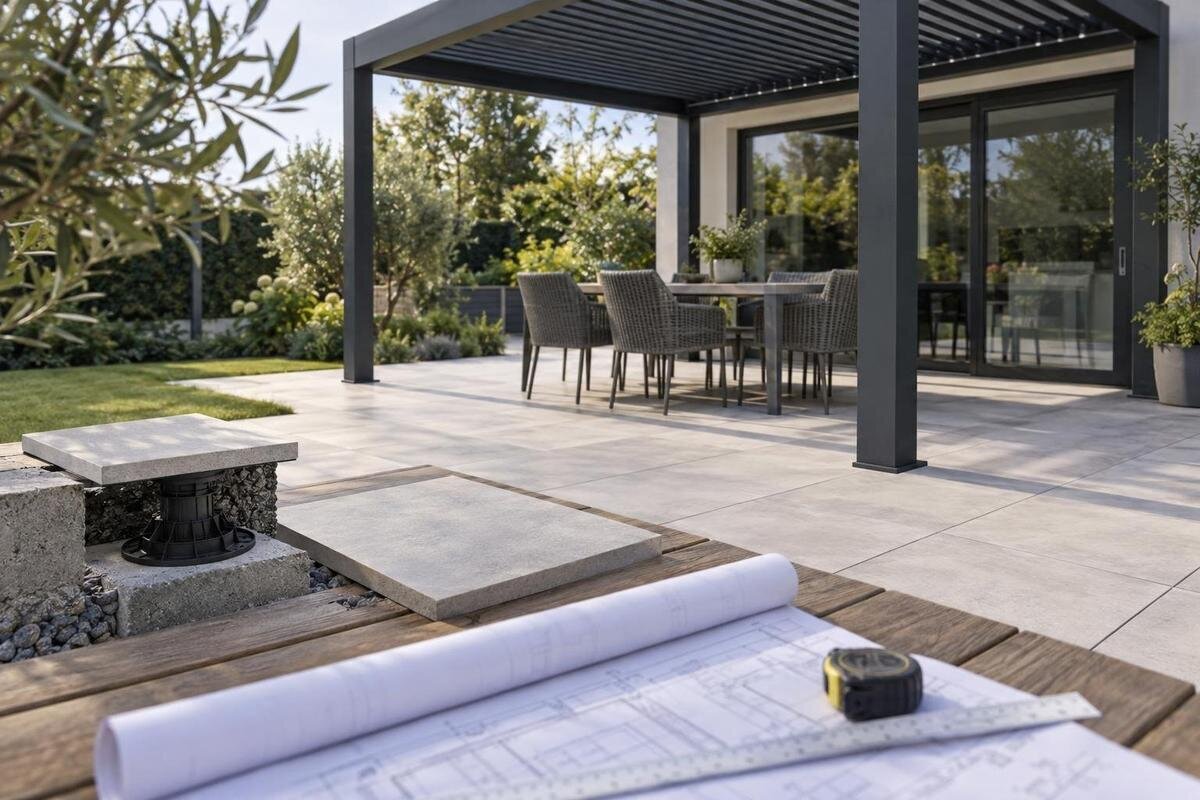
Pergola foundation planning
Porcelain pavers can make a patio feel like a finished room, but they are not a pergola foundation. Post locations, structural footings, paver cuts, drainage, and finished elevations need to be coordinated before a new surface is laid—or before existing pavers are disturbed. The essential distinction is the load path: an approved anchoring arrangement must connect each post to suitable supporting construction, while porcelain remains a separate finish. This guide covers the site information to gather, the details to show on drawings, and the decisions to settle with the pergola supplier and qualified installation professionals.

Before installation 1
Structural support beneath porcelain pavers
A pergola’s posts transfer structural forces to their supports. The anchoring detail must connect each post to a footing or other support assessed for the selected model and actual site. Porcelain paving, grout, and bedding are finish components; do not count on them to resist post movement or hold an anchor. A paver may feel solid underfoot without being an engineered connection. The post base, fasteners, and supporting construction form one load path. A tight tile cut or a bead of sealant does not make the surrounding porcelain structural. Keep this distinction explicit on the drawings so every installer knows which components carry the connection.
This matters even when pavers cover concrete. A continuous-looking surface does not reveal whether concrete lies directly below a post, how it was built, or whether it suits the proposed connection. Nor does a paver on bedding become an anchoring point because it is thick or heavy. Until the substrate and anchor arrangement are verified, treat each post location as an open design question. The supporting construction may sit beneath the finished surface, but its location and elevation still need to match the approved post layout. Plan the tile pattern around that support, rather than letting a neat paving line dictate a structural decision.
Identify the patio’s supporting assembly
Find out whether the pavers are bonded over a slab, laid on a bedding layer, supported on pedestals, or installed as part of another assembly. The porcelain surface alone gives little reliable information about what lies below it. The support type affects where structural work can take place, what access is available, and which finished-edge details may be possible. If you are planning new paving, ask for a section drawing that identifies each layer and its function. For an existing patio, look for original plans, construction photos, or invoices, then have the surface and underlying construction assessed rather than guessing from appearance.
Record more than the paver pattern. Note patio boundaries, steps, drains, channels, walls, movement joints, and changes in elevation. Mark known service routes and areas where excavation could conflict with utilities or irrigation. If the patio has been remodeled, older plans may not match the current assembly; label uncertain information as unverified. A site assessment can identify whether the base needs further investigation before anyone selects a footing detail. It can also reveal an edge condition or drainage feature that affects post placement, not merely the appearance of a tile cut. Photos help document what is visible, but they do not confirm concealed construction.
Before installation 2
Obtain the exact pergola layout
Choose the exact pergola model before anyone sets out footing centers. Request a current, dimensioned plan and approved anchoring drawings for that model, including post centerlines and any permitted layout options. The Bloomcabin Pergola product page identifies a product option, but a catalogue image is not a setting-out drawing or anchoring approval. Ask whether the documents also show the base-plate footprint, connection orientation, installation clearances, and the reference point used for dimensions. Record the drawing revision and the exact option being considered so the paving team does not work from preliminary or mismatched information.
Compare the drawings with measured site dimensions, not just a nominal patio size. A post center can conflict with a stair, door swing, drain, wall, or paver edge even when the overall frame appears to fit. Mark each center from a fixed reference and state whether a dimension is to the centerline, plate edge, or another point. Show nearby obstacles on the plan, rather than relying on notes that say they are close by. Have the supplier or qualified designer confirm which adjustments, if any, remain within the approved configuration. If the model changes after the paving plan is drawn, compare the drawings again before ordering cuts.
Map post centers onto the paver grid
Once the structural post centerlines are confirmed, overlay them on the measured paver module, planned joint spacing, perimeter pieces, and intended starting line. Use the drawing for the exact model: for Bloomcabin Bioclimatic Aluminum Pergola, do not assume a generic post pattern. Work from the actual dimensions of the chosen pavers and joints, not just a nominal product size. A scaled plan lets the paving installer see where full pavers can remain, where cuts fall, and whether a border or edge strip changes the layout. It also makes conflicts visible while the options can still be compared on paper.
If a post lands within a paver, consider whether the paving start line, pattern, border, or cut pieces can be adjusted around the independently designed support. Those are paving choices only if they preserve the approved post locations and meet the requirements of the paving assembly. Aligning a grout joint with a post may look intentional, but it is not a reason to move an anchor. Do not shift a post, enlarge a base plate, or bridge a gap simply to avoid a visible cut. Mark narrow or unusual pieces on the plan so the tile installer can assess them before material is ordered.

Before installation 3
Detail the post-to-paving junction
Decide how the paving meets each post base before the tile work starts. The project detail should show a section through the post, support, anchor, and finished surface, including the actual paving build-up. It needs to make clear whether the pavers terminate around the connection, pass below a separately supported component, or meet another specifically designed arrangement. Porcelain should not act as a shim, bearing pad, or substitute for the designed support. Do not infer the junction from a product photo or copy a detail from a different pergola installation; the site assembly and approved connection both matter.
Specify the intended joint or clearance around the post or plate and any finish material used there. The detail needs to account for the paving assembly’s movement and water-management approach without making the tile part of the anchor connection. Sealant alone does not establish structural support or correct an unsuitable connection, so any sealing should follow the approved detail. Keep the junction accessible for installation and inspection where the design requires it. If Bloomcabin Lean-To Pergola is under consideration, request the drawings for that exact option rather than borrowing a post or base detail from another model.
Set finished elevations and drainage
Give the installation team clear elevation references. A section should account for the supporting surface, any bedding or pedestal build-up, paver thickness, and the finished top of the patio. Ask the responsible designer to state how the finished surface relates to the footing top and post base; do not leave those heights for installers to reconcile by eye. A drawing that gives only the overall pergola height or the patio elevation may not resolve the interface. For the bioclimatic aluminum option, use the exact model’s issued dimensions and support details rather than estimating levels from a photograph.
Show how surface water currently moves and where it is intended to go after installation. Posts, cutouts, raised supports, or altered paver edges should not unintentionally block a drain or create a low spot where water collects. Mark channels, inlets, thresholds, and discharge routes on the site plan, then coordinate any changes with the paving professional. If a proposed footing or finish detail would change the existing drainage arrangement, have the relevant professional review it before the layout is finalized. The goal is a clear, consistent transition between support and paving, not a post location chosen without regard to the patio’s water paths.
Before installation 4
Plan paver cuts and movement joints
Treat tile cuts as their own part of the work. On the paving plan, identify which pieces are cut, the location of each notch or opening, the finished joint at a post base, and how exposed edges will be treated. Have the tile installer confirm that the chosen porcelain format, thickness, and surface can be cut as drawn. Do not assume that a neat opening can be made after the footing is installed without affecting the surrounding layout. A scaled drawing or full-size template can reveal a post-to-joint mismatch before pieces are ordered or cut, when changing the paving pattern is easier to discuss.
Account for existing movement or control joints as part of the paving design; do not simply conceal one beneath a new rigid detail. The paving professional should explain how the surface assembly treats those joints at the post locations. Consider whether cut pieces can be replaced later without disturbing the anchor, and show the intended joint widths and border pieces on the cut plan. When considering the Bloomcabin Pergola option, obtain its current layout before finalizing that plan. Ask the paving installer which replacement pieces to retain, how to identify them, and whether future access would require removing a whole paver or only a separate border piece.
Check utilities, edges, and concealed layers
Before ground disturbance, identify buried utilities, irrigation, drains, and other services that could conflict with footing locations. Also mark patio edges, retaining structures, nearby walls, and changes in support beneath the paving. Those features can limit where structural work is possible, even if a post appears to fit the visible tile pattern. Arrange the appropriate site investigation when records are missing or unclear; do not treat an assumed service route or an old drawing as confirmed. The point is to give the designer reliable site information before footing locations and paving cuts are committed.
If the patio is over a waterproofed structure or contains a concealed waterproofing layer, have the responsible designer and waterproofing professional review the proposed support and any penetrations before work proceeds. A ground-level footing detail does not establish suitability for a raised patio or roof. For the Bloomcabin lean-to option, include the model drawings in that review alongside the site's structural and waterproofing records. Record which areas must remain accessible, who is responsible for restoring any disturbed waterproofing, and how that work will be documented. Keep these requirements with the drainage details so both installation teams understand the concealed layers they must protect.

Before installation 5
Coordinate the teams and work sequence
Give each part of the project a clear owner. The pergola supplier should identify the relevant model drawings and anchoring information; a qualified structural or site professional should assess the proposed support against the actual conditions; and the paving installer should plan the layout, cuts, and finished edges. If drainage or waterproofing is involved, include the professional responsible for that system. Agree who verifies measurements, who marks post centers, who approves changes, and who is responsible for coordinating the junction between paving and post bases. Clear responsibilities reduce the chance that one crew assumes another has resolved the connection.
A useful planning sequence is to reconcile the model drawings with a measured site plan, investigate the substrate and hidden constraints, agree on the footing and anchor details, then finalize elevations and tile cuts. The order of physical work can vary with the paving assembly, so use the project detail to establish it. If you are considering Bloomcabin’s bioclimatic aluminum pergola, request its installation information while discussing the schedule with the supplier. Agree when measurements will be verified and which work must remain exposed for inspection. Also plan delivery access and material staging so pergola components and cutting equipment do not obstruct unfinished paving or required access to post supports.
Keep installation records and manage changes
Keep a coordinated project record from planning through completion. Start with the measured site plan, exact model and current drawings, approved anchoring details, evidence about the supporting assembly, footing locations, finished elevations, drainage information, and paver cut plan. As work progresses, add approved revisions and photographs of support locations and concealed layers before they are covered. Ask the installation professionals to identify what the photographs show; an unlabeled image may be difficult to interpret later. Record any differences between the planned and completed layout, and keep the final documents accessible for future paving repairs or inspection of the post connections.
Agree on what happens if the site differs from the drawings. A concealed slab edge, service, drain, movement joint, or unexpected paving build-up may make a planned location unsuitable. Pause the affected work and ask the responsible professional to review the detail before a post is moved, additional pavers are cut, or the anchor arrangement changes. If you selected the regular pergola model, retain its product reference with the revised drawings and written decisions. Note who approved the change, which drawing it replaces, and whether it affects adjacent paving or drainage. Give both teams the revised information rather than relying on a verbal adjustment at the patio.
Frequently asked questions
Can I anchor a pergola through porcelain pavers?
A connection may pass through paving only when it is specifically detailed for the supporting construction and accounts for the tile penetration. Porcelain, grout, and bedding remain finish layers, not the anchor. Have the pergola supplier and a qualified site professional confirm the exact connection; do not rely on the paver itself.
Do pergola posts need to line up with grout joints?
No. A joint can help organize the paving pattern, but post locations come from the exact model’s approved layout and the site assessment. If a post lands within a paver, coordinate the grid or a suitable cut. Move a post only if the responsible designer confirms that the change is permitted.
Can the concrete under a paver serve as the footing?
Not on appearance alone. The concrete may be a patio slab rather than a footing, and its construction or condition may be unknown. A qualified professional needs to assess the substrate at the post locations against the proposed anchoring detail. Do not assume any slab can accept any pergola anchor.
Should the footings go in before the pavers?
There is no universal order for every paving assembly and footing detail. Structural supports are often coordinated before the final pavers, but the project drawings and site conditions determine the sequence. Agree on access, elevations, inspections, and responsibility for tile cuts before either installation team begins.
What should I provide for an installation assessment?
Share the exact pergola model and current drawings, measured patio dimensions, the paver format and support system, available site records, and photos of edges and drainage. Note known utilities or waterproofing, desired post locations, and finished levels. Mark unknown details clearly so they can be checked before work is priced or scheduled.
A clean paver layout starts with an approved structural layout, not the other way around. Treat post centers and footing details as design inputs, then coordinate the cuts, joints, drainage, and finished levels around them. When the exact model drawings, patio assembly, and installation responsibilities are recorded together, the porcelain can remain a well-planned finish instead of being asked to carry a pergola connection.
