
A Pergola in a Wildlife-Friendly Garden
Garden design guide
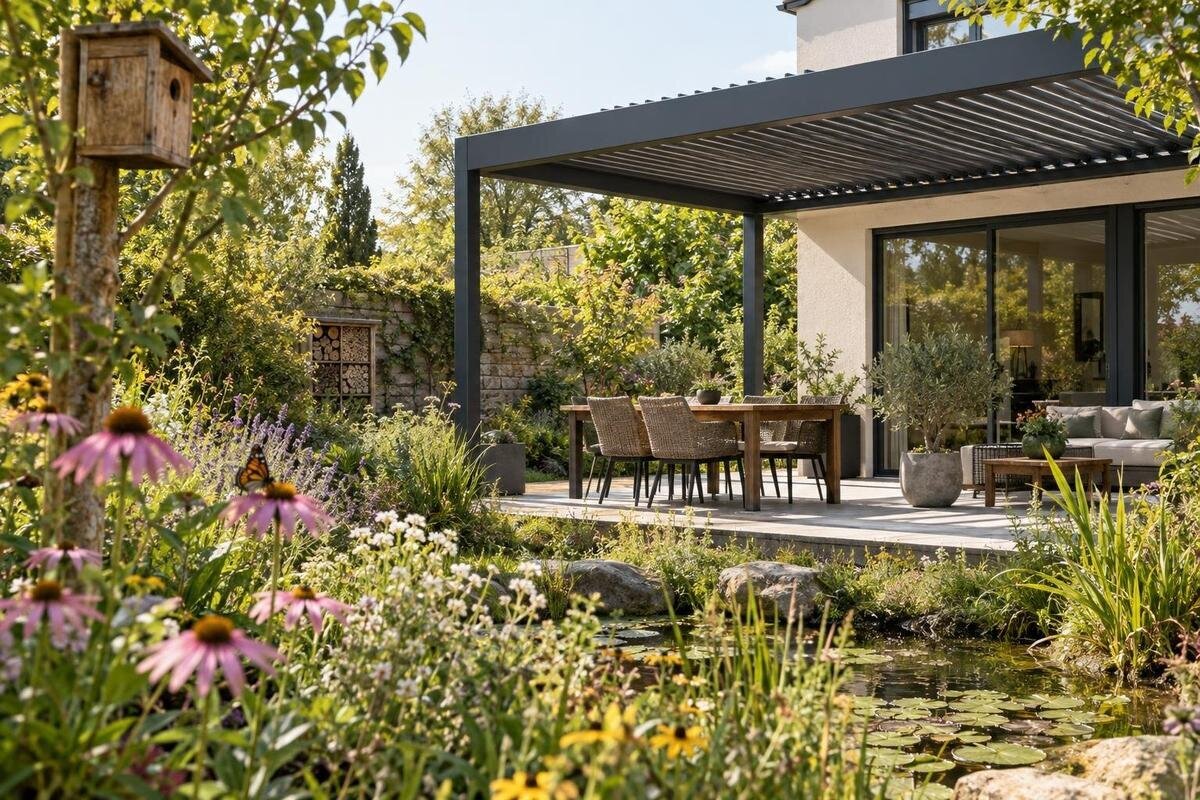
A pergola changes more than the space beneath its roof: posts occupy ground, the structure affects planting conditions, and outdoor lights can reach beyond the seating area. In a wildlife-friendly garden, plan its position alongside existing trees and beds, everyday paths, light spill, drainage, and maintenance access. The structure itself does not guarantee an ecological benefit. Assess the garden’s existing features and use a site-specific plan to decide where the pergola can fit without making those features harder to care for.

01
Map existing planting and garden activity
Before choosing a footprint, inventory what already occupies the garden: mature trees, shrubs, perennial beds, ground cover, bare soil, leaf-litter areas, water features, and places where you regularly notice birds, pollinators, or other wildlife. Note which features persist and which change with the seasons. Visit in the morning, midday, and evening on more than one day; activity, sun, and shade shift, and one snapshot can miss a frequently used corner. This is not a species survey. Its practical purpose is to identify what a new post, path, roof, light, or seating area could disturb, shade, illuminate, or make harder to reach. Label observations with the date and weather rather than relying on memory.
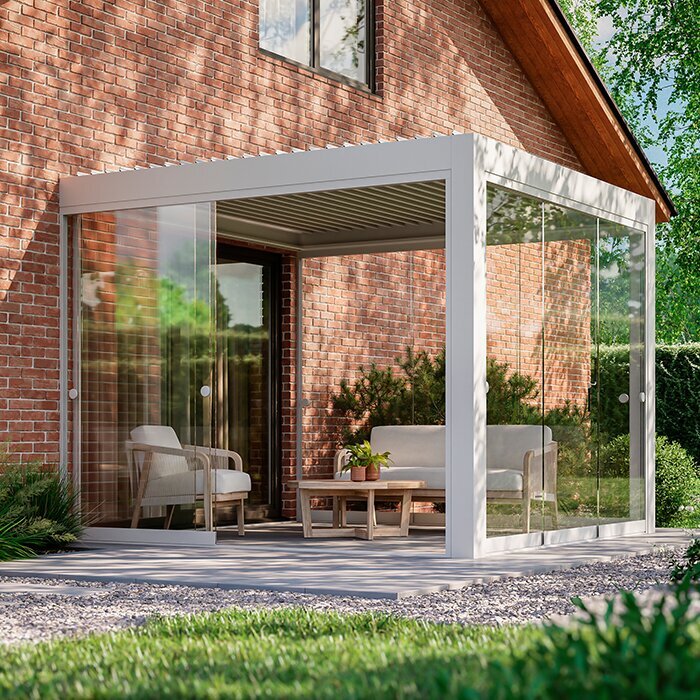
Mark established trees and beds on a scaled sketch before setting out the frame. Include trunks, canopy edges, planting boundaries, and anything that needs periodic access; roots may extend beyond the visible canopy, so a bare-looking ring beside a tree is not automatically a safe excavation zone. If proposed posts or digging could affect substantial roots, ask an arborist or landscape professional to assess the location. Include a house-side alternative when comparing locations for the Bloomcabin Lean-To Pergola. Check what occupies that space now, including narrow beds or shrubs beside doors. Keep the inventory and drawing together so later decisions account for existing planting rather than treating unpaved ground as unused space.
Draw the footprint, paths, and clearances together
Measure the space you can actually use, then draw the pergola posts, roof outline, seating, doors, gates, and main walking routes at one scale. A structure may fit on a patio yet pinch the route from a gate to a shed, divide a bed, or block access to a hose bib or utility panel. Mark door swings and the space needed to carry a wheelbarrow or garden tools; access that exists only after moving furniture is unlikely to work for routine care. Include where you move containers or bring mulch, not only the permanent pedestrian route. Set clearances around household needs and site constraints instead of borrowing a generic width for a supposed wildlife corridor.
When evaluating the Bloomcabin Pergola, obtain the selected configuration’s dimensions, post positions, and installation clearances before finalizing paving or planting. Apply the same documentation standard to any wall-mounted alternative. If a detail the site depends on is not shown, request a dimensioned drawing rather than estimating from a photograph. Removable stakes or tape on the ground can expose awkward corners, narrowed paths, and views blocked from the house. Recheck the route with chairs, a hose, and garden equipment in place, and ask someone else to walk it as they would during ordinary watering, harvesting, or cleanup. Check the view from common standing and seated positions, too.
02
Planting layers and mature plant size
Plan planting in zones rather than filling every gap around the pergola. Retain existing plants that suit the site and do not need to be moved, then consider the garden’s canopy trees, mid-height shrubs, flowering perennials, and lower ground cover. Each plant still needs appropriate light, soil, moisture, and mature room. Use regional extension or native-plant resources to identify species suited to local conditions; a plant described as native is not automatically right for every yard or bed. If local pollinator planting is one goal, consult regional guidance about flowering periods and plant choices. Draw the mature size, not just the nursery-pot width, and note where a hose can reach without crossing the main walkway.
Keep denser planting where it can grow without blocking a gate, sightline, or access to the structure. A lower planting band beside a path can preserve visibility, while taller shrubs need enough mature width that they will not close the route or press against a wall. When comparing the Bloomcabin Bioclimatic Aluminum Pergola with other options, use the selected configuration’s drawings to assess how its placement could change light in nearby beds. Observe existing shade from trees and buildings as well; a product name does not establish a planting zone’s light conditions. Mark uncertain areas on the planting plan and delay choosing light-sensitive plants until the expected conditions are clear.
Treat climbing plants as a separate design decision
Climbers can change the look of a structure, but mature weight, spread, attachment method, seasonal leaf cover, and pruning needs all matter. Compare plants by how they grow: some need ties to a separate support, while others cling or twine. Their growth habit affects where stems will travel and how easily you can keep them within the intended area. Keep stems away from serviceable parts or moving components where present, and avoid choosing a fast-growing vine solely because it quickly covers a frame. Draw the space needed to reach and prune the plant, including its upper growth. If that work requires standing in a dense bed or blocking the only path, reconsider the support’s location.
Think about the plant’s care cycle, not just its appearance on planting day. A deciduous climber changes shade as it loses and regrows leaves; an evergreen retains foliage through the year, and either may need regular pruning. Before adding a vine or support to the wall-mounted pergola option, obtain written confirmation that the exact product and installation can accept it, including approved attachment points and required clearances. Keep that confirmation with the product documents. If attachment is not approved, consider an independently supported trellis. It still needs an appropriate location, pruning access, and room to clear fallen leaves without obstructing fixtures, drainage points, or walking routes.
03
Control outdoor lighting spill
Plan lighting after the walking routes and seating are drawn. Identify where task lighting is genuinely needed, such as a door, steps, or a work area, and aim each fixture at that surface rather than across a bed, toward tree canopies, or into neighboring windows. Shielded fixtures and the lowest useful output can limit stray light, while separate switches, dimmers, or timers let you avoid illuminating the whole garden for every task. Keep path and stair lighting sufficient for safe movement. Controls can reduce unnecessary operating time, but they cannot correct a poorly aimed lamp. Decorative lighting can be left out where it serves no clear task. Avoid claims that one fixture color or style guarantees a wildlife benefit; local conditions differ.
Inspect the result from outside the pergola and from inside the house after dark. A lamp can look contained from directly below yet send glare sideways along a fence or across a planting edge. Check views at the property boundary as well as along the route, and note whether porch or security lights add to the overall spill. If you are considering the Bloomcabin Bioclimatic Aluminum Pergola listing, confirm separately whether any proposed lighting is included or requires an additional purchase. Record fixture positions and controls on the lighting plan. Repeat the nighttime check after changing fixture direction or output, and check timer settings when household routines change.
Leave room for routine maintenance
Put maintenance access on the drawing as carefully as the seating area. Someone may need to sweep, prune, replace a plant, inspect fasteners, reach a wall, or clean paving around the pergola. A gap that appears adequate on paper can become unusable when branches, chairs, pots, or a gate obstruct it. Mark where a ladder or garden cart might need to stand and which areas should remain reachable without moving heavy items. Keep storage and compost containers away from the main route unless there is a clear alternate path. Think about seasonal use, too, such as moving stored furniture or clearing a path after leaves fall. This matters around a wall connection and near utilities, where blocked access can slow ordinary upkeep.
Use the maintenance instructions for the Bloomcabin Pergola model under consideration to identify where you will need inspection and cleaning access. Translate those requirements into spaces on the site drawing, rather than leaving an unspecified gap around the frame. Check whether the person doing the work can approach from the paving or would have to step through planting. A plant that needs frequent pruning may be a poor fit beside a narrow service aisle even if its light and soil requirements match the site. Keep containers movable where they border an access area, and reserve a temporary place for them during maintenance so they do not block another route.
04
Plan paving, soil, and water around the posts
Show existing paving, planting beds, downspouts, known irrigation lines, low spots, and places where water already collects. Do not assume the pergola will shelter a bed or manage runoff: roof form and water handling vary, and an open-looking structure may not behave as expected in rain. Ask the supplier or designer how the selected product handles water and what its installation drawing requires. Before digging, locate known buried utilities through the appropriate local service process; if routes or ground conditions remain uncertain, use a qualified professional. Trace rainwater on the site plan so new paving does not direct it into a planting bed, toward a foundation, or onto neighboring property. Note whether surfaces are permeable or sealed, since that affects where water can go.
For a wall-mounted arrangement, check how the house edge, downspouts, door thresholds, and planting beds interact during rain. With a freestanding arrangement, map each post location against known utilities and proposed paving. When reviewing the Bloomcabin Lean-To Pergola page, request water-management details for the exact setup and show any outlets on the site drawing. Keep plants clear of drains and access covers, and avoid placing moisture-sensitive species where runoff or splash would make conditions unsuitable. Coordinate grading or drainage changes with a landscape or site professional. Include access for clearing debris from drainage points, particularly where nearby trees shed leaves onto the paving.
Compare pergola layouts against everyday garden use
Choose a layout for the way the garden connects, not just for the largest patch of paving. A wall-mounted option may keep a route open in one yard, while in another it can crowd doors, cast shade over intended planting, or make a bed difficult to reach. A freestanding option may offer more placement choices, but its posts occupy ground that could otherwise be planted or used for circulation. These are possible trade-offs, not automatic advantages. Draw at least two alternatives and compare clearances, existing plants, shade, access, maintenance, and views from the house. Include a typical task, such as watering or moving prunings, rather than judging each option as an empty frame.
Compare wall-mounted and freestanding schemes using the same scale, furniture, and planting assumptions. Show house doors and windows, mature plant sizes, paths, lights, and the work area around each structure. Use the Bloomcabin Pergola listing as a product reference, confirming the available configuration before including it in a scheme. A design consultation is most useful when it works from dimensioned landscape drawings and documented planting requirements. Ask the designer to distinguish fixed requirements from preferences: retaining an established tree may be essential, while moving a table may be acceptable. Record why one layout is preferable and which details remain provisional, so later changes do not undo the reasons for choosing it.

05
Put plant, lighting, and care requirements in writing
A concise schedule prevents a sketch from hiding everyday obligations. For each plant, list mature size, preferred light and soil conditions, pruning window, irrigation needs, and any seasonal support; confirm details with reliable local horticultural guidance. For each fixture, note its purpose, position, direction, control, and intended operating hours, then identify optional lights separately. Add furniture and surface care that will occupy the same space. The schedule should expose conflicts: a shrub that will cover a path, a spotlight aimed at the main planting area, or a vine that requires access the frame cannot provide. Revise the layout while moving a note on paper is still easy. Include the season and person responsible for each recurring task.
Give each recurring job an owner and a workable frequency: watering during establishment, routine pruning, path sweeping, fixture checks, and the structure’s maintenance may fall to different people. Keep manufacturer care instructions separate from horticultural advice, and note the source for each requirement. That distinction matters because a plant label or a pergola’s style cannot prove how the whole space will perform for wildlife. Write down open questions—approved attachment points, planting clearance, light controls, or exact dimensions—and resolve them before the design is difficult to change. The written plan is a practical handoff for a gardener or installer, not a promise of ecological outcomes. Store it with the site drawing and update both when planting or fixture locations change.
Review the layout through changing seasons
Review the proposed layout in more than one season if your schedule allows, especially where shade, foliage, access, or seasonal planting will change. Photograph the same views from the house and gate, note when sun reaches key beds, and record where fallen leaves, snow, or vigorous growth could narrow routes. If there is no time for a seasonal trial, use current site observations and document the assumptions that remain. Major questions about roots, utilities, drainage, or product clearances may require professional review rather than observation alone. Flagged post locations and temporary furniture can test circulation, but cannot replace technical drawings or installation guidance. Repeat photographs from the same positions so you can compare changes over time.
After installation, compare the real garden with the plan at regular intervals. If a light reaches beyond the intended route, adjust it through its approved controls or have the fixture repositioned by a qualified person; if a plant closes a passage, prune it appropriately or revise the bed. Keep observations modest: note what has changed rather than claiming that the pergola attracted or repelled wildlife without evidence. This review can guide small adjustments to planting, furniture, and care routines. If a task repeatedly falls behind, simplify the planting or revise the schedule. A usable long-term layout respects existing garden features and locally informed planting choices while leaving room for the people who maintain it.
Frequently asked questions
Does a pergola make a garden wildlife-friendly?
No. A pergola is a garden structure, not a wildlife feature by itself. Its effects depend on what it displaces or shades, where lights fall, and whether planting and access remain manageable. A thoughtful layout can avoid unnecessary disturbance, but style alone cannot guarantee ecological results.
Where should a pergola go in a wildlife-friendly garden?
Map existing trees, beds, access routes, utilities, and places where water collects. Compare the posts and roof outline with those features, then leave room for plant care and movement. If excavation could affect significant roots or known utilities, seek a qualified assessment before finalizing the location.
Can I grow vines on any pergola?
Not automatically. Confirm that the specific pergola and installation can accept the proposed vine or support, and check the plant’s mature spread and pruning needs. An independent trellis may be preferable if attachment is not approved, provided it leaves access to the structure and does not obstruct paths.
How can I reduce light spill around a pergola?
Aim light only where needed, use shielded fixtures at the lowest useful output, and control separate areas independently. Check the result from the house and garden boundary after dark, including light from nearby fixtures. Keep steps and paths adequately lit for safe movement; no single setup guarantees a wildlife outcome.
Should I use native plants around a pergola?
Choose plants for local soil, light, moisture, and mature size, using reliable regional horticultural guidance. Native status alone does not mean a plant suits every site. Consider watering, pruning, and access before placing it near a pergola, and avoid assuming the structure itself will attract wildlife.
A pergola fits best into a wildlife-friendly garden when its footprint, nearby planting, lighting, and upkeep are planned together. Preserve the established features you value, leave practical routes for everyday care, and give plants the space and conditions they need at maturity. The result should be a seating area that works as part of the garden—not one that requires beds to be repeatedly cut back, paths to be cleared of furniture, or the whole yard to be lit for a single evening task.
