
Pergola Lighting Design for Dining, Reading, and Ambient Light
Pergola lighting guide
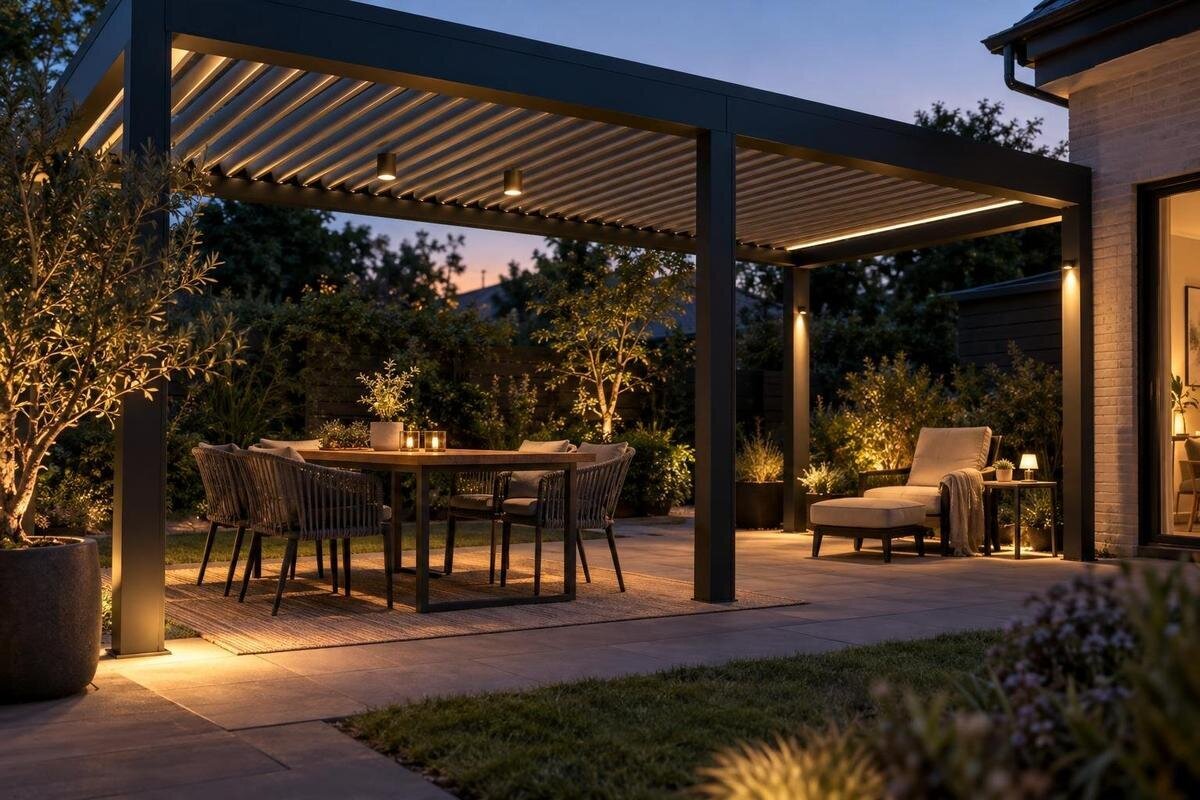
A successful pergola lighting plan begins with what people do after sunset, not with a catalog of decorative fixtures. Mark the dining table, reading seat, entry route, and the parts of the yard you want to keep in view. Then plan separate task light for the tabletop, focused light for reading, and a softer ambient layer for the wider space. Check potential sources from real seated and standing positions for glare. Before selecting equipment, verify outdoor suitability, mounting approval, and electrical requirements against the exact manuals with qualified professionals.
Build the plan around evening activities
A useful plan starts with a map of evening use rather than a list of fixture styles. Draw the table and its usual chairs, the preferred reading seat, doors or gates, and the route people take between them. At each spot, note the task: setting out food, eating, reading, talking, or moving through the space. Mark which activities happen at the same time, because a localized reading light and a broadly lit meal need different coverage. If furniture is rearranged, choose the layout used most often and sketch one alternate. Also show where pulled-out chairs affect the normal route; otherwise the plan may light an empty floor area while leaving a practical path awkward.
Give each layer a job before comparing products. Task light makes a tabletop or page easy to see; ambient light supplies a gentler background so the seating area does not feel like a bright island; route light helps people identify an entrance or change of level. These functions may overlap, but they should not have to run at full output together. A single strong source can leave a reader’s page shadowed even when the roof looks bright. Write down what must remain visible for each activity, then assess light distribution, control zones, and output against those needs. That record keeps fixture choices tied to use rather than appearance alone.
Map the footprint before choosing light locations
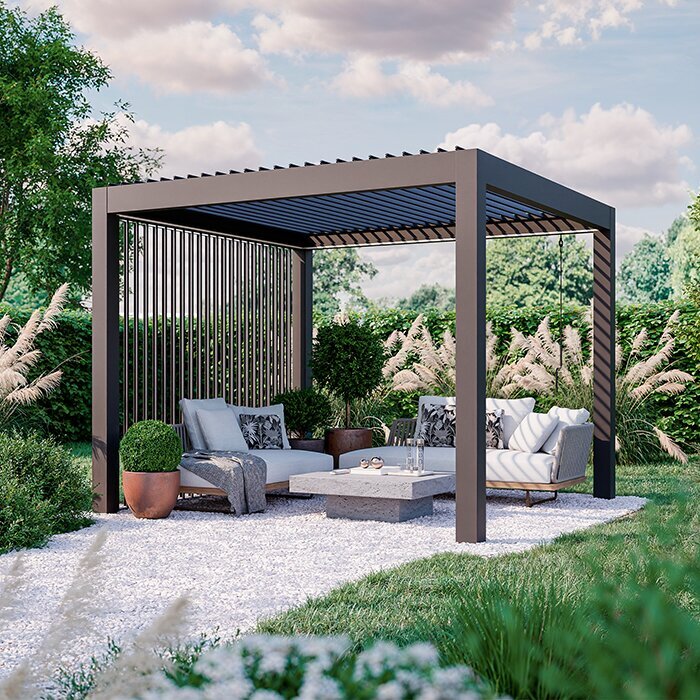
Build a scaled drawing rather than relying on a catalog photo. Record the edges of the covered area, posts, any adjacent wall, table and chairs, and roof components that move. Mark likely light locations only after furniture and walking routes are in place. As one footprint reference, the listed 97–258 sq ft range for Bloomcabin Bioclimatic Aluminum Pergola can orient a comparison; it does not identify fixture positions, table capacity, or light output. Use the exact size and layout under consideration, not the midpoint of a broad range, when planning coverage. Include doors and nearby surfaces that could affect where people look or move.
Mark where light would fall, not only where a cable might emerge. Note the full tabletop, the space beside each chair when someone sits back, the reading page, the entry route, and the transition to the yard. Draw the plan from above and note views from typical seats. If any roof components move, identify the positions in which people expect to use the pergola; an approved location may create a different pattern as the roof changes. This drawing can reveal overlap and dark pockets before a fixture choice or mounting position narrows your options.
Give the dining table even, comfortable light
Start with the table surface and the way it is used. The center may look bright while place settings at the ends remain hard to see, so plan for reasonably even light across the areas where people set food and hands. Guests also need to see one another; a pool of light on dishes with faces in shadow can make conversation feel awkward. When considering Bloomcabin Lean-To Pergola, compare the selected layout with the table’s actual length, width, and position. Include any extension used for guests: a plan that covers a compact everyday table may leave the additional place settings outside the useful light.
Color appearance is separate from brightness. Check a fixture maker’s stated color temperature and color-rendering information, if provided, then judge a sample under the patio’s actual materials and finishes. Color temperature describes whether light appears warmer or cooler; color-rendering information indicates how colors appear under it. Neither tells you how much light will reach the table. A light that feels comfortable beside wood may look different against pale stone, painted siding, or green foliage. If dining and conversation call for different moods, check whether the exact equipment supports a lower setting and whether its controls are compatible; never assume dimming from a fixture’s style alone.
Direct reading light to the page
Treat the open book or printed page as the reading task, rather than assuming general light across the roof will reach it. A focused source should illuminate the page without sitting directly in the reader’s line of sight. Check whether the reader’s head, shoulder, or writing hand will cast a shadow, and whether a glossy page or nearby tabletop will reflect a bright spot. If a hand shadow gets in the way, consider whether a different light direction would help before increasing overall output. The useful target is the page from the normal seat, not a bright mark on the pergola frame.
Test the arrangement in the actual chair position: sit upright, recline if that is how the seat is used, open a book, and look up toward the table and yard. A source that seems unobtrusive while standing may be visible from a low lounge seat, so ask someone else to sit in the reading spot while you observe from nearby seats. If you are planning a reading area within Bloomcabin Pergola, mark both the usual chair position and any alternate position on the layout submitted for consultation. Note whether the reader tends to move the chair or change its angle during the evening. That information helps define the coverage needed before you ask which fixtures and mounting locations are supported.
Use ambient light to connect the seating area to the yard
Ambient light connects the task areas to their surroundings. It should give enough background definition to recognize the seating area’s edges and move between chairs without competing with the table or reading light. If the only bright area is the tabletop, the pergola can feel like an isolated patch against a dark yard; if the whole yard is lit equally, the dining and reading zones lose their visual hierarchy. Think about the effect from the patio and from inside the house, not just beneath the roof. Decide which boundaries, plants, or nearby surfaces should remain visible after dark.
Set an intended edge for the ambient layer and review where light could spill beyond it, including toward windows or neighboring seating. When considering the bioclimatic aluminum pergola listing, include the surrounding patio in your planning sketch rather than stopping at the structure’s outline. Identify which nearby surfaces you want to see and which areas can remain dark. Plan ambient brightness separately from task light and the route to an entrance, so lowering the background does not leave a threshold hard to see. During a trial, compare the view with the ambient layer on and off. It should make the surroundings easier to read without drawing attention away from the people at the table.
Check for glare from actual viewpoints
Glare is not simply a question of having too much light overall. A bright point within the field of view can pull attention from a face, page, or view of the garden; reflections from glossy tabletops, glass, or polished metal can do the same. Make the check at the height people actually sit, because a position that appears clear while standing can put a source in someone’s eyes at dinner. Check the reader’s normal posture too. This is a comfort test within the lighting plan, not a reason to raise general brightness until a dark corner disappears.
On the scaled plan, note what each seat faces and where likely bright sources would appear; then verify the main dining and reading views during a nighttime trial. Look up from the page, glance across the table, and check that light does not dominate the view toward a door or garden. If the Bloomcabin Pergola product listing is your starting point, add these seated viewing directions to the layout you discuss with the supplier. Record which seat has the problem and whether it comes from a visible source or a reflection. That distinction makes the feedback useful: simply asking for less light could reduce visibility at the table without resolving the distracting bright spot.
Confirm mounting locations against the pergola design
Where a light is attached matters as much as where it would be useful. Pergola frames and roofs differ, so do not assume that every beam, post, channel, or underside can accept a fixture. For a movable roof, confirm that the proposed position stays clear through its full approved movement and does not interfere with access or drainage. Consult documentation for the exact configuration and ask for documented mounting approval when it is not explicit. Approval should cover the selected fixture and pergola configuration, not just a general product family. Resolve any uncertainty before choosing a light or mounting position.
With a wall-mounted design such as the wall-mounted Bloomcabin pergola, the attachment to the building is part of the layout to discuss, but the model identity does not establish approved light mounts or wiring routes. Include the exact model and configuration when asking the manufacturer or installer for an approved drawing. Keep access for inspection and future replacement in view, too; a fixture that is difficult to reach may complicate maintenance. Treat photographs as visual references, not documentation that a particular point accepts a fixture.
Verify outdoor ratings and electrical compatibility
Electrical planning should happen before a fixture is ordered or a route is concealed. Ask a qualified electrician to review the power source, routing, switching, and site exposure against the selected equipment and local conditions. A label that says outdoor does not, by itself, tell you whether a fixture suits the actual covered or exposed position; check its instructions and rating with the electrician. Exposure can differ between a sheltered area and an open side of the pergola. Review drivers, connectors, control gear, and required accessories as one system rather than mixing parts based on appearance. Do not infer wiring methods or circuit capacity from a photograph.
If the Bloomcabin bioclimatic model is under consideration, include its exact model and selected configuration in the consultation; the product listing is not a fixture manual or evidence of an approved electrical package. Ask which specific lighting equipment, if any, is verified for that configuration, and request its instructions and mounting documentation before purchase. The electrician can then assess the actual equipment and site together. Keep the final list of approved components with the project record so a future replacement can be checked against the same requirements.

Plan separate lighting scenes and controls
Turn the use map into a small set of lighting scenes. A meal might use the table layer with enough ambient light for conversation; reading might use the focused page light while the table layer is off; a relaxed evening might reduce both task layers while leaving an entry route visible. These are different needs, not three fixture styles. Decide which layers should work together and which should be independent, then confirm that the exact controls allow those combinations. Where dimming is involved, verify compatibility across the light, driver, switch, and control system rather than treating a dimmer as a universal add-on.
Keep operation simple enough that guests can choose a scene without guessing which switch does what. Group controls by activity or zone, label them plainly, and consider who needs access when entering the pergola. If an app or remote is proposed, ask how the lights can be operated if that device is unavailable, following the maker’s instructions rather than assuming a fallback. When asking which controls are verified for a configuration, identify the exact Bloomcabin lean-to model and request the option list; its model name alone confirms neither dimming nor smart-control support.
Test the plan after dark
Before committing to permanent positions, test the plan in the real arrangement after sunset. Use only temporary light sources intended for the setting and follow their instructions; do not improvise a permanent attachment or wiring. Put the table, book, and chairs where they will actually be used, then check whether the table ends and reading page are clear, whether faces are easy to see, and whether transitions remain visible. Try the planned activity combinations, not just every light switched on together. Note bright sources in view, unwanted reflections, or dark patches on the walking route, then revise the drawing before permanent work.
After installation, repeat the check with the approved equipment and controls, since the final light distribution and surrounding surfaces determine the result. Keep manuals, mounting approvals, and component information together for service or replacement, and note which settings work for dining and reading. If furniture, a roof component, or a fixture changes later, reassess the same viewpoints instead of assuming the old balance still holds. A short review after the first few evenings can reveal practical changes in seating and use that were not obvious on paper.
Frequently asked questions
What are the three layers in a pergola lighting plan?
Plan task light for activities such as eating or reading, ambient light for the wider seating area, and enough route light to see entrances or changes in level. The layers can overlap, but each should have a clear purpose so one bright source does not have to serve every activity.
How bright should the light over a dining table be?
There is no single output that suits every table and layout. Consider how much of the surface needs to be visible, then assess the light at the table with the actual chairs and finishes in place. A fixture’s stated output does not by itself show how much light reaches the tabletop.
Can one light serve both dining and reading?
Possibly, if its distribution reaches both areas without leaving the page shadowed or putting a bright source in someone’s view. Test the positions with the actual furniture. Separate, compatible controls can make it easier to use a focused reading layer without lighting the whole dining area at full output.
How can I check for glare before installation?
Use a layout drawing to identify sources that could fall within seated sightlines, then try suitable temporary lights after dark, following their instructions. Sit in the usual dining and reading positions and look toward the table, page, other seats, and yard. Notice distracting bright sources or reflections. Include a low lounge seat if you use one; a standing viewpoint may miss glare that seated guests would see.
Does an outdoor-rated fixture automatically work on any pergola?
No. An outdoor rating addresses the fixture’s intended exposure; it does not establish that the pergola has an approved mounting point or that the electrical components and controls are compatible. Check the exact fixture and structure documentation, and have a qualified electrician review the equipment for the site.
A comfortable pergola is not the one with the most light, but the one whose lighting fits how the space is used. Let dining, reading, and ambient layers answer separate needs, check the view from actual seats, and confirm every fixture against documented mounting and electrical requirements. When those decisions follow a scaled plan instead of a product photo, evening light can serve meals and books without flattening the space into one bright field.
