
Pergola Splashback: Keeping Rain Off the Seating Area
PERGOLA RAIN PLANNING
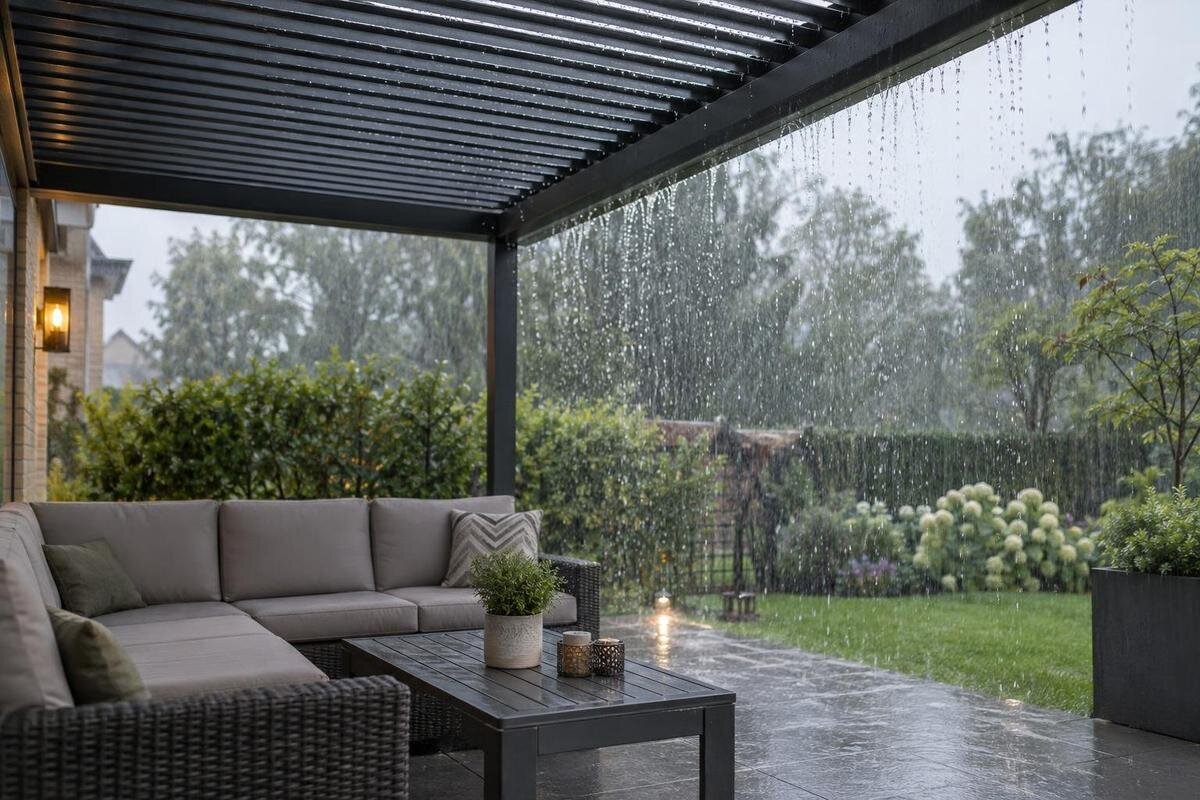
Rain reaching a pergola’s seating area does not automatically mean the roof is leaking. Drops can strike patio pavers, soil, gravel, or a shallow puddle and rebound onto chair legs, cushions, and nearby surfaces. Runoff from an adjoining lawn or planting bed can add muddy splash at the paving edge. These floor-level paths need a different response from rain entering from above or blowing through an open side. Start by locating the wettest spots, then consider surface drainage, landscape transitions, furniture placement, and compatible side protection. No single surface or screen can keep every pergola dry in every storm.

What ground-level splashback looks like
At ground level, splashback starts where drops hit patio paving, gravel, compacted soil, or standing water. The impact can send droplets toward chair and table legs, rug edges, lower cushions, and storage close to the surface. The wet area may be a narrow band rather than a puddle, so checking only for standing water can miss it. Look for the same low surfaces becoming damp after separate rain events, and note what ground material lies beside them. Furniture and edging can redirect spray, so wet marks alone may not identify the point of impact. The pattern across several nearby surfaces is more useful than a single wet chair after one shower.
Compare the pattern with rain direction and timing. When lower items nearest the paving get wet first, bouncing water or surface flow may be involved. If rain arrives across several heights during gusts, wind-driven entry through an open side is another possibility; drips from above need their own assessment. Several paths can occur at once, especially where wet paving meets an open edge. Treat splashback as a working diagnosis rather than a catch-all: shifting a chair may help with one recurring ground-level strip, while a screen or separate roof check addresses a different route. Note whether marks face the prevailing gust or cluster near the floor.
Track the water before changing the layout
During ordinary rain, observe from a safe, sheltered spot and note when dampness appears, which direction the wind is coming from, and where water moves across the ground. After the rain passes, inspect the paving, the furniture nearest the perimeter, and the transition to lawn or planting beds. Sketch the locations rather than relying on memory; a simple plan can show whether wet marks line up with a puddle, a low paving joint, an edge, or runoff arriving from outside the patio. Repeat the observation on another rainy occasion before deciding that one cause explains every event. A second event may show whether the first pattern depended on wind or a saturated garden bed.
Keep the site sketch separate from the pergola model drawing. Mark the intended posts, actual seat locations, paving boundary, and recurring wet strip, then compare them with the exact dimensions for the option under consideration. When considering Bloomcabin Pergola, use the drawing for the chosen configuration to see where its footprint falls within the existing patio. Include nearby steps and doorways so the plan captures how people use the space. This comparison can reveal a chair sitting in a splash path, a patio edge receiving runoff, or a narrow circulation route that leaves little room to move seats. Keep the observations dated so later changes can be compared with the original layout.
How paving changes the splash pattern
Paving affects how water remains on the surface and how impact droplets scatter, but rougher paving is not automatically a solution. Finish, joint spacing, slope, surface wear, rain intensity, and wind all influence the pattern. A smooth slab, textured paver, or gravel strip may behave differently when dry than when a film of water or a shallow puddle is present. Treat material as one part of the explanation, not a performance guarantee. A broad wet patch may indicate water sitting on the surface, while scattered marks on nearby low objects may point toward impact and rebound. Both can happen during the same shower.
During inspection, note whether water runs over the surface, moves through joints, or gathers at a dip; visible gaps do not prove that the patio drains adequately. The surface and its base work as a system, and a replacement paver or coating cannot correct an unsuitable slope or blocked outlet by itself. Watch for loose joints, eroded edges, and changes where repairs meet older paving, since small level differences can redirect flow. If the pattern persists, ask a qualified patio or drainage professional to assess the whole paved area before choosing a finish based only on appearance. Include where the water can go, not just where it begins.
Where paving meets the yard
Look beyond the patio itself. Rain moving off a lawn, sloped bed, walkway, or compacted strip can reach the paving carrying soil or mulch; a soaked planting edge can also become a source of muddy droplets. Gravel and decorative bark behave differently from settled soil, so neither should be assumed to stop splash. Check where water first reaches the paving, whether an edge has been undermined, and whether bare patches expose loose material. If the wet strip begins at one boundary, mark that point on the site sketch rather than treating the entire pergola footprint as equally exposed. Beds may behave differently as they become saturated, so compare more than one rain event.
Record the height changes, planting, and visible flow paths along the patio-to-yard transition, then overlay the intended structure and seating layout. When comparing Bloomcabin Bioclimatic Aluminum Pergola, locate its proposed footprint relative to those boundaries rather than considering the covered area alone. A seat close to an exposed planting edge may receive muddy spray even when it sits within that footprint. Leave access to the boundary for garden maintenance and inspection; a planter or storage box can conceal the point where water enters. Have a qualified professional review proposed grading changes, including where redirected water would go and whether it could collect elsewhere on the patio.

Place seating outside recurring wet zones
Think of the layout as a wet perimeter and a seating zone, with usable patio space between them where the site allows. Use recurring wet marks to locate the exposed edge instead of assuming a standard buffer width. Keep cushions and storage out of that strip, and move the main seats farther in if there is room. Also allow for chair pullback and a clear walking route to the yard; a position that looks dry on a plan may be awkward once people are sitting down or moving around the table. Measure the actual furniture rather than relying on the tabletop size alone.
Draw furniture at its full in-use size and mark where feet land, where people walk, and where cushions are stored; splash can reach these lower areas first. If you are comparing the regular pergola model, check the exact dimensioned layout for the chosen option, then see whether it leaves a practical buffer between seats and the recurring wet strip. A published pergola area alone does not tell you how much room remains around a table with its chairs pulled out. Include loungers in their reclined position and benches with any overhanging cushions. A small rearrangement may be easier than rebuilding paving, provided it does not block an entrance or make the route cramped.
Side screens and floor-level splash
A suitable side screen or enclosure may intercept some wind-driven rain or rebounding droplets, depending on its position and design. It does not correct the pooling or surface runoff that produces floor-level wetting. A low gap, a corner, or a doorway may remain a path for spray, and water may collect at the base of a panel. Treat side protection as one part of the plan, chosen with the direction of rain and the way people need to enter and leave in mind. Assess the whole perimeter rather than only the side beside the table: protecting one opening can leave another route exposed.
Confirm compatibility and limits for the exact pergola model before planning a screen, panel, or other enclosure; a generic accessory description does not establish fit or performance in wind-driven rain. For Bloomcabin Lean-To Pergola, ask which side treatments are documented for the chosen configuration and how their lower edges, corners, and entrances are arranged. Compare those details with the splash marks on your site sketch. A panel beside the wet strip may intercept spray, while one farther from the source may leave droplets entering beneath it. Ask the supplier about the intended use and maintenance of any lower tracks or openings, and do not add improvised seals that could obstruct drainage or operation.
Follow runoff across the patio
Water that stands or flows across paving can create secondary splash when raindrops hit it, and it may leave dirt or grit along the chair zone after the rain. Note whether water moves toward an existing inlet, a planting area, or a low point, and check for leaves or sediment visibly obstructing a surface drain. Do not cover a drain with rugs, planters, or temporary edging. The goal is to keep a route open away from the seating area, not to build a dam around the pergola that sends water back across the patio. Also note whether the flow begins outside the covered area.
Pergola drainage information and site-drainage observations answer different questions. Ask for the model-specific drainage information relevant to Bloomcabin’s bioclimatic pergola model and compare it with what you see at ground level; a structure document does not establish that a patio drain or surrounding grade can handle water at the site. If water repeatedly collects near posts, a doorway, or the house wall, have a qualified drainage or landscape professional review the condition before adding a channel, raising a border, or changing slope. Those changes need to suit the full site rather than send water into another problem area. Avoid choosing a slope or drain capacity from a generic online rule.
When the patio surface needs attention
If a patio surface needs to change, start with the water route and the use of the area rather than choosing a finish by color or texture alone. Replacing a narrow strip, adjusting a transition, or adding a designed drainage feature may be options, but each depends on the existing base, levels, soil, and outlet. Loose mulch, a mat, or an outdoor rug can hide a wet patch without removing the water; a saturated or curled layer can also make the route harder to inspect. Do not cover a recurring puddle before finding why it forms. Temporary floor coverings may conceal the pattern until they are moved.
Coordinate hardscape work with the final pergola position. For a patio planned around the Bloomcabin Pergola footprint, give the paving contractor the dimensioned structure layout alongside the observed runoff paths. Include proposed finished levels, existing thresholds, drain locations, and any side elements that meet the paving. If the surface changes after the structure is specified, have the installer and paving contractor review the transition around post bases and openings before work proceeds. Ask how the proposed surface handles water at its edges, where excess water goes, and how drains will remain accessible. Keep these details in the work plan so the finished patio does not introduce a new collection point beside the seats.

Check documents for the exact pergola configuration
Read product weather information for the exact model and configuration, rather than generalizing from a broad pergola category. Look for the stated conditions, the type of observation or test behind a claim, and any limits related to open sides or selected enclosures. For floor-level splash, ask how exposed edges and openings may affect rain reaching the seating area; keep that question separate from any promise that all weather will be excluded. Limits are not interchangeable across models, and a product name by itself does not establish suitability for a particular storm or site. Request relevant information for side elements too, if they are part of the plan.
Use the Bloomcabin Bioclimatic Aluminum Pergola listing to identify the model, then request the current documents for the configuration you are considering. Useful information distinguishes roof performance from side-entry protection and explains the conditions under which any weather claim applies. Ask whether supporting observations cover the selected enclosure, its openings, and wind-driven rain, or only the roof assembly. Review those limits with the supplier and a qualified installer alongside your site observations. If floor-level spray is not addressed, do not infer protection from a product photo or a broad weather-resistance description. Instead, keep furniture placement and patio drainage decisions grounded in the water paths you have observed.
Recheck the seating area after rain
After the pergola, paving, and seating are in place, check the area after ordinary rain using the same points from your original sketch. Note whether the wet band narrowed, moved to another edge, or now collects near a new level change; compare marks on furniture and paving, not only the overall impression of a damp patio. Repeat the check when planting grows, mulch is refreshed, or a drain becomes obstructed, because changes around the structure can alter the route water takes. There is no need to investigate during severe weather or change structural components in response to a single shower. One isolated gust may not represent a recurring pattern.
Keep the chosen configuration and instruction documents with the site plan. Save the relevant information from the Lean-To Pergola product page so you can identify the installed option when discussing a later change or maintenance question. Take comparison photos from the same positions after rain, including the patio edge and the lower parts of nearby furniture. Record any changes made between observations, such as moving a planter or clearing a surface drain; otherwise, it can be difficult to tell what helped. Follow the applicable maintenance instructions and keep drainage access unobstructed. If a wet strip returns despite routine upkeep, the record can help a professional distinguish a recurring site problem from a temporary obstruction.
Frequently asked questions
Does wet furniture under a pergola mean the roof is leaking?
Not necessarily. Drops can rebound from paving, splash from a shallow puddle, or run in from a lawn or planting bed. Check where the wetting first appears and whether it follows wind, rain, or water moving across the ground. Drips from above are a separate pattern to assess.
How much space should I leave between seats and the patio edge?
There is no fixed distance that suits every patio. Use recurring wet marks after ordinary rain to identify the splash zone, then allow for chair pullback, walking paths, and the full furniture footprint. Place seats outside that zone where the layout permits, and reassess if landscaping or paving changes.
Will a side screen prevent pergola splashback?
A suitable screen may intercept some wind-driven rain or rebounding droplets, but the result depends on its position, design, and remaining openings. It does not correct pooling or runoff across the paving. Check compatibility and documented limits for the exact model, and assess floor-level water paths separately.
Does permeable paving eliminate patio splash?
Not automatically. The result depends on the full paving assembly, its base, the soil, the slope, and where excess water can go. Discuss it as one possible surface choice with a qualified patio or drainage professional rather than assuming it will eliminate splash, ponding, or muddy runoff.
Can a pergola keep the seating area dry in every storm?
There is no universal guarantee. Rain may blow through an open side or reach the seating area from wet ground, apart from how the roof performs. Review the exact model’s documented weather limits and suitable enclosure configuration, then plan the seating and drainage around the site.
Keeping seating drier starts with the water path on the ground. A repeated splash beside one chair, a strip of standing water, and runoff arriving from a planting bed call for different responses, so map the pattern before shifting furniture or changing paving. Clear routes, considered seat placement, and compatible side protection may reduce exposure, while wind and site conditions still matter. The most useful plan handles the patio’s observed runoff and matches expectations to the exact documented pergola configuration.
