
Planning Pergola Drainage Without Sending Water to a Neighbor
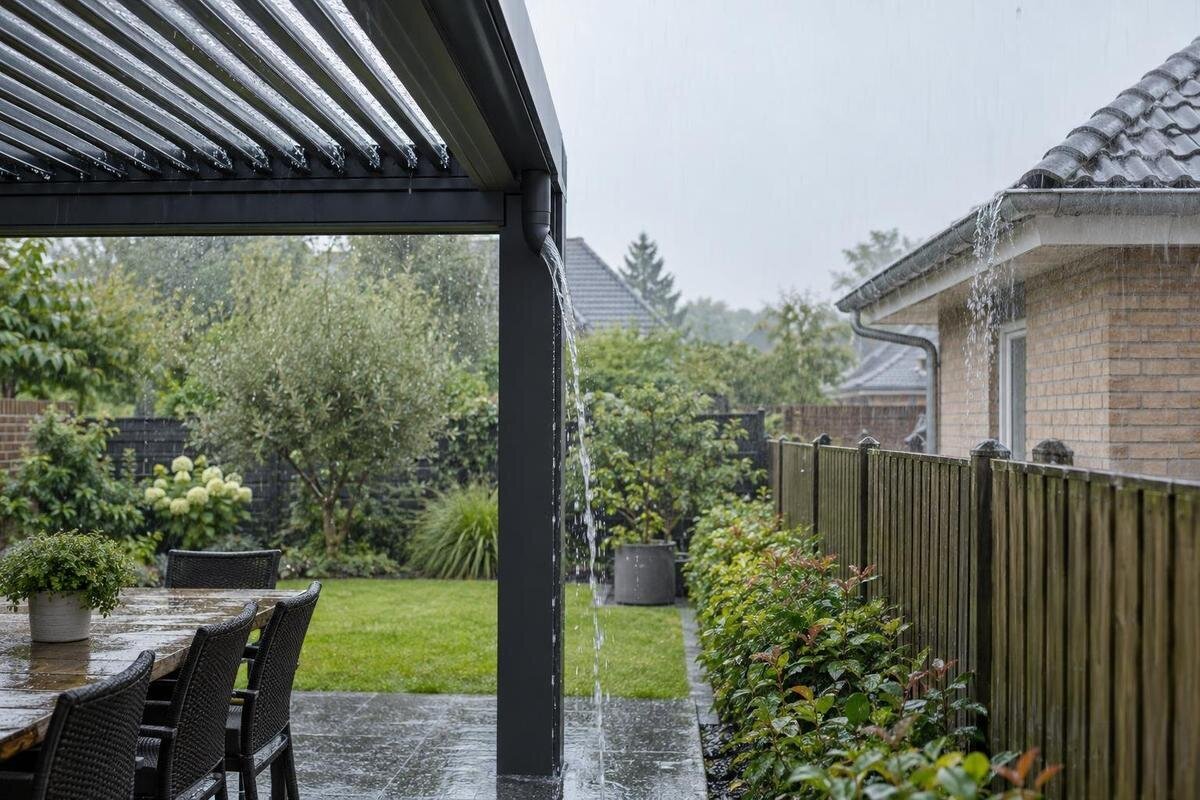
PERGOLA DRAINAGE
Rainwater planning for a pergola is not complete when you identify where it leaves the structure. The outlet must connect to a route that carries water across the site without creating a new low spot, eroding a bed, pooling beside a foundation, or pushing runoff toward a neighbor. That route depends on the exact pergola configuration, patio surfaces, existing roof drainage, and the shape of the lot. Map the path before installation, then confirm local requirements and any design questions with the appropriate professional.

Follow water from the pergola to its final destination
Treat pergola drainage as a route with a beginning, middle, and end. The beginning is where rain is collected or shed by the exact structure; the middle is the surface, channel, or pipe it follows; the end is a place able to receive it without creating another problem. A clear outlet does not prove the route works. Water landing at a patio edge, in a narrow strip by a fence, or on a slope can keep moving and cross a boundary. A concentrated discharge can behave differently from rain falling across open ground, so trace it across paving edges, paths, and planting beds all the way to the receiving point.
Record both the normal discharge route and the path excess water would take if the usual route could not handle it. These paths may overlap; the important question is where water goes under each condition. Plan to manage both on your property unless an approved, professionally designed arrangement provides another destination. Protect your own foundation, doors, walkways, planting beds, and low spots too; keeping runoff away from a neighbor does not mean sending it toward a vulnerable part of your yard. Do not assume a street inlet, shared pipe, or nearby swale is available to receive water. Confirm the receiving point and complete route before committing to the pergola position or changes to paving.
Map existing drainage before placing the pergola
Walk the site in ordinary rain if practical and note where water already flows, ponds, or leaves the lot. Mark the proposed footprint, property line, nearby fence or retaining wall, patio edges, drains, downspouts, doors, foundation, and low points. Pay attention to surface changes: a hard patio, gravel strip, lawn, and planted bed do not receive and move water alike. A shallow swale or depression can hide the route; watch where water exits, not only where it first collects. Check the path beyond the posts, including the yard segment leading toward a side or rear boundary. If a wet-weather visit is not possible, mark uncertain flow lines as assumptions for later review.
Create a simple sketch with a fixed reference, approximate dimensions, surface types, and arrows showing observed flow. It is a planning aid, not an elevation survey: if the slope is subtle, the ground has retaining walls, or the outlet must cross a grade change, ask a qualified site professional to verify levels. Draw candidate outlet points and show where each could end. For a Bloomcabin Lean-To Pergola, include the wall and proposed footprint in the same sketch, but do not infer the water outlet from the product name. The map should show whether a convenient discharge is actually close to the boundary or part of an existing drainage route.
Use the exact model's drainage documents
Pergola designs differ, so the word pergola alone does not establish whether rain is collected, where it leaves, or how the route changes with the selected configuration. Before laying out paving or pipe, request the drainage diagram and weather-performance information for the exact model and configuration. Identify each indicated outlet and intended water path; ask what orientation the drawing covers and whether a site connection, extension, or modification is permitted. Keep the documents with the layout and make sure the installer is working from the same model and configuration, not a similar-looking product or general illustration. If instructions specify operating positions or maintenance conditions, note those too.
Treat an illustration as a starting point, not a guarantee for every site or storm. Model-specific weather limits and controlled observations do not establish universal watertightness or eliminate overflow in exceptional rain; use documents only for their stated scope. The Bloomcabin Bioclimatic Aluminum Pergola is one candidate to assess this way: verify the applicable drainage diagram, where water exits, and any permitted connection details with the supplier or installer before placing the structure. Do not assume a channel can be moved, an outlet redirected, or rainwater connected to a house drain unless the exact instructions support it.
Choose a discharge point on your property
Set an endpoint before deciding how to conceal or extend an outlet. A discharge that falls near a property line, onto a sloping walk, or into an open strip can keep moving beyond the intended spot. Keep the outlet and route far enough from boundaries for water to be received and managed on your lot; no single setback distance works for every grade or local requirement, so do not rely on an arbitrary number. Avoid aiming a concentrated stream toward a neighbor's fence, retaining wall, driveway, or low yard area. A fence does not stop runoff and should not be treated as a drainage feature. Consider the route after water leaves a pipe or channel, not only its location at the outlet.
Possible receiving locations include a properly planned planted area, on-site collection, or a conveyance system, but none is automatically suitable. Soil infiltration, seasonal saturation, slope, underground utilities, nearby foundations, and local requirements can determine whether an endpoint is practical. If a connection to a drain or street is being considered, confirm that it is allowed and can accommodate the added water; proximity is not permission or proof of capacity. For the Bloomcabin lean-to model, locate the documented outlet first, then ask how the planned route can reach the chosen receiving point without redirecting discharge across a boundary. A professional may need to assess difficult or low-lying sites.

Check how paving and grading carry runoff
Patios and walks can carry pergola runoff farther than expected. Review the direction of existing paving and where water spills from its edge: a surface that slopes toward the house, side yard, or neighbor can override a well-placed outlet. Pavers, poured concrete, compacted gravel, and lawn behave differently; joints, seams, and low edges can concentrate or hold water. Sketch where each surface changes and note whether a curb, raised bed, step, or edging might trap water or send it around an obstacle. A strip that looks dry in fair weather is not proof that it can receive a concentrated discharge.
Do not solve a boundary problem by adding soil, raising an edge, or cutting a channel without considering where the changed flow will go. Small elevation changes can create ponding against a structure or push runoff to a different lot edge. When a pergola is planned over existing paving, compare the outlet route with the actual surface, not a drawing that shows only the roof footprint. For Bloomcabin Pergola, plot the candidate location and full route on one site plan. If new grading, a trench drain, or a retaining feature is needed, have a qualified drainage or site professional design it for local conditions rather than guessing elevations.
Coordinate pergola outlets with existing roof drains
A pergola may sit beneath or beside roof downspouts, a garage, a shed, or a paved drive. Map these sources because their runoff may already cross the intended route or arrive at the same low point. Do not connect a pergola outlet to an existing house drain just because the pipe is nearby: its purpose, condition, ownership, and capacity may be uncertain. A connection can combine more water than the receiving line or yard feature was planned to handle. Likewise, avoid putting a new outlet immediately upstream of a narrow catch basin or drain without confirming how that system works and where it discharges.
Record each existing discharge point and the destination it appears to serve, then confirm uncertain connections with the property owner or a qualified professional. Keep flows separate unless a competent designer confirms that joining them is suitable and permitted. The plan for Bloomcabin's bioclimatic pergola should show nearby roof downspouts and their routes as well as the pergola outlet; the model name does not show that existing drainage can accept another source. If several areas converge, a qualified professional can assess the combined site flow and select an appropriate receiving route without relying on assumptions about pipe size or infiltration capacity.
Plan a route for overflow
Consider where water could go if it cannot follow the intended outlet route. Leaves, windblown debris, maintenance work, or a rain event beyond a system's documented limits can interrupt or exceed normal flow. This is a design question, not just a cleaning issue: identify where water would travel if an outlet backs up or a channel overflows, and whether that path stays away from a doorway, the building base, and neighboring ground. Do not rely on water spilling over a fence or across a shared side yard. The plan should show where excess flow ends, not merely where it first leaves the structure.
Keep access to outlets, channels, and receiving features in the plan. Avoid burying them beneath permanent paving or dense planting if they need inspection; route water so the path can be seen and ordinary debris can be cleared. Ask the manufacturer or installer to explain the documented limits and intended overflow behavior rather than estimating capacity yourself. With Bloomcabin's wall-mounted pergola, request the diagram for the exact model and configuration and ask the installer to identify an appropriate site-specific backup path. If no route stays on your lot without major earthwork or a discharge near the boundary, pause the layout for professional review.
Include screens and enclosures in the drainage plan
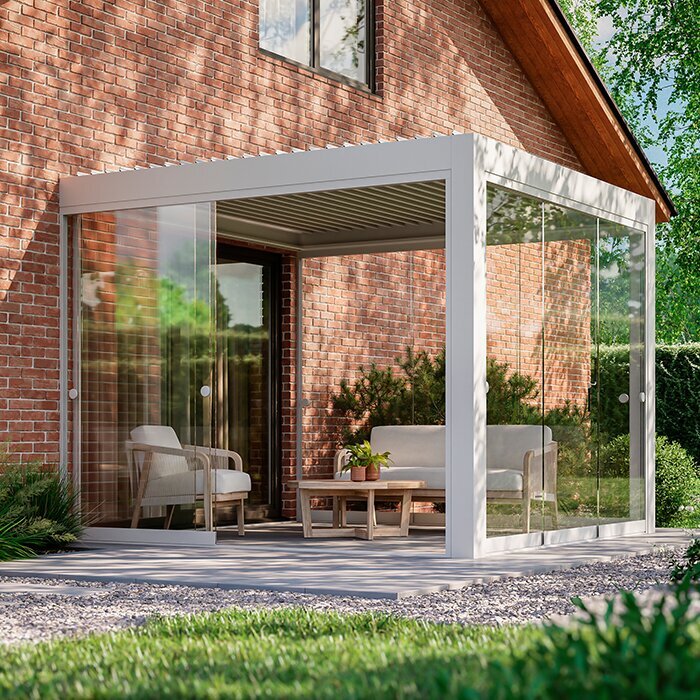
The planned enclosure configuration belongs in drainage discussions from the outset. Screens, sliding panels, or other side elements can change exposure to wind-driven rain and where water reaches the patio; they may also affect access to an outlet or route beside the structure. Do not base the plan only on an open-frame display or a product image. Mark openings, fixed sides, doors, and places where water could collect in the intended arrangement, then compare that arrangement with the manufacturer's model-specific documents. If the layout may change later, distinguish the current plan from a future configuration. This matters particularly when the pergola sits close to a wall, boundary, or area with limited drainage options.
Review the ground-level details around the proposed enclosure as well as its roof drainage. A door threshold, panel track, or nearby paving edge may lie across the runoff route; show any such features on the site sketch and ask how water will pass them without collecting at an entrance. Leave room to inspect and service outlets rather than placing a fixed side element directly in front of them. For the Bloomcabin Pergola configuration you are considering, confirm whether the proposed side elements are supported and which drainage details apply before finalizing the layout. If an enclosure is added later, reassess the route instead of assuming the original plan still works.
Verify local requirements and site constraints
Ask the local authority that handles building or stormwater questions which requirements apply to this particular project. Questions may include where runoff from a pergola may discharge, whether new grading or a drain needs review, and whether a proposed connection to public infrastructure is acceptable. Requirements differ by location, so do not treat a neighbor's setup, an online diagram, or a generic product statement as approval. Review property records for known easements or shared drainage, and check any homeowners association process that applies to the lot; those checks do not replace local review.
If water must cross a complex slope, pass near a foundation, enter an existing drain, or be held in an infiltration feature, bring in a qualified civil engineer, drainage designer, or site professional as appropriate. Provide the site sketch, surface types, boundary location, pergola footprint, outlet diagram, and chosen enclosure configuration. If the bioclimatic aluminum model is under consideration, include its model-specific drainage and weather documents so the reviewer can assess the proposed layout. Ask the reviewer to identify the receiving point, overflow path, approvals still needed, and any uncertainties that require a survey or further investigation. Clarify who will obtain approvals and who will verify the installed route; an unresolved responsibility can leave an otherwise detailed plan incomplete.
Review the route before and after installation
Before installation, mark the intended footprint, outlet, receiving point, and overflow path on the ground. Walk the proposed route from the structure to its end and check that nothing sends water toward the property line: a planter edge, gate threshold, downspout, raised paving lip, or blocked swale can change the path. Confirm that the outlet remains visible and reachable and that the planned route avoids doors, foundations, and frequently used walking areas. If the layout depends on a subtle grade that you cannot confidently read, have the elevations checked instead of relying on your eye.
After installation, observe the route during ordinary rain and look for unexpected ponding, erosion, or flow toward a boundary. Those observations can reveal a mismatch between the plan and the actual surface, but they cannot prove performance in more severe conditions. Keep outlets and receiving areas accessible for routine upkeep, and have a qualified professional review a recurring problem before moving the outlet or changing grades. Keep a copy of the final sketch: later landscaping, new paving, or a fence can alter the route. Good planning gives rain a maintainable path on your property and identifies what to do if site conditions or product limits are reached.
Frequently asked questions
Where should pergola runoff go?
Choose a receiving point on your property that the full route can reach without running across a boundary or causing pooling or erosion. Whether that is a planted area, on-site collection, or a designed conveyance depends on soil, grade, nearby structures, and local requirements. Have difficult sites reviewed.
Can I connect a pergola outlet to a house downspout or drain?
Not automatically. The existing system may not be designed or able to accept another flow. Before making a connection, confirm the pergola's documented outlet, the receiving system's intended function and capacity, and any applicable local requirements with a qualified professional.
Will grading the patio away from the neighbor solve the problem?
Not necessarily. Changing a patio or yard slope can move water toward another low area, a foundation, or a different property edge. Check how water travels across the whole site, and have uncertain elevations or significant grading reviewed by a qualified professional.
Does a drainage diagram prove that runoff will stay on my property?
No. A model-specific diagram describes the structure's intended drainage, not the full path across your yard. Match its outlets to your site's grades, surfaces, receiving point, and overflow route. Even if water leaves the pergola as intended, it can still travel toward a boundary after reaching the ground.
What should I bring to a local review or a drainage professional?
Bring a site sketch showing boundaries, the pergola footprint, surfaces, known low points, and existing roof drains. Add the exact model's drainage and weather documents, planned enclosure configuration, proposed receiving point, and overflow route. This lets the reviewer consider the actual project rather than an abstract pergola.
A sound pergola drainage plan follows water from the documented outlet to a receiving point the site can handle and accounts for where excess water would go. It keeps runoff away from neighboring property without trading that problem for pooling beside your own home. Matching the product documents to actual grades, paving, nearby roof drains, and local requirements is more dependable than choosing an outlet by convenience. Once the full route is clear, you can judge whether the proposed pergola location leaves enough room to manage and maintain it.
